
Adding floats to a Mini Vapor
Last November, at the Horizon Indoor Electric Festival, I had a chance to test and sort out a few issues I was having with my Mini Vapor float design. The event's indoor water runway is the perfect place to fly a lightweight floatplane model!
My original float design worked well for the Vapor, so I shrunk it to Mini Vapor size. However, I was having trouble getting the Mini Vapor to take off from the water.
The first thing I tried was to increase the size of the flat foam piece used on the bottom front of the floats to increase the area. This seemed to help: the floats performed better, and I got the model to lift off once or twice. However, it was obvious the model now needed more power.
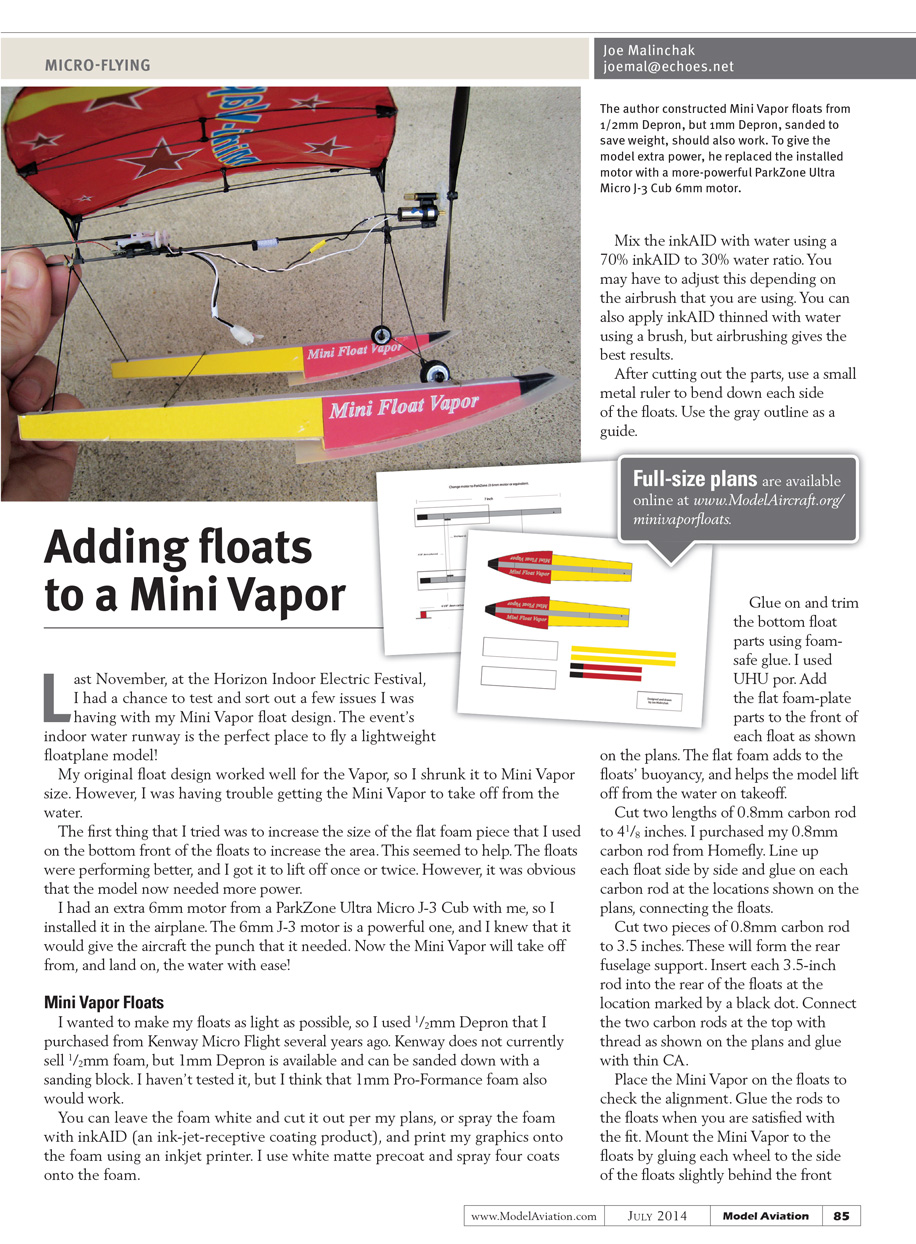
I had an extra 6 mm motor from a ParkZone Ultra Micro J-3 Cub with me, so I installed it in the airplane. The 6 mm J-3 motor is a powerful one, and I knew it would give the aircraft the punch it needed. With the upgrade, the Mini Vapor will take off from and land on the water with ease!
Mini Vapor Floats
I wanted to make the floats as light as possible, so I used 1/2 mm Depron that I purchased from Kenway Micro Flight several years ago. Kenway does not currently sell 1/2 mm foam, but 1 mm Depron is available and can be sanded down with a sanding block. I haven't tested it, but I think 1 mm Pro-Formance foam would also work.
You can leave the foam white and cut it out per the plans, or spray the foam with inkAID (an ink-jet-receptive coating product) and print graphics onto the foam using an inkjet printer. I use the white matte precoat and sprayed four coats onto the foam. Mix the inkAID with water using a 70:30 inkAID-to-water ratio. You may have to adjust this depending on your airbrush. You can also apply inkAID thinned with water using a brush, but airbrushing gives the best results.
After cutting out the parts, use a small metal ruler to bend down each side of the floats. Use the gray outline as a guide. Glue on and trim the bottom float parts using foam-safe glue (I used UHU por). Add the flat foam-plate parts to the front of each float as shown on the plans. The flat foam adds buoyancy and helps the model lift off from the water on takeoff.
Cut two lengths of 0.8 mm carbon rod to 4-1/8 inches. I purchased my 0.8 mm carbon rod from Homefly. Line up each float side by side and glue each carbon rod at the locations shown on the plans, connecting the floats.
Cut two pieces of 0.8 mm carbon rod to 3.5 inches. These will form the rear fuselage support. Insert each 3.5-inch rod into the rear of the floats at the location marked by a black dot. Connect the two carbon rods at the top with thread as shown on the plans and glue with thin CA.
Place the Mini Vapor on the floats to check alignment. Glue the rods to the floats when you are satisfied with the fit.
Mount the Mini Vapor to the floats by gluing each wheel to the side of the floats slightly behind the front carbon rod as shown on the plans. The rear of the fuselage is connected to the rear support by a small rubber band.
You will need to change out the motor to the ParkZone Ultra Micro J-3 before flying off the water. The motor will slip right into the Mini Vapor gearbox, but its wires will not reach the receiver. To solve this, cut the Mini Vapor's 6 mm motor wires an inch or two from the motor, remove them, and solder the J-3 6 mm motor wires directly onto the remaining wires.
The J-3 6 mm draws more current and needs a slightly larger battery for decent flight time. I used a 50 mAh cell from Ares; the battery is perfect for this setup.
Flying the Mini Vapor with the motor upgrade is fun. It performs great, and I was even able to loop the model a few times, which was surprising given the increased weight of the floats!
Using a Glue Stick to Cover Balsa Models
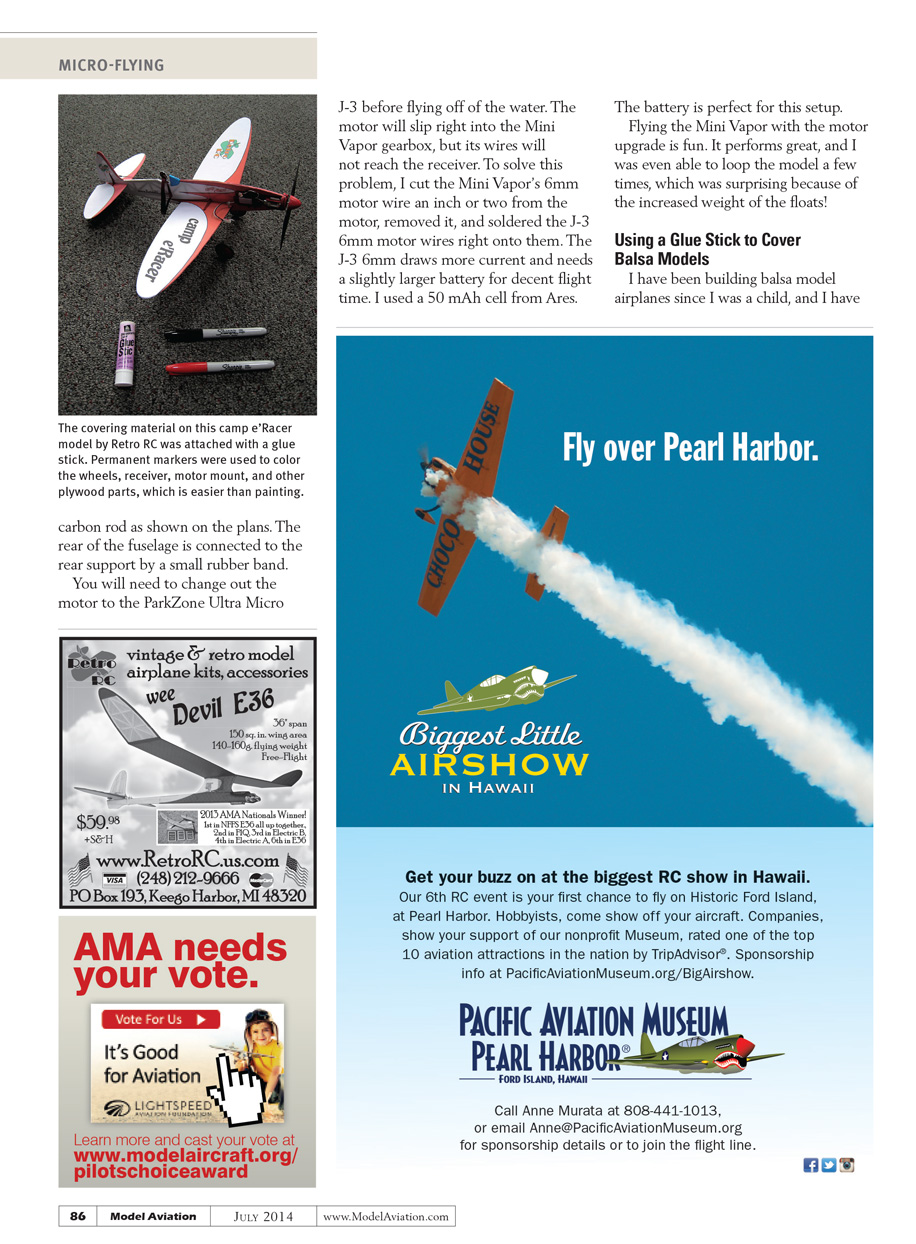
I have been building balsa model airplanes since I was a child, and I have tried many techniques to apply tissue or other coverings. We all have our proven and favorite methods. Mine is using a glue stick to apply the material. I prefer the Avery brand.
I recently finished the easy-to-build, great-flying Retro RC Camp e'Racer. Joe Hass did a great review of the kit in the September 2013 issue of MA. The model uses a light, preprinted paper covering material.
The instructions say to apply it with spray adhesive, which works fine. However, I used that technique on the wings and had a problem repositioning the material, and then I put a smudge mark on one wing panel.
After that, I decided to try covering it again using my glue stick technique. I contacted Mark Freeland of Retro RC, who helped me find new graphics for the wing panels.
To apply the covering material:
- Put a thin layer of glue on the part you are covering.
- Position the material and smooth it with your fingers.
- If necessary, reposition easily and smooth again.
With the glue stick method, you can easily reposition the material if necessary. The glue stick method did not add weight, whereas the spray adhesive did. My model weighed in at 41 grams ready-to-fly, which is on the lighter side of the model's suggested weight!
I also used permanent markers to color all of the plywood parts.
SOURCES:
- Horizon Hobby — (800) 338-4639 — www.horizonhobby.com
- Kenway Micro Flight — (908) 850-1385 — www.kenwaymicroflight.com
- inkAID — [email protected] — www.inkaid1.com
- Homefly — (407) 862-3201 — www.homefly.com
- Ares — (800) 205-6773 — www.ares-rc.com
- Avery — (800) 462-8379 — www.avery.com
- Retro RC LLC — (248) 212-9666 — www.retrorc.us.com
Transcribed from original scans by AI. Minor OCR errors may remain.

