
Micro-Flying
Dave Robelen
Introduction
Hello from Central Virginia. Since this issue is intended to reach out to the newcomer, I'll take up the issue of getting started flying indoor radio control (RC).
I'll make some basic assumptions, such as that you are reasonably proficient with outdoor models and have a reasonable understanding of the basics of electric-powered models.
The unique thing about indoor RC is the walls! No matter where you fly, the building will have solid walls and probably other obstacles. Some modelers will have access to club groups that have an indoor site of substantial size, and others (such as myself) may be the only user of a relatively small building.
There are a variety of ways to successfully tackle this growing phase of the hobby. For now I'll discuss one approach.
Choosing a Model and Basic Modifications
In the interest of economy, I decided to work with the very popular LiteStik/Pico Stick model and cover some simple changes that can make this machine a very reasonable indoor flier.
As it comes out of the box, this model has a couple of basic shortcomings that need to be corrected. When assembled according to the instructions, the wings have virtually no dihedral. This needs to be changed in order for the model to turn and bank in response to the rudder.
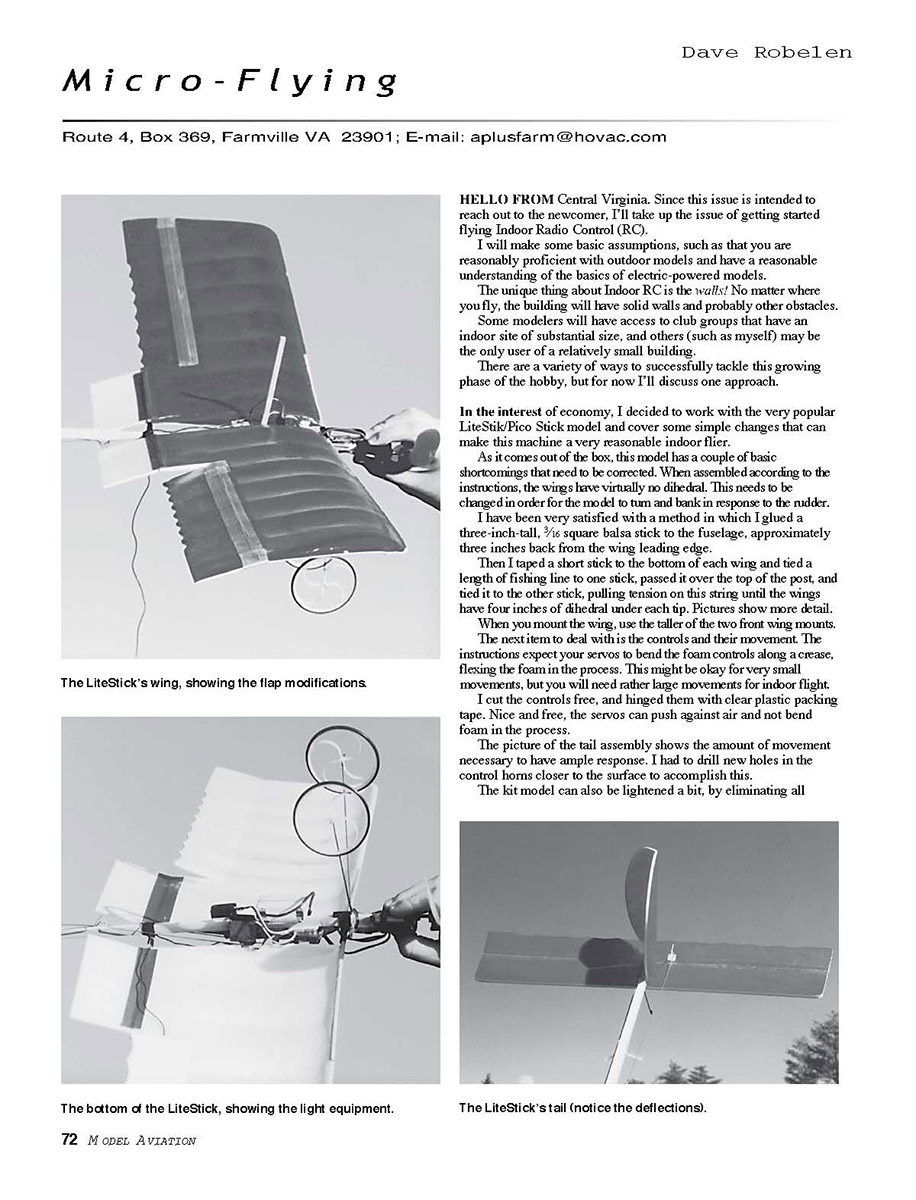
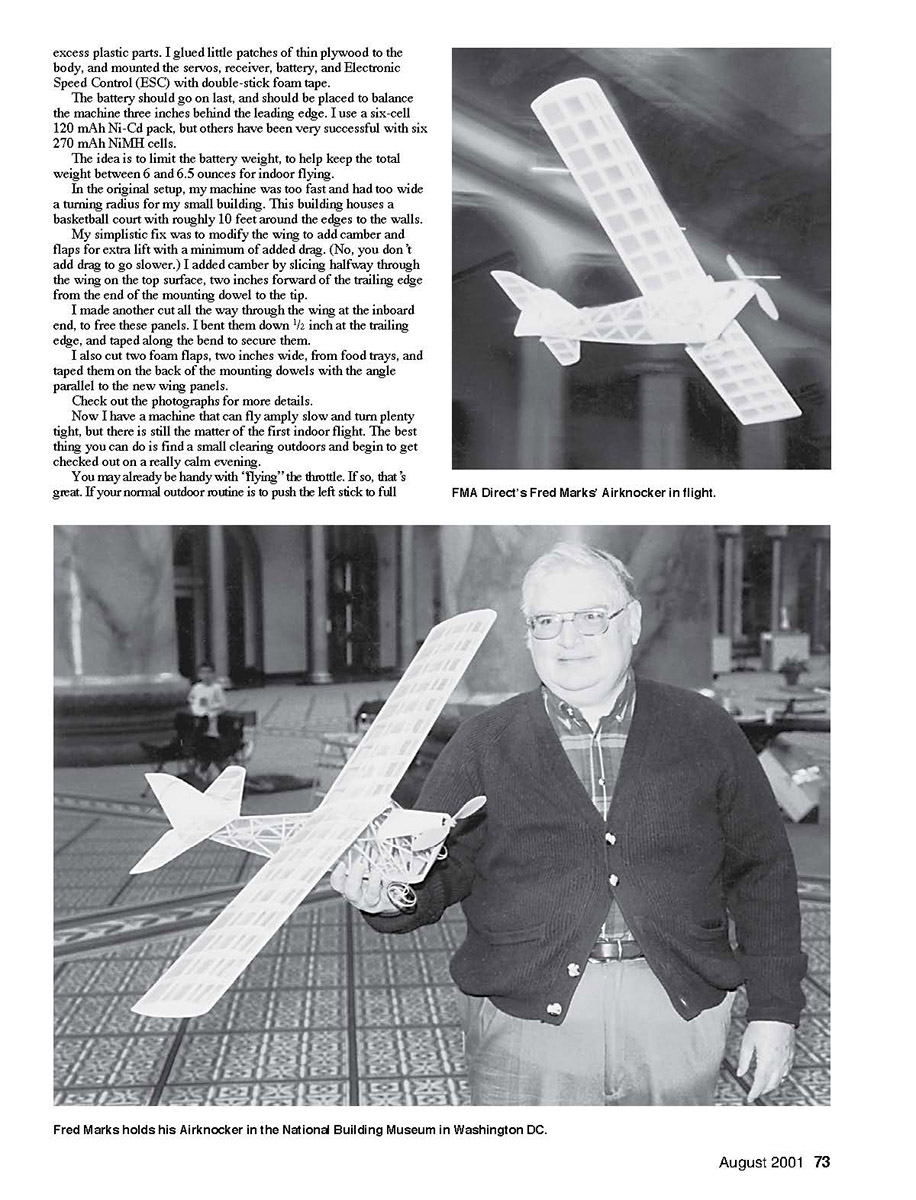
I have been very satisfied with a method in which I glued a three-inch-tall, 3/16" square balsa stick to the fuselage, approximately three inches back from the wing leading edge. Then I taped a short stick to the bottom of each wing and tied a length of fishing line to one stick, passed it over the top of the post, and tied it to the other stick, pulling tension on this string until the wings have four inches of dihedral under each tip. Pictures show more detail.
When you mount the wing, use the taller of the two front wing mounts.
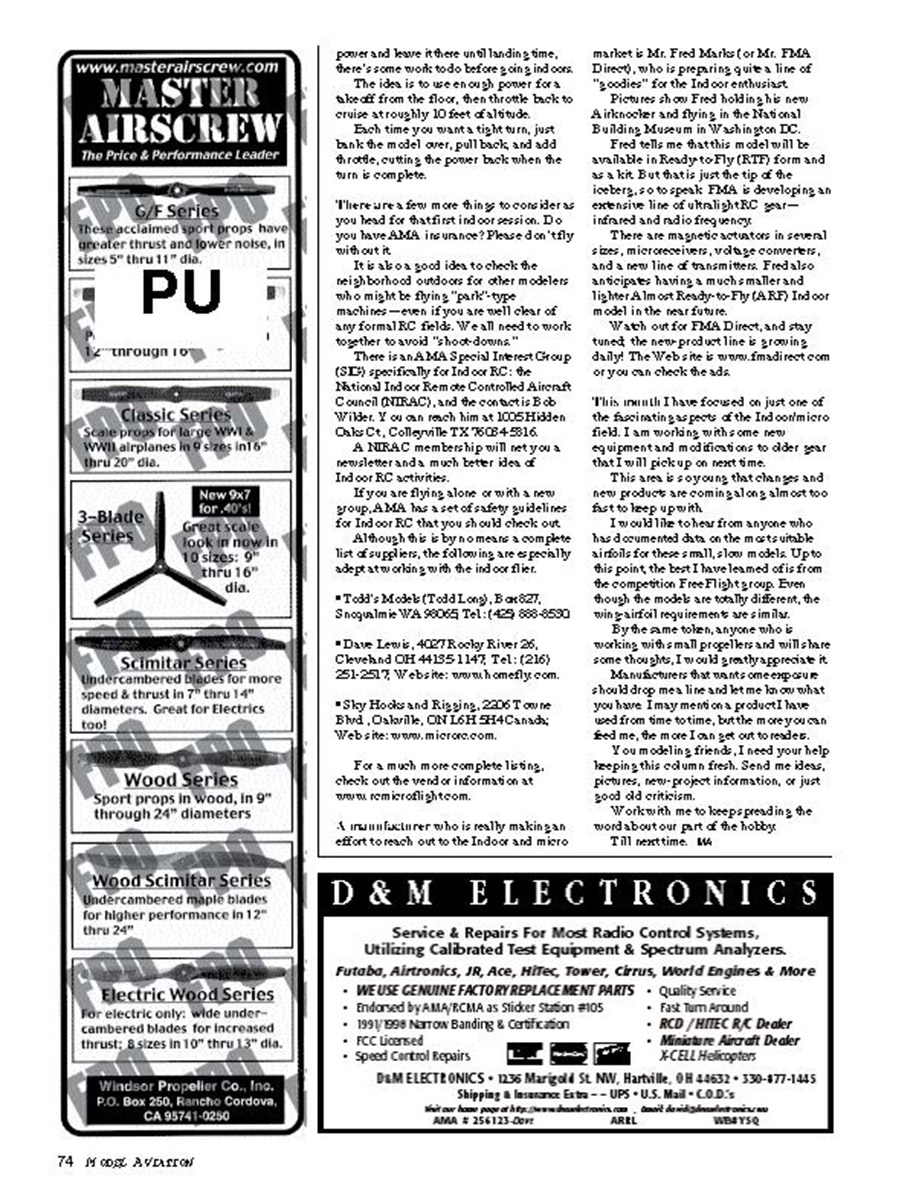
The next item to deal with is the controls and their movement. The instructions expect your servos to bend the foam controls along a crease, flexing the foam in the process. This might be okay for very small movements, but you will need rather large movements for indoor flight.
I cut the controls free and hinged them with clear plastic packing tape. Nice and free, the servos can push against air and not bend foam in the process. The picture of the tail assembly shows the amount of movement necessary to have ample response. I had to drill new holes in the control horns closer to the surface to accomplish this.
The kit model can also be lightened a bit by eliminating all excess plastic parts. I glued little patches of thin plywood to the body and mounted the servos, receiver, battery, and electronic speed control (ESC) with double-stick foam tape.
The battery should go on last and should be placed to balance the machine three inches behind the leading edge. I use a six-cell 120 mAh Ni-Cd pack, but others have been very successful with six 270 mAh NiMH cells. The idea is to limit the battery weight to help keep the total weight between 6 and 6.5 ounces for indoor flying.
Wing Modifications for Slow Flight and Tight Turns
In the original setup, my machine was too fast and had too wide a turning radius for my small building. This building houses a basketball court with roughly 10 feet around the edges to the walls.
My simplistic fix was to modify the wing to add camber and flaps for extra lift with a minimum of added drag. (No, you don't add drag to go slower.) I added camber by slicing halfway through the wing on the top surface, two inches forward of the trailing edge from the end of the mounting dowel to the tip. I made another cut all the way through the wing at the inboard end to free these panels. I bent them down 1/2" at the trailing edge and taped along the bend to secure them.
I also cut two foam flaps, two inches wide, from food trays, and taped them on the back of the mounting dowels with the angle parallel to the new wing panels.
Check photographs for more details. Now I have a machine that can fly amply slow and turn plenty tight.
First Outdoor Checks and Flight Technique
There is still the matter of the first indoor flight. The best thing you can do is find a small clearing outdoors and begin to get checked out on a really calm evening.
You may already be handy with "flying" the throttle. If so, that's great. If your normal outdoor routine is to push the left stick to full throttle on the airplane, you will find you end up flying the plane into the floor. Try to get in the habit of using small stick movements. It helps to use a friend as a spotter to call out corrections. Practice flying figure eights and circles at a comfortable altitude. When landing, keep power in until landing time; there's some work to do before going indoors. The idea is to use enough power for a takeoff from the floor, then throttle back to cruise at roughly 10 feet altitude.
Each time you want a tight turn, just bank the model over, pull back, and add throttle, easing the power back when the turn is complete.
Safety, Organizations, and Resources
There are a few more things to consider as you head for that first indoor session. Do you have AMA insurance? Please don't fly without it.
It is also a good idea to check the neighborhood outdoors for other modelers who might be flying "park"-type machines—even if you are well clear of any formal RC fields. We all need to work together to avoid "shoot-downs."
There is an AMA Special Interest Group (SIG) specifically for indoor RC: the National Indoor Remote Controlled Aircraft Council (NIRACC). The contact is Bob Wisker at 1005 Hidden Oaks Ct., Colleyville TX 76034-3816. A NIRACC membership will net you a newsletter and a much better idea of indoor RC activities.
If you are flying alone or with a new group, AMA has a set of safety guidelines for indoor RC that you should check out.
Although this by no means is a complete list of suppliers, the following are especially adept at working with the indoor flyer:
- Todd's Models (Todd Long), Box 627, Snoqualmie WA 98065; Tel: (425) 888-6530
- Dave Lewis, 4027 Rocky River 26, Cleveland OH 44135-1147; Tel: (216) 251-2877; Website: www.homefly.com
- Sky Hooks and Rigging, 2206 Towne Blvd., Oakville, ON L6H 6H4, Canada; Website: www.microrc.com
For a much more complete listing, check out the vendor information at www.microflight.com.
A manufacturer who is really making an effort to reach out to the indoor and micro market is Fred Marks (FMA Direct), who is preparing quite a line of "goodies" for the indoor enthusiast. Pictures show Fred holding his new Airknocker and flying in the National Building Museum in Washington, D.C. Fred tells me that this model will be available in ready-to-fly (RTF) form and as a kit. But that is just the tip of the iceberg. FMA is developing an extensive line of ultralight RC gear—infrared and radio frequency gear.
FMA is also offering magnetic actuators in several sizes, microservos, voltage converters, and a new line of transmitters. Fred anticipates having a much smaller and lighter almost ready-to-fly (ARF) indoor model in the near future.
Watch out for FMA Direct and stay tuned. The Web site is www.fmadirect.com.
Closing and Request for Input
This month I have focused on just one of the fascinating aspects of the indoor micro field. I am working with some new equipment and modifications to older gear that I will pick up on more next month. This area is so young that changes and new products are coming along almost too fast to keep up with.
I would like to hear from anyone who has documented data on the most usable airfoils for these small, slow models. Up to this point, the best I have seen are from the competition FreeFlight groups. Even though the models are totally different, the wing/airfoil requirements are similar.
By the way, if anyone is working with small propellers and will share some thoughts, I would greatly appreciate it. Manufacturers that want some exposure should drop me a line and let me know what you have. I may mention a product I have used from time to time, but the more you can feed me, the more I can get out to readers.
You can e-mail me, friends—I need your help keeping this column fresh. Send me ideas, pictures, new-product information, or just good old criticism. Work with me to keep spreading the word about our part of the hobby.
Till next time. MA
Transcribed from original scans by AI. Minor OCR errors may remain.

