
MICRO-SCALE MODELS SUPER RINGMASTER
By Allen Goff
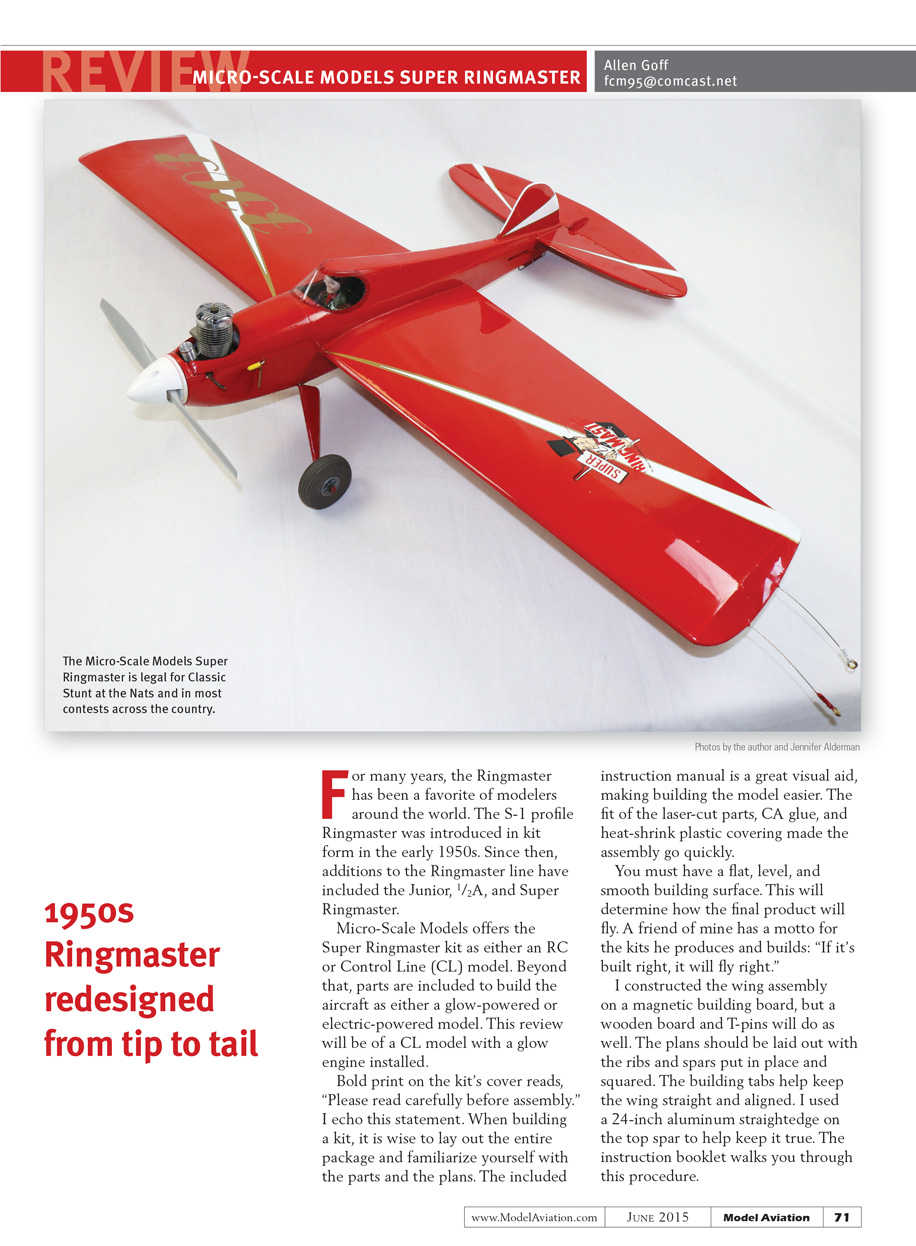
For many years the Ringmaster has been a favorite of modelers around the world. The S-1 profile Ringmaster was introduced in kit form in the early 1950s. Since then, additions to the Ringmaster line have included the Junior, 1/2A, and Super Ringmaster.
Micro-Scale Models offers the Super Ringmaster kit with multiple options:
- RC or Control Line (CL) model.
- Parts to build as glow-powered or electric-powered.
This review covers a CL model built with a glow engine installed.
Before you start
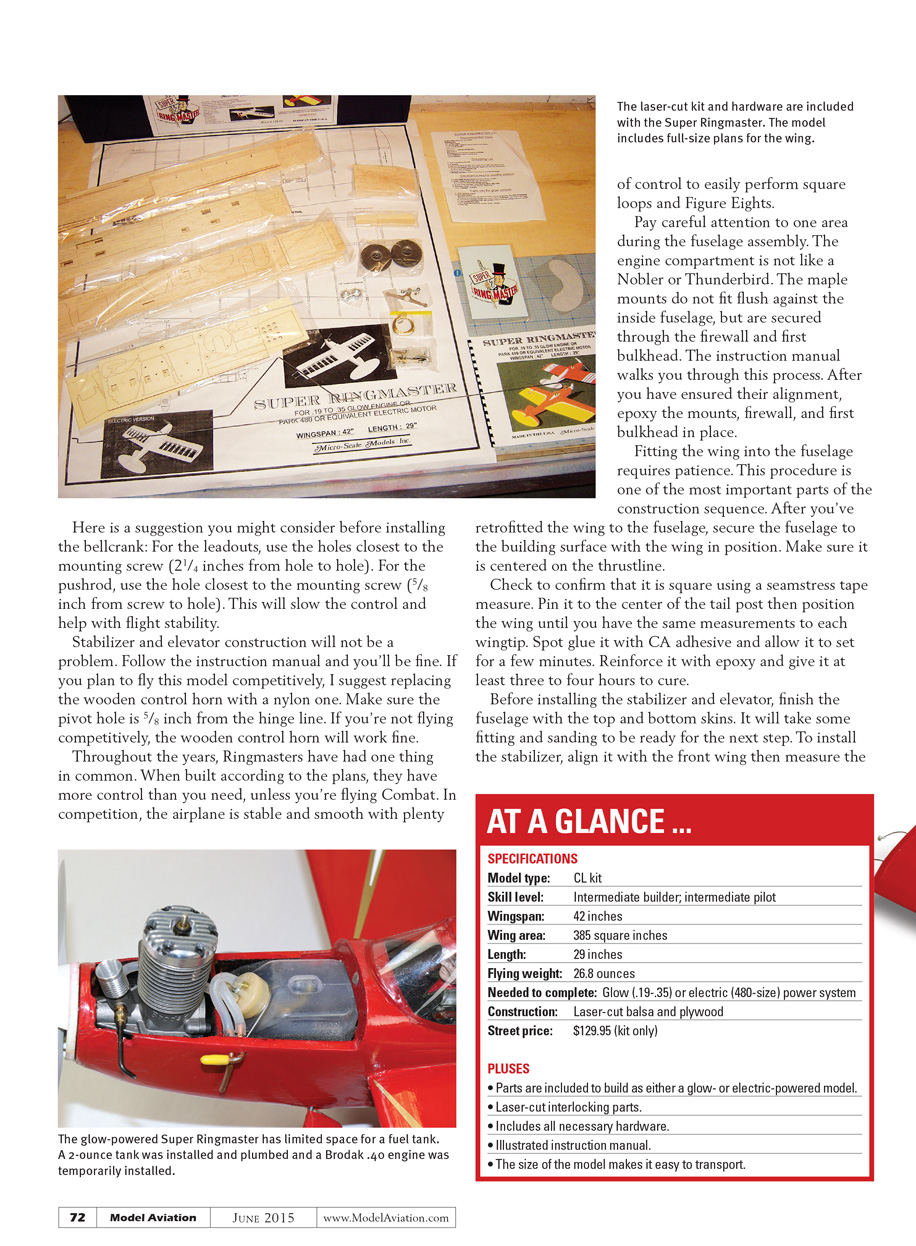
- Read the instruction manual carefully and lay out the entire package to familiarize yourself with parts and plans.
- Use a flat, level, smooth building surface — this affects how the model will fly.
- The kit includes laser-cut parts, CA glue-friendly joints, and heat-shrink plastic covering that speed assembly when used properly.
- A magnetic building board is convenient; a wooden board and T-pins will also work.
Wing assembly
- Lay out the plans with ribs and spars squared. Building tabs help keep the wing straight and aligned.
- Use a 24-inch aluminum straightedge on the top spar to keep it true.
- The instruction booklet provides a visual step-through of the assembly.
Control link suggestions (before installing the bellcrank):
- For the leadouts, use the holes closest to the mounting screw (2-1/4 inches from hole to hole). This slows the control and improves flight stability.
- For the pushrod, use the hole closest to the mounting screw (5/8 inch from screw to hole).
These settings will provide gentler, more stable control response.
Stabilizer and elevator
- Follow the instruction manual; construction should be straightforward.
- For competitive flying, replace the wooden control horn with a nylon horn and ensure the pivot hole is 5/8 inch from the hinge line.
- For casual flying, the wooden control horn is acceptable.
Ringmasters built to plan generally have more control than needed for sport flying but are appropriately responsive for Combat or competition flying (square loops, Figure Eights, etc.).
Fuselage and engine mount
- Pay careful attention to the engine compartment: maple mounts do not fit flush against the inside fuselage but are secured through the firewall and first bulkhead.
- Ensure alignment, then epoxy the mounts, firewall, and first bulkhead in place as instructed.
Fitting the wing to the fuselage
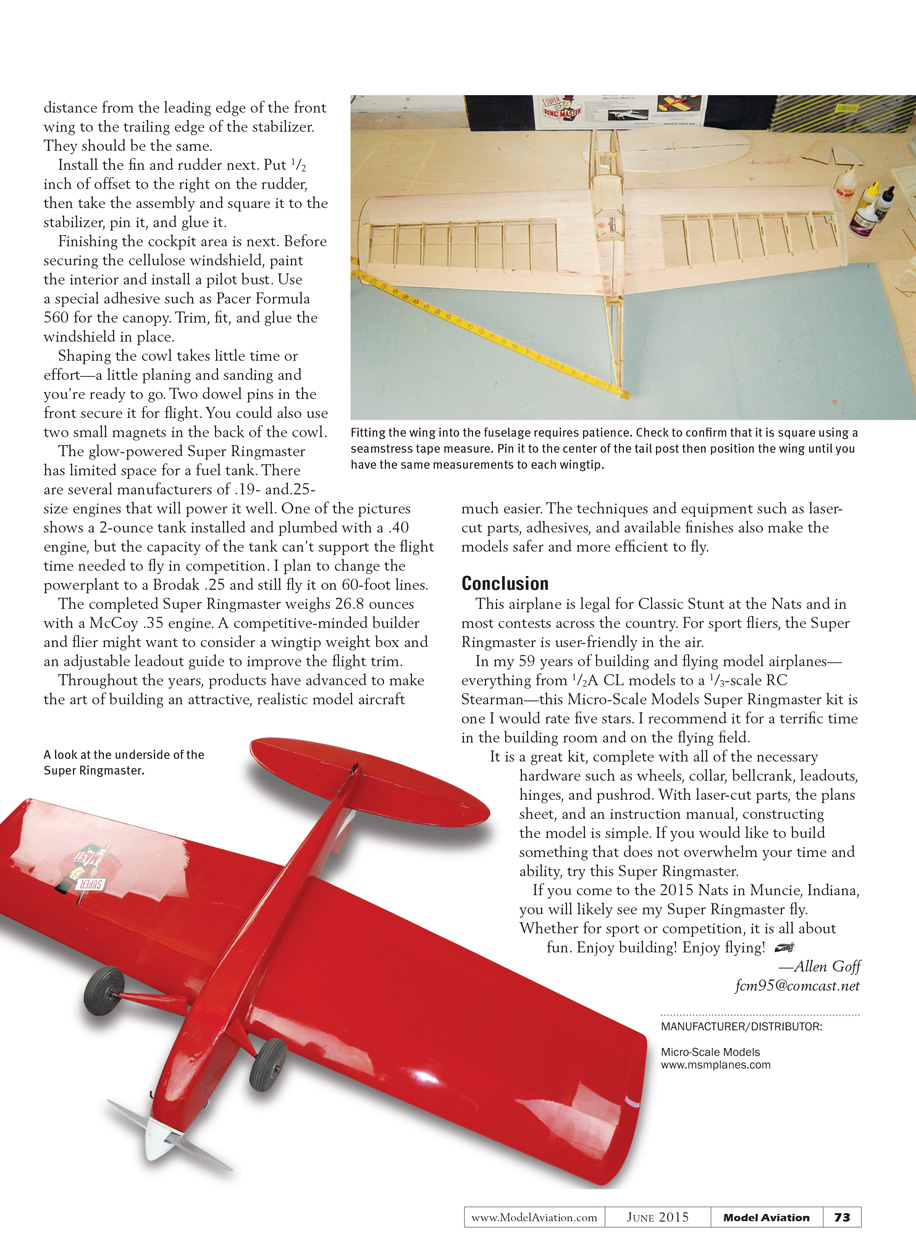
- This step requires patience and is critical to flight performance.
- Retrofit the wing to the fuselage, secure the fuselage to the building surface with the wing in position, and make sure it is centered on the thrustline.
- Use a seamstress tape measure to confirm symmetry: pin the fuselage at the center tail post and measure to each wingtip until the distances match.
- Spot-glue with CA to hold position, then reinforce with epoxy and allow 3–4 hours to cure.
Tail surfaces and rigging
- Before installing the stabilizer and elevator, finish the fuselage top and bottom skins and do the necessary fitting and sanding.
- To install the stabilizer, align it with the front wing and measure to each wingtip.
- Install the fin and rudder next: put 1/2 inch of right offset on the rudder, then square the assembly to the stabilizer, pin, and glue.
Cockpit and cowl
- Paint the interior and install a pilot bust before securing the cellulose windshield.
- Use a special canopy adhesive such as Pacer Formula 560 to trim, fit, and glue the windshield.
- Shape the cowl with light planing and sanding. Secure with two front dowel pins for flight; alternatively, use two small magnets in the back of the cowl.
Powerplant
- The glow-powered Super Ringmaster has limited space for a fuel tank.
- .19- and .25-size engines from several manufacturers will power the model well.
- A 2-ounce tank plumbed to a .40 engine was shown in photos but will not support competition flight times.
- The author plans to use a Brodak .25 and fly on 60-foot lines.
Final weight and trim suggestions
- The completed model weighed 26.8 ounces with a McCoy .35 engine.
- Competitive flyers may want to add a wingtip weight box and an adjustable leadout guide to refine flight trim.
Advances in modeling
- Modern products and techniques (laser-cut parts, adhesives, finishes) have made building attractive, realistic models easier, safer, and more efficient to fly.
Conclusion
This airplane is legal for Classic Stunt at the Nats and in most contests across the country. For sport fliers, the Super Ringmaster is user-friendly in the air.
In 59 years of building and flying model airplanes, from 1/2A CL models to a 1/3-scale RC Stearman, I rate the Micro-Scale Models Super Ringmaster kit five stars. It is an excellent kit for both the building room and the flying field.
The kit is complete with necessary hardware:
- Wheels
- Collar
- Bellcrank
- Leadouts
- Hinges
- Pushrod
With laser-cut parts, a plans sheet, and an instruction manual, constructing the model is simple. If you want a project that won't overwhelm your time or ability, try this Super Ringmaster.
If you come to the 2015 Nats in Muncie, Indiana, you will likely see my Super Ringmaster fly. Whether for sport or competition, it is all about fun. Enjoy building! Enjoy flying!
—Allen Goff [email protected]
Manufacturer / Distributor
Micro-Scale Models www.msmplanes.com
Transcribed from original scans by AI. Minor OCR errors may remain.

