
Micro Yogi
By Joe Beshar With Jay Smith
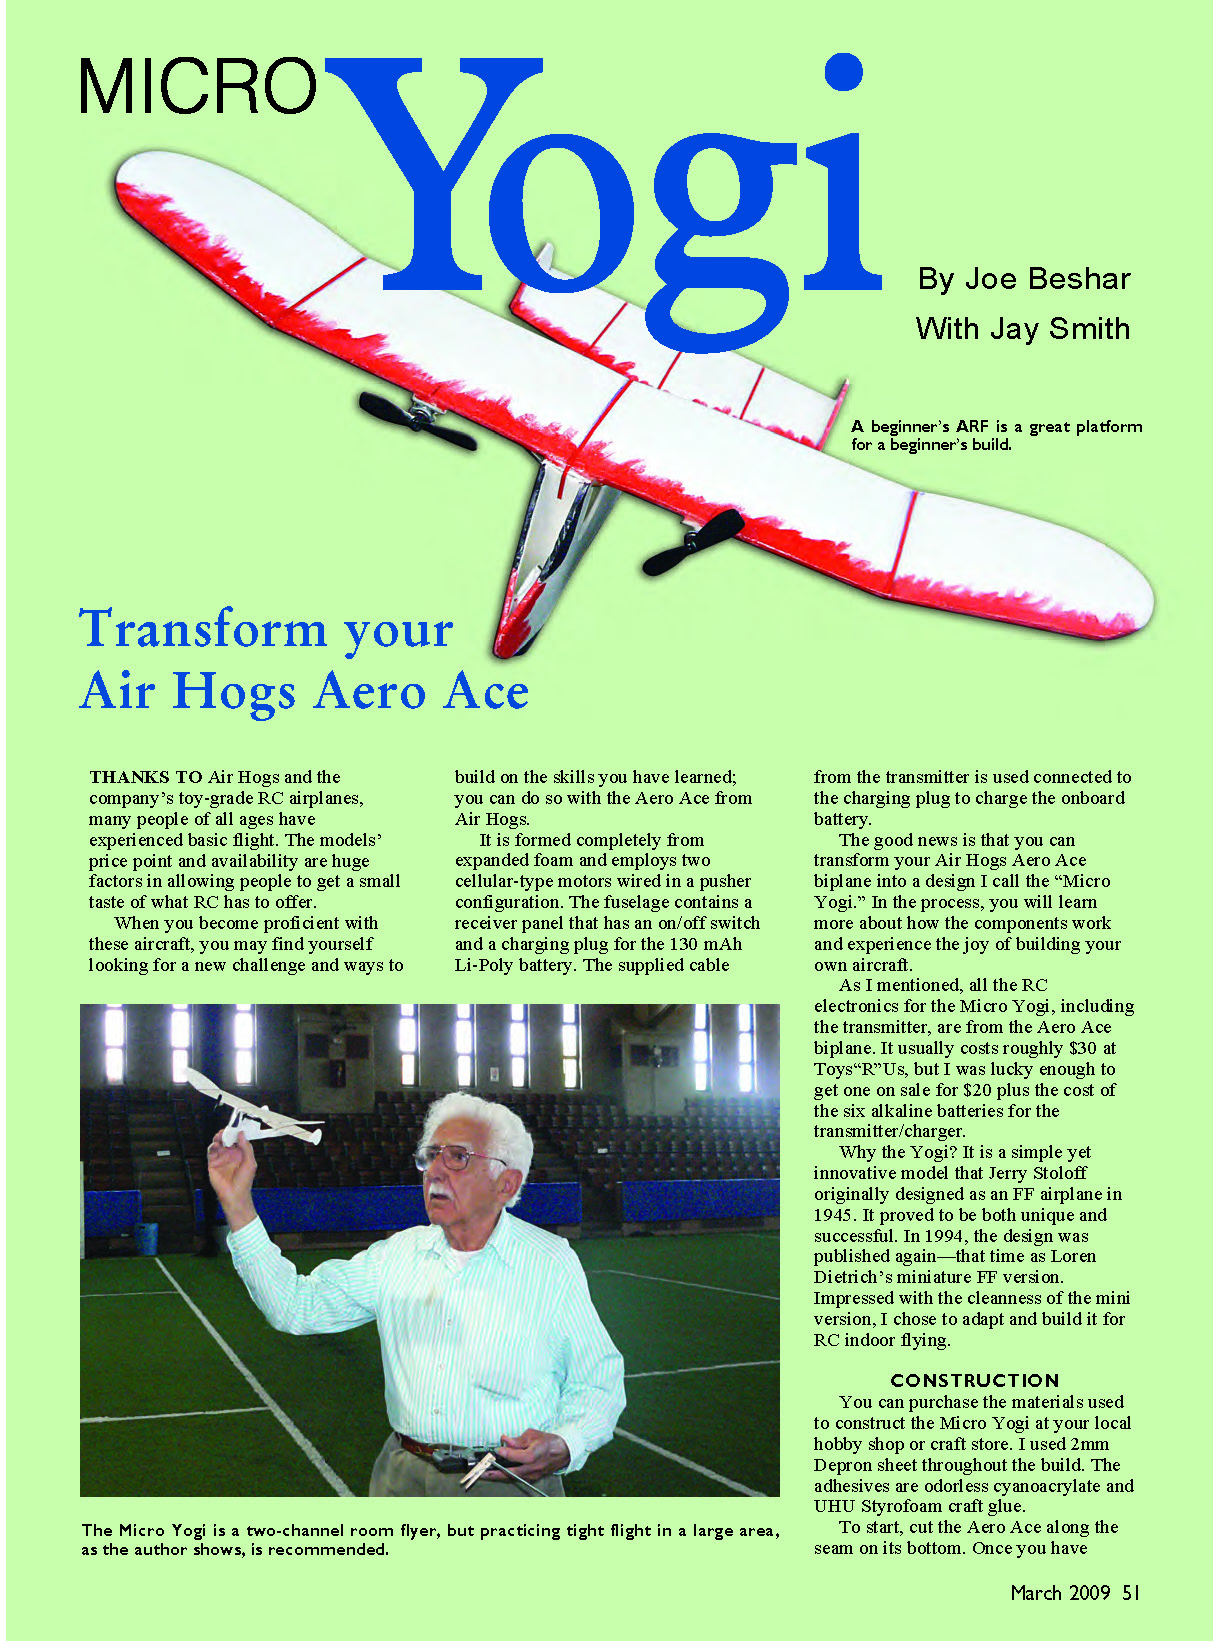
Transform your Air Hogs Aero Ace
Thanks to Air Hogs and the company’s toy-grade RC airplanes, many people of all ages have experienced basic flight. The models’ price point and availability are huge factors in allowing people to get a small taste of what RC has to offer.
When you become proficient with these aircraft, you may find yourself looking for a new challenge and ways to build on the skills you have learned; you can do so with the Aero Ace from Air Hogs.
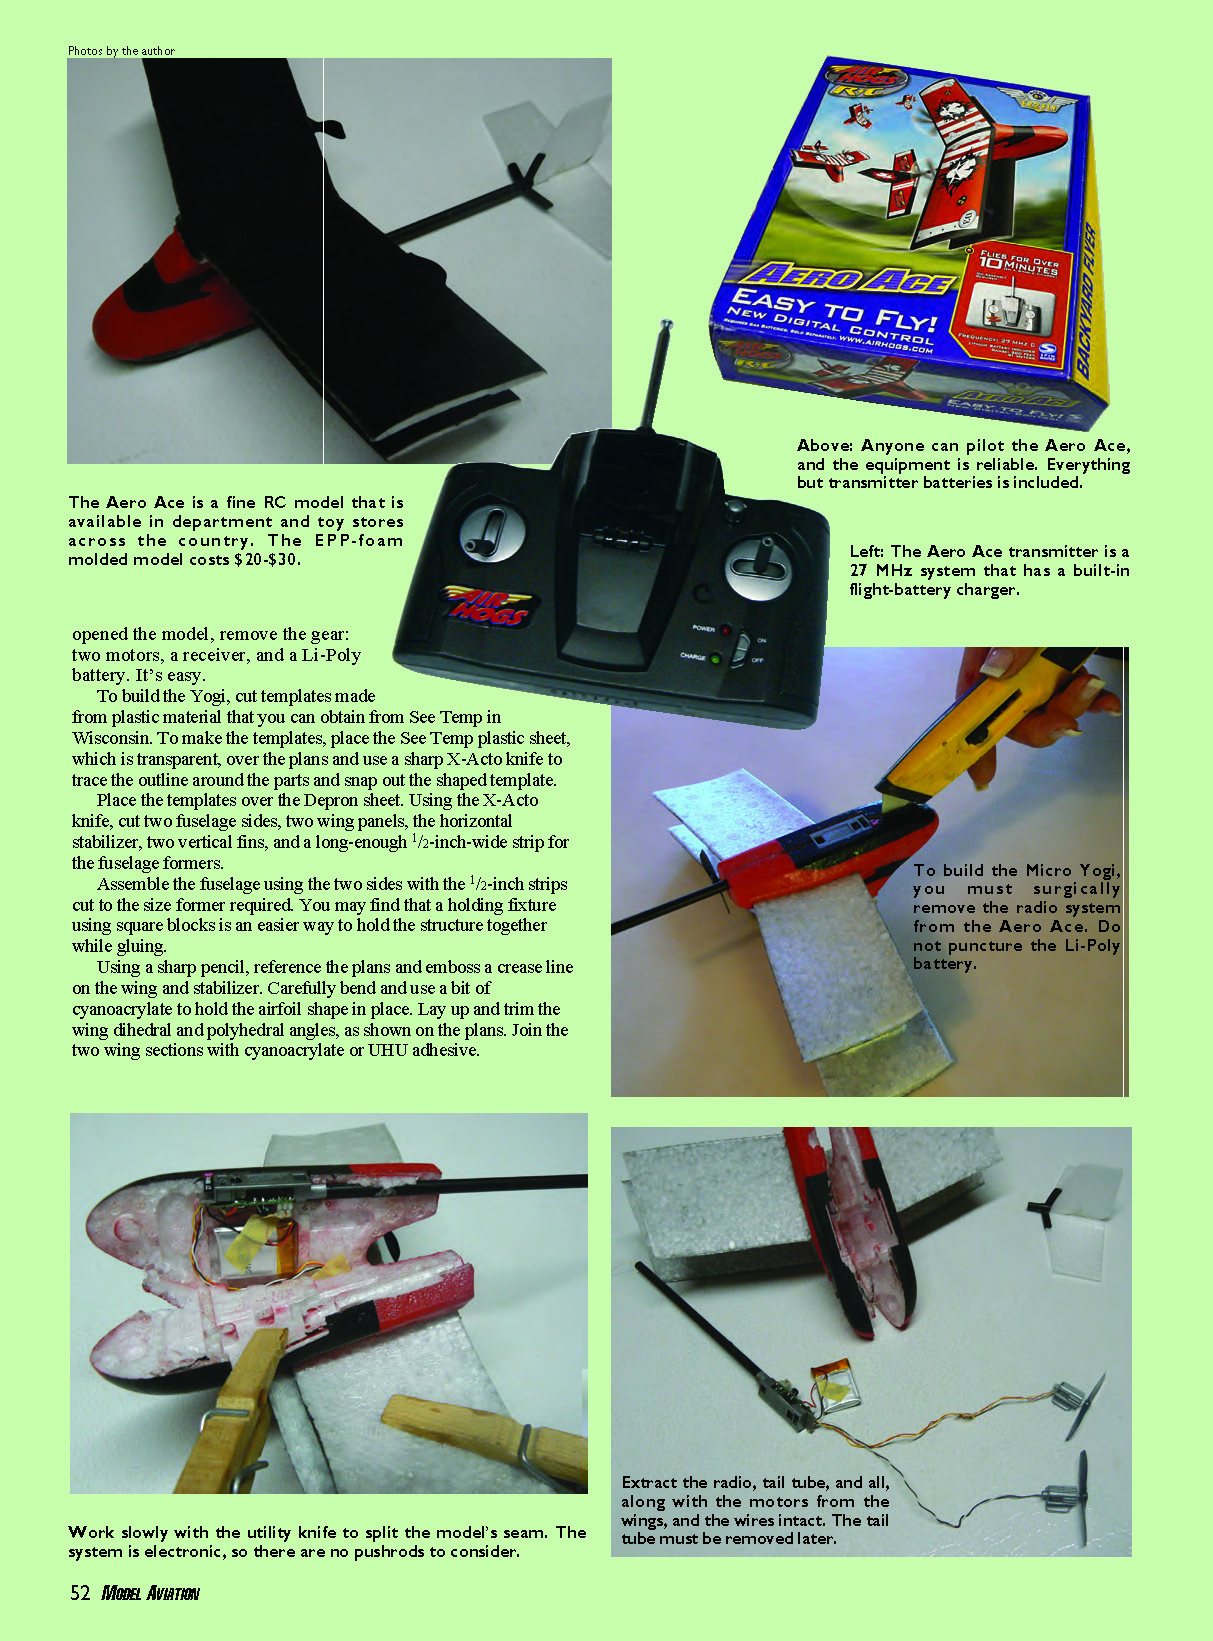
The Aero Ace is formed completely from expanded foam and employs two cellular-type motors wired in a pusher configuration. The fuselage contains a receiver panel that has an on/off switch and a charging plug for the 130 mAh Li-Poly battery. The supplied cable from the transmitter is used, connected to the charging plug, to charge the onboard battery.
You can transform your Air Hogs Aero Ace biplane into a design I call the “Micro Yogi.” In the process, you will learn more about how the components work and experience the joy of building your own aircraft.
All the RC electronics for the Micro Yogi, including the transmitter, are from the Aero Ace biplane. It usually costs roughly $30 at Toys "R" Us, but I was lucky enough to get one on sale for $20 plus the cost of the six alkaline batteries for the transmitter/charger.
Why the Yogi? It is a simple yet innovative model that Jerry Stoloff originally designed as an FF airplane in 1945. It proved to be both unique and successful. In 1994, the design was published again—that time as Loren Dietrich’s miniature FF version. Impressed with the cleanness of the mini version, I chose to adapt and build it for RC indoor flying.
Construction
Materials
- 2mm Depron sheet (used throughout the build)
- Odorless cyanoacrylate and UHU Styrofoam craft glue
- See Temp plastic sheet (for templates)
- Double-stick tape
- X-Acto knife, sharp pencil, pliers, soldering iron
Steps
- Open the Aero Ace by working slowly with a utility knife to split the seam on the bottom. Once opened, remove the gear: two motors, a receiver, and the Li-Poly battery. Extract the radio, tail tube, motors, and associated wiring intact. (The tail tube must be removed later as required by the Yogi design.)
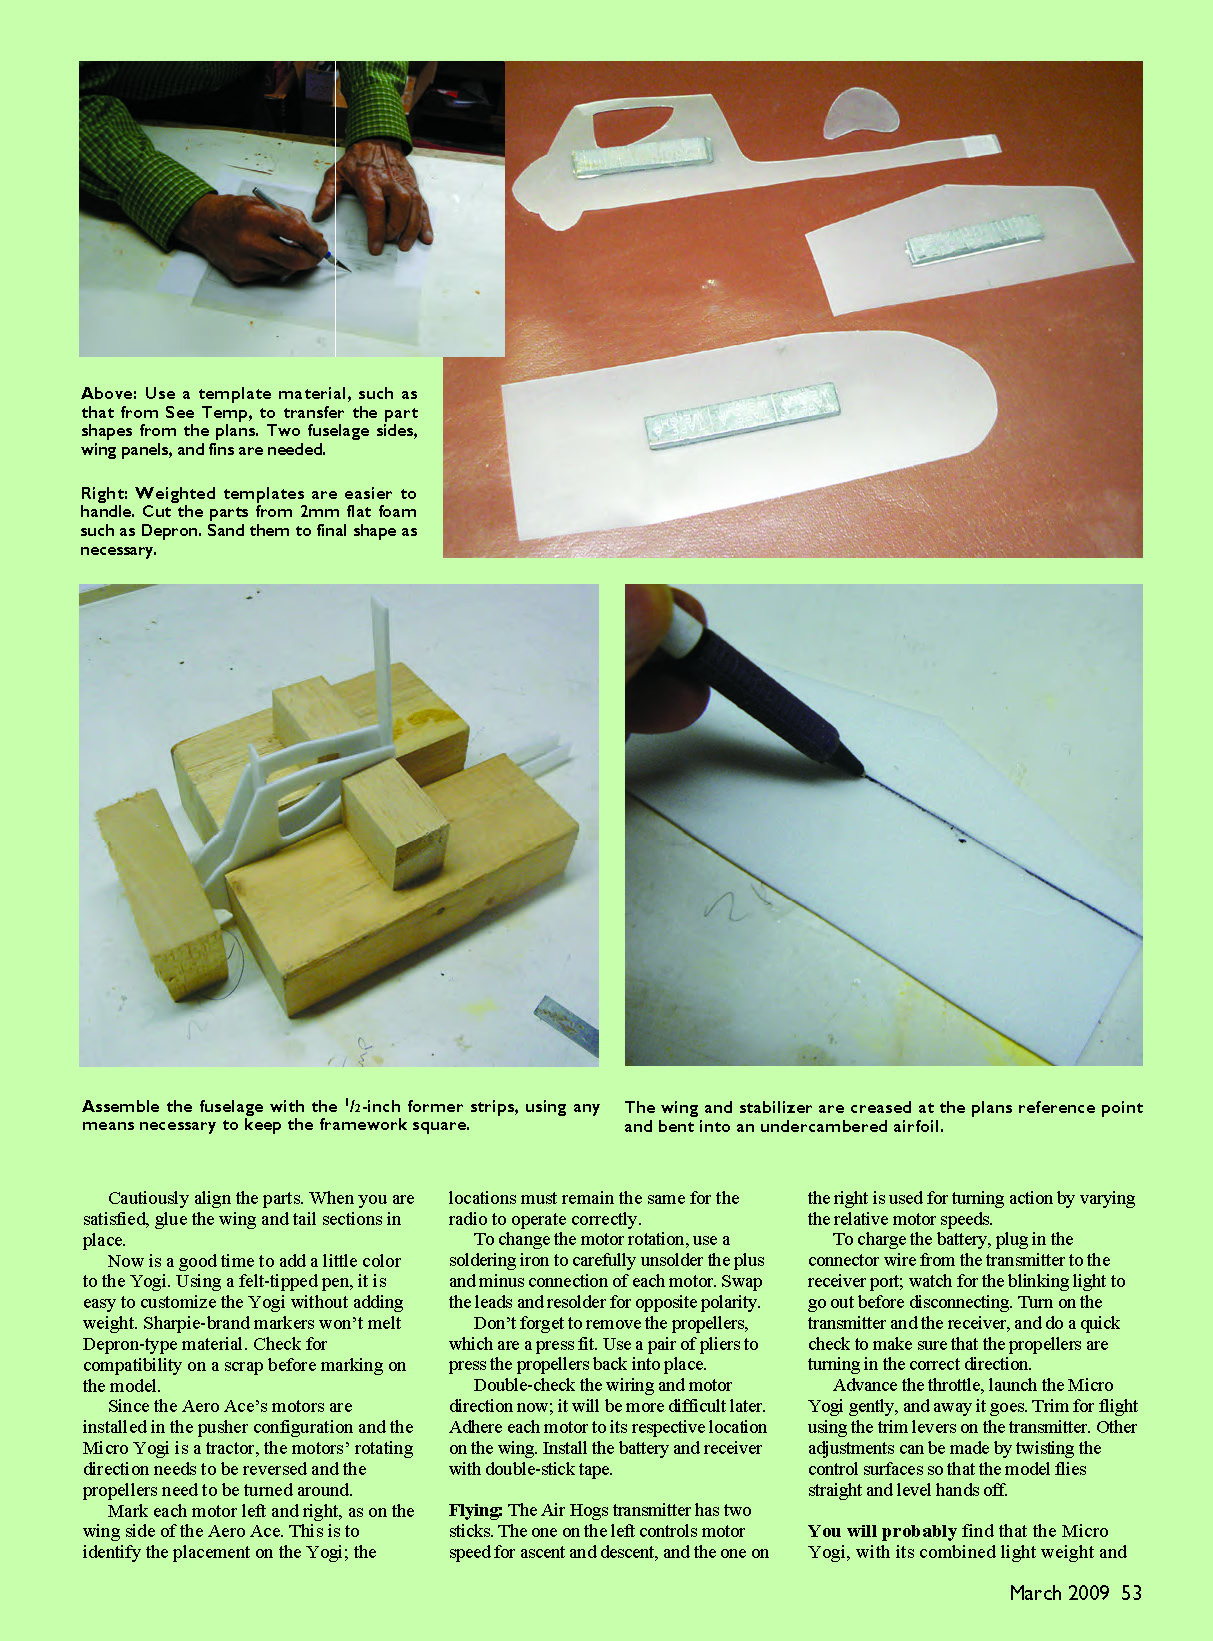
- Make templates from See Temp plastic: place the transparent See Temp sheet over the plans, use a sharp X-Acto knife to trace the outlines, and snap out the shaped templates.
- Place the templates over the Depron sheet and cut:
- Two fuselage sides
- Two wing panels
- The horizontal stabilizer
- Two vertical fins
- A long-enough 1/2-inch-wide strip for the fuselage formers
- Assemble the fuselage using the two sides and the 1/2-inch former strips cut to size. A holding fixture made from square blocks makes it easier to hold the structure while gluing.
- Using a sharp pencil, reference the plans and emboss a crease line on the wing and stabilizer. Carefully bend to form the airfoil and use a bit of cyanoacrylate to hold the shape.
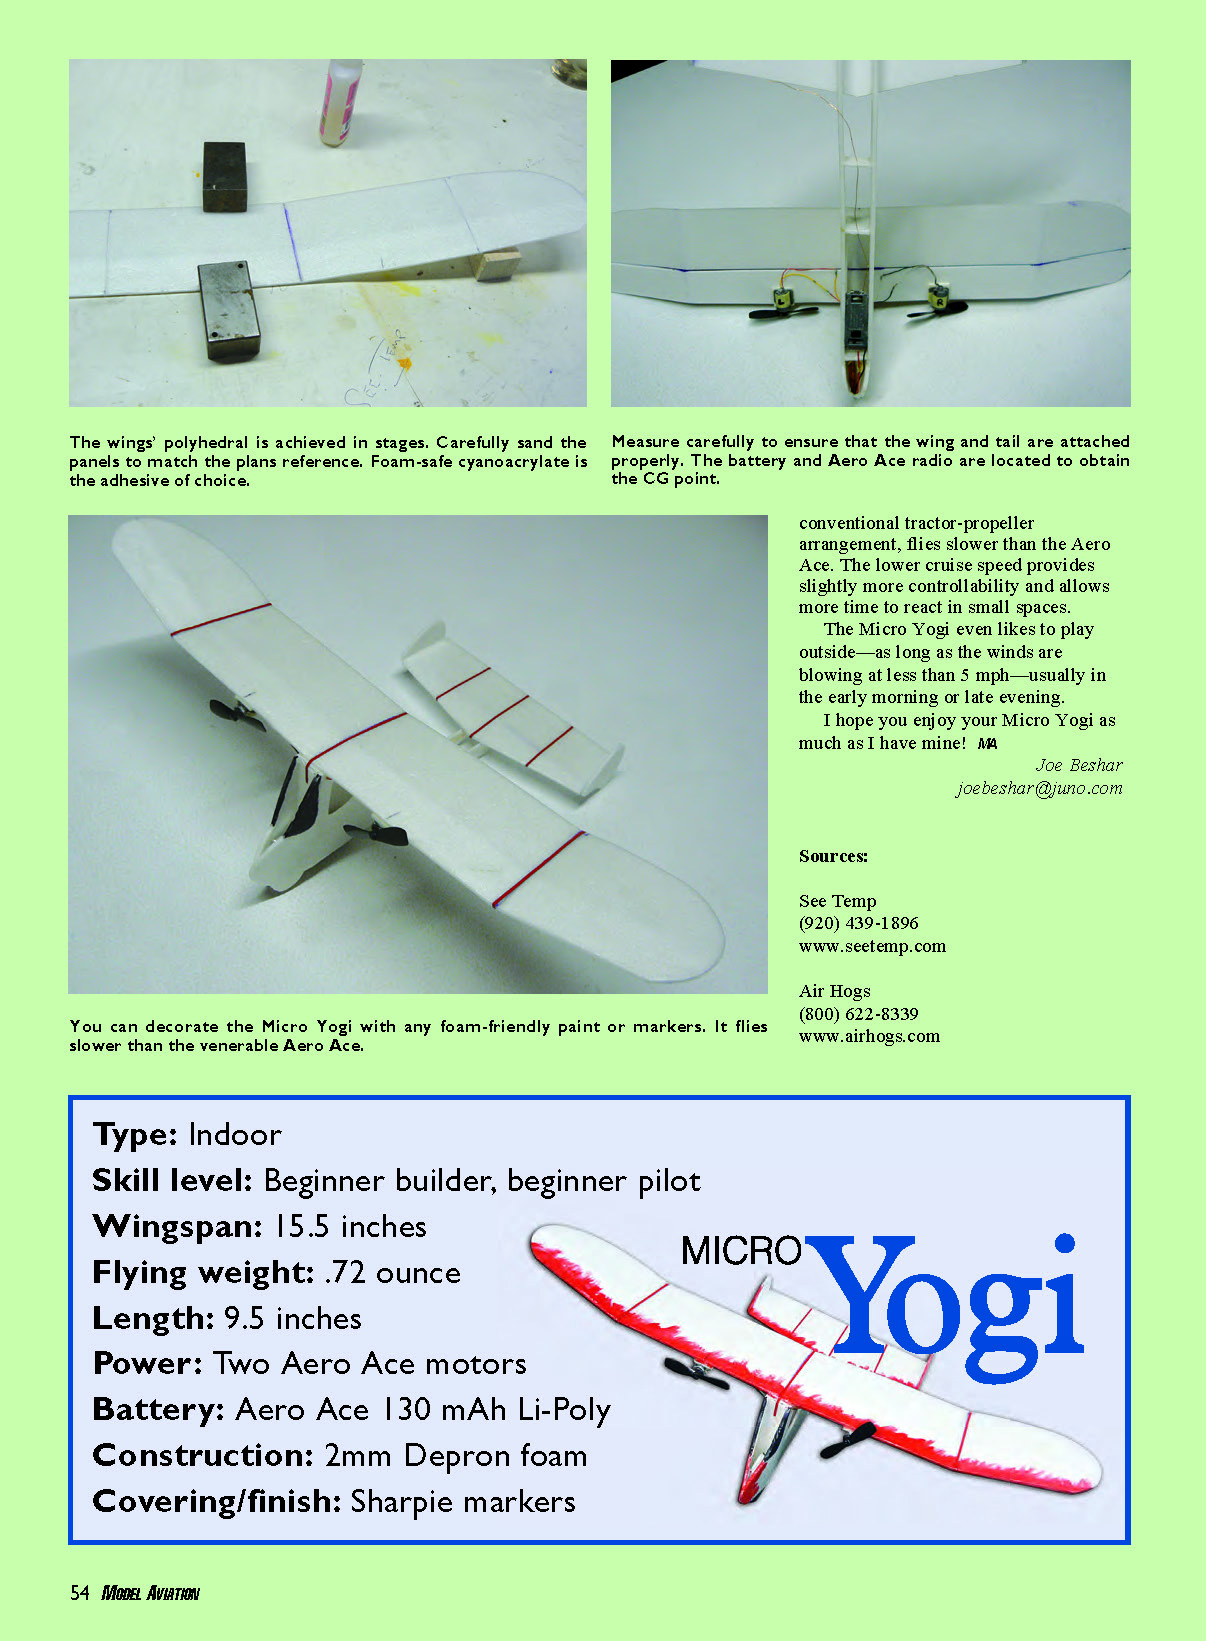
- Lay up and trim the wing dihedral and polyhedral angles as shown on the plans. Join the two wing sections with cyanoacrylate or UHU adhesive, cautiously aligning the parts. When satisfied, glue the wing and tail sections in place.
- Add color with felt-tipped pens; they’re light and won’t melt Depron-type material. Sharpie-brand markers are generally safe—check compatibility on a scrap before marking the model.
- Since the Aero Ace’s motors are in a pusher configuration and the Micro Yogi is a tractor, the motors’ rotation needs to be reversed and the propellers turned around:
- Mark each motor left and right, matching the wing side locations from the Aero Ace so the radio operates correctly.
- Use a soldering iron to carefully unsolder the plus and minus connections of each motor. Swap the leads and resolder for the opposite polarity.
- Remove the propellers (they are a press fit) and reinstall them in the correct orientation using pliers to press them back into place.
- Double-check wiring and motor direction now; it will be more difficult later. Adhere each motor to its respective location on the wing. Install the battery and receiver with double-stick tape.
Flying
- The Air Hogs transmitter has two sticks: the left stick controls motor speed for ascent and descent; the right stick controls turning by varying the relative motor speeds.
- To charge the battery, plug the connector wire from the transmitter into the receiver port and watch for the blinking light to go out before disconnecting.
- Turn on the transmitter and the receiver, and do a quick check to make sure the propellers are turning in the correct direction.
- Advance the throttle, launch the Micro Yogi gently, and away it goes. Trim for flight using the trim levers on the transmitter. Other adjustments can be made by twisting the control surfaces so the model flies straight and level hands-off.
- The Micro Yogi, with its light weight and conventional tractor-propeller arrangement, flies slower than the Aero Ace. The lower cruise speed provides slightly more controllability and allows more time to react in small spaces.
- The Micro Yogi can be flown outside as long as winds are under about 5 mph—usually early morning or late evening are best.
I hope you enjoy your Micro Yogi as much as I have mine!
Joe Beshar [email protected]
Sources
- See Temp
(920) 439-1896 www.seetemp.com
- Air Hogs
(800) 622-8339 www.airhogs.com
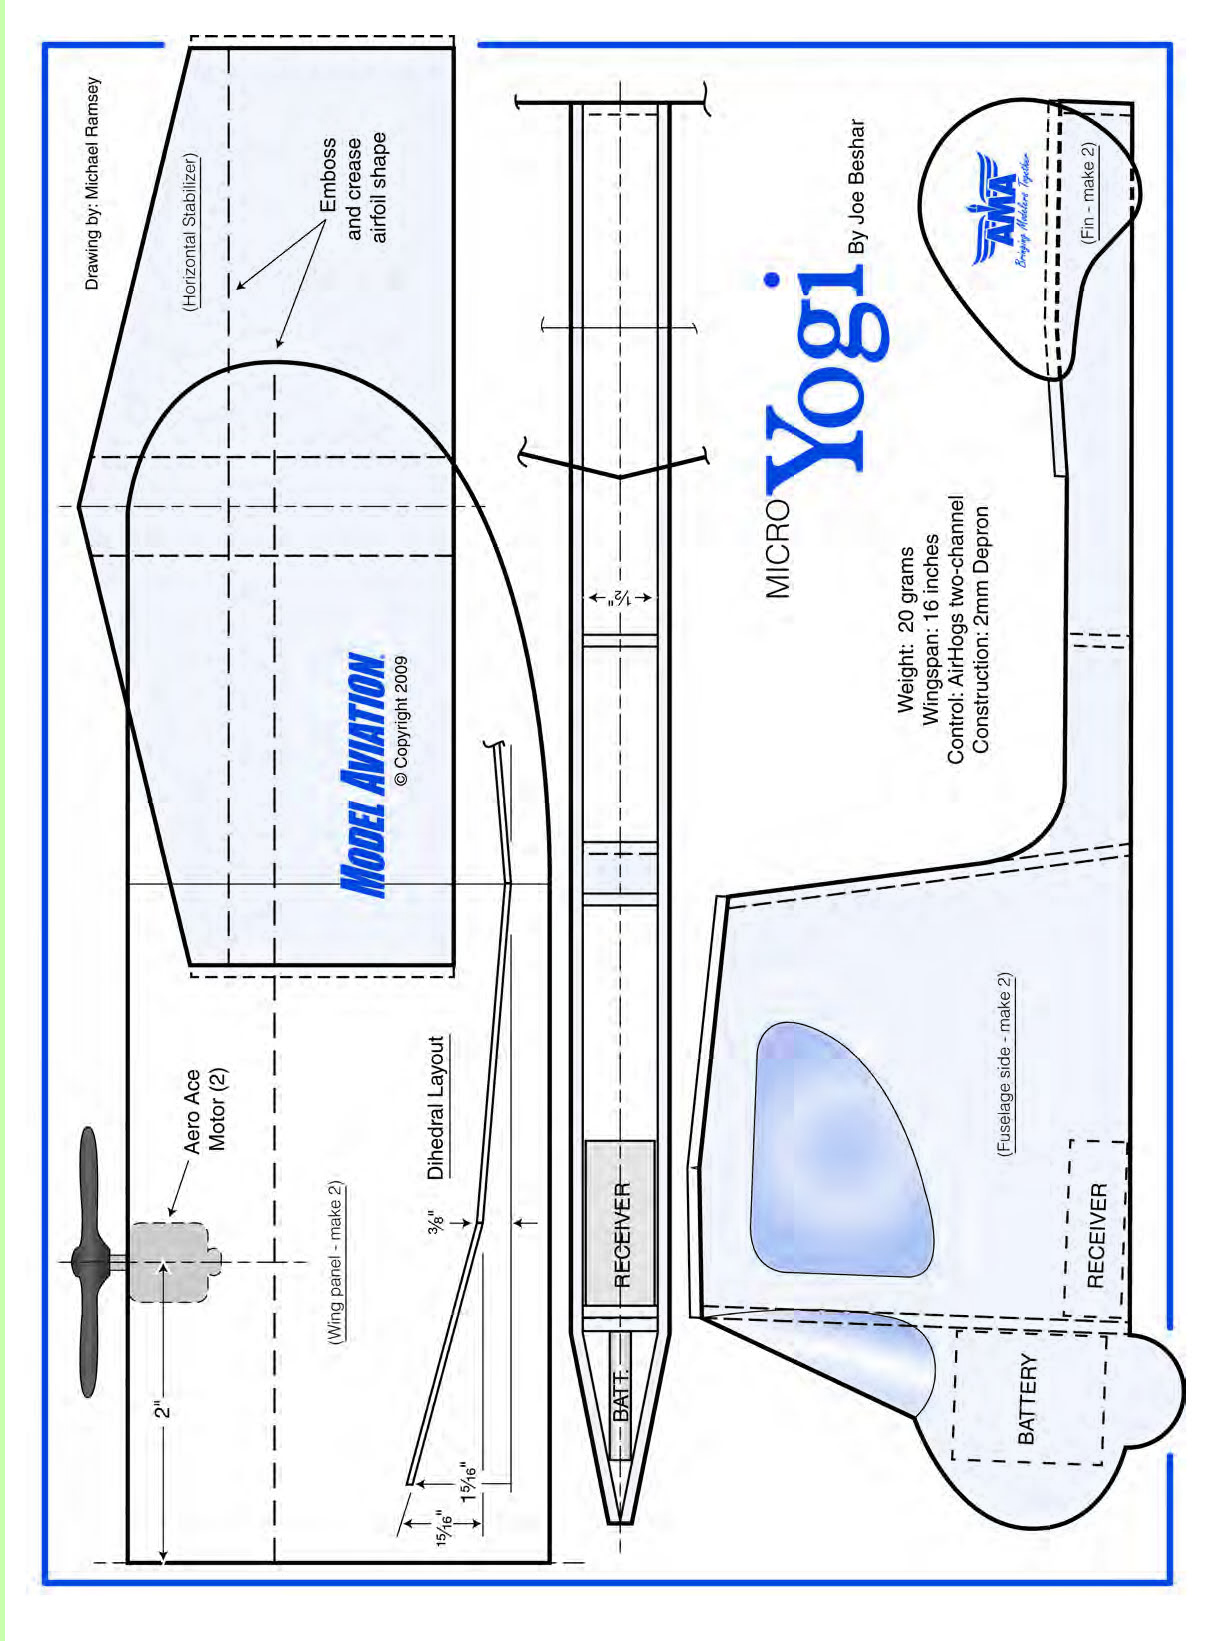
MICRO Yogi
Weight: 20 grams Wingspan: 16 inches Control: AirHogs two-channel Construction: 2mm Depron Drawing by: Michael Ramsey
MODEL AVIATION © Copyright 2009
Transcribed from original scans by AI. Minor OCR errors may remain.

