
Model Aero Polaris XL
Eric Henderson [email protected]
My previous experience with building Depron "slab-type" foamies for 3-D flying and general bashing around the sky gave me a degree of building confidence, so I was looking forward to putting together a Model Aero Polaris XL.
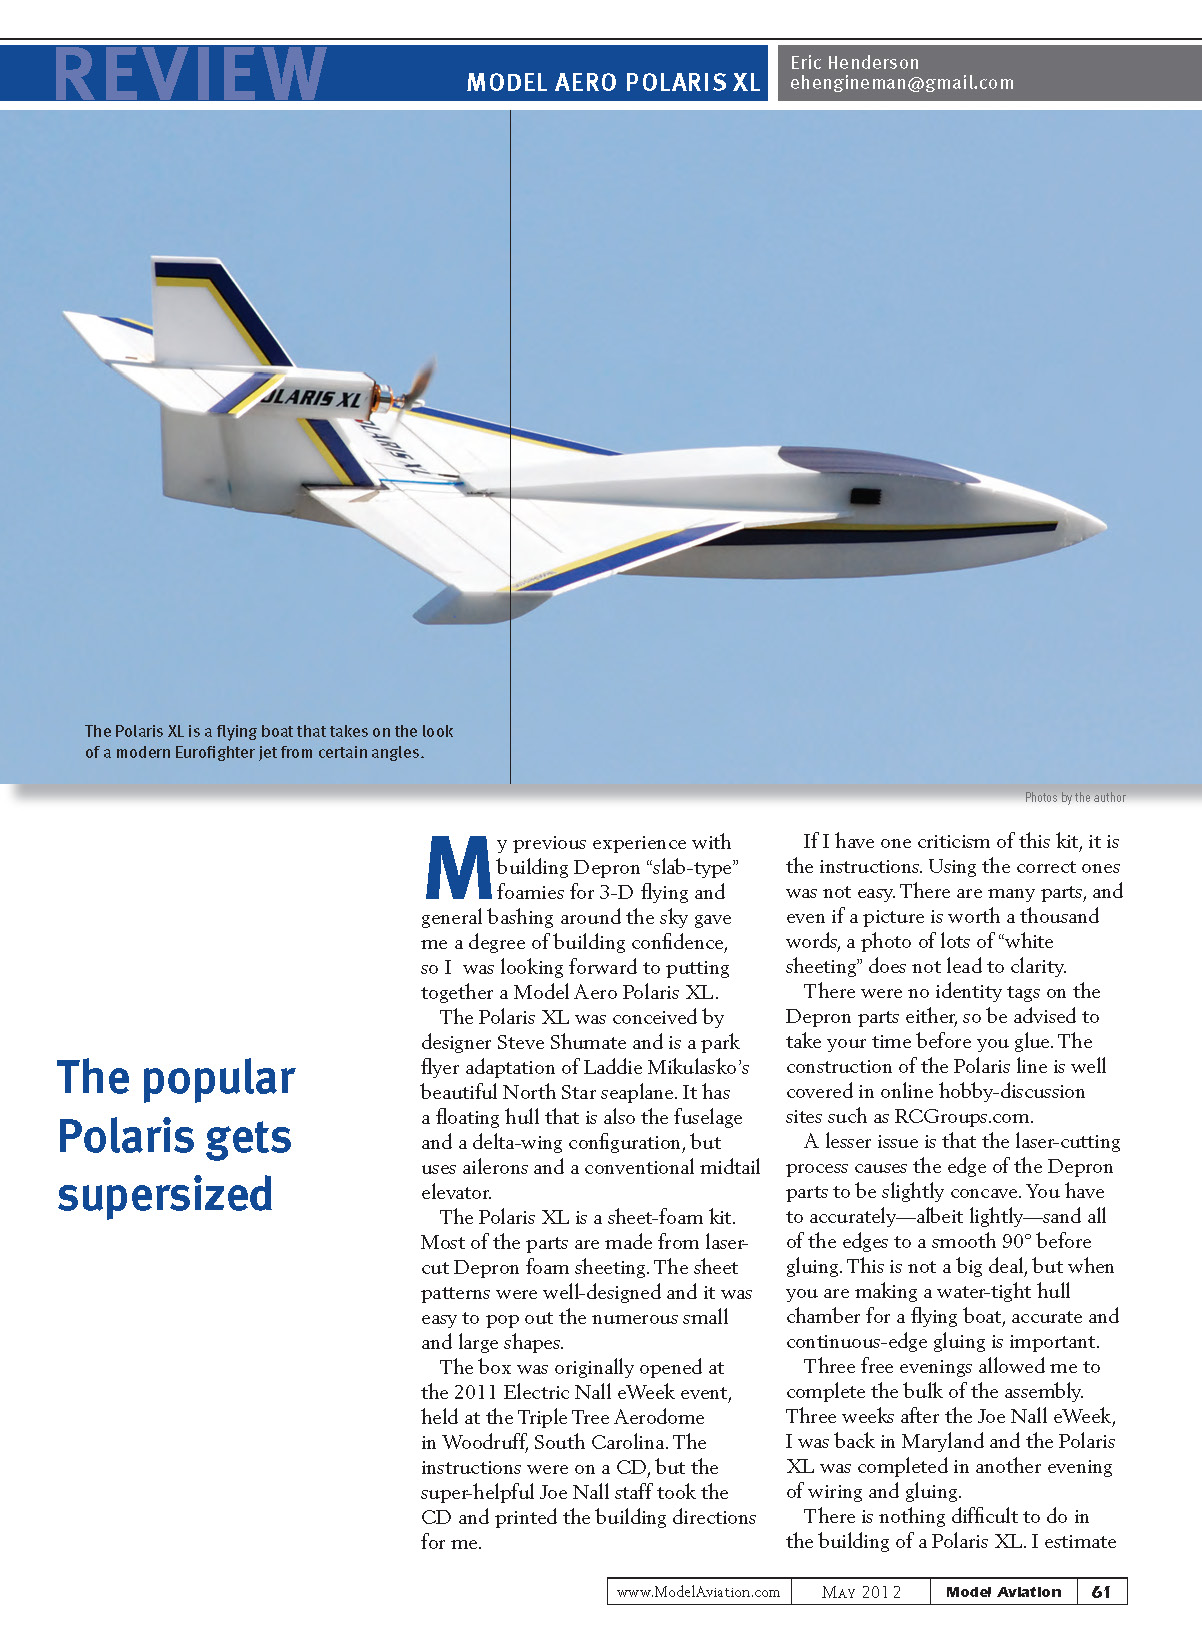
The Polaris XL was conceived by designer Steve Shumate and is a park-flyer adaptation of Laddie Mikulasko's beautiful North Star seaplane. It has a floating hull that is also the fuselage and a delta-wing configuration, but uses ailerons and a conventional midtail elevator.
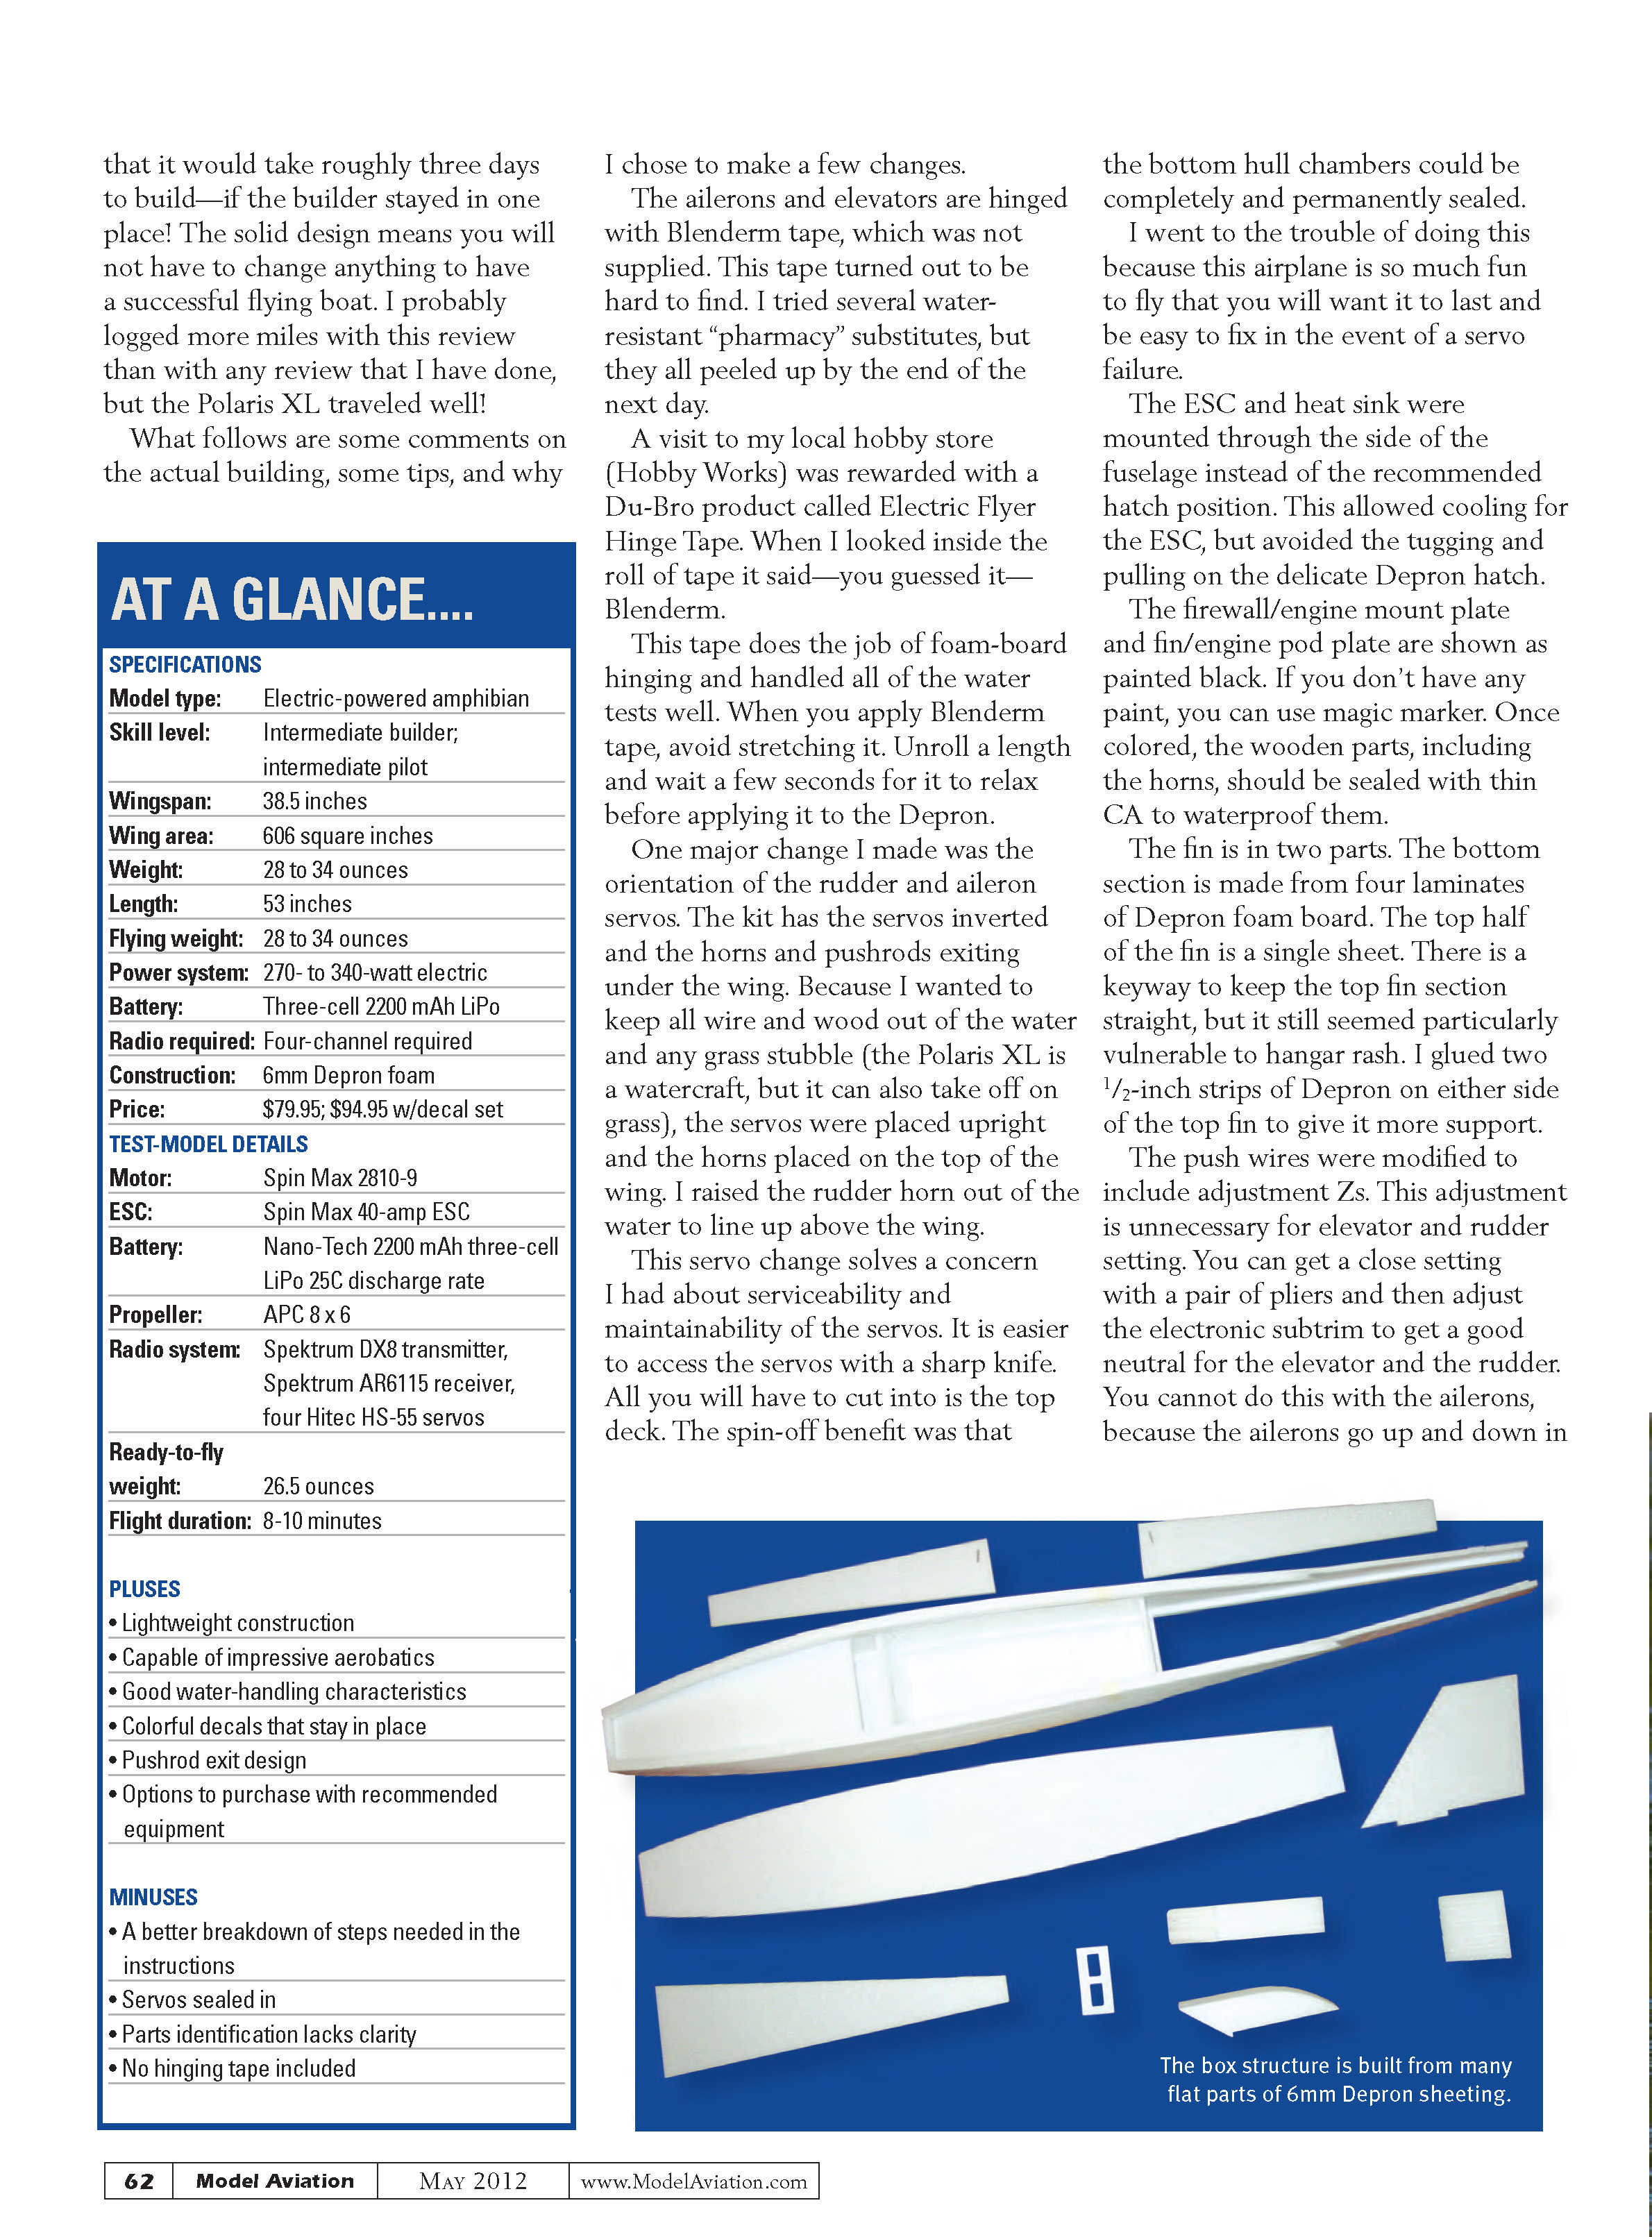
The Polaris XL is a sheet-foam kit. Most of the parts are made from laser-cut Depron foam sheeting. The sheet patterns were well-designed and it was easy to pop out the numerous small and large shapes.
The box was originally opened at the 2011 Joe Nall eWeek event, held at the Triple Tree Aerodrome in Woodruff, South Carolina. The instructions were on a CD, but the super-helpful Joe Nall staff took the CD and printed the building directions for me.
If I have one criticism of this kit, it is the instructions. Using the correct ones was not easy. There are many parts, and even if a picture is worth a thousand words, a photo of lots of "white sheeting" does not lead to clarity.
There were no identity tags on the Depron parts either, so be advised to take your time before you glue. The construction of the Polaris line is well covered in online hobby-discussion sites such as RCGroups.com.
A lesser issue is that the laser-cutting process causes the edge of the Depron parts to be slightly concave. You have to accurately—albeit lightly—sand all of the edges to a smooth 90° before gluing. This is not a big deal, but when you are making a water-tight hull chamber for a flying boat, accurate and continuous-edge gluing is important.
Three free evenings allowed me to complete the bulk of the assembly. Three weeks after the Joe Nall eWeek, I was back in Maryland and the Polaris XL was completed in another evening of wiring and gluing.
There is nothing difficult to do in the building of a Polaris XL. I estimate that it would take roughly three days to build—if the builder stayed in one place! The solid design means you will not have to change anything to have a successful flying boat. I probably logged more miles with this review than with any review that I have done, but the Polaris XL traveled well!
What follows are some comments on the actual building, some tips, and why I chose to make a few changes.
The ailerons and elevators are hinged with Blenderm tape, which was not supplied. This tape turned out to be hard to find. I tried several water-resistant "pharmacy" substitutes, but they all peeled up by the end of the next day.
A visit to my local hobby store (Hobby Works) was rewarded with a Du-Bro product called Electric Flyer Hinge Tape. When I looked inside the roll of tape it said—you guessed it—Blenderm.
This tape does the job of foam-board hinging and handled all of the water tests well. When you apply Blenderm tape, avoid stretching it. Unroll a length and wait a few seconds for it to relax before applying it to the Depron.
One major change I made was the orientation of the rudder and aileron servos. The kit has the servos inverted and the horns and pushrods exiting under the wing. Because I wanted to keep all wire and wood out of the water and any grass stubble (the Polaris XL is a watercraft, but it can also take off on grass), the servos were placed upright and the horns placed on the top of the wing. I raised the rudder horn out of the water to line up above the wing.
This servo change solves a concern I had about serviceability and maintainability of the servos. It is easier to access the servos with a sharp knife. All you will have to cut into is the top deck. The spin-off benefit was that the bottom hull chambers could be completely and permanently sealed.
I went to the trouble of doing this because this airplane is so much fun to fly that you will want it to last and be easy to fix in the event of a servo failure.
The ESC and heat sink were mounted through the side of the fuselage instead of the recommended hatch position. This allowed cooling for the ESC, but avoided the tugging and pulling on the delicate Depron hatch.
The firewall/engine mount plate and fin/engine pod plate are shown as painted black in the plans. If you don't have any paint, you can use a magic marker. Once colored, the wooden parts, including the horns, should be sealed with thin CA to waterproof them.
The fin is in two parts. The bottom section is made from four laminates of Depron foam board. The top half of the fin is a single sheet. There is a keyway to keep the top fin section straight, but it still seemed particularly vulnerable to hangar rash. I glued two 1/2-inch strips of Depron on either side of the top fin to give it more support.
The push wires were modified to include adjustment Zs. This adjustment is unnecessary for elevator and rudder setting. You can get a close setting with a pair of pliers and then adjust the electronic subtrim to get a good neutral for the elevator and the rudder. You cannot do this with the ailerons, because the ailerons go up and down in opposite directions at the ends of the servo arm.
The instructions are provided in a file so you can modify them to personalize and match your needs and construction sequencing.
The Polaris XL is moderately priced at $79.95 and full details can be found on Model Aero’s website. The airplane can be bought as a basic model by the pilot who already has many of the electronics, or with the recommended equipment needed to complete the model.
The review model came with an ESC, decals, the Spin Max 2810-9 (1400 Kv) motor, and APC 8 x 6 propeller, but no servos.
AT A GLANCE
SPECIFICATIONS
- Model type: Electric-powered amphibian
- Skill level: Intermediate builder; intermediate pilot
- Wingspan: 38.5 inches
- Wing area: 606 square inches
- Length: 53 inches
- Flying weight: 28 to 34 ounces
- Power system: 270- to 340-watt electric
- Battery: Three-cell 2200 mAh LiPo
- Radio required: Four-channel required
- Construction: 6mm Depron foam
- Price: $79.95; $94.95 with decal set
TEST-MODEL DETAILS
- Motor: Spin Max 2810-9
- ESC: Spin Max 40-amp ESC
- Battery: Nano-Tech 2200 mAh three-cell LiPo, 25C discharge rate
- Propeller: APC 8 x 6
- Radio system: Spektrum DX8 transmitter, Spektrum AR6115 receiver, four Hitec HS-55 servos
- Ready-to-fly weight: 26.5 ounces
- Flight duration: 8–10 minutes
PLUSES
- Lightweight construction
- Capable of impressive aerobatics
- Good water-handling characteristics
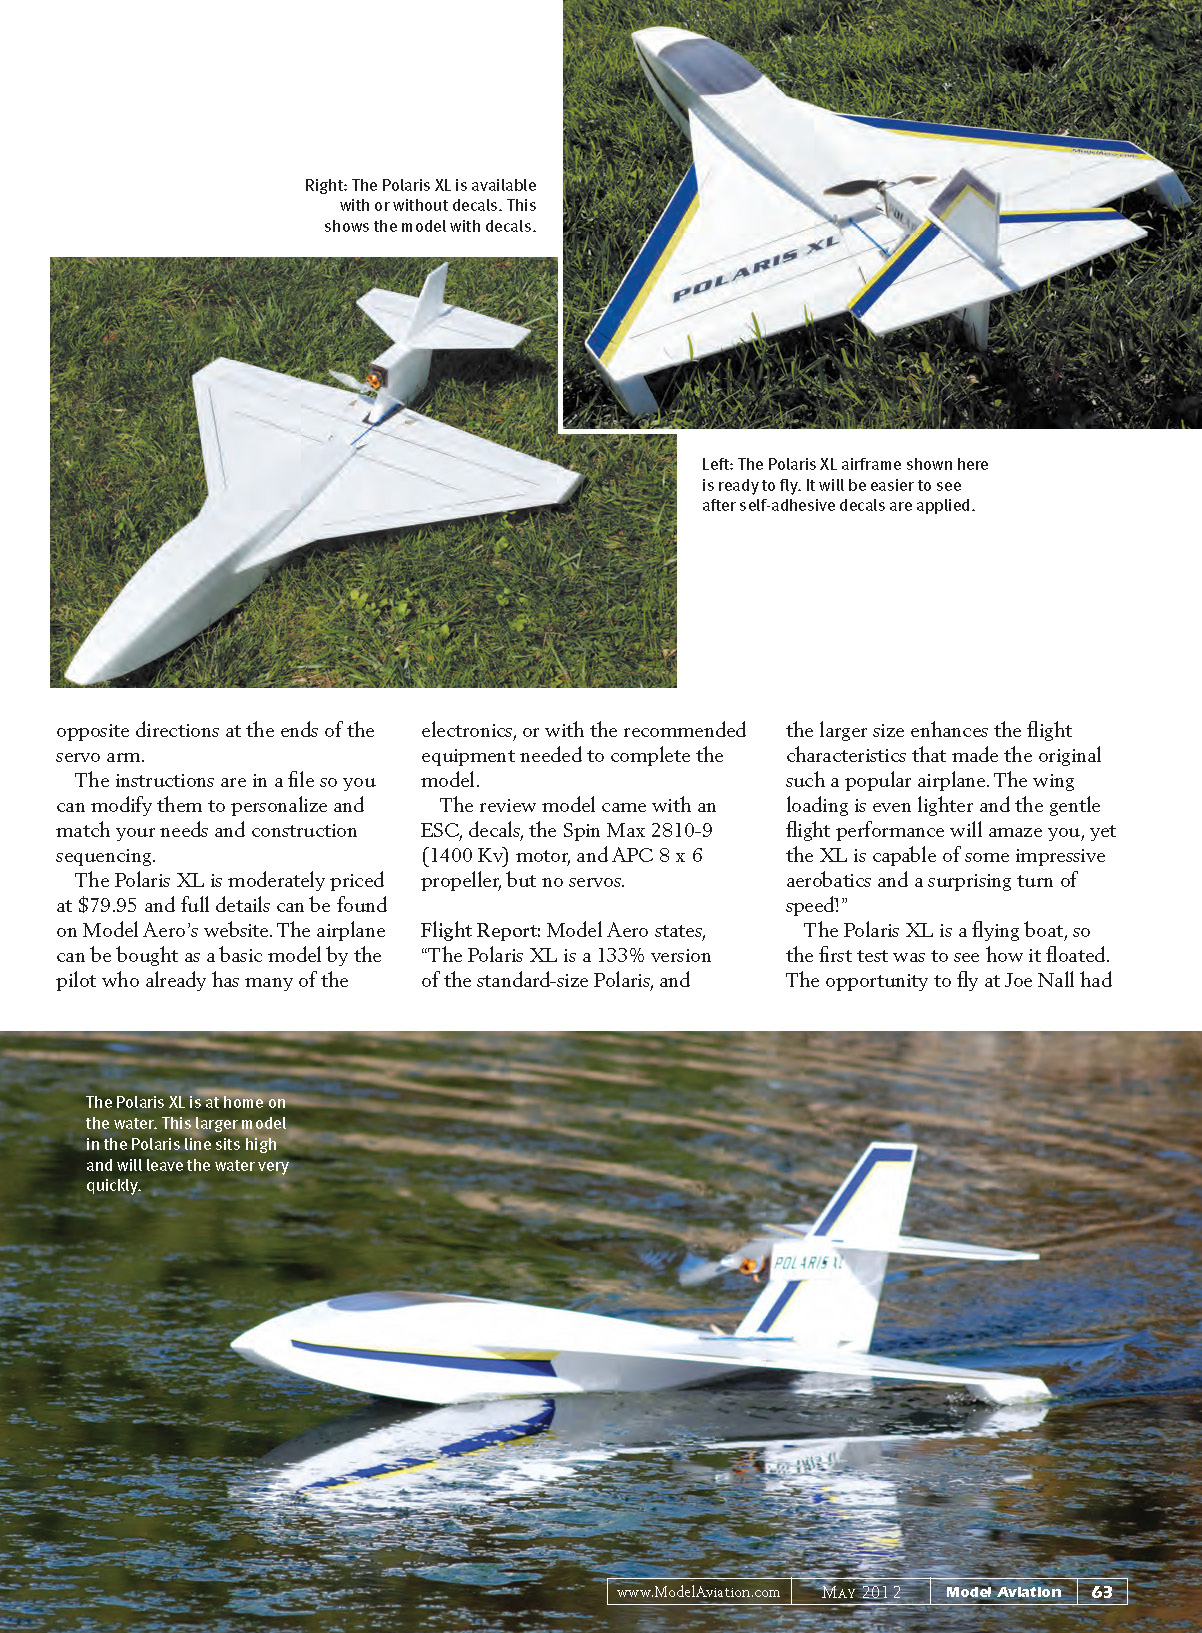
- Colorful decals that stay in place
- Pushrod exit design
- Options to purchase with recommended equipment
MINUSES
- A better breakdown of steps needed in the instructions
- Servos sealed in (stock configuration)
- Parts identification lacks clarity
- No hinging tape included
FLIGHT REPORT
Model Aero states, "The Polaris XL is a 133% version of the standard-size Polaris, and the larger size enhances the flight characteristics that made the original such a popular airplane. The wing loading is even lighter and the gentle flight performance will amaze you, yet the XL is capable of some impressive aerobatics and a surprising turn of speed!"
The Polaris XL is a flying boat, so the first test was to see how it floated. The opportunity to fly at Joe Nall had passed by, so I used a local RC boating pond.
The water handling was great. The airplane sets high in the water and responds well to the rudder at low speeds. At high speed, the hull comes up on the step and the rudder is less effective. This is not a problem, because by this time the boat is becoming an airplane.
I performed several taxi tests at different speeds and there was no sign of any tipping or porpoise action. The square hull created a wide wake and then the whole front lifted out of the water and only the rear section behind the step made contact. This was a boating-only pond, so I only tested a few hops, but it was clear that the airplane would leave the water in about 10 to 15 feet at full power.
After drying the hull on the outside and checking for any water inside (none was found), the local flying field was my next port of call. It was a lovely, sunny day and the grass was dry. I was not sure if it would be possible to take off without wheels and was ready to do some hand launching.
My fears were unfounded. The Polaris XL effortlessly slid forward on the grass and was airborne in less than 10 feet. A few beeps of down-trim were required and then it was basically hands-off. The first flight was for the camera. It was pleasing to feel how smooth and well the Polaris XL tracked near the ground. The overall look in the air is more that of a jet fighter than a flying boat.
A simple landing on the grass let me put in a fresh three-cell 2200 mAh LiPo and then it was time to wring it out!
Takeoff was predictable and I made a steep climb as soon as the grass was gone. Initial aerobatics were done at altitude. After roughly a minute, I found myself flying at 20 feet and doing slow rolls and loops from level flight.
Flying inverted was a pleasant surprise. The flat-section wing did not seem to care which way it flew. Only a slight amount of down-elevator was needed. An outside loop was as easy to do as an inside loop.
I performed the initial flights on low rates, then mid rates, and finally everything I had. As long as you use exponential (approximately +26% in JR terms), the Polaris XL is smooth around stick center.
A knife-edge attempt showed that rudder will also roll the airframe. Some counter aileron was mixed with the rudder, which allowed some flat turns. The Polaris XL's star feature is the delta-wing behavior. You can slow this airplane down to a crawl by feeding in the power at the same time as the elevator. The nose will stay pointed up at a steep angle, also known as a high-alpha angle of attack!
The wings will wobble a bit, as do all deltas at this angle of attack, but there is no real stall. The Polaris XL mushes and loses height slowly. This feature lets you do some amazing landing approaches. You can bring the airplane to a stop before it flops onto the ground.
I give this airplane two thumbs up in the flying department, and have every confidence that on land or water, it will be a blast to fly.
—Eric Henderson [email protected]
SOURCES
- Model Aero — (419) 966-2230 — www.modelaero.com
- Du-Bro — (800) 848-9411 — www.dubro.com
- RCGroups — www.rcgroups.com
Transcribed from original scans by AI. Minor OCR errors may remain.

