
MULTIPLEX FUNJET ULTRA
Tom Sullivan [email protected]
Satisfy your need for speed
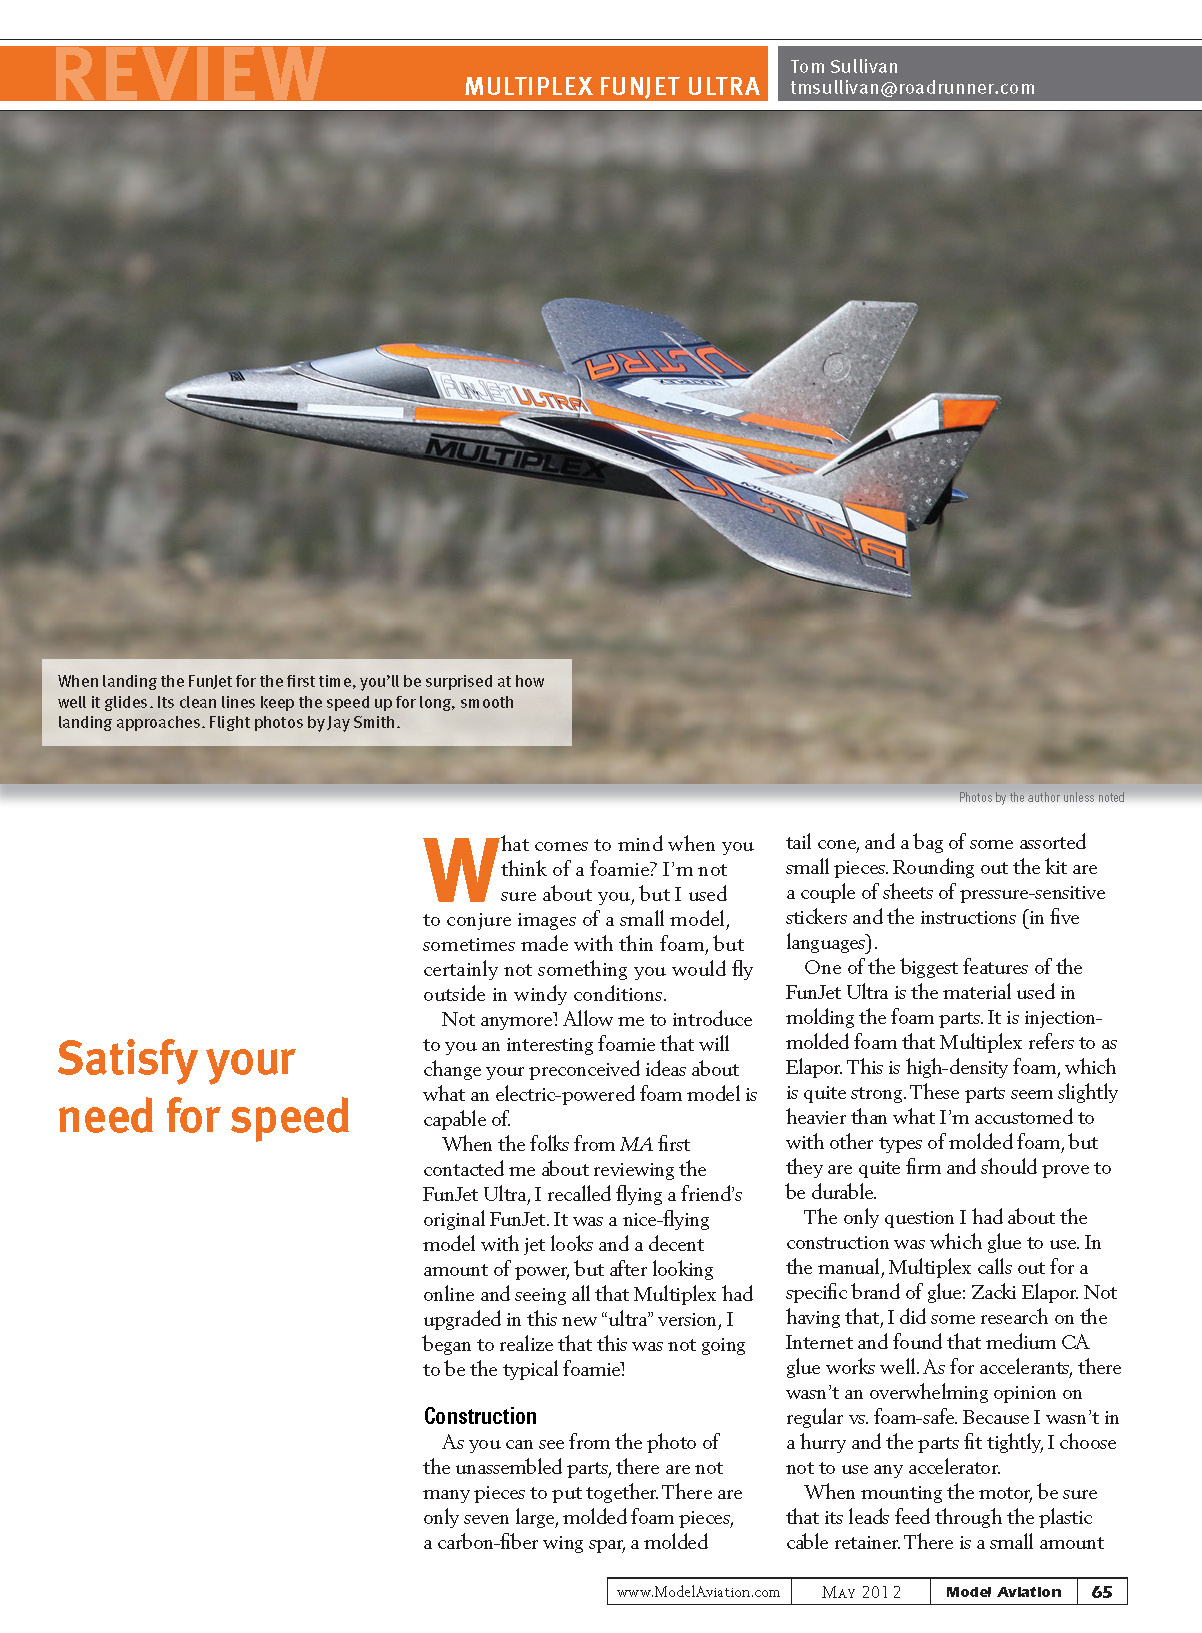
What comes to mind when you think of a foamie? I’m not sure about you, but I used to conjure images of a small model, sometimes made with thin foam, but certainly not something you would fly outside in windy conditions.
Not anymore! Allow me to introduce an interesting foamie that will change your preconceived ideas about what an electric-powered foam model is capable of.
When the folks from Multiplex first contacted me about reviewing the FunJet Ultra, I recalled flying a friend’s original FunJet. It was a nice-flying model with jet looks and a decent amount of power, but after looking online and seeing all that Multiplex had upgraded in this new “Ultra” version, I began to realize that this was not going to be the typical foamie!
Construction
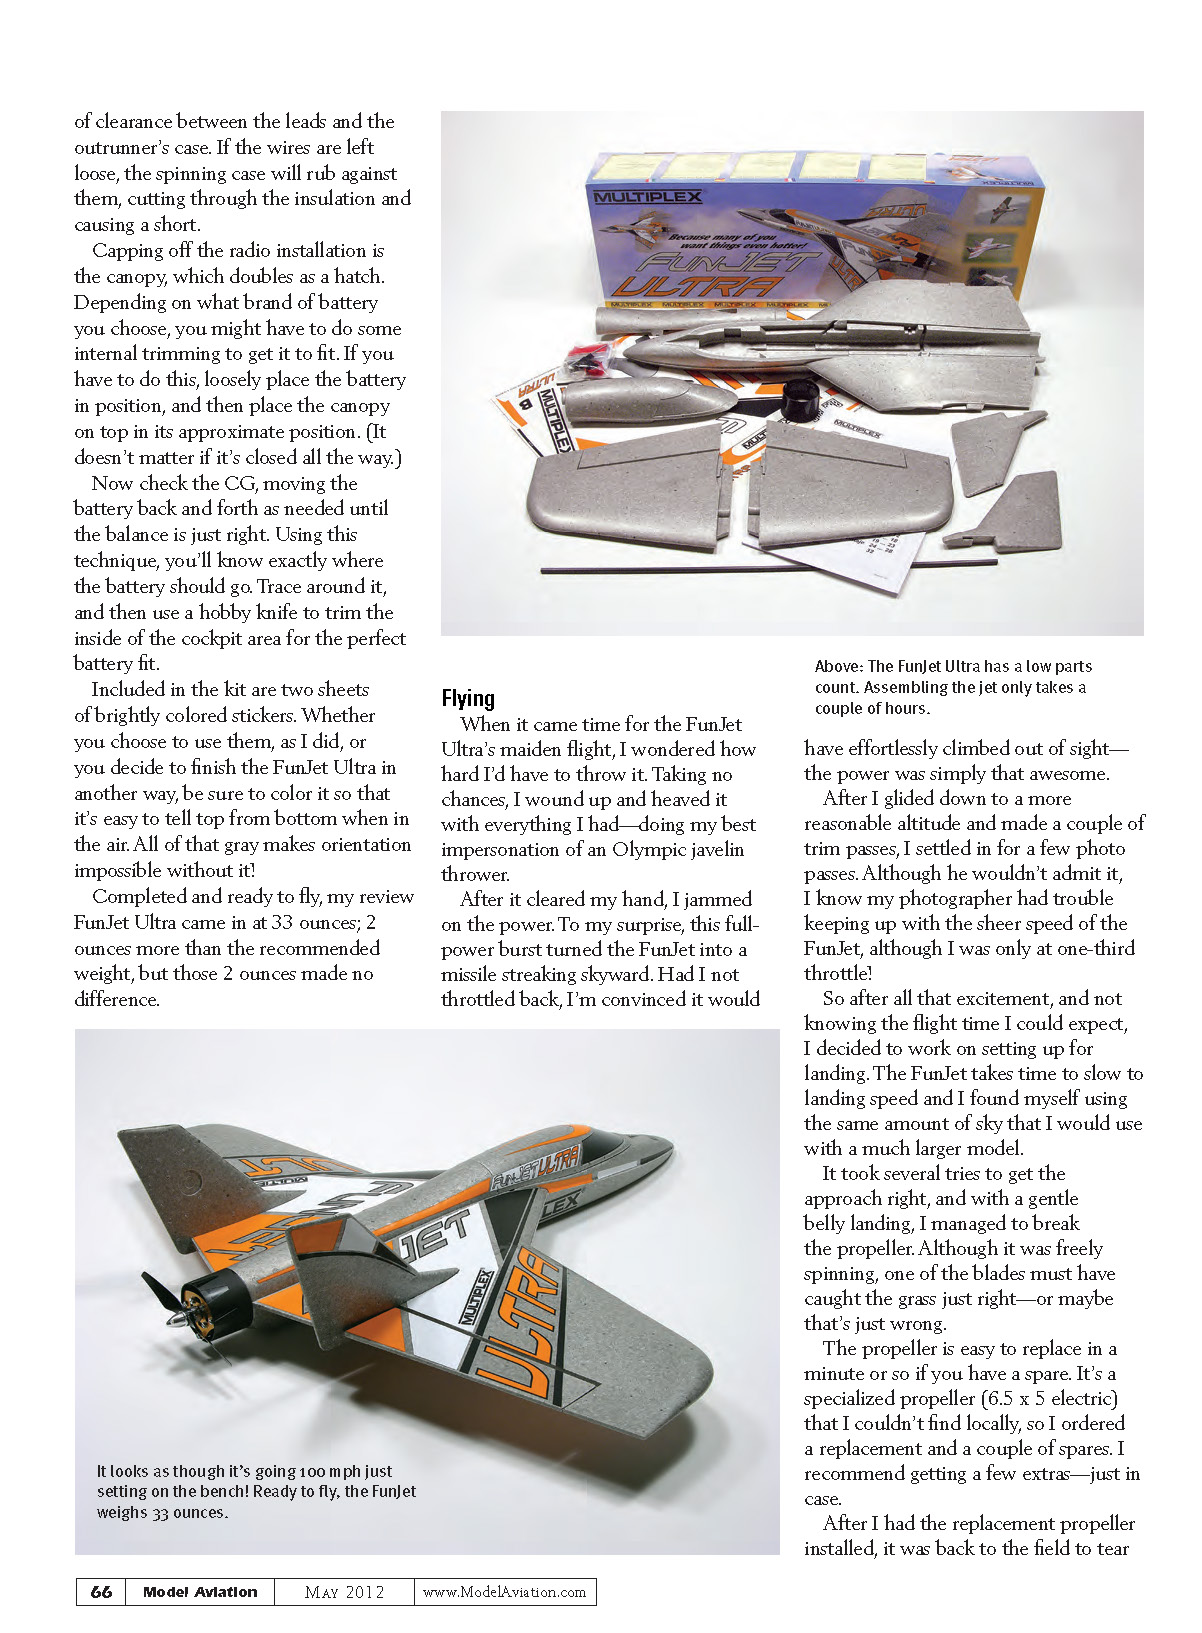
As you can see from the photo of the unassembled parts, there are not many pieces to put together. There are only seven large molded foam pieces, a carbon-fiber wing spar, a molded tail cone, and a bag of assorted small pieces. Rounding out the kit are a couple of sheets of pressure-sensitive stickers and the instructions (in five languages).
One of the biggest features of the FunJet Ultra is the material used in molding the foam parts. It is injection-molded foam that Multiplex refers to as Elapor. This is high-density foam, which is quite strong. These parts seem slightly heavier than what I’m accustomed to with other types of molded foam, but they are quite firm and should prove durable.
The only question I had about the construction was which glue to use. In the manual, Multiplex calls out a specific brand of glue: Zacki Elapor. Not having that, I did some research on the Internet and found that medium CA glue works well. As for accelerants, there wasn’t an overwhelming opinion on regular vs. foam-safe. Because I wasn’t in a hurry and the parts fit tightly, I chose not to use any accelerator.
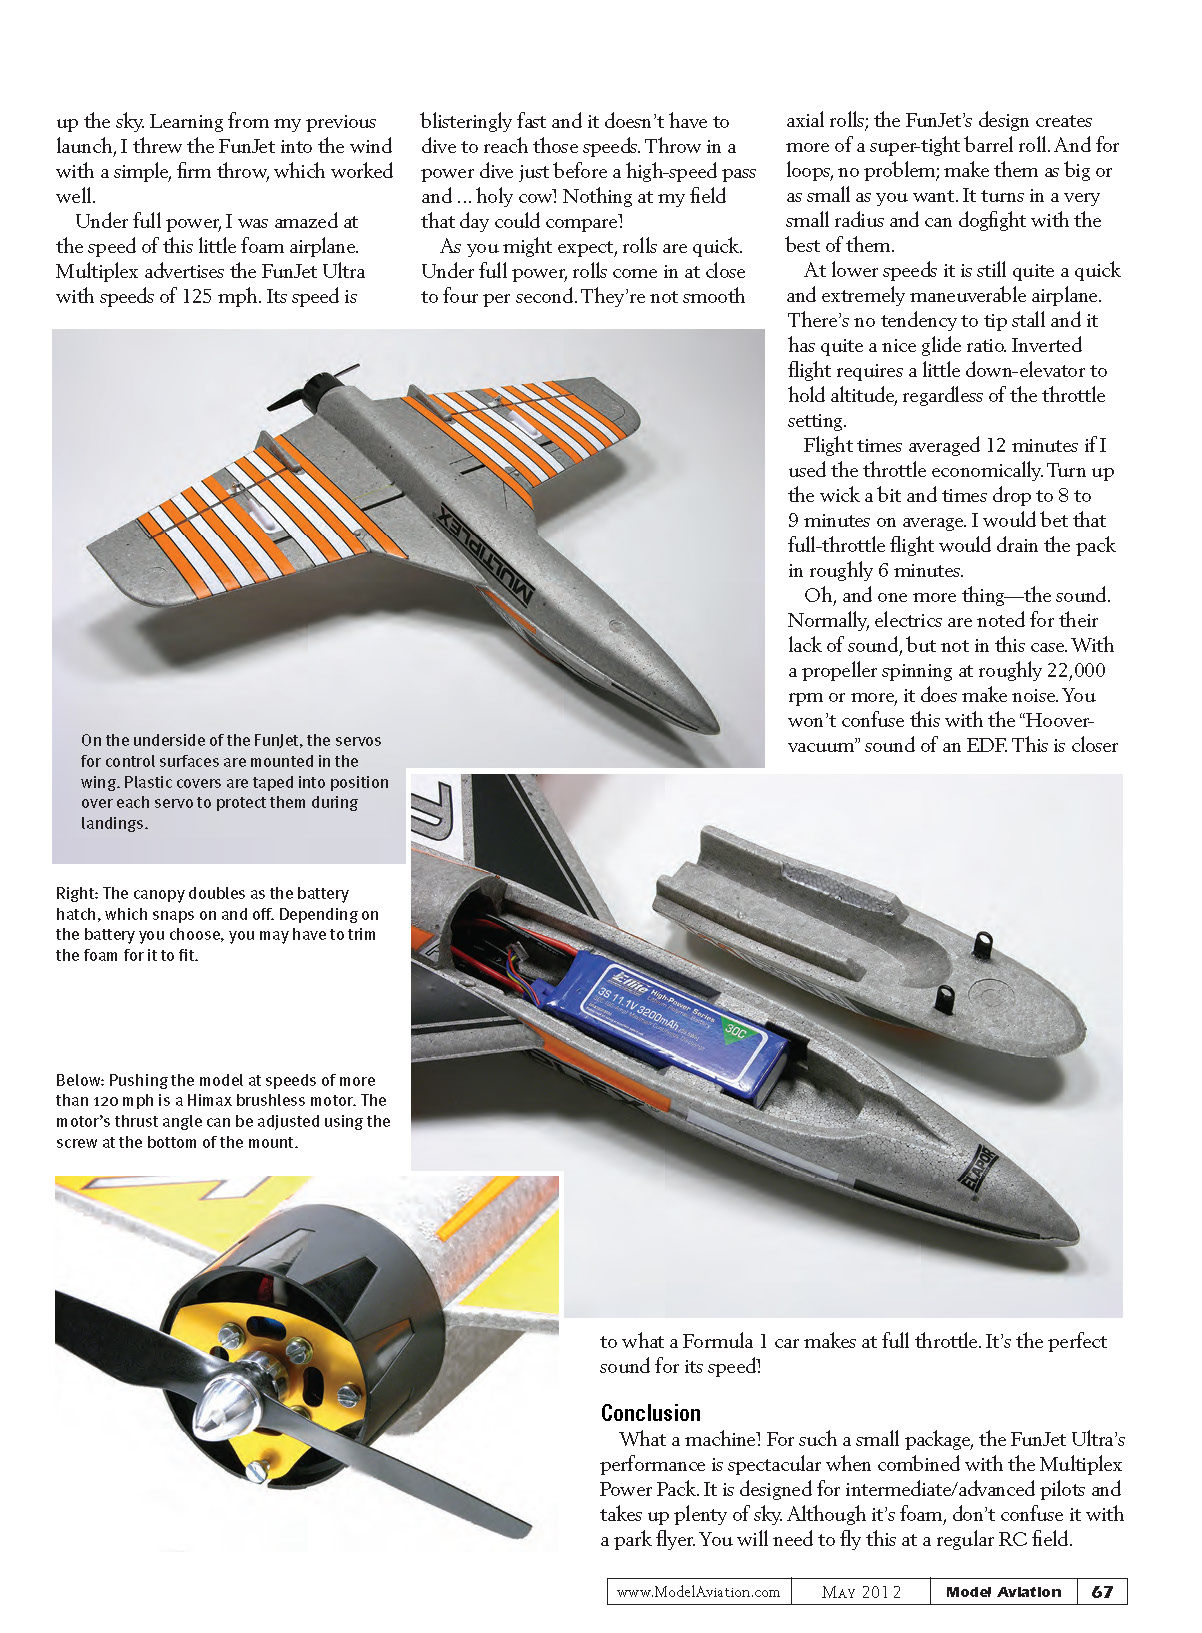
When mounting the motor, be sure that its leads feed through the plastic cable retainer. There is a small amount of clearance between the leads and the outrunner’s case. If the wires are left loose, the spinning case will rub against them, cutting through the insulation and causing a short.
Capping off the radio installation is the canopy, which doubles as a hatch. Depending on what brand of battery you choose, you might have to do some internal trimming to get it to fit. If you have to do this, loosely place the battery in position, and then place the canopy on top in its approximate position (it doesn’t matter if it’s closed all the way). Now check the CG, moving the battery back and forth as needed until the balance is just right. Using this technique, you’ll know exactly where the battery should go. Trace around it, and then use a hobby knife to trim the inside of the cockpit area for the perfect battery fit.
Included in the kit are two sheets of brightly colored stickers. Whether you choose to use them, as I did, or you decide to finish the FunJet Ultra in another way, be sure to color it so that it’s easy to tell top from bottom when in the air. All of that gray makes orientation impossible without it!
Completed and ready to fly, my review FunJet Ultra came in at 33 ounces — 2 ounces more than the recommended weight — but those 2 ounces made no difference.
Flying
When it came time for the FunJet Ultra’s maiden flight, I wondered how hard I’d have to throw it. Taking no chances, I wound up and heaved it with everything I had—doing my best impersonation of an Olympic javelin. After it cleared my hand, I jammed on the power. To my surprise, this full-power burst turned the FunJet into a missile streaking skyward. Had I not throttled back, I'm convinced it would have effortlessly climbed out of sight—the power was simply that awesome.
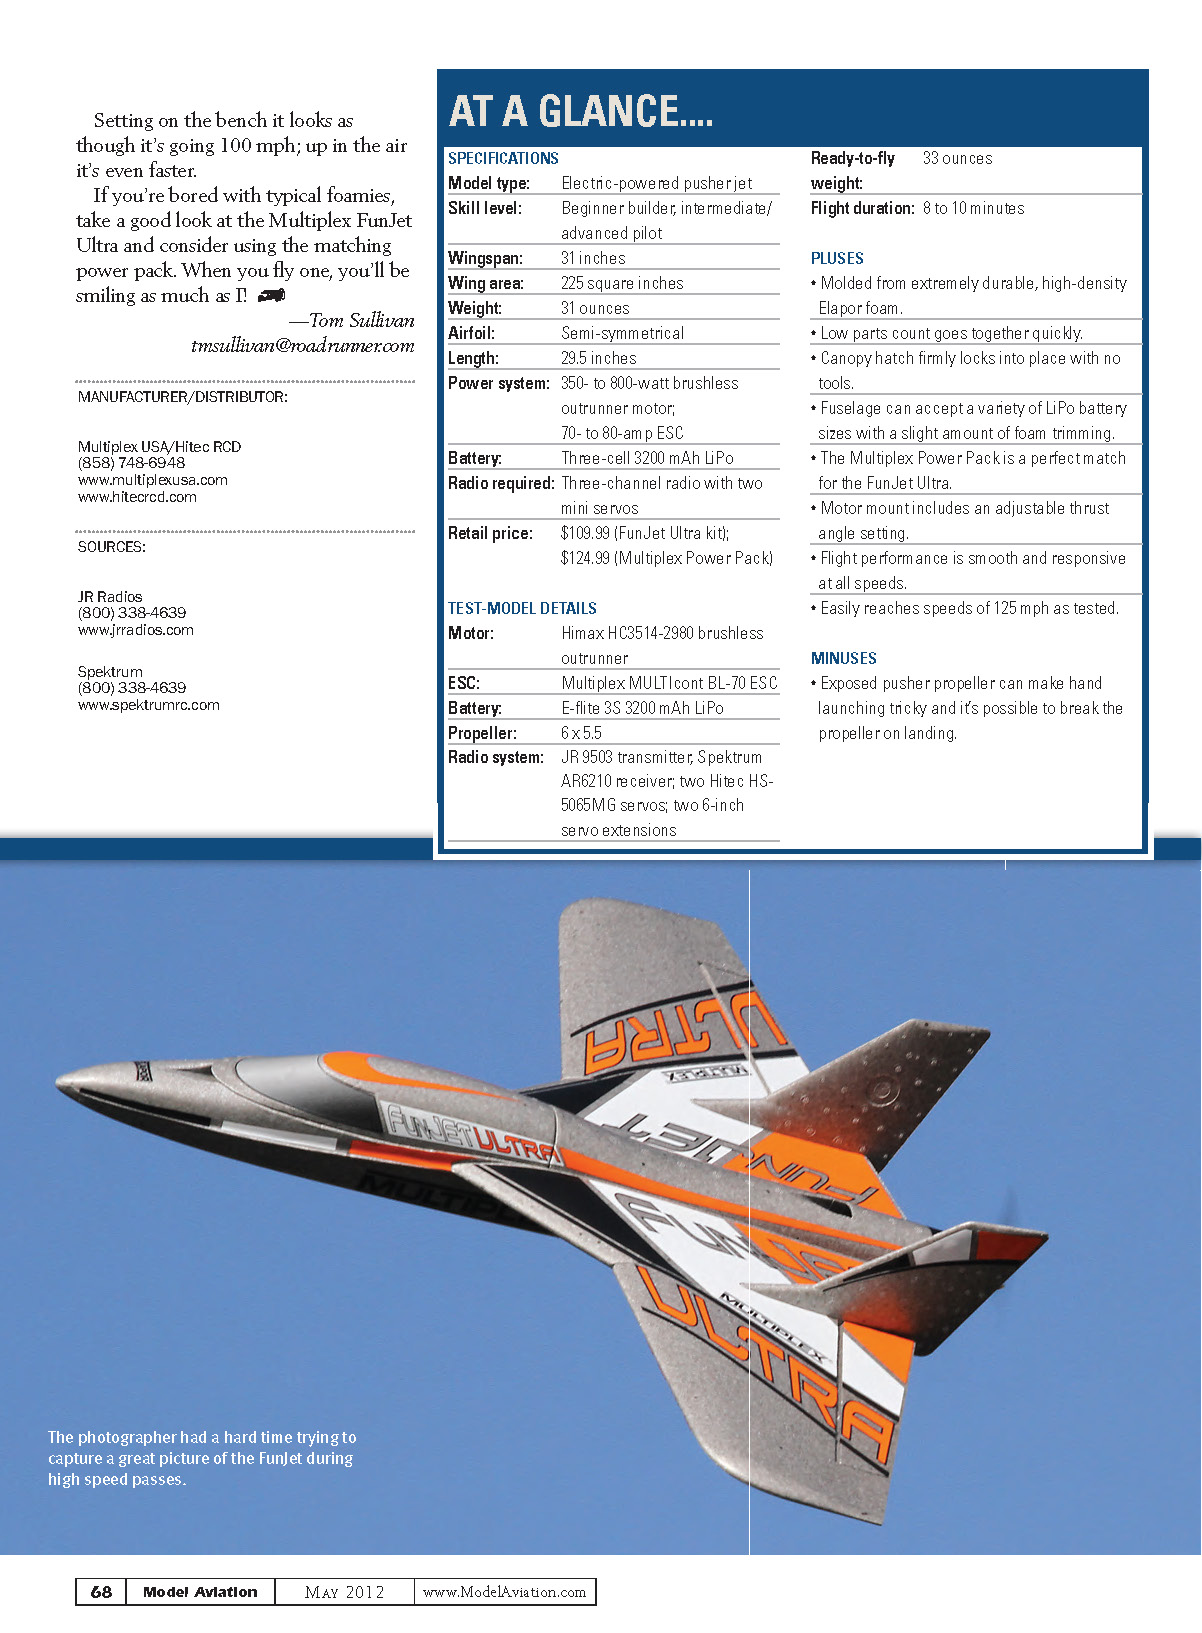
After I glided down to a more reasonable altitude and made a couple of trim passes, I settled in for a few photo passes. Although he wouldn't admit it, I know my photographer had trouble keeping up with the sheer speed of the FunJet, although I was only at one-third throttle!
So after all that excitement, and not knowing the flight time I could expect, I decided to work on setting up for landing. The FunJet takes time to slow to landing speed and I found myself using the same amount of sky that I would use with a much larger model.
It took several tries to get the approach right, and with a gentle belly landing, I managed to break the propeller. Although it was freely spinning, one of the blades must have caught the grass just right—or maybe that's just wrong.
The propeller is easy to replace in a minute or so if you have a spare. It's a specialized propeller (6.5 x 5 electric) that I couldn't find locally, so I ordered a replacement and a couple of spares. I recommend getting a few extras—just in case.
After I had the replacement propeller installed, it was back to the field to tear up the sky. Learning from my previous launch, I threw the FunJet into the wind with a simple, firm throw, which worked well.
Under full power, I was amazed at the speed of this little foam airplane. Multiplex advertises the FunJet Ultra with speeds of 125 mph. Its speed is blisteringly fast and it doesn't have to dive to reach those speeds. Throw in a power dive just before a high-speed pass and ... holy cow! Nothing at my field that day could compare!
As you might expect, rolls are quick. Under full power, rolls come in at close to four per second. They're not smooth axial rolls; the FunJet's design creates more of a super-tight barrel roll. And for loops, no problem; make them as big or as small as you want. It turns in a very small radius and can dogfight with the best of them.
At lower speeds it is still quite a quick and extremely maneuverable airplane. There's no tendency to tip stall and it has quite a nice glide ratio. Inverted flight requires a little down-elevator to hold altitude, regardless of the throttle setting.
Flight times averaged 12 minutes if I used the throttle economically. Turn up the wick a bit and times drop to 8 to 9 minutes on average. I would bet that full-throttle flight would drain the pack in roughly 6 minutes.
Oh, and one more thing—the sound. Normally, electrics are noted for their lack of sound, but not in this case. With a propeller spinning at roughly 22,000 rpm or more, it does make noise. You won't confuse this with the "Hoover vacuum" sound of an EDF. This is closer to what a Formula 1 car makes at full throttle. It's the perfect sound for its speed!
Conclusion
What a machine! For such a small package, the FunJet Ultra's performance is spectacular when combined with the Multiplex Power Pack. It is designed for intermediate/advanced pilots and takes up plenty of sky. Although it's foam, don't confuse it with a park flyer. You will need to fly this at a regular RC field.
Sitting on the bench it looks as though it's going 100 mph; up in the air it's even faster.
If you're bored with typical foamies, take a good look at the Multiplex FunJet Ultra and consider using the matching power pack. When you fly one, you'll be smiling as much as I!
—Tom Sullivan [email protected]
MANUFACTURER/DISTRIBUTOR:
- Multiplex USA / Hitec RCD
- (858) 748-6948
- www.multiplexusa.com
- www.hitecrcd.com
SOURCES:
- JR Radios
- (800) 338-4639
- www.jrradios.com
- Spektrum
- (800) 338-4639
- www.spektrumrc.com
AT A GLANCE
SPECIFICATIONS
- Model type: Electric-powered pusher jet
- Skill level: Beginner builder, intermediate/advanced pilot
- Wingspan: 31 inches
- Wing area: 225 square inches
- Weight: 31 ounces
- Airfoil: Semi-symmetrical
- Length: 29.5 inches
- Power system: 350- to 800-watt brushless outrunner motor; 70- to 80-amp ESC
- Battery: Three-cell 3200 mAh LiPo
- Radio required: Three-channel radio with two mini servos
- Retail price: $109.99 (FunJet Ultra kit); $124.99 (Multiplex Power Pack)
- Ready-to-fly weight: 33 ounces
- Flight duration: 8 to 10 minutes
TEST-MODEL DETAILS
- Motor: Himax HC3514-2980 brushless outrunner
- ESC: Multiplex MULTIcont BL-70 ESC
- Battery: E-flite 3S 3200 mAh LiPo
- Propeller: 6 x 5.5
- Radio system: JR 9503 transmitter, Spektrum AR6210 receiver; two Hitec HS-5065MG servos; two 6-inch servo extensions
PLUSES
- Molded from extremely durable, high-density Elapor foam.
- Low parts count goes together quickly.
- Canopy hatch firmly locks into place with no tools.
- Fuselage can accept a variety of LiPo battery sizes with a slight amount of foam trimming.
- The Multiplex Power Pack is a perfect match for the FunJet Ultra.
- Motor mounting includes an adjustable thrust angle setting.
- Flight performance is smooth and responsive at all speeds.
- Easily reaches speeds of 125 mph as tested.
MINUSES
- Exposed pusher propeller can make hand launching tricky and it's possible to break the propeller on landing.
Transcribed from original scans by AI. Minor OCR errors may remain.

