
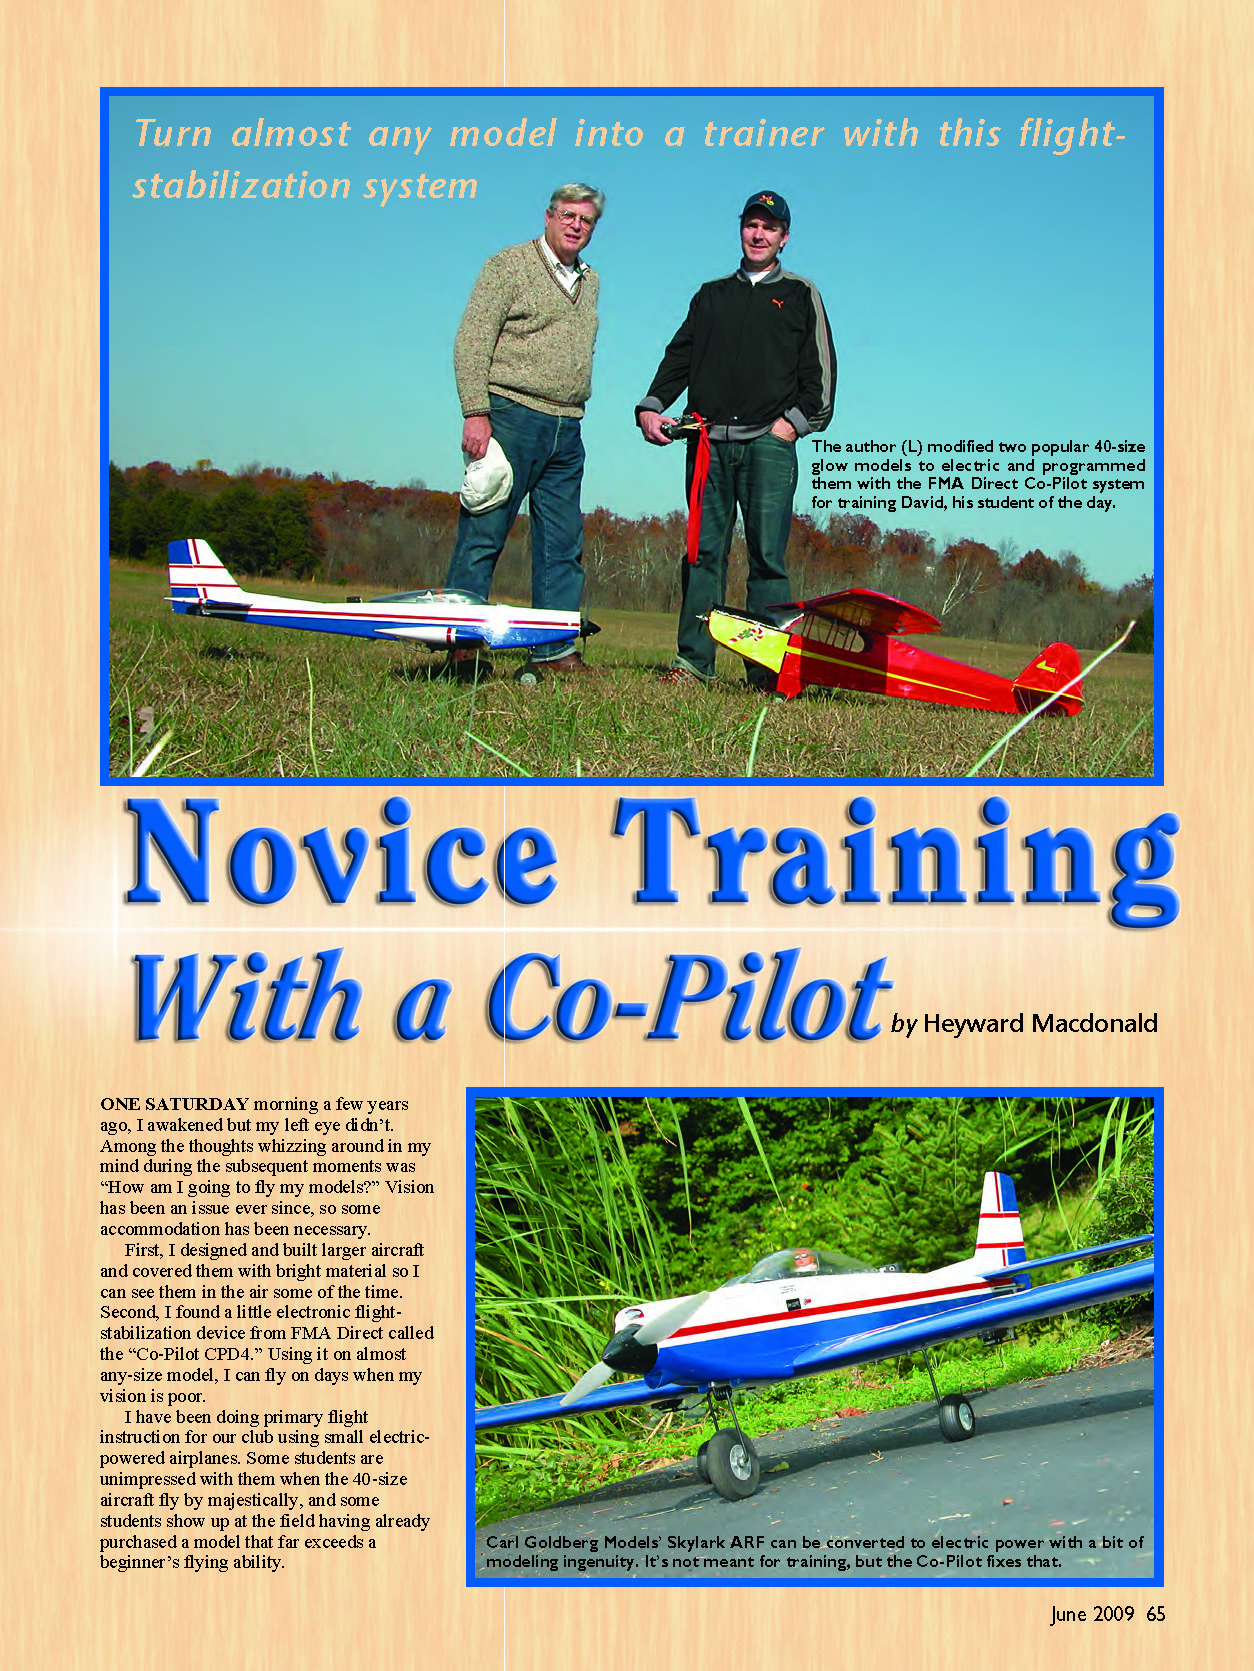
Turn almost any model into a trainer with this flight-stabilization system
Novice Training With a Co-Pilot
by Heyward Macdonald
One Saturday morning a few years ago, I awakened but my left eye didn't. Among the thoughts whizzing around in my mind during the subsequent moments was, "How am I going to fly my models?" Vision has been an issue ever since, so some accommodation has been necessary.
First, I designed and built larger aircraft and covered them with bright material so I can see them in the air some of the time. Second, I found a little electronic flight-stabilization device from FMA Direct called the Co-Pilot CPD4. Using it on almost any-size model, I can fly on days when my vision is poor.
I have been doing primary flight instruction for our club using small electric-powered airplanes. Some students are unimpressed with them when the 40-size aircraft fly by majestically, and some students show up at the field having already purchased a model that far exceeds a beginner's flying ability. I thought about trying to train new pilots with a more aggressive airplane, using the Co-Pilot to do for the student what it does for me with my diminished eyesight: tame the more powerful model and keep the student (and instructor) relatively calm.
I have experimented with this device and own two of them in the hopes of extending my flying days to age 103 or so. It works for me.
In certain light conditions, large sections of the sky disappear—airplane and all. With the Co-Pilot, I relax and let the sensors level the aircraft and fly it through the empty space in the sky. My eye picks up the model in a couple of seconds, but unfortunate things can happen in that length of time.
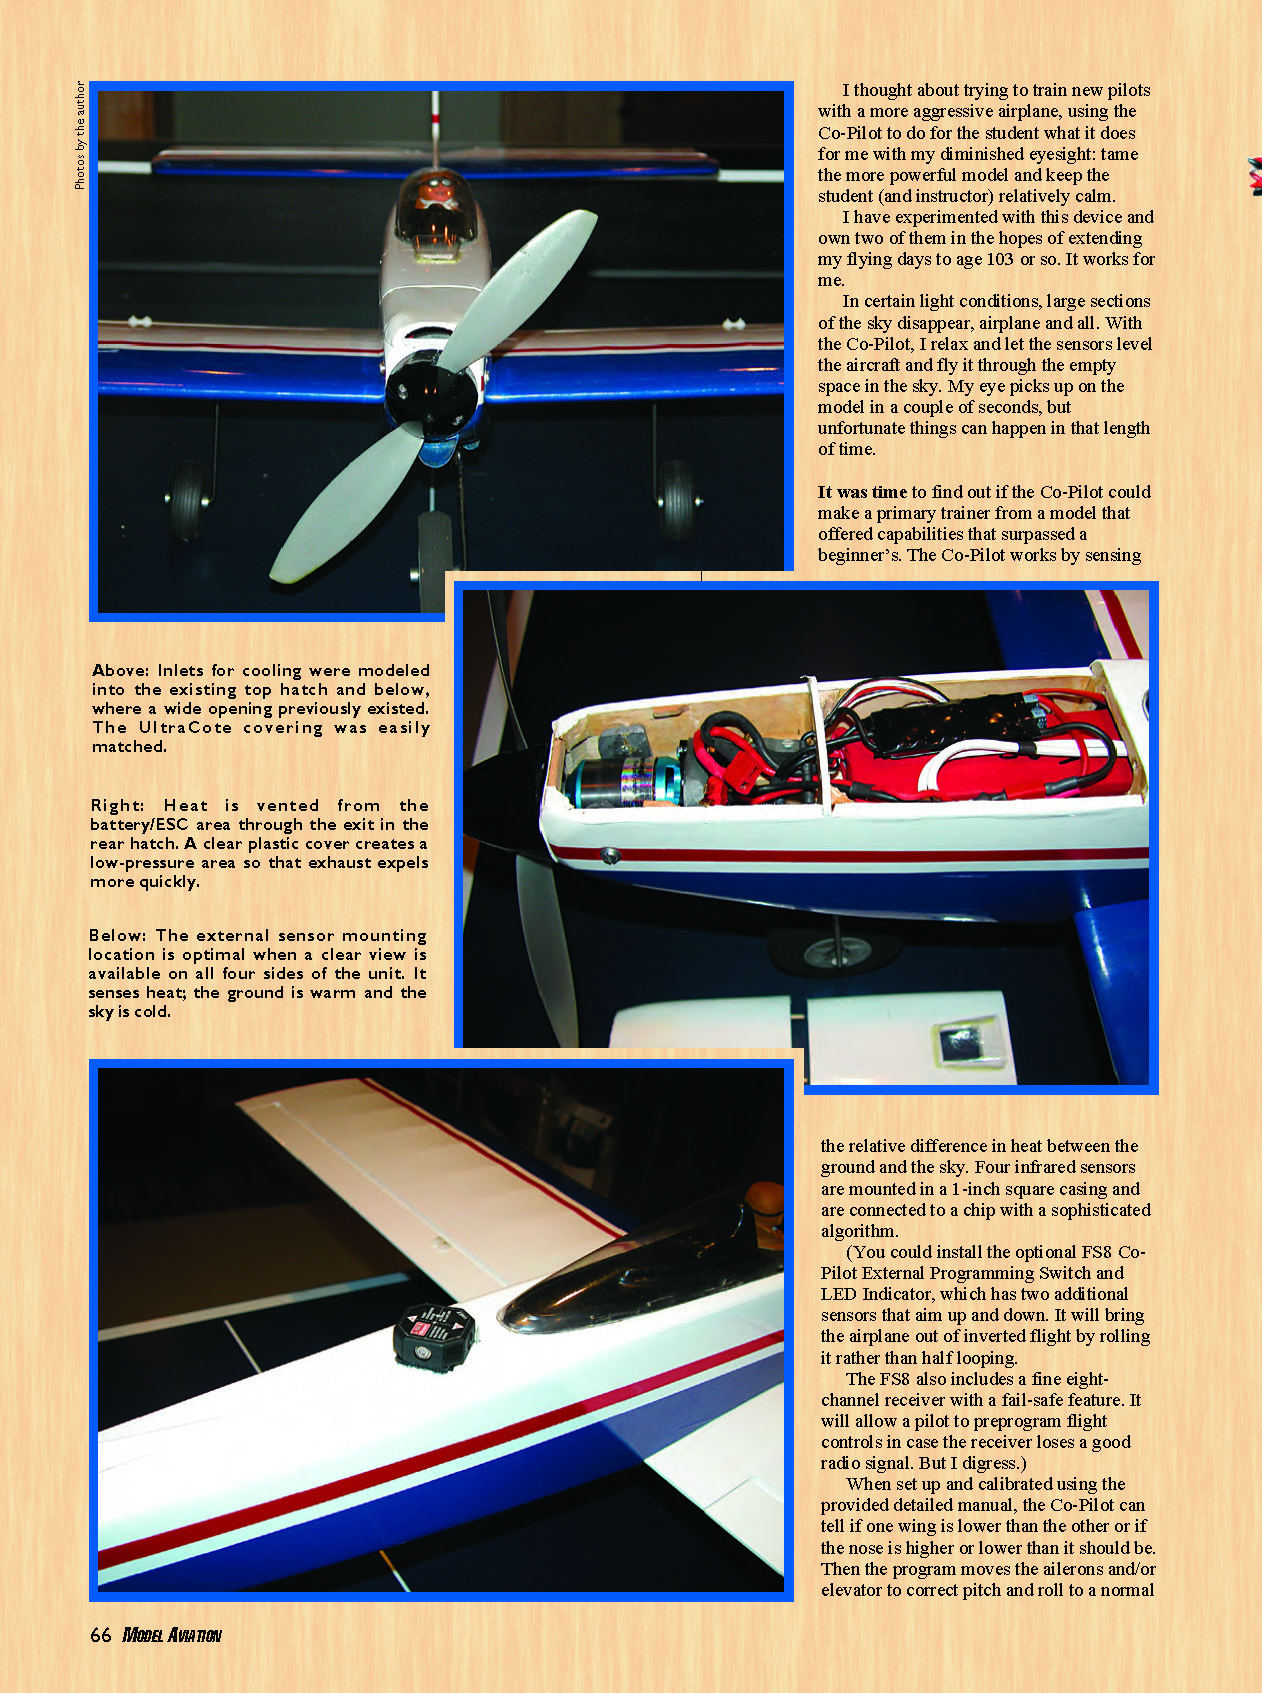
It was time to find out if the Co-Pilot could make a primary trainer from a model that offered capabilities that surpassed a beginner's. The Co-Pilot works by sensing the relative difference in heat between the ground and the sky. Four infrared sensors are mounted in a 1-inch square casing and are connected to a chip with a sophisticated algorithm.
You can install the optional FS8 Co-Pilot External Programming Switch and LED Indicator, which has two additional sensors that aim up and down. It will bring the airplane out of inverted flight by rolling it rather than by a half loop. The FS8 also includes a fine eight-channel receiver with a fail-safe feature. It will allow a pilot to preprogram flight controls in case the receiver loses a good radio signal.
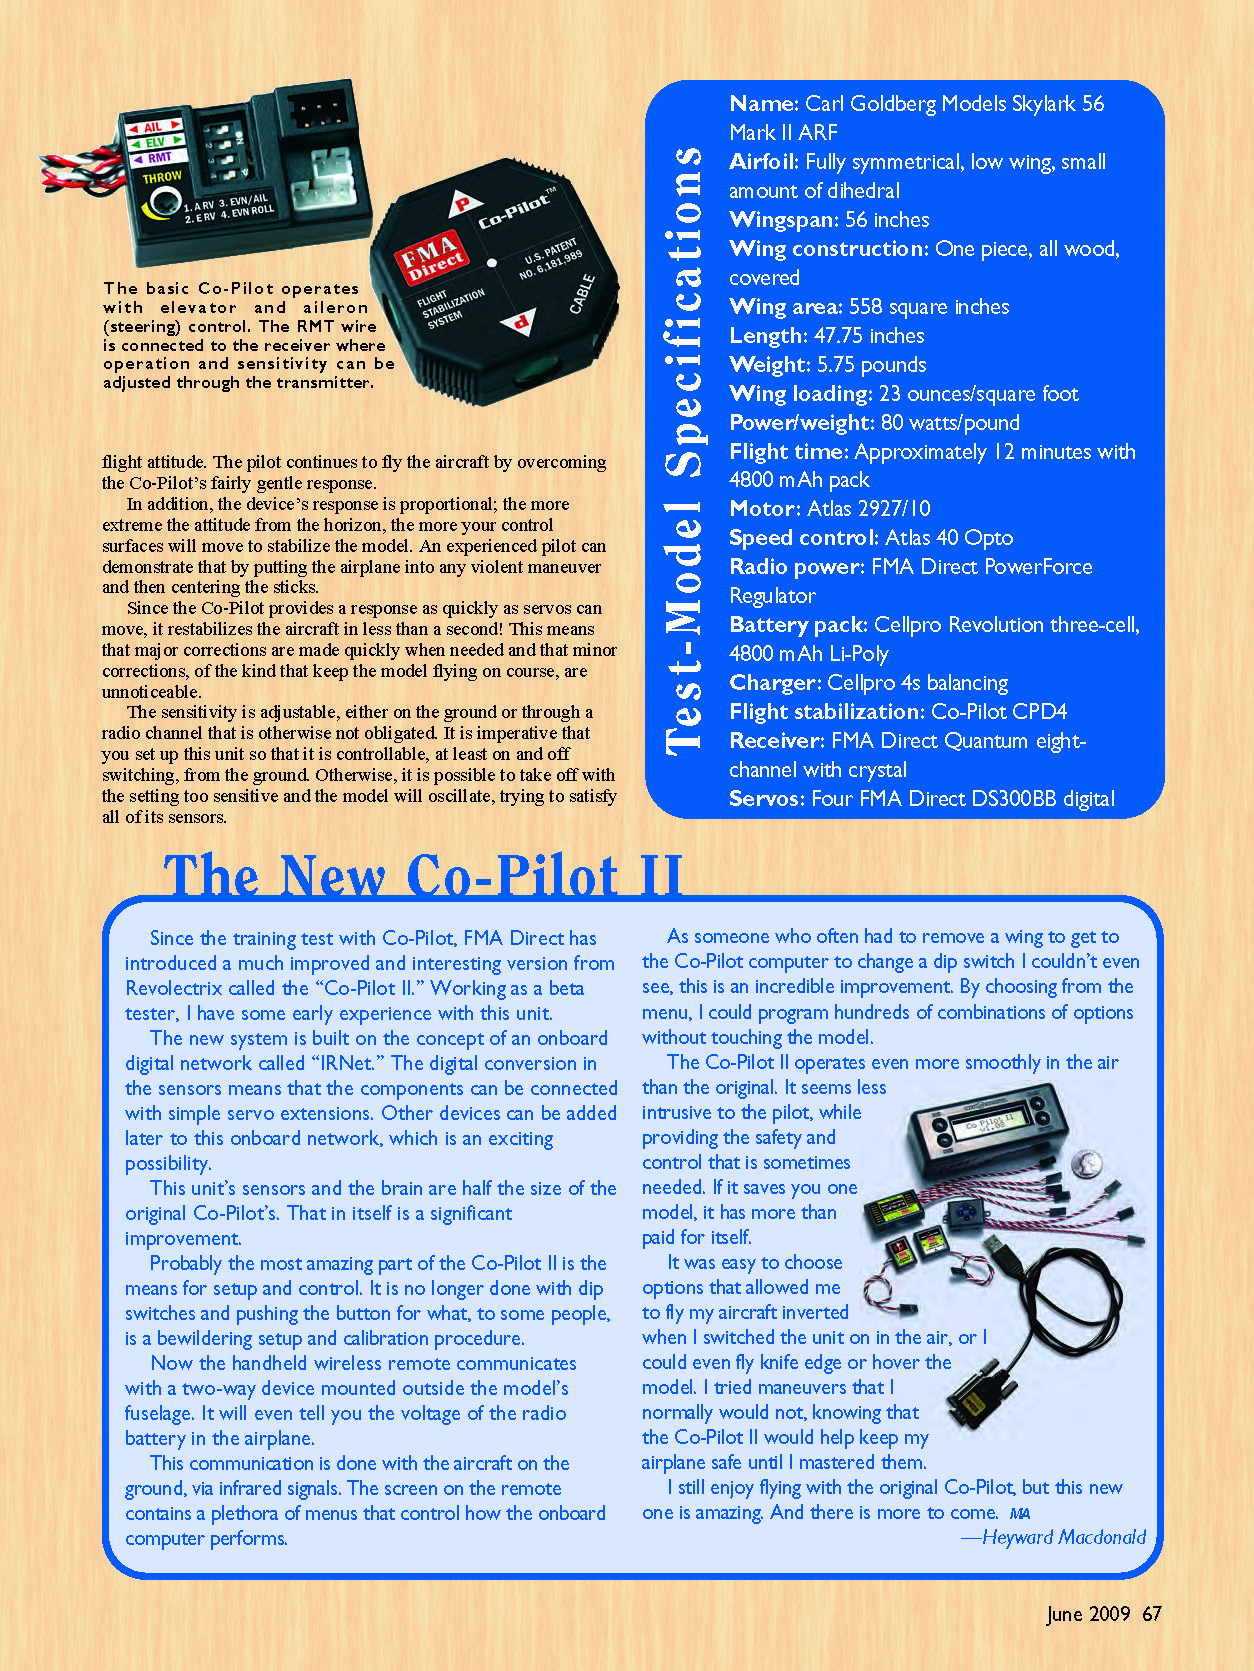
When set up and calibrated using the provided detailed manual, the Co-Pilot can tell if one wing is lower than the other or if the nose is higher or lower than it should be. The program moves the ailerons and/or elevator to correct pitch and roll to a normal flight attitude. The pilot continues to fly the aircraft by overcoming the Co-Pilot’s fairly gentle response.
In addition, the device’s response is proportional; the more extreme the attitude from the horizon, the more your control surfaces will move to stabilize the model. An experienced pilot can demonstrate that by putting the airplane into any violent maneuver and then centering the sticks.
Since the Co-Pilot provides a response as quickly as servos can move, it restabilizes the aircraft in less than a second. This means that major corrections are made quickly when needed and that minor corrections, of the kind that keep the model flying on course, are unnoticeable.
The sensitivity is adjustable, either on the ground or through a radio channel that is otherwise not obligated. It is imperative that you set up this unit so that it is controllable, at least on/off switching, from the ground. Otherwise, it is possible to take off with the setting too sensitive and the model will oscillate, trying to satisfy all of its sensors.
The New Co-Pilot II
Since the training test with the original Co-Pilot, FMA Direct has introduced a much improved version from Revelectrix called the Co-Pilot II. Working as a beta tester, I have some early experience with this unit.
The new system is built on the concept of an onboard digital network called IRNet. The digital conversion in the sensors means that the components can be connected with simple servo extensions. Other devices can be added later to this onboard network, which is an exciting possibility.
This unit’s sensors and the brain are half the size of the original Co-Pilot’s. That in itself is a significant improvement.
Probably the most amazing part of the Co-Pilot II is the means for setup and control. It is no longer done with DIP switches and pushing a button for what, to some people, is a bewildering setup and calibration procedure. Now the handheld wireless remote communicates with a two-way device mounted outside the model’s fuselage. It will even tell you the voltage of the radio battery in the airplane.
This communication is done with the aircraft on the ground via infrared signals. The screen on the remote contains a plethora of menus that control how the onboard computer performs.
As someone who often had to remove a wing to get to the Co-Pilot computer to change a DIP switch I couldn’t even see, this is an incredible improvement. By choosing from the menu, I could program hundreds of combinations of options without touching the model.
The Co-Pilot II operates even more smoothly in the air than the original. It seems less intrusive to the pilot while providing the safety and control that is sometimes needed. If it saves you one model, it has more than paid for itself.
It was easy to choose options that allowed me to fly my aircraft inverted while I switched the unit on in the air, or even to fly knife edge or hover the model. I tried maneuvers that I normally would not, knowing that the Co-Pilot II would help keep my airplane safe until I mastered them.
I still enjoy flying with the original Co-Pilot, but this new one is amazing. And there is more to come.
Installation and Setup
I installed the 1-inch-square sensor array on a Skylark’s turtledeck. You can mount it underneath, but I like to get it out of the way of debris such as flying sticks and wet grass that is freshly cut by the propeller on takeoff.
Obscuring one of these sensors is not a good idea. Since the canopy eclipses the view forward, the unit must be mounted at about a 45° angle. Consulting the manual and trial and error are necessary to get the four DIP switches set correctly, but once set for a model, it is done.
The test airplane has a wing loading of almost 23 ounces per square foot. It is not a primary trainer without the addition of the Co-Pilot. But that was the objective: to make it behave like a primary trainer by using the system.
I brought the Skylark in over the runway at approximately 100 feet of altitude and turned on the stabilization system. Nothing happened, which is good—nothing happened because I was flying straight and level.
I stood the model on its wing and lifted its nose. Centering the sticks, the Co-Pilot gently took it back to level flight and off it flew, straight and true. The guys at the field watching loved it, and so did I.
A subtle advantage for a beginner who uses the Co-Pilot is that it automatically keeps the airplane trimmed for level flight, even with power changes. Without the system, trim usually needs to be adjusted with each power change; that is difficult for the novice. Once he or she gains competence and confidence, the beginner can learn to trim by turning the Co-Pilot to low gain or off in flight to see what happens and take action to trim.
Does It Work?
My friend Fred was a navigator on a Navy P-3 Orion during the Vietnam War. He flew along that country’s coast at altitude and felt sorry for the likes of me, who was on the ground at a firebase at the same time.
Fred had never touched the stick of an RC model. However, being a brave sort, he agreed to try to fly the Skylark with the Co-Pilot installed.
Fred and I met one morning for an hour of ground school. We covered safety; AMA and club rules; axes of roll, pitch, and yaw; and how the control surfaces work.
Then we discussed altitude gain and loss and sensitivity of controls; most beginners seriously overcontrol their models. The next topic was maneuvering, including taxiing, climb and descent, turns, takeoff and landing, and how the sticks work to do it all.
At that point I introduced Fred to the concept and operation of the Co-Pilot. I explained how it works, what it does, and how to fly with it. It is important that the student has some trust in the device so that he or she will release the sticks and allow it to correct the airplane’s attitude when necessary.
The instructor’s primary job is to remind the trainee to gently center the sticks if he or she is getting into trouble. The Co-Pilot will fly the aircraft straight and level, using minimal control-surface movement to keep it that way. The pilot overpowers the flight-stabilization system to make maneuvers.
At those times of insecurity we fliers feel, especially as learners, one centers the sticks and the system brings the model back to level flight. The unit is proportional: the more the deviation from level flight, the more control-surface movement the Co-Pilot uses to correct the airplane’s attitude.
That education session was followed by a practicum on the ground. Fred sat in a chair behind the Skylark in my driveway and imagined turns, climb, and descent, using the sticks to deflect the control surfaces. He also practiced taxiing the aircraft.
This exercise overcomes a key difficulty for the beginner. When the model is coming toward the pilot, whether in the air or taxiing, ailerons and rudder produce the opposite reaction from what intuition tells him or her. Fifteen minutes of practice taxiing corrects that problem.
Flying
The next day, when both Fred and I were available and the weather cooperated, we met at the airfield to try Co-Pilot Assisted Training (COPAT). Wind was negligible, and the sky was a beautiful blue with lovely cumulus.
I had Fred stand behind the Skylark and use the transmitter to talk himself through takeoff, climb, coordinated turns, descent, landing approach, and landing. We powered up the aircraft. Fred taxied it around a bit and tried a few runs at close to half power to learn how to hold a straight line on takeoff.
I handled the airplane on the first takeoff and got it properly trimmed after a couple of altitude corrections. Then I demonstrated how the Co-Pilot works to recover from any attitude other than a low-altitude stall. It is important for the student to trust the instrument and not freeze on the sticks. I showed Fred a few coordinated turns in the air and he took over.
At first he made the novice’s mistake of diving the model in a turn. I immediately reminded him to center the sticks, and the Co-Pilot effected a recovery. After a couple minutes, Fred had the Skylark flying figure eights.
We started to line up the Skylark on the runway. On the second try it looked so good that I told him to cut the throttle a bit. The airplane started settling in on final, and I decided to let Fred land it.
Just before touchdown I had Fred pull the throttle to zero and then flare slightly. The model touched down on its main gear and rotated forward on its nose wheel without a bounce.
Reflecting on this landing, the Skylark actually hit the center of a big "X" painted in the middle of this old World War II training runway. This thing really works! Fred exclaimed as he looked at me in wonderment.
The model was sitting in the middle of the strip, so I instructed Fred to smoothly add power and keep it straight. He did so, and the airplane lifted off the runway and climbed almost as nicely as I could make it.
Fred made a left turn that could have used a bit of rudder, but it wasn’t bad. Then he began to make coordinated turns, which were fine. But I had forgotten to start the timer and the power failed at roughly that time. I took over and did a fairly nice dead-stick landing, if I do say so myself.
On a second flight, Fred flew without the flight-stabilization system; the result was as expected. He knew a lot about how to do it but had little experience in doing it. His turns ended in dives from which he could not recover alone. He lost his confidence, because he didn't have anything in which to have confidence. The Co-Pilot allowed Fred to have a fine first flight, but he was still a beginner.
This system can provide a student with the chance to learn quickly, but it can give that person the confidence to try maneuvers sooner than he or she would otherwise. I have tried the same flight with another beginner, with much the same results, including my forgetting to turn on the timer.
David had just finished his graduate degree nearby. His thoughtful wife asked him what he had always wanted but had deemed unreasonable to purchase. He answered, "A radio-controlled model airplane."
Where they went astray was in not contacting the local RC club. Instead they relied on the advice of someone who had a model with an especially good markup. David came to our October fly-in with his fantastic 40-size Mustang and asked if he could fly it at our field. I was dumbfounded; I wasn't sure that I wanted him to fly that airplane!
I asked him to put his P-51 away for a time and fly with me using a similar-size model equipped with an FMA Direct Co-Pilot. With that little piece of electronics, he was performing coordinated turns and figure eights with the Skylark on the first flight.
David recently achieved his second flight, complete with unassisted takeoffs and landings. A seasoned pilot who was watching was stunned not only when I let David land my Skylark on his own on the second flight, but also when I walked away from David while he was doing it!
I suggested to David that he get a Co-Pilot for his Mustang.
"You betcha!" he said.
I think he will soon be able to fly his P-51. Furthermore, the model will probably be okay and David will have had a positive first experience in the hobby.
So it worked with a novice! Fred is thrilled, the club might have a new member, and the Skylark sustained no damage.
I love flying this model. It is a step up for me but is probably too aggressive for novice training, even with the Co-Pilot. Although it worked fine, there would be more time to react with a lighter aircraft, and it could be kept closer to the flightline.
The airplane doesn't have to be a trainer—just not quite such a rocket. Something weighing approximately 4.25 pounds with a wing loading of roughly 15 ounces per square foot would probably work.
The important thing to remember is that, with an instructor who knows when and what to tell a student to do, the Co-Pilot allows a beginner to fly even this intermediate/advanced-class model. With the device, a student knows that he or she is flying the airplane and is not guessing whether or not the instructor has taken control, as happens with a buddy box.
I have heard that using flight stabilization will keep a new pilot from truly learning to fly. If a novice wants to learn, he or she will use the Co-Pilot to allow him or her to take more risks sooner, knowing that it will save the airplane. The student can turn off the system from the transmitter to fly the model unassisted and turn it back on if needed.
If the transmitter has a free channel with a slide or knob control, the Co-Pilot's sensitivity can be decreased in the air for progressively less correction. If there is a free channel but only a switch controlling it, computer radios allow deflection limits to be set from the screen. That means the pilot can land the aircraft, quickly adjust the system's sensitivity, and be off again in a few seconds without touching the model.
I have learned that this system will keep an airplane flying straight and level in gusty conditions. It makes its corrections much faster than the pilot can apply them from the ground and flies the model through the turbulence. Again, the sensitivity can be adjusted from the transmitter.
For those pilots who can handle a 150-watt park flyer but want to move up to a more exciting, challenging setup, get a Co-Pilot. It can give you substantial confidence as you transition to these bigger airplanes. It worked for me.
If you are a beginner, don't buy an aggressive aircraft, add a Co-Pilot, and take off at your local baseball diamond. Unless your model is a light trainer, find someone who is qualified to teach you to fly and has experience setting up, calibrating, and flying with the system.
Awhile ago I set up the instrument with the fuselage upside-down on my workbench. The next day I field-calibrated it (I thought) and took off with the Co-Pilot on. However, the device was disabled at my transmitter when I field-calibrated it.
When I took off with the model, it rolled over on its back as soon as it cleared the ground, thinking it was still on my workbench. I was extremely startled. In addition, the sensitivity was set too high, so there was nothing I could do about it until the airplane gained altitude.
The good news is that it flew fine, hands off, inverted around the pattern until I regained enough sense to turn off the Co-Pilot. After landing, I calibrated the system again, with the switch on this time. The model was fine thereafter.
Read the instructions, pay attention, train with someone who has already made these mistakes, and turn on your timer. Enjoy this exciting technology!
— Heyward Macdonald [email protected]
Sources
- FMA Direct (Cellpro), (800) 343-2934, www.fmadirect.com
- Atlas Products: Hobby Lobby, (866) 933-5972, www.hobby-lobby.com
Transcribed from original scans by AI. Minor OCR errors may remain.

