

Building model aircraft is an art form
Old-Timers — Bob Angell ([email protected])
BUILDING A MODEL from a kit or scratch-building from a set of plans has its own unique rewards. While reporting to no one, you single-handedly become the management consultant for feasibility studies, the board of directors for project approval, and the comptroller for funding. You are also:
- project manager
- chief engineer
- quality-control specialist
- director of safety
- production superintendent
- shop boss
- skilled laborer
- test pilot
Not many of us get to do that within the confines of our workaday world. It’s an opportunity to learn and master mechanical skills that are often missing in many desk-type jobs today.
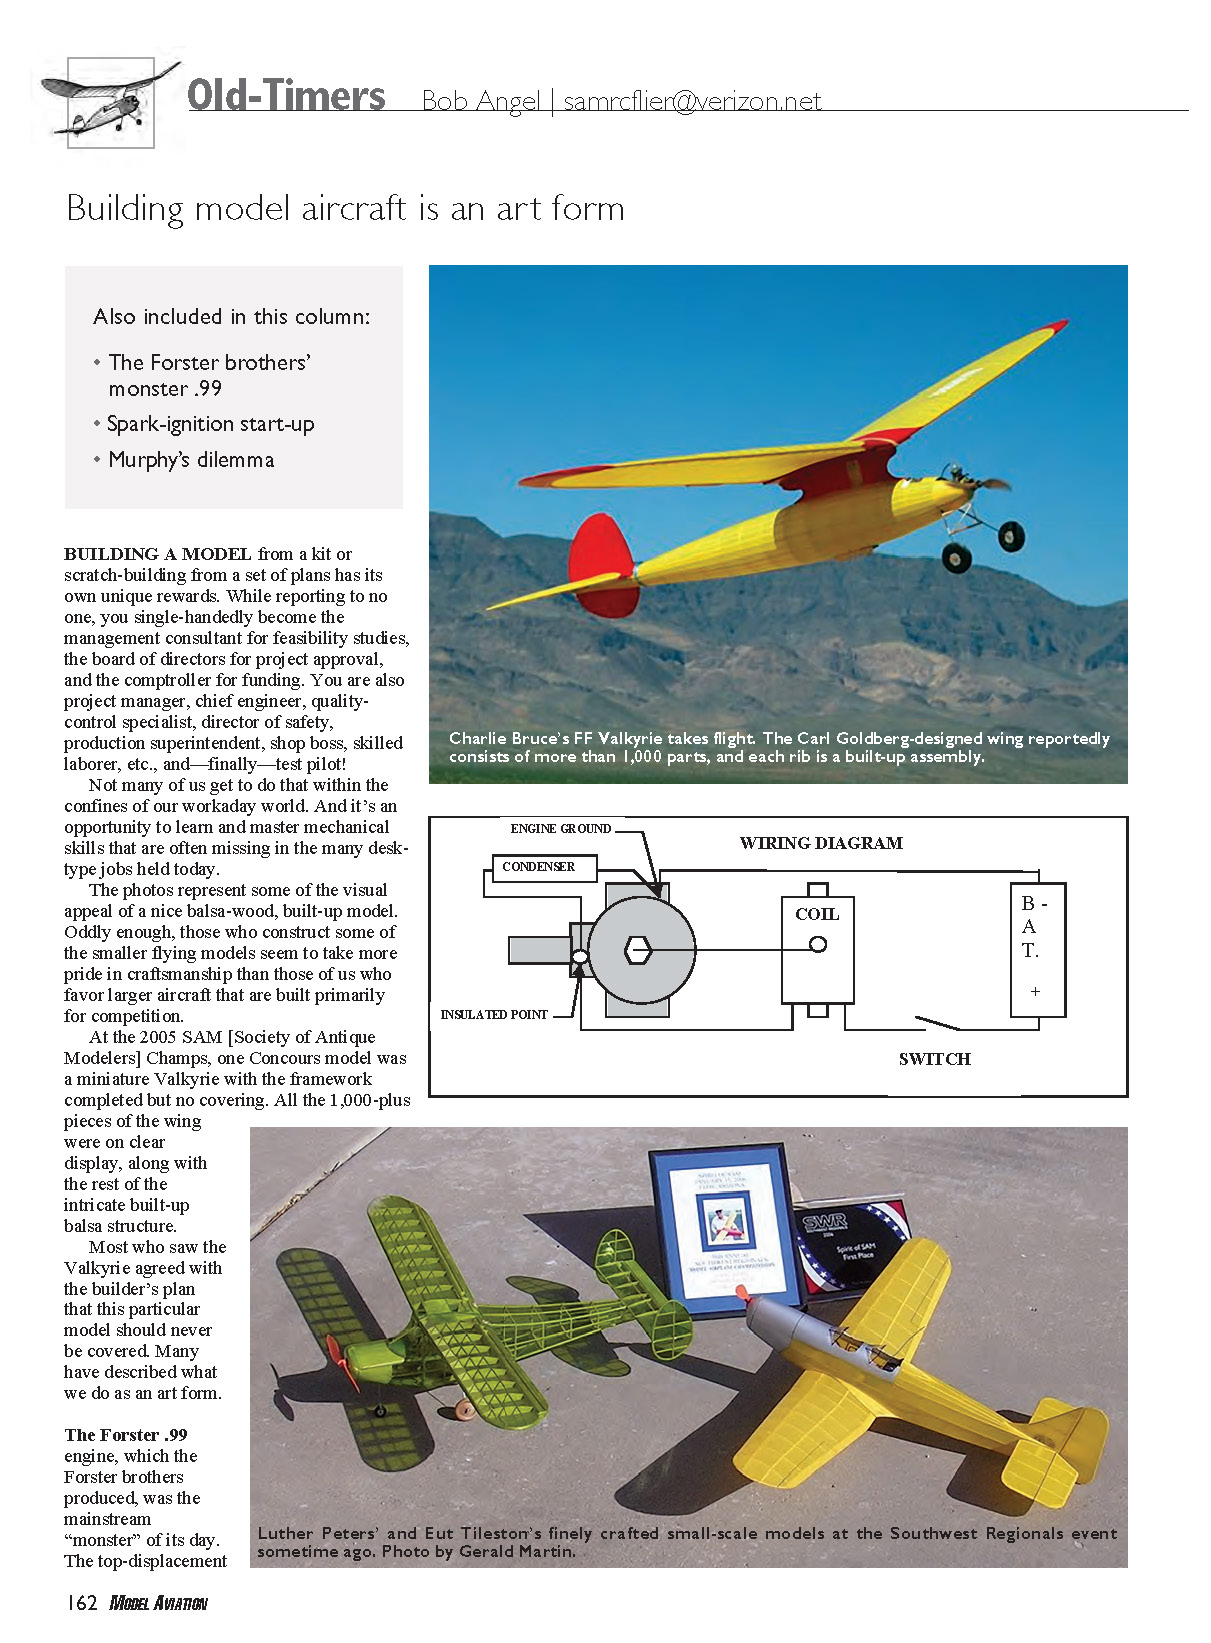
The photos represent some of the visual appeal of a nice balsa-wood, built-up model. Oddly enough, those who construct some of the smaller flying models seem to take more pride in craftsmanship than those of us who favor larger aircraft built primarily for competition.
At the 2005 SAM (Society of Antique Modelers) Champs, one Concours model was a miniature Valkyrie with the framework completed but no covering. All the 1,000-plus pieces of the wing were on clear display, along with the rest of the intricate built-up balsa structure. Most who saw the Valkyrie agreed with the builder’s plan that this particular model should never be covered. Many have described what we do as an art form.
The Forster .99 engine
The Forster .99 engine, which the Forster brothers produced, was the mainstream “monster” of its day. The top-displacement engines in common use were usually limited to .60 or .65 cu. in. and were referred to as the “big” .60s. Forster .99s were the best known of the bigger engines, but not even they were used in large numbers.
Many .99s were produced with dual points, for two-speed running. They had lots of torque but revved slowly, usually running on big propellers of 14 inches and larger diameter. Sal Taibi, a FF legend, and a few other modern practitioners have used the big engine with success in Texaco competition. And you’ve got to love that sound (best heard through ear protection).
A friend recently presented me with a .99 he bought as a young man. I decided to bench-run it before confining it indoors in my collection. The procedure was slightly different. The original prop nut had been replaced with a friction nut, and I soon found out why. The .99 uses almost the same size drive and propeller washers as a smaller engine. But with the large propeller and so much torque, it’s hard to keep the propeller from slipping. Without that locknut you’d spend a considerable amount of time on your hands and knees searching for prop nuts and washers.
The slippage was cured when I cut a couple washers from thin leather and used them on both sides of the propeller. And I found that the timer needs to be retarded more than for most engines for hand starting. Ouch!
Preparing and fuels
In the previous column I promised to share some basics of starting and running an old spark-ignition engine. This time, armed with the wiring diagram, you should have enough information to at least fire up an old sparker on the test stand.
Other than adjusting the timer, procedures are almost the same as for running a glow engine. I described engine cleanup before running in the February issue. I’ll repeat one precaution from that column and add a couple more.
Don’t melt one of those original plastic fuel tanks by putting glow fuel in it. If you do run glow fuel rather than gasoline, keep it mild, at 5% or less nitromethane (nitro). FAI fuel (no nitro) is preferable and safest to keep that old jewel intact.
You need to hand-start these engines; never use a starter. Wear a thick leather glove or use a chicken stick. Aside from a few racing engines such as Hornets, McCoys, and the like, most had no thrust-absorbing bearings. Pushing a starter into them could press the crankpin and/or conrod back against the backplate, grinding things up inside.
Even when there is enough internal clearance, the drive washer can gall the front of the crankcase and produce metal grindings in an oil slurry that can spread and do nothing worthwhile to an engine.
A 3:1 mixture of gasoline and 70-weight (SAE 70) oil was the standard fuel recommended for most ignition engines. You can still find that 70W oil, or at least SAE 60W, at some Harley-Davidson motorcycle shops and maybe at some airports.
Gasoline helps start an engine more easily than alcohol-based fuel does, especially in cold weather. Some of us prime with gas for easy starting even when we’re running methanol. Glow-fuel consumption rate is almost twice that of gasoline, so a richer needle setting is needed for glow.
Plain, old Coleman or other camp-stove fuel is the best gasoline base. High octane has no particular advantage in small engines, and some modern pump gasolines have allowed the oil to separate from the mix. If you choose to use commercial low- or no-nitro glow fuel, add some degummed castor oil (such as Sig brand) for engine protection.
Many of us commonly use a 3:1 mix of pure methanol and castor oil. Methanol usually lets an engine run slightly cooler and a bit faster than gasoline fuels. Motorcycle shops stock another oil that is okay for our use; it’s polymerized castor oil, which blends with either gasoline or alcohol. Maxima is one brand name.
Wiring and ignition
A couple of fresh, strong, dry cells, at least C size, is the minimum battery requirement. Used in series, they produce the 3 volts for the nominal rating of the spark coil. Two or preferably three AA or larger Ni-Cds are better and should allow easier starting. Most coils can handle as many as 4 volts without damage.
The capacitor (or condenser) is shown in a location to clarify the diagram, but it’s usually attached to an engine lug for ground and mounted to that lug or behind the engine. The capacitor value is noncritical and, as I remember, the manufacturers usually specified .05–.10 mfd (microfarad). Actually, a small automotive condenser can be used.
Let’s set up the timer to run. An ohmmeter or a simple series-wired continuity light is handy for testing and adjusting the timer.
Make sure the points are opening and closing properly by attaching the tester’s clips to the insulated point and to the engine ground. Turn the propeller through a few revolutions, watching for the test light to go on and off or the meter to react. You’ll often be surprised to find that the points are either a little dirty or aren’t making and breaking properly. If so, clear up that problem.
Setting the timer and starting
The coil fires when the points open — not when they close. So we’re concerned with exactly when that point opening occurs.
There’s a time lag between the points opening, the spark jumping, and the fuel mixture firing and building cylinder pressure. That requires the points to open sometime before the piston reaches top dead center (TDC) and is called “spark advance.” For easy hand starting, that will usually be 10°–15° of propeller rotation before the piston reaches TDC.
You can estimate this by watching the propeller. Move the piston to TDC, note the propeller position, and then rotate the propeller backward until the test light or meter tells you the points have just closed. Adjust the timer until this exercise gives you the necessary 10°–15° of advance.
Once you get the engine running, you can advance the timing by moving the timer in the direction of rotation. Then you can lean the needle valve down.
As with any other engine, you want to be conservative and keep the needle a tad on the rich side—slightly below absolute top speed. Treat the timer adjustment the same way. Keep the spark advance below maximum speed.
One of the most common reasons for in-air flameouts in these engines is overheating and seizure from overadvancing the spark and/or overleaning the needle. Gasoline fuel runs hotter and is more susceptible to that problem than glow fuel.
Addendum — Murphy’s dilemma
Let’s call this “Murphy’s dilemma.” When you find a useful new modeling material, you must decide on one of two choices.
- Buy the quantity you need for the project at hand. Then when you need more for next month’s project, you’ll learn that the material has been discontinued.
- Buy a lifetime supply to preclude the possibility of ever running out. The following week you’ll discover a new and better material at half the price.
MA
Transcribed from original scans by AI. Minor OCR errors may remain.

