

Park View: BP Hobbies Pitts Special EP ARF
Ray Juschkus
My first encounter with a Pitts Special was in Missouri in the 1970s. I was there to attend a photojournalism course and was told to take a topic with me that I could do a story about. I landed in Springfield, rented a car, and while driving to a town called Cassville I passed a small airport that looked like a good subject. I walked into the hangar and a man asked if he could help me. Out of the corner of my eye I spotted a tiny Pitts Special. I asked if he minded if I did a story about his operation, and he said he would be delighted.
He ran the place single-handed. There was a twin Cessna parked up front that he used for a taxi service, and on weekends he would fly the Pitts at nearby air shows. I left feeling that I had my topic wrapped up, but when I presented it to the faculty they said aviation topics were overdone and refused it.
In 1989, when I was doing reviews for Flying Models, then-editor Bob Hunt assigned me to cover the Sailplane Symposium in Madison, Wisconsin. We visited the Experimental Aircraft Association Museum in Oshkosh, and upon entering the lobby my eyes almost popped out of my head: there was a display of three Pitts Specials suspended from the ceiling in a fleur-de-lis pattern. It took my breath away.
Curtis Pitts built the first Pitts Special in 1945 and sold the second one to Betty Skelton; she called it the "Little Stinker." Betty went on to win the 1949 Feminine International Aerobatic Championship in Miami, Florida.
This past winter, while attending the WRAM Show in White Plains, New York, I was strolling past the BP Hobbies booth and saw a Pitts Special sitting on top of a pole. I inquired about the model but was told it was not in stock at the time. As I left the booth I kept looking over my shoulder at the airplane. If you are a modeler, you probably know the feeling — it stuck in my mind for quite a while.
On the main floor I ran into my old and very dear friend Bob Hunt, MA's then-aeromodeling editor, and he asked if I wanted to do some reviews for him again. I asked if I could review the BP Pitts Special, thinking he could get me one, but they were out of stock. Roughly a month later I got an e-mail from Michael Ramsey, MA's then-associate editor. He had been in touch with BP Hobbies, and the company wanted MA to review the Pitts Special when it became available. I had been flying electrics for the last four years and I love biplanes, so I guess I was the right fit for this model.
Assembly
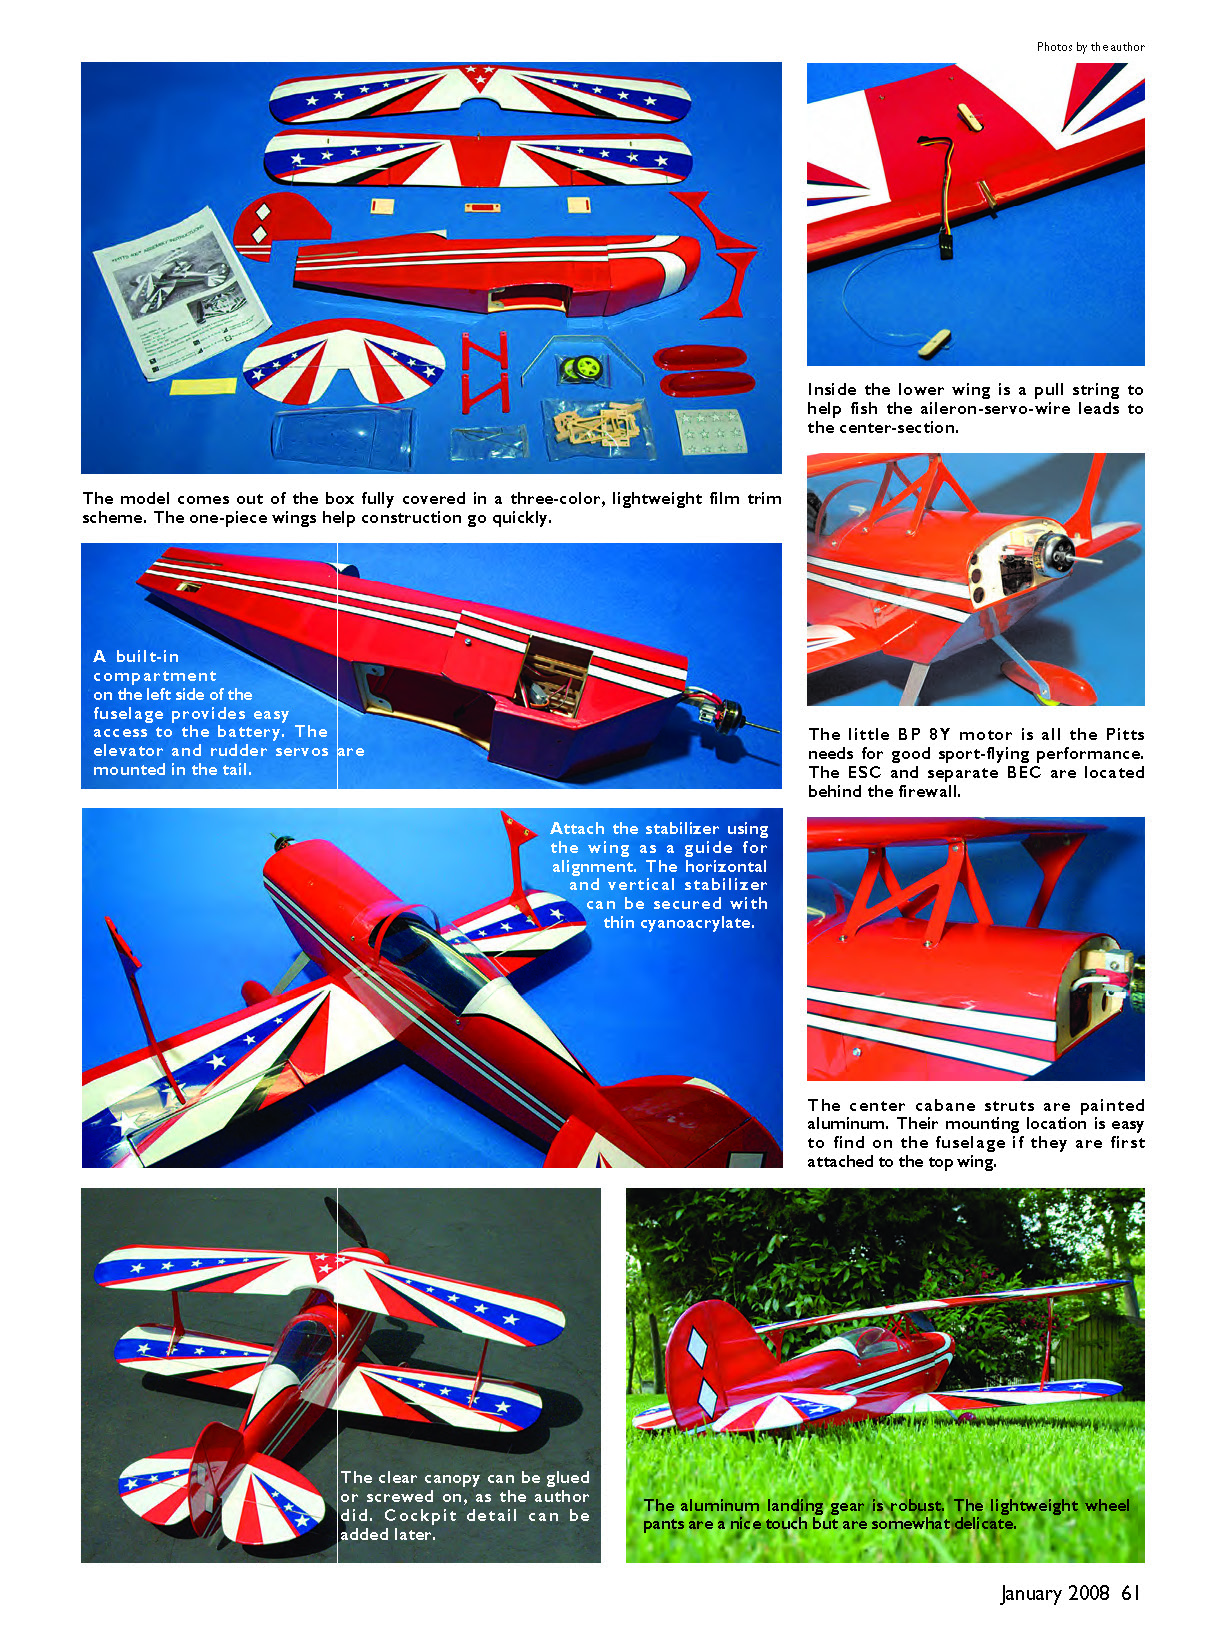
The kit arrived one evening via UPS; the box had a nice hole on one side, but luckily it missed the fuselage by a hair. As I carefully took everything out, the red, white, and blue color scheme really pumped me up. It was extremely well done, and I was extraordinarily pleased with the kit. Then I noticed the wheel pants were just plastic drawn over a plug and painted red.
I was under the impression the model had four ailerons, but only the lower wing had them. I decided I could live with that. Editor's note: The Pitts ARF now has ailerons on all four wings.
The motor was a BP 8Y brushless outrunner, cleverly mounted on a stick with a heat sink. I used a BP 15-amp ESC and a ParkBEC Switching BEC, which I had never used before; I followed the hookup diagram and it worked like a charm. I used a Hitec Electron 6 receiver because I was going to fly at an exceptionally active field — a single conversion would have been adequate for park flying.
I noticed there was no mention of the CG. The next day I called BP Hobbies and was told it was 20 mm in front of the lower wing leading edge. The problem was solved quickly, and the correction was made on the website the next day — how's that for interactive customer service?
You do not build this model; you assemble it. I started with the wings. I looked for an indication of where to put the aluminum cabanes on the top of the fuselage but could not find any. The top wing had plywood tabs with holes in them. I fastened the cabanes to the top wing and the struts to the lower wing with the bolts provided, then attached the struts to the upper wing. This gave me the exact location for the cabanes on the fuselage. Everything lined up perfectly.
Notable kit features:
- Rudder and elevator servos neatly recessed into the rear of the fuselage so only the arms stuck out.
- Battery compartment with a clever little side door held on with magnets (my magnets were not glued in and popped out when I opened the door — a little epoxy took care of that).
- Beautifully done fiberglass cowl.
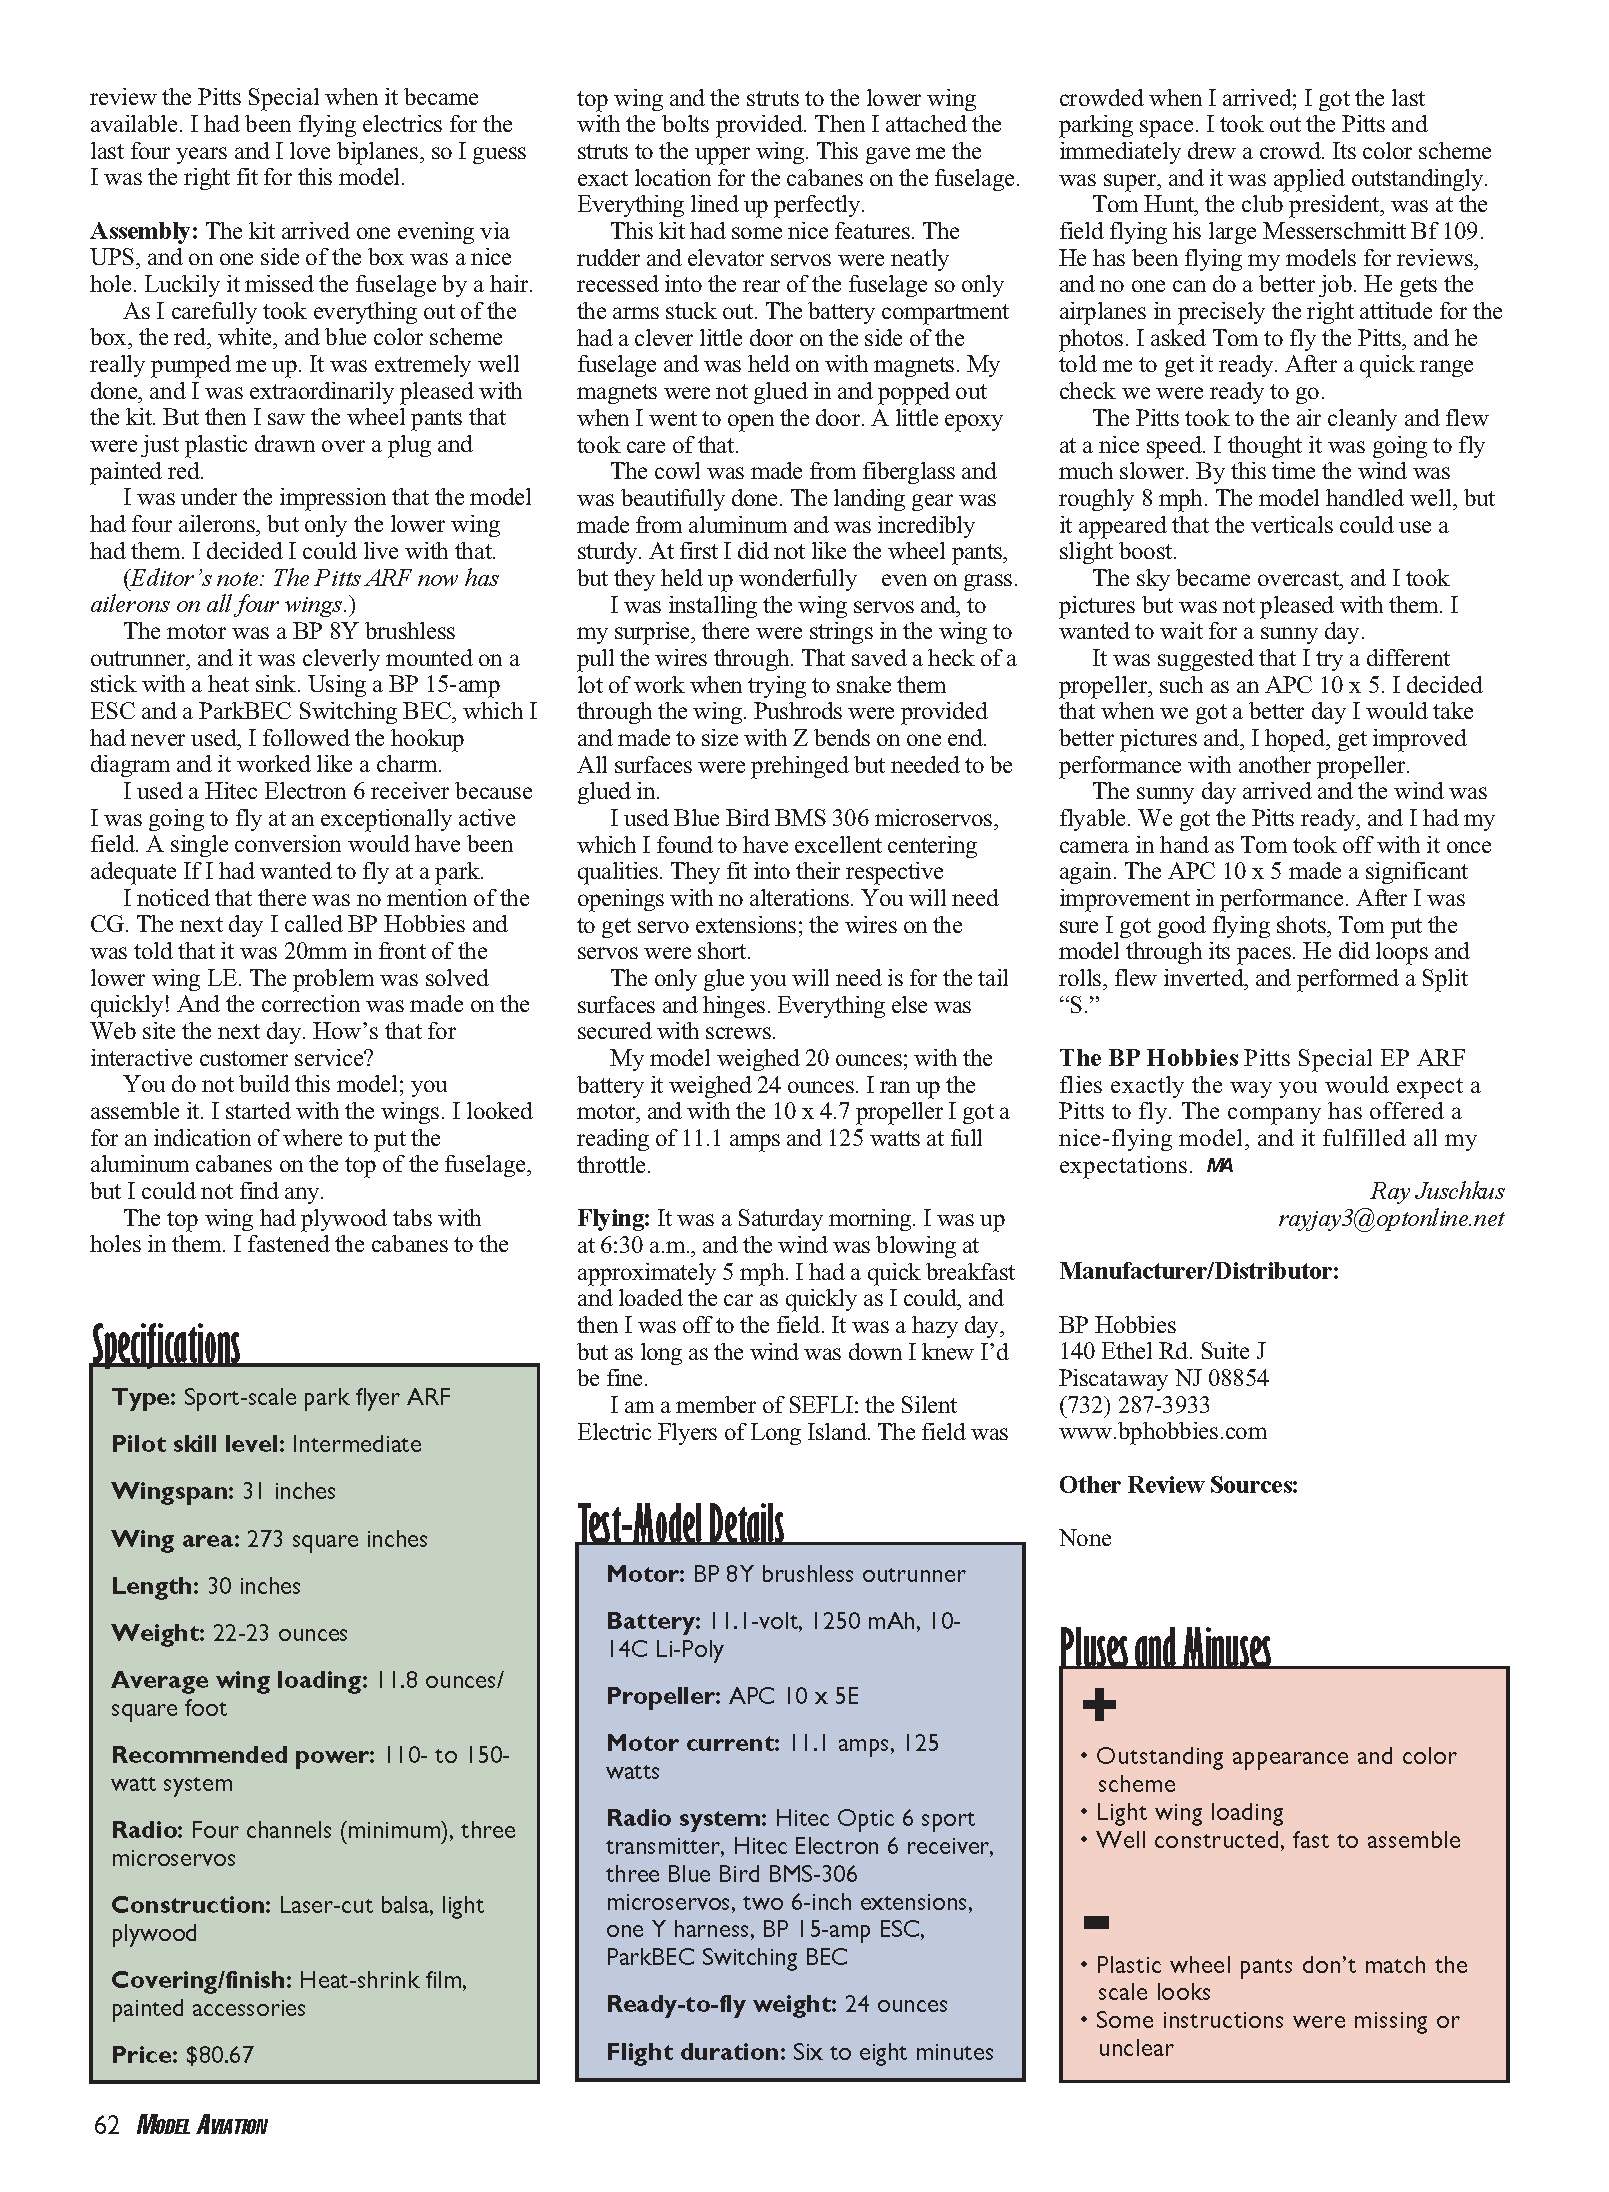
- Aluminum landing gear that was incredibly sturdy; wheel pants held up well even on grass.
- Strings in the wing to pull the wires through, which saved a lot of work.
- Pushrods provided and made to size with Z bends on one end.
- All surfaces prehinged but needing to be glued in.
I used Blue Bird BMS 306 microservos, which have excellent centering qualities and fit their openings with no alterations. You will need servo extensions; the servo wires were short. The only glue needed was for the tail surfaces and hinges; everything else was secured with screws.
My model weighed 20 ounces; with the battery it weighed 24 ounces. I ran up the motor, and with the 10 x 4.7 propeller I got a reading of 11.1 amps and 125 watts at full throttle.
Flying
It was a Saturday morning. I was up at 6:30 a.m., and the wind was blowing about 5 mph. I had a quick breakfast, loaded the car, and was off to the field. It was a hazy day, but as long as the wind was down I knew I'd be fine.
I am a member of SEFLI (Silent Electric Flyers of Long Island). The field was crowded when I arrived; I got the last parking space. I took out the Pitts and immediately drew a crowd — the color scheme was superb and applied outstandingly.
Tom Hunt, the club president, was at the field flying his large Messerschmitt Bf 109. He has been flying my models for reviews and does an excellent job getting the airplanes in precisely the right attitude for photos. I asked Tom to fly the Pitts; after a quick range check we were ready to go.
The Pitts took to the air cleanly and flew at a nice speed — I had thought it would fly much slower. By this time the wind was roughly 8 mph. The model handled well, but the verticals could use a slight boost. The sky became overcast; I took pictures but was not pleased with them and wanted to wait for a sunny day.
It was suggested I try a different propeller, such as an APC 10 x 5. When the sunny, flyable day arrived we fitted the APC 10 x 5 and saw a significant improvement in performance. After I was sure I got good flying shots, Tom put the model through its paces: loops, rolls, inverted flight, and a Split "S."
The BP Hobbies Pitts Special EP ARF flies exactly the way you would expect a Pitts to fly. The company has offered a nice-flying model that fulfilled all my expectations.
Ray Juschkus [email protected]
Transcribed from original scans by AI. Minor OCR errors may remain.

