
Park View: ElectriFly Pluma 3D EP ARF
Jay Smith
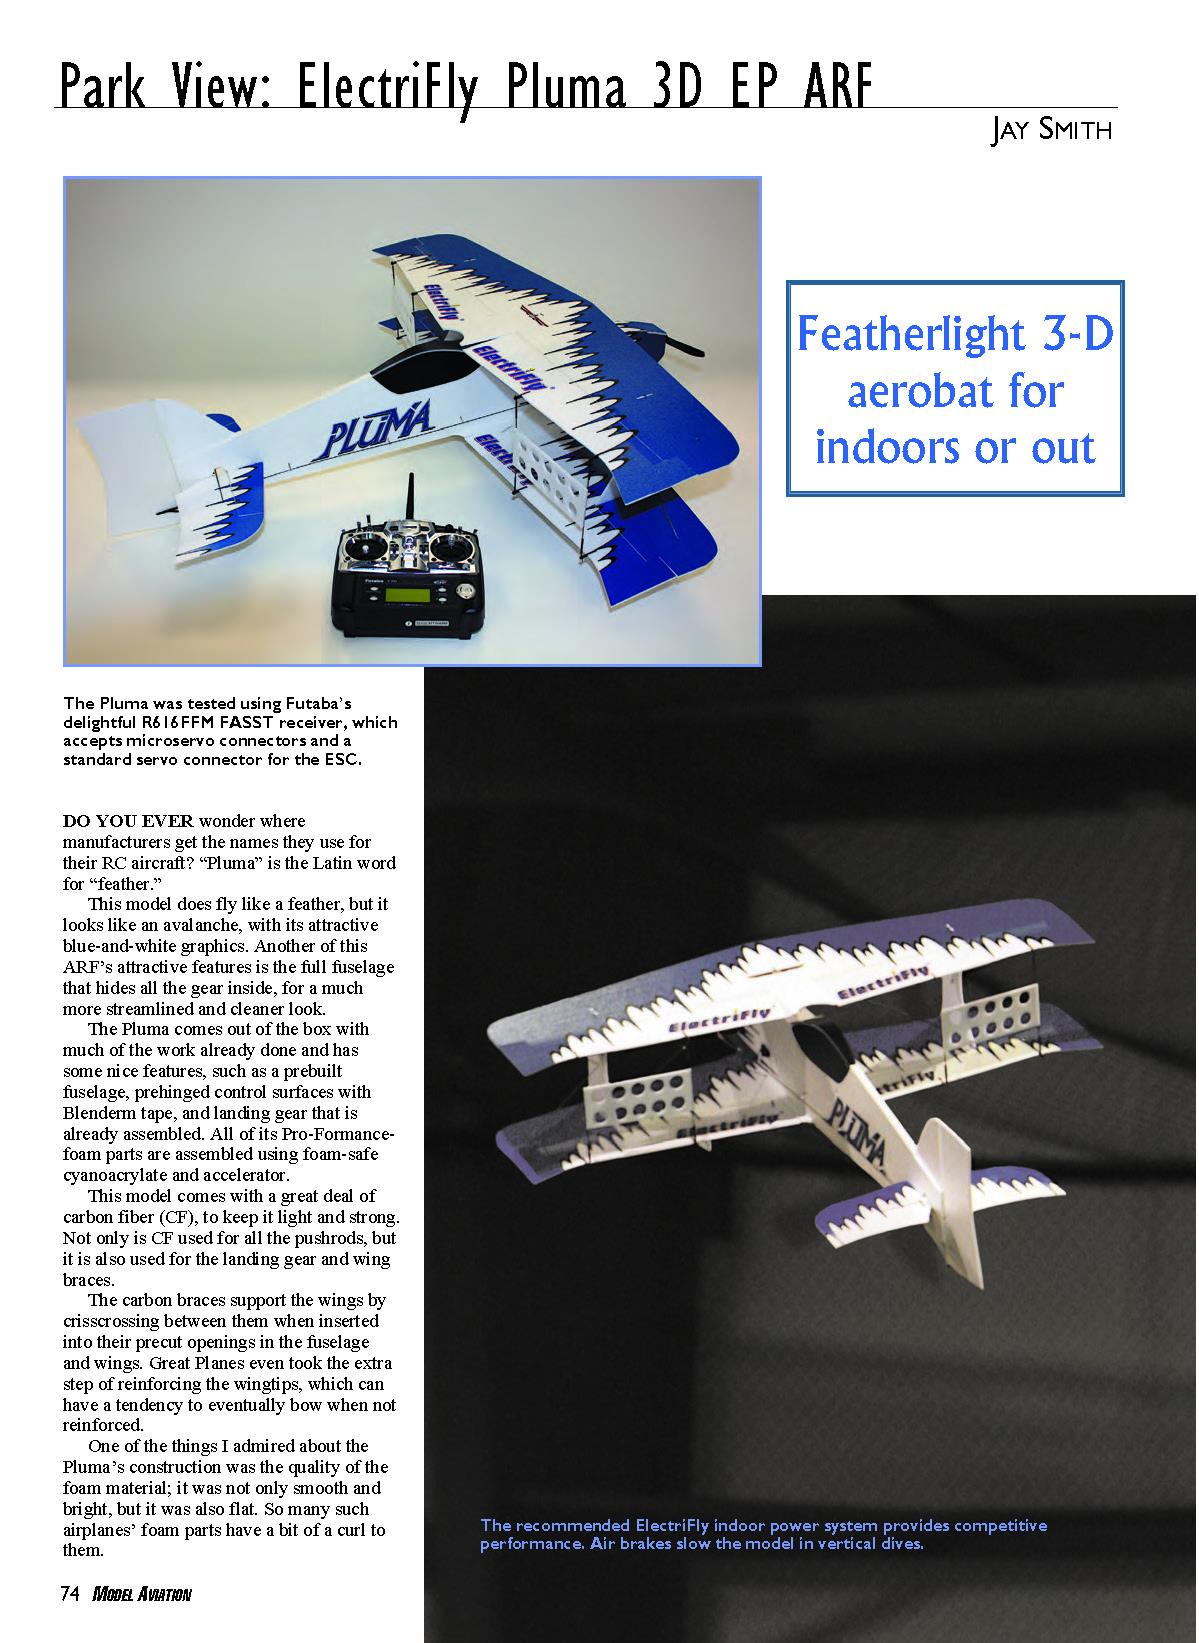
DO YOU EVER wonder where manufacturers get the names they use for their RC aircraft? "Pluma" is the Latin word for "feather."
This model does fly like a feather, but it looks like an avalanche with its attractive blue-and-white graphics. Another attractive feature of this ARF is the full fuselage that hides all the gear inside for a much more streamlined, cleaner look.
The Pluma comes out of the box with much of the work already done and has some nice features, such as a prebuilt fuselage, prehinged control surfaces with Blenderm tape, and landing gear that is already assembled. All of its Pro-Formance foam parts are assembled using foam-safe cyanoacrylate and accelerator.
The model includes a great deal of carbon fiber (CF) to keep it light and strong. CF is used for all the pushrods, the landing gear, and wing braces. The carbon braces support the wings by crisscrossing between them when inserted into their precut openings in the fuselage and wings. Great Planes even reinforced the wingtips, which can tend to bow when not reinforced.
One thing I admired about the Pluma's construction was the quality of the foam material: it was smooth, bright, and flat. Many foam parts have a bit of curl to them; the Pluma has been engineered by Great Planes to build straight and remain strong. Indoor aerobatics pilots should appreciate this attribute — stiffer airframes fly more precisely.
Pluses and Minuses
- Quick construction with quality hardware.
- Attractive preprinted trim scheme.
- Keyed and laser-cut parts coupled with carbon bracing keep the Pluma strong and straight.
- Generous wing area and light weight allow for slow flight.
- Lightweight construction makes the Pluma more susceptible to hangar rash.
- Landing gear may not hold up on rough surfaces.
Construction
While building the model, it becomes evident that a lot of thought went into its design and into ways to keep the airframe light yet rigid. The keyed and laser-cut parts and the strong focus on keeping the Pluma straight and true reward the builder/pilot with an aircraft that is crisp and responsive in the air.
One decision the builder must make is whether to use the indoor or outdoor setup. Since wintertime is cold here in Indiana, I went the indoor route.
The manual is short but has plenty of pictures and text detailing all the steps to completion. Great Planes has printed an addendum for step 1 on page 7 regarding the aileron link rods: they should measure 6 1/8 inches — not 2 1/8 inches.
Assembling the pushrods is easy with the included precut CF pushrods, prebent Z-bends, and precut heat-shrink tubing. You can use a heat gun on only one end; the other end is installed on the model before shrinking. I found it helpful to preshrink the tubing slightly before installation using the heat gun and then use the iron for final shrinking on the aircraft. Preshrinking helps keep the Z-bend from moving while adjusting the linkage. Use a drop of cyanoacrylate on the end of the heat shrink to ensure everything stays put.
Servos are installed using only cyanoacrylate to hold them in place. I was concerned about the possibility of them coming loose and considered hot glue, but wanting to keep the Pluma as light as possible, I left the installation as specified in the manual. The cyanoacrylate installation has held up fine.
I deviated slightly from the manual by waiting until the model was complete and I could check the CG before attaching the receiver and speed control inside the fuselage. There is some room to move the battery, but because I went with the lighter indoor power system and battery, I wanted to make sure the airplane would not come out tail-heavy.
Tape folded to make a tab on the battery makes it easier to remove. The fuselage is narrow and can be difficult to work in; in this case, a bit of Velcro on the side of the fuselage goes a long way. I final-mounted the receiver and speed control with Velcro.
A handy tip I picked up on RCGroups.com makes mounting propellers with a prop saver easier. Use a piece of aluminum or brass tubing that will fit over the prop saver screw head. Once you have one side of the O-ring attached, slide the tube between the propeller and the O-ring, rotate the tube up so it fits over the screw head, then slide the O-ring down onto the screw and remove the tube.
The Pluma was easily balanced. On the scale, the ready-to-fly weight was 8.4 ounces — light for a full-fuselage, 518-square-inch biplane. With wing loading at 2.3 ounces per square foot, this indoor flyer has plenty of promise. A quick run-up on the watt meter revealed that the RimFire motor and GWS 0840 propeller could pull 75 watts static at 7.3 amps.
I set the low rates as described in the manual and left the high rates at full throw. I programmed 40% exponential on high rates since I planned to fly the model at slow speeds and wanted to keep it maneuverable.
Specifications
Model type: ARF
Skill level: Intermediate builder, intermediate pilot
Wingspan: 32.5 inches
Wing area: 518 square inches
Length: 38 inches
Weight: 8.4 ounces
Wing loading: 2.3 ounces per square foot
Recommended power: RimFire 28-22-1380 motor (indoor) or RimFire 28-26-1000 motor (outdoor)
Radio: Four channels (minimum), three microservos
Construction: Pro-Formance 3mm extruded polystyrene foam
Covering/finish: Preprinted two-color scheme
Price: $49.99
Test-Model Details
Motor: RimFire 28-22-1380
Battery: 11.1-volt, 300 mAh Li-Poly
Propeller: GWS 0840
Motor current: 7.3 amps
Motor output: 75 watts
Radio system: Futaba 7C FASST transmitter, Futaba R607FS receiver, three Futaba S3114 servos, ElectriFly Silver Series 8-amp ESC
Ready-to-fly weight: 8.4 ounces
Flight duration: Five to six minutes, depending on throttle usage
Slight rudder is needed to carry a high-alpha knife-edge pass. No other controls are held in to provide a slow pass at a constant heading. A little rudder touch in a closed flight area is a fun challenge. I used roughly 50% exponential to tame the flight controls around center stick.
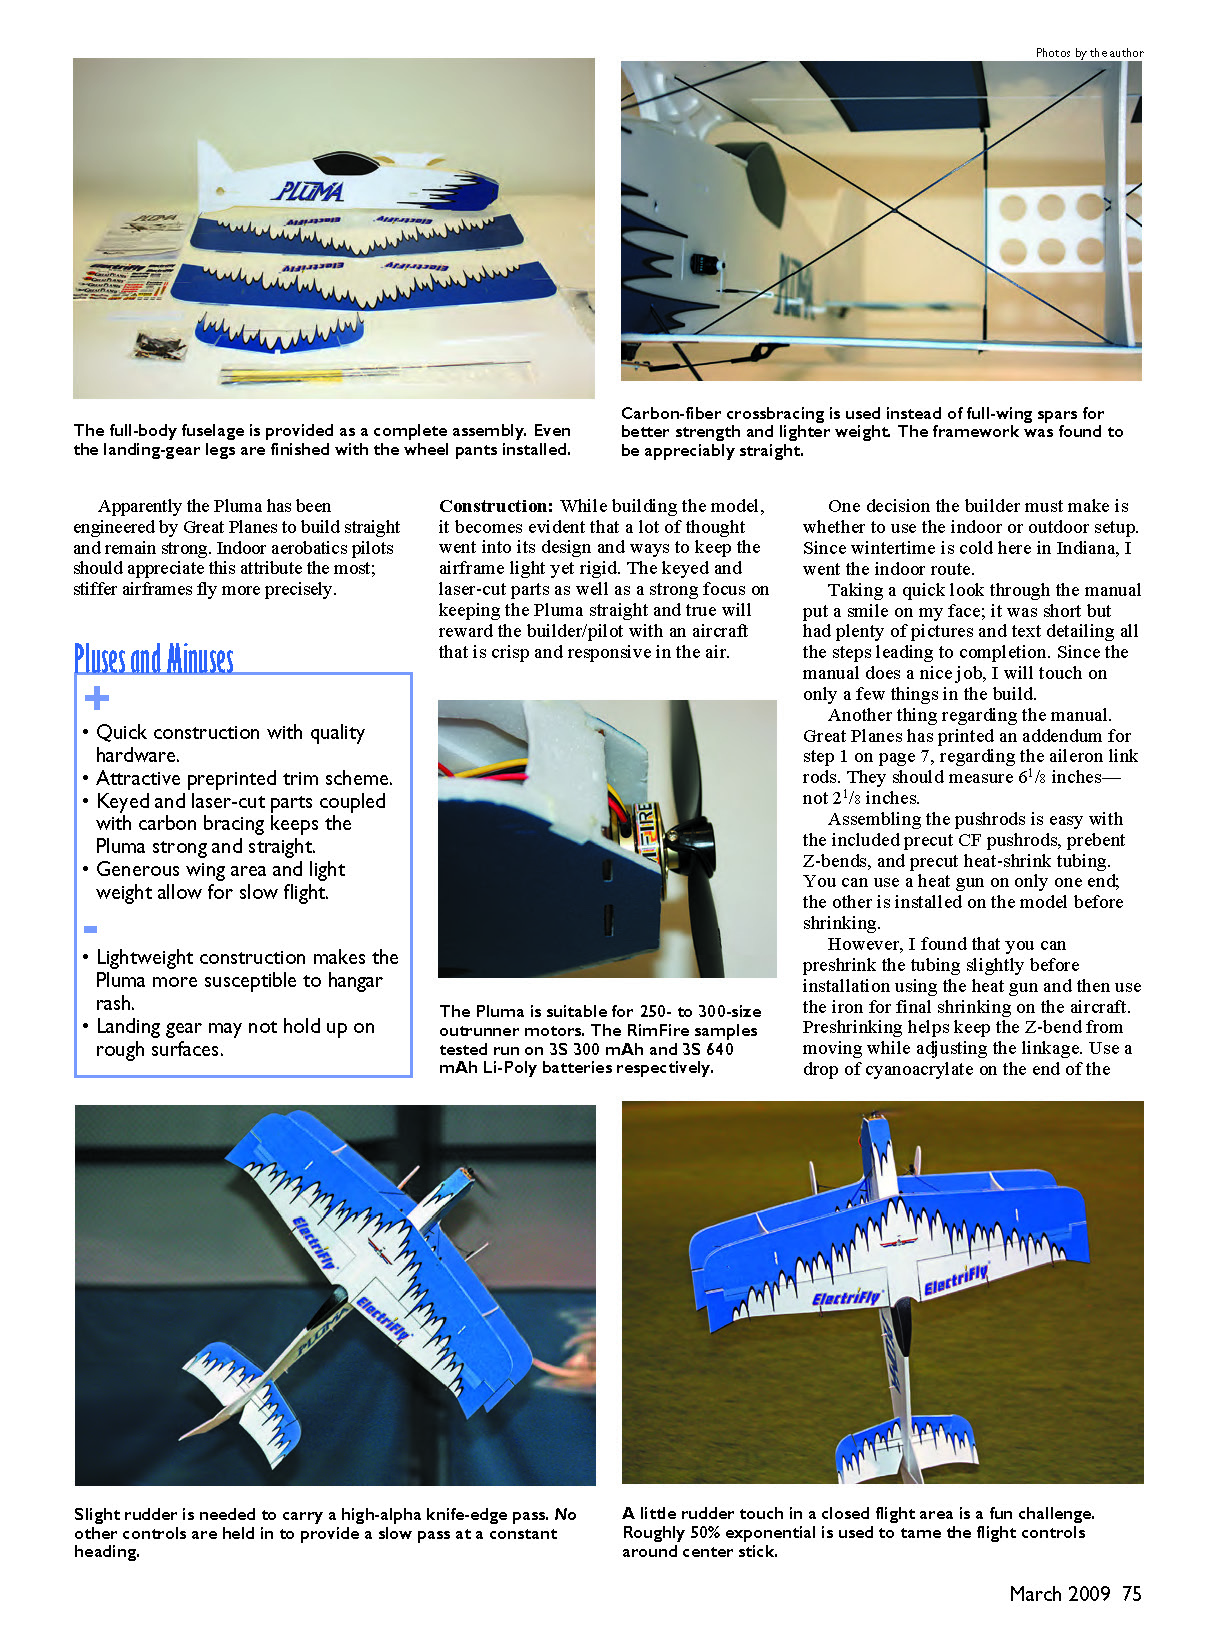
The full-body fuselage is provided as a complete assembly. Even the landing-gear legs are finished with wheel pants installed. Carbon-fiber crossbracing is used instead of full wing spars for better strength and lighter weight. The framework was appreciably straight.
The Pluma is suitable for 250- to 300-size outrunner motors. The RimFire samples tested run on 3S 300 mAh and 3S 640 mAh Li-Poly batteries respectively.
Flying
I took the Pluma to a local club’s indoor site for its maiden and had the assistance of Brian Butts, who put the first flight on the model so I could take some flying shots. Having a Pluma of his own, Brian was comfortable with it, and it showed in his flying. Watching him effortlessly put the biplane through knife-edge flight, hovering, and other aerobatics made me eager to take the sticks.
Brian hand-launched and hover-caught the Pluma because the floor was thick, man-made grass. When it was my turn, I switched out the battery to try ROG (rise-off-ground) and see how the landing gear held up in the short grass. The Pluma took off in approximately six feet and was capable of flying slowly while I took a few laps to get comfortable with both the model and indoor flying with several other aircraft.
Going against the manual’s warnings, I installed the speed brakes right off since I was flying indoors — and it paid off. I realized during flight that I was on high rates; it was so comfortable and responsive that I left it there. The Pluma had plenty of power to cover the indoor field but seemed happier with slower, graceful flight. It was easy to fly in knife edge and hovered well, with power on tap for a punch-out. Rolls required a bump of down elevator to keep axial. Landing was easy thanks to the low wing loading. After two flights, a quick check of the landing gear and servos found everything still glued solidly in place.
The Pluma proved to be attractive to the eye and appealing to the thumbs. The amount of work already done for you is refreshing unless you were looking for a winter build. The CF reinforcement and Blenderm-taped hinges should stand up to aggressive maneuvers.
Having flown the Pluma indoors, the only limitations were of the venue and not the aircraft. If flying outdoors is your plan, Great Planes offers the more powerful RimFire 28-26-1000 outrunner motor and a Silver Series 12-amp ESC that requires a 640 mAh 20C three-cell pack. With that power and all that wing area, in winds up to 10 mph the model punches through turbulent air and becomes an air-show thriller.
When transporting the biplane, remember that its lightweight construction makes it more susceptible to hangar rash. Handle it with care and your Pluma will be ready to fly when you are.
Jay Smith [email protected]
Manufacturer / Distributor
ElectriFly / Great Planes Model Distributors Box 9021 Champaign, IL 61826 (217) 398-3630 www.electrifly.com
Sources
Futaba (217) 398-8970 www.futaba-rc.com
Other Printed Reviews
- Park Pilot: Fall 2008 issue
- Hobby Merchandiser: September 2008 issue
Transcribed from original scans by AI. Minor OCR errors may remain.

