
Park View: Multiplex TwinStar II
BY DAVID ADAMS
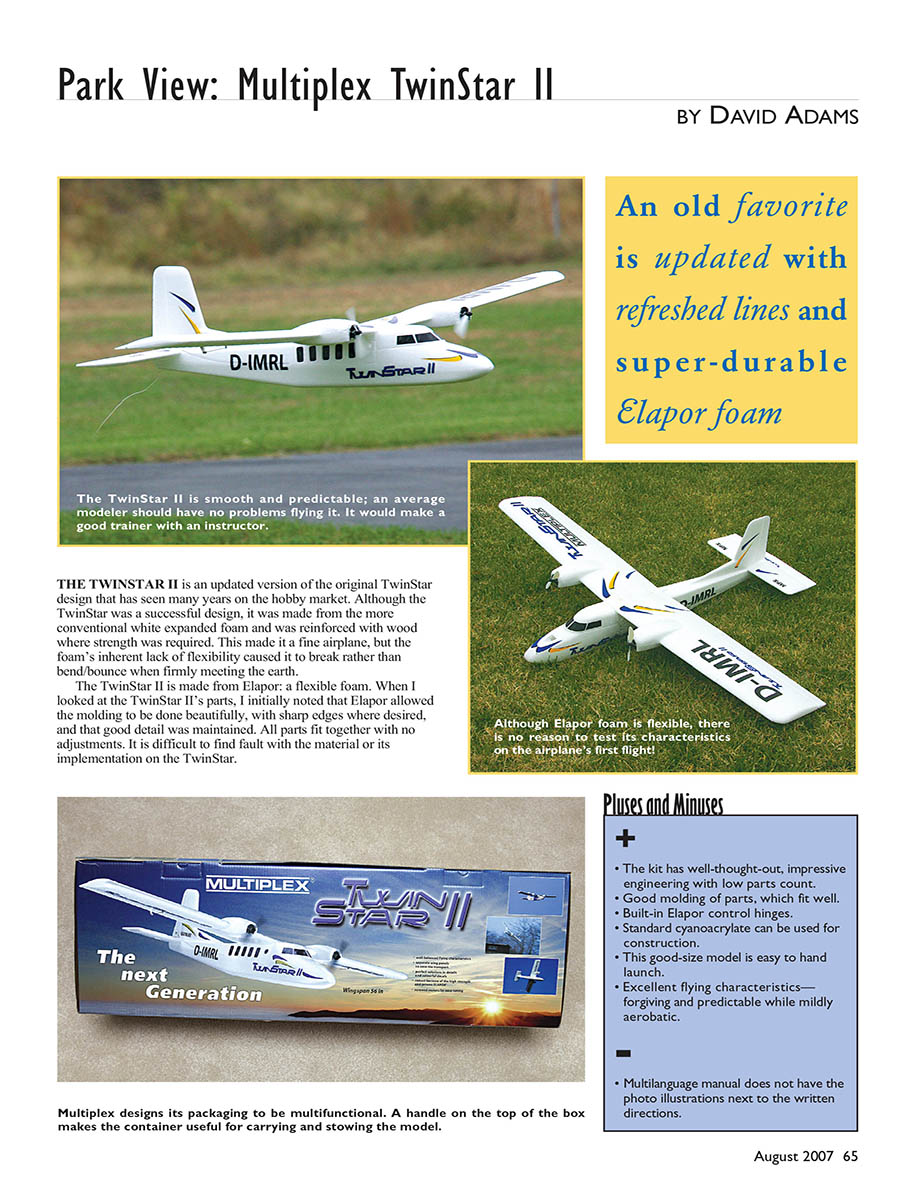
The TwinStar II is an updated version of the original TwinStar design that has been on the hobby market for many years. The original TwinStar was successful but made from conventional expanded foam reinforced with wood. That construction produced a fine airplane, but the foam’s inherent lack of flexibility caused it to break rather than bend or bounce on harder impacts.
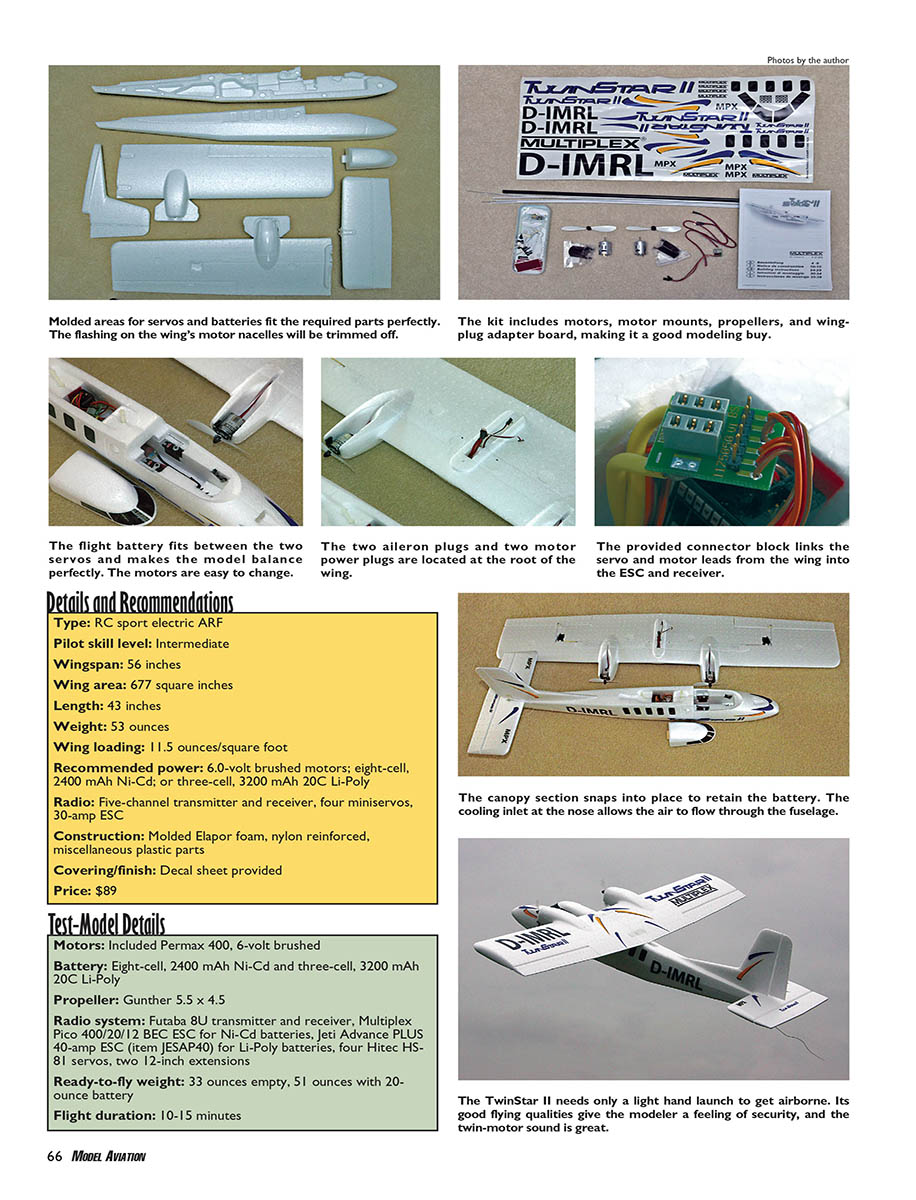
The TwinStar II is molded from Elapor, a flexible foam. The material allows excellent molding with sharp edges and good detail; all parts fit together with no adjustments. Elapor's flexibility is especially apparent in the stabilizer/elevator assembly: the elevator and stabilizer are molded as one piece, with the elevator attached by a thin cross-section of Elapor foam. By cutting along the extreme left and right edges of the elevator the control surfaces are freed and the remaining foam forms a durable, flexible hinge. Overall, it is difficult to find fault with the material or its implementation on the TwinStar II.
Pluses and Minuses
- The kit has well-thought-out, impressive engineering with a low parts count.
- Good molding of parts, with excellent fit.
- Built-in Elapor control hinges.
- Standard cyanoacrylate (CA) can be used for construction.
- This good-size model is easy to hand-launch.
- Excellent flying characteristics—forgiving and predictable while mildly aerobatic.
- Multilanguage manual does not place photo illustrations next to the written directions.
Details and Recommendations
- Type: RC sport electric ARF
- Pilot skill level: Intermediate
- Wingspan: 56 inches
- Wing area: 677 square inches
- Length: 43 inches
- Weight (kit recommended): 53 ounces
- Wing loading: 11.5 ounces/sq ft
- Recommended power: 6.0-volt brushed motors; eight-cell, 2400 mAh Ni-Cd; or three-cell, 3200 mAh 20C Li-Poly
- Radio: Five-channel transmitter and receiver, four mini servos, 30-amp ESC
- Construction: Molded Elapor foam, nylon reinforced, miscellaneous plastic parts
- Covering/finish: Decal sheet provided
- Price: $89
Test-Model Details
- Motors: Included Permax 400, 6.0-volt brushed
- Battery: Eight-cell, 2400 mAh Ni-Cd and three-cell, 3200 mAh 20C Li-Poly
- Propeller: Gunther 5.5 x 4.5
- Radio system: Futaba 8U transmitter and receiver
- ESCs: Multiplex Pico 400/20/12 BEC ESC for Ni-Cd batteries; Jeti Advance PLUS 40-amp ESC (item JESAP40) for Li-Poly batteries
- Servos: Four Hitec HS-81 servos; two 12-inch extensions
- Ready-to-fly weight: 33 ounces empty, 51 ounces with 20-ounce battery
- Flight duration: 10–15 minutes
Construction and Assembly
The TwinStar II has no wood parts and only a minimal number of small plastic pieces. The tubular glass-reinforced plastic (GRP) main spar plugs into the two-piece wing, allowing the separated wing pieces to be transported in a small car and providing a strong assembly. The wings showed minimal deflection in tight loops. Supplied plastic parts include motor mounts, snap-on canopy attachments, screw hold-down wing attachments, and control horns. All servos press into place and are secured with a bit of cyanoacrylate; the receiver and ESC attach with self-adhesive hook-and-loop material.
Assembly Overview
This is a well-designed and well-executed model and is enjoyable to construct. The biggest problem builders have is glancing at photos and assembling parts without reading the instructions. Read the directions completely before you start. It doesn’t take long and you might otherwise miss important notes such as moving the assembly drawings out of the manual and that standard cyanoacrylate can be used to assemble the airplane.
I won’t go through a step-by-step build here; the fit and finish are satisfying and following the directions will produce a fine flier. There are no parts that don’t fit or require excessive adjustment.
A point to note about using cyanoacrylate and accelerator with Elapor: the instructions call for putting CA on one fuselage-half mating surface and lightly spraying accelerator on the other. Join the two surfaces and the CA sets almost instantly. You have only a few seconds to align the halves before the CA sets, so be prepared for a rapid, one-shot alignment. The process does allow for fast building—the test model was finished in two evenings.
You will need to solder the motor leads from the ESC to the connector board assembly and solder the motors to their individual leads; that is the only soldering required. Everything else plugs in.
I did not paint my TwinStar II because paint tends not to adhere well to Elapor. The surface is too slick for most paints to stick reliably. If you must paint, test adhesion on a small hidden area first. The supplied decals adhere well; I plan to add more color with decals and adhesive colored paper. Beginners might add DayGlo trim on the underside of the wings for orientation.
I balanced the completed TwinStar II by sliding the battery fore and aft in the provided battery compartment slot and glued a small bit of foam into the bottom of the compartment to keep the battery in position. The battery can still be swapped with the locating foam in place. The finished model’s weight was within a few ounces of the instructions’ recommendation.
Flying
The TwinStar II needs only a light hand launch. On the test day I slid the wing halves together over the GRP spar, inserted the two wing hold-down bolts, installed the battery through the canopy hatch, snapped the canopy on, and double-checked control throws and directions. Then I tested the motors.
I was worried about hand-launching due to a bad knee and the airplane’s apparent size, but a standing toss with both motors throttled up resulted in a straight, level climb with a bit of up-elevator. The model performed small loops and rolls from level flight; however, its capabilities are limited by the power of the twin Speed 400s. This is not a 3-D or hovering airplane, but it flies impressively well given the modest motors.
Flight characteristics are benign: controllable with full up-elevator and comfortable in a nose-high attitude. Control responses are crisp and predictable. Landings are straightforward—full-stall landings produce very short slides on paved surfaces; grass landings are uneventful and avoid black marks on the fuselage bottom. The propellers’ location on the wing helps protect them on landing.
An embarrassing lesson: the instructions advise applying CA to motor shafts to help hold props in place. I omitted the CA because I thought I might later use prop adapters; during a flight I lost a propeller (and experienced a sudden yaw and roll) but managed a safe landing. The model flew surprisingly well on one motor, but follow the instructions—secure the props.
Another lesson: do not power the included 6.0-volt Speed 400 motors with a three-cell (11.1 V) Li-Poly pack. The higher voltage produces excessive current and heat and will quickly ruin the motors. I burned out motors this way. The solution was to replace the 6.0-volt Speed 400s with 7.2-volt Speed 400 motors, which allowed safe use of three-cell Li-Poly batteries. That swap reduced weight by about 10 ounces and significantly improved performance.
I did not try a two-cell Li-Poly pack with the 6.0-volt motors because I lacked a suitably large 2S pack. My larger packs are intended for bigger models and I prefer to use the same three-cell pack across models.
With 7.2-volt Speed 400s the TwinStar II is a lot of fun—higher speed and expanded maneuverability. Low-level passes and “dust-offs” are enjoyable, and the twin-motor sound adds to the experience. For modest cost, higher-voltage motors are a worthwhile upgrade if you have the batteries.
Possible upgrades and modifications to consider:
- Removable tricycle landing gear to allow paved runway takeoffs. Gear could be very light and plug in for easy removal.
- Brushless motor power system for better reliability and performance (cost will be higher).
- Multiplex could offer optional removable fuselage molds to convert the TwinStar II to a seaplane; minimal changes would be required and it would be useful for float fly-ins.
The TwinStar II builds quickly, flies well with basic power sources, and has no bad habits. Assembled and pretested, it provides a good modeling experience and should be durable. It would make a good trainer when used with dual training equipment, but is not suitable for a complete beginner flying solo.
The TwinStar II is a Multiplex design that I routinely pack in my car for trips to the flying field. It’s reliable, fun, and distinct enough to merit the effort. Another Multiplex model I often bring is the Micro-Jet, which is also made from Elapor.
David Adams [email protected]
Manufacturer/Distributor
Multiplex ModelSport USA / Hitec RCD 12115 Paine St. Poway, CA 92064 (858) 748-6948 www.multiplexusa.com
Other Resources
- Fly RC magazine: November 2006
- Quiet Flyer magazine: October 2006, January 2007
- RCM&E magazine: January 2006
Transcribed from original scans by AI. Minor OCR errors may remain.

