
Park View: Thunder Tiger Profile EP Christen Eagle - 2006/07
GREG GIMLICK
Highlights
- Easy and fast assembly with great parts fit.
- Well-illustrated instruction manual.
- Pre-applied graphics.
- Excellent fuselage doublers installed on the nose.
- Stock power setup easily supports 3-D flying on a 3S Li-Poly pack.
- “Cute factor.”
Pluses and Minuses
- Weak landing-gear mounting method.
- Brittle gearbox prop shaft.
Specifications
- Type: Aerobatic/3-D sport ARF
- Pilot skill level: Advanced
- Wingspan: 31 inches
- Wing area: 369.8 square inches
- Length: 32 inches
- Weight (kit): 10.5 ounces
- Wing loading (kit): 4.1 ounces per square foot
- Motor (recommended): Speed 370 (geared)
- Radio: Four channels (minimum), three microservos
- Construction: 5 mm flat EPP foam sheet
- Covering/finish: Pre-applied graphics
- Price: $45.19 (Manufacturer’s Suggested Retail Price)
Test-Model Details
- Motor: Super 370 geared 6:1 (as supplied)
- Battery: Poly-Quest PQ-1200-3S
- Propeller: 11 x 8 (included)
- Motor current: 11 amps
- Radio system: Multiplex Royal Evo 9, Berg five-channel receiver, Hitec HS-55 servos
- Ready-to-fly weight: 13 ounces
- Ready-to-fly wing loading: 5.1 ounces per square foot
- Flight duration: 5–10 minutes
WITH THE proliferation of “foamies” on the market today, it can be daunting to select one that suits your flying skills and your aesthetic requirements. The Thunder Tiger Christen Eagle did both for me and I think you’ll be pleased with it too. I like airplanes that look like airplanes, so even though the Christen Eagle is a profile type, there is no mistaking that it’s an Eagle.
In the Box
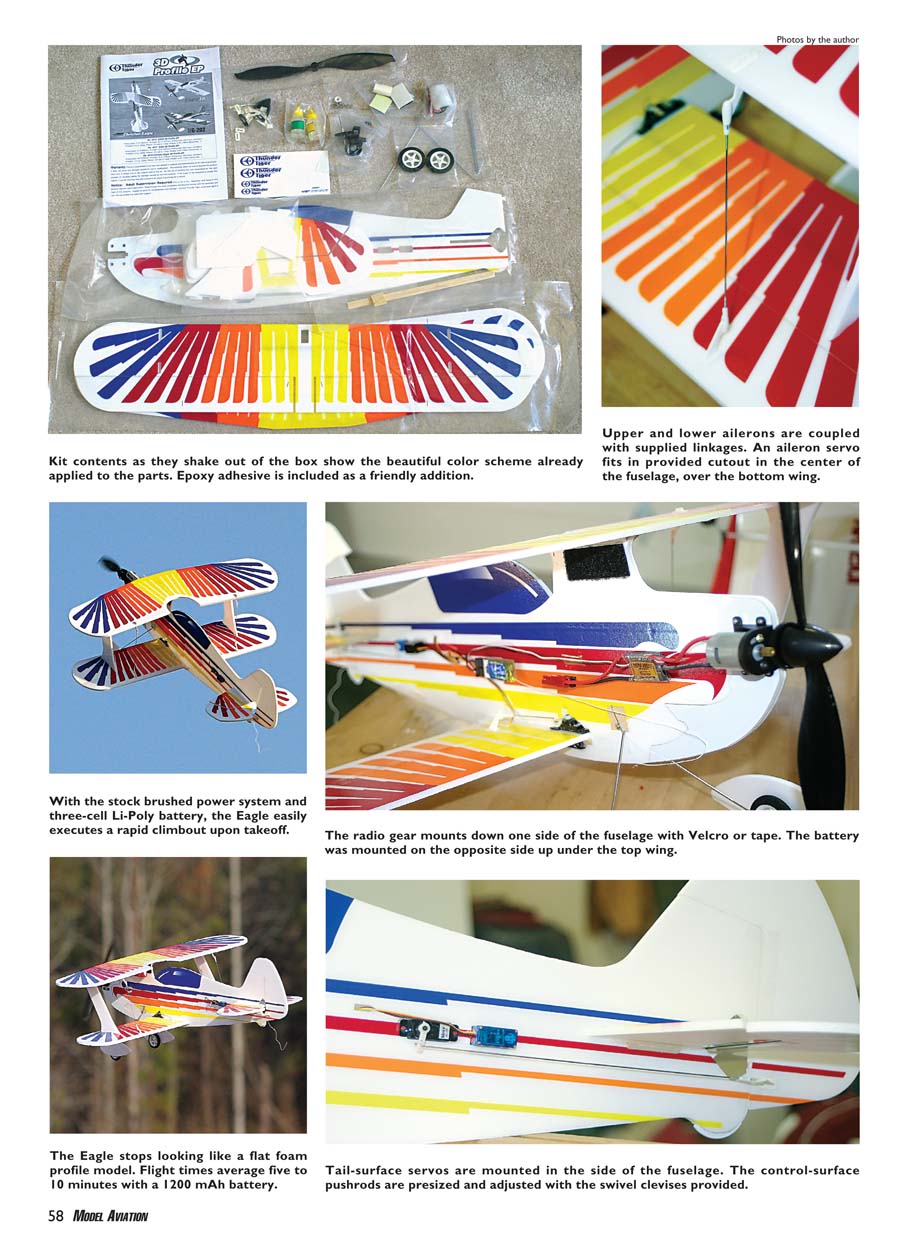
As the photo shows, everything shakes out of the box nicely protected and packed in plastic bags. All the components are grouped in their own bags and securely fastened to the box so nothing is damaged during shipping. The instructions are complete and well illustrated, including a section to identify every part of the kit. It even included a couple little bottles of epoxy, so there’s really nothing for you to buy unless you need radio equipment.
Assembly
If you buy this kit on a Friday and don’t have many plans for Saturday, you’ll be flying it on Sunday. All graphics are applied at the factory; if you’ve constructed a few foam park-flyer-type kits, you know that’s a time-consuming chore. The surfaces are all hinged and only require checking to make sure they are well adhered. My kit had one aileron that didn’t want to stick, so I replaced the hinge with SR Batteries Hinge Tape. I’ve used this product since it was introduced and haven’t found anything that works as well.
Be sure to follow the instructions closely and pay attention to which model they are referring to. The book shows how to build three different kits that are in the 3-D Profile EP line. That may sound confusing, but it really isn’t. Have your radio equipment by your side when you begin because you will be installing a couple of the servos into the airplane as you go. When you do the aileron servo, be sure to hook it up and have it properly centered before you install it. Once installed, you won’t be able to remove the horn to reposition it.
The wings are self-aligning because of the tabbed wing supports and fuselage brace. Go slowly and trial-fit everything before you epoxy parts in place. The center support is reinforced with balsa triangle stock. All four ailerons are functional and the preformed control rods fit perfectly, although I had trouble threading the rods onto the clevises. You’ll save yourself much time and aggravation if you tap them ahead of time using a tap or one of the threaded rods.
The landing gear is an interesting and efficient arrangement, but be sure to follow the instructions or you’ll end up installing a wheel before you insert the block into the fuselage. (Don’t ask me how I know that.) If you don’t make that little mistake, it will take you only a few minutes to assemble the gear. The wheel pants are cute, and the method of installing them is ingenious and effective. The wheel retainer is also the mount for the wheel pants and the retainers that lock onto them. Don't experiment to see if they will hold or you'll have a problem getting them apart. (I didn't trust them so I experimented, and they really do hold well.) It is recommended to use epoxy when you install them, and that's probably a good idea but I doubt it's necessary.
If you place all your radio equipment and battery where the instructions indicate, you'll find that the model balances nicely without a great deal of adjustment.
Power System
The kit comes with a Super 370 motor and gearbox that you'll have to assemble. If you've never done this before, you'll learn how easy it is. All the components of the box went together well and mounted easily to the predrilled section on the fuselage. The instructions have you break in the motor using low voltage and a couple drops of oil. This is a good idea, but be sure to go light on the oil and don't run the motor until it gets hot.
The provided 11-inch propeller mounts on the threaded shaft, leaving enough shaft protruding to mount the rubber safety spinner.
You'll need to provide a speed control that will handle approximately 12 amps and has a voltage cutoff if you're going to use Li-Poly cells. I chose a Poly-Quest 3S-1200 mAh pack I got from Model Electronics Corporation and an AstroFlight Micro Series 115 speed control. That speed-control unit is no longer available and doesn't provide a programmable voltage cutoff, so it will be replaced now that the test flights are complete. I used what I had on hand and kept track of the time so I didn't draw the battery down too far.
Radio
Any radio will do the trick as long as you have microservos and a lightweight receiver to save weight and fit the spaces provided. I used my synthesized Multiplex Royal Evo 9 transmitter linked to a Berg five-channel receiver and three Hitec HS-55 servos.
Flight Characteristics
The Christen Eagle is not designed for beginners. I don't recommend it to anyone who is not already comfortable with a low-wing sport airplane with ailerons.
With the stock motor setup, this model is sprightly using a 3S Li-Poly pack and is capable of any maneuver you want it to attempt. I have no doubt that it will be impressive with the recommended brushless upgrade.
This little airplane will slow down and plod along hanging on the propeller, but mine drops the left wing so I need to do some work there (check for wing warping). The stalls are fairly quick, as you'd expect from a 3-D aircraft, but they are not abrupt and the Eagle recovers easily. With the power of even the stock system, you can fly out of any trouble you get into by adding throttle and flying away.
This isn't a speedster, and with that big propeller out front it isn't meant to be, but it does scoot along nicely. Maneuverability is excellent; all four ailerons are functional. With the rates on high the Eagle is touchy in pitch; I have my CG set toward the aft parameters, so this could be dampened out a bit by moving the CG forward.
3-D flight is what you buy this model to do, and it won't disappoint. On the test flight it was off the ground within a couple of feet, and against the pilot's better judgment it was hovering 6 feet off the ground. I don't recommend hovering before the airplane is thoroughly trimmed and checked, but it just wanted to do it.
With the stock geared motor on the Poly-Quest 3S-1200 pack spinning the 11 x 8 propeller, any 3-D maneuver is possible. The stock setup's performance is extremely impressive.
I'm thrilled with this airplane. It looks good in the air and went together quickly. I advise that you reinforce the landing-gear mount with a bit of cloth and epoxy or leave it off altogether. Most 3-D foamies go without gear anyway.
The stock motor gets warm, but after dozens of flights it was still pulling well enough before being upgraded to a brushless setup. I only did this because I wanted to test that new setup—not because I wasn't happy with the stock motor. You won't find much more fun than this for a stock $50 airplane.
Greg Gimlick [email protected]
Distributor
- Ace Hobby Distributors, Inc.
- 2055 Main St.
- Irvine, CA 92614
- (949) 833-0088
- www.acehobby.com
Sources
- Model Electronics Corporation — (866) 507-9956 — www.modelelectronicscorp.com
- AstroFlight — (310) 821-6242 — www.astroflight.com
- Hitec — (858) 748-6948 — www.hitecrcd.com
Transcribed from original scans by AI. Minor OCR errors may remain.

