
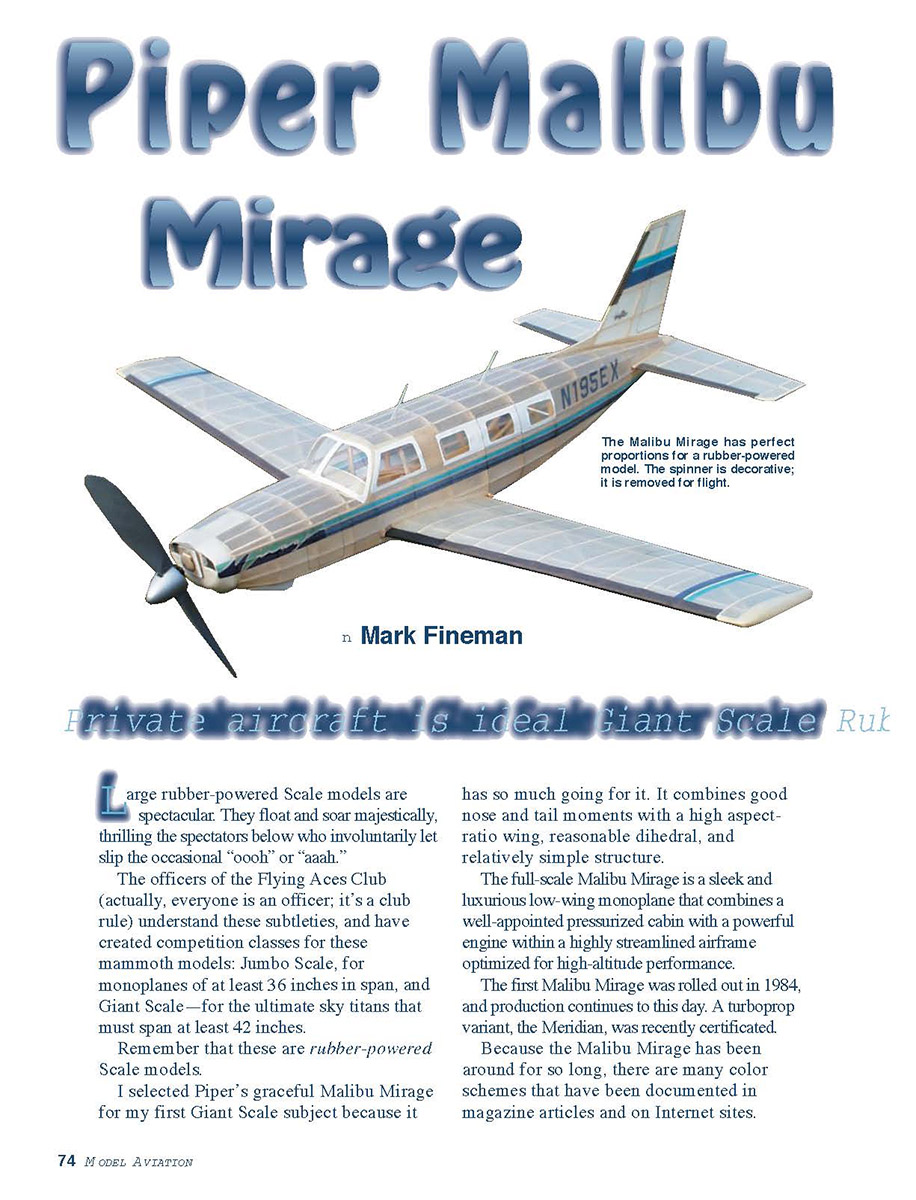
Piper Malibu Mirage
by Mark Fineman
Large rubber-powered scale models are spectacular. They float and soar majestically, thrilling the spectators below who involuntarily let slip the occasional "oooh" or "aaah."
The officers of the Flying Aces Club (actually, everyone is an officer; it's a club rule) understand these subtleties, and have created competition classes for these mammoth models: Jumbo Scale, for monoplanes of at least 36 inches in span, and Giant Scale—for the ultimate sky titans that must span at least 42 inches.
Remember that these are rubber-powered scale models.
I selected Piper's graceful Malibu Mirage for my first Giant Scale subject because it has so much going for it. It combines good nose and tail moments with a high aspect-ratio wing, reasonable dihedral, and relatively simple structure.
The full-scale Malibu Mirage is a sleek and luxurious low-wing monoplane that combines a well-appointed pressurized cabin with a powerful engine within a highly streamlined airframe optimized for high-altitude performance.
The first Malibu Mirage was rolled out in 1984, and production continues to this day. A turboprop variant, the Meridian, was recently certificated.
Because the Malibu Mirage has been around for so long, there are many color schemes that have been documented in magazine articles and on Internet sites.
CONSTRUCTION
Wing assembly
At the heart of the wing is a truss-type spar assembly that was popularized by Dave Rees. Many of us call this style a "Rees wing."
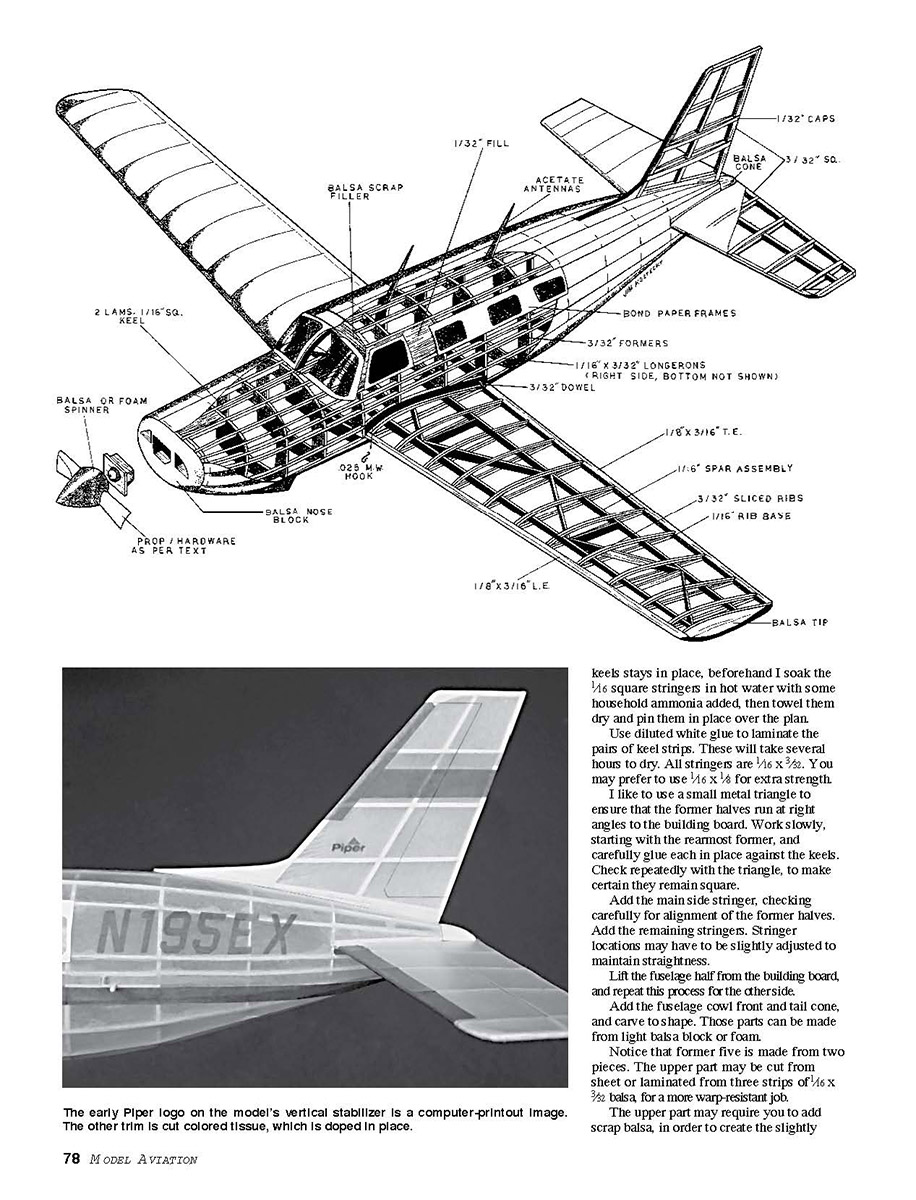
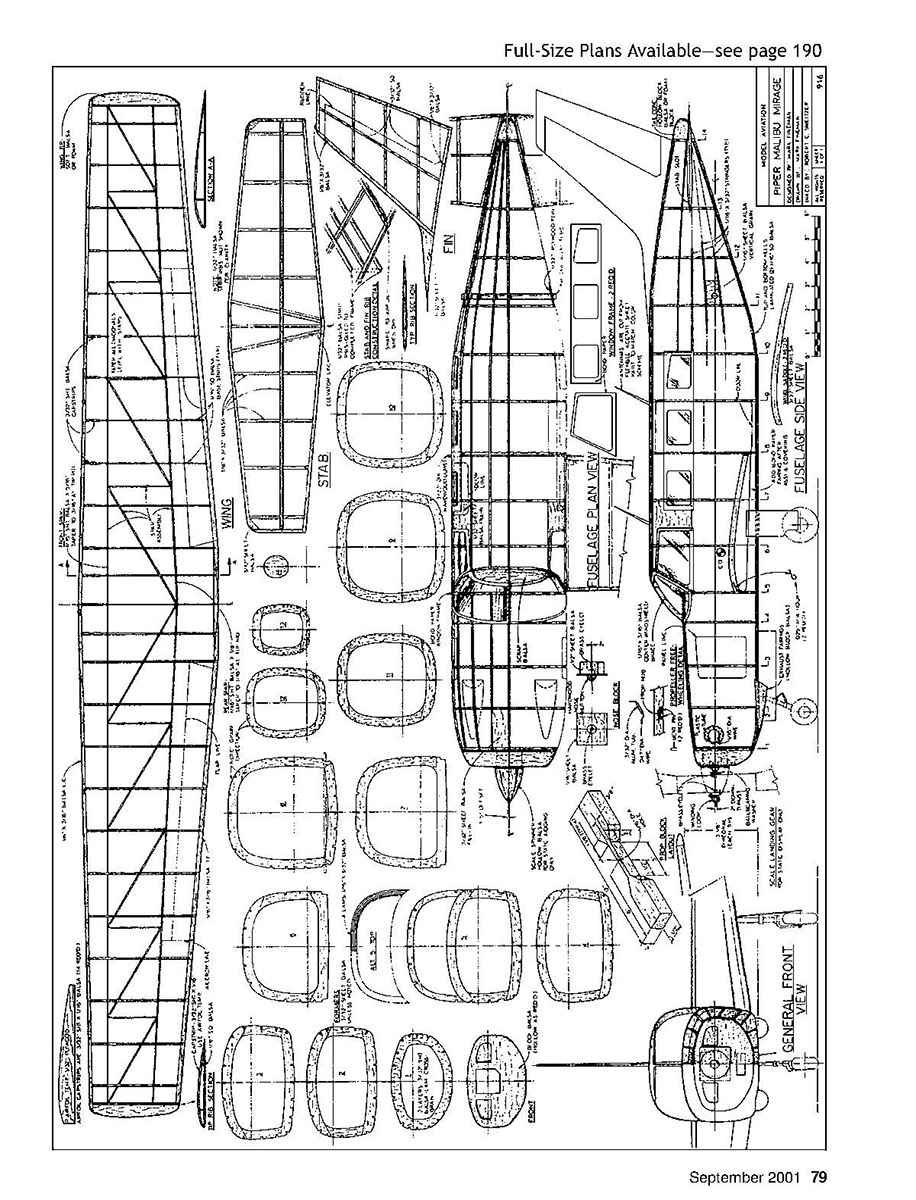
Each wing panel is built in two stages. The truss assembly is built directly over the plan and allowed to dry. This assembly consists of two tapered spars connected by appropriately tapered diagonal crossmembers. Once dry, the truss assembly is removed from the plan and set aside.
Ribs are the sliced type. An individual rib is made from a lower 1/16" square strip topped by a curved airfoil component. The tops are made in production-line fashion with a thin plywood template cut to the rib shape.
- Select a length of 1/16" sheet that is slightly longer than the rib template. Make sure the grain runs in the direction of the chord, left to right.
- Use a sharp knife or razor to successively slice the ribs, moving the template down in 3/32" increments as you go.
Once the 1/16" square rib bottoms are pinned over the plan, glue the truss assembly in place, followed by the leading and trailing edges, and topped with sliced rib uppers, in that order.
As the wing tapers, cut off the rib tops from the rear to make them fit. Add the solid-balsa or foam wingtips, and carve them to shape.
Leave out the center top ribs until both panels are completed. Block up the halves to a rounded shape that will blend in with the curve of the windshield.
The side window frames are constructed from bond paper, 1/32" sheet balsa, or, as I have done, a combination of the two. Fill in the top center area with balsa near the propeller, and build up with scrap to make the bulged fairing behind the propeller.
Covering, finishing, and final assembly
The entire model is covered with light Japanese tissue — white in the case of my model.
The markings on my Malibu are early Piper style, and were created from a combination of cut colored tissue and computer graphics, such as the Piper logo on the tail.
When the model has been fully doped, install the windshield acetate and fair with bond paper. Glue the vertical and horizontal tail surfaces to the fuselage. Leave room for the stabilizer to be shimmed for flight adjustments. The slat can be faired in later.
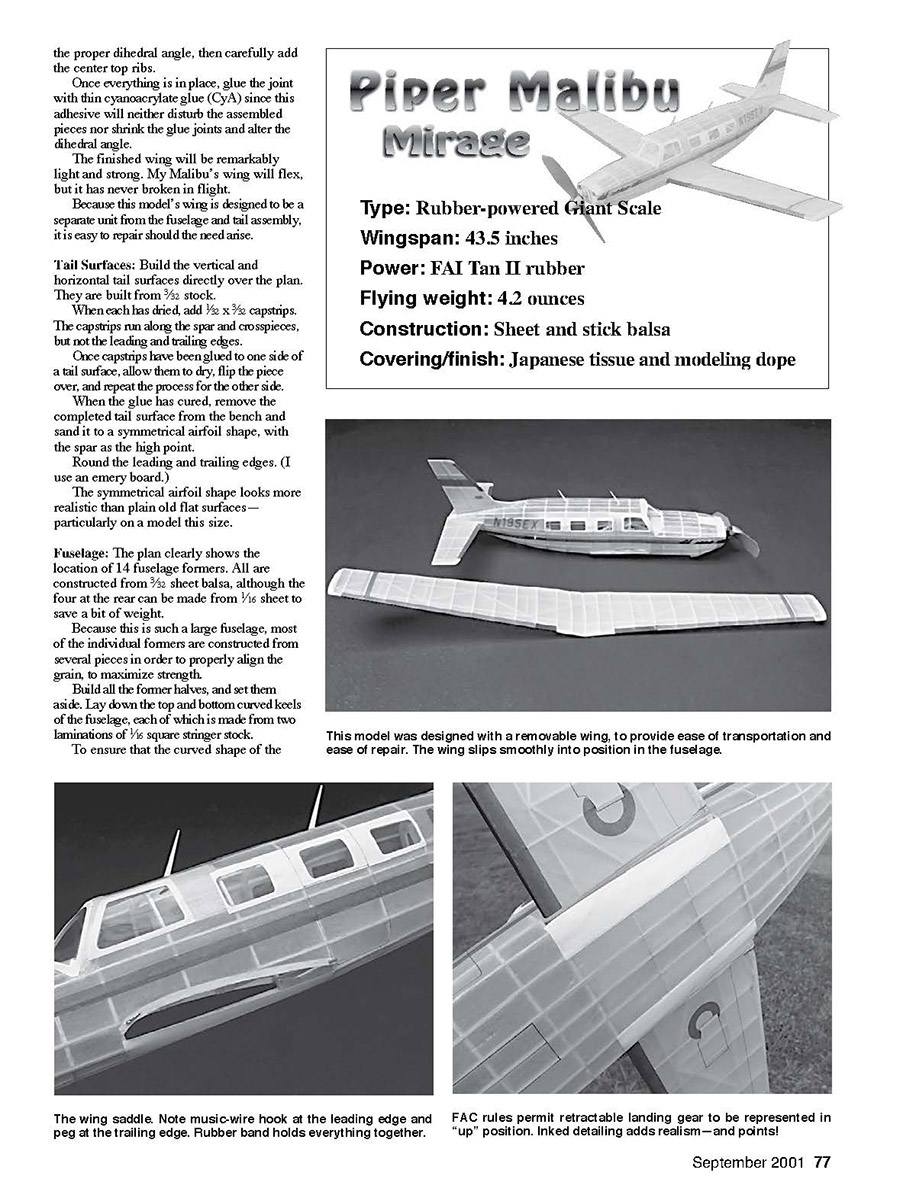
This model's wing is intended to be removable, to facilitate transportation, access, and repair. The wing slips into slots located near its center with the wing saddle on the fuselage. Dowels and/or fine machine screws placed at the front and rear of the saddle allow rubber bands to hold the wing against the saddle.
Because these hold-downs are on the bottom of the wing adjacent to the fuselage, they are almost invisible. The antennas are painted acetate sheet that will bend, but will not break off.
The rear peg is subject to a great deal of stress and must span quite a distance across the fuselage, so I made it from a length of 3/32"-diameter fiberglass rod I obtained from a kite-supply catalog.
I carved the propeller from a balsa block measuring 1 x 1/2 x 12 inches. The freewheeler is a simple length of 1/32" brass tube with a ramp filed into it, and it's glued into the prop-shaft hole with thin CYA.
Flying
My giant Malibu Mirage required no nose weight and came in at an overall weight of 42 ounces including rubber. It is powered by three 27-inch-long loops of 1/8" Federation Aeronautic Internationale Tan II rubber.
The turned balsa spinner is entirely decorative; its pressure-fit to the prop is fine for scale judging, but is removed for winding and flight. I highly recommend that you use a winding tube to avoid the inevitable consequences of a burst motor.
This model has a very long, thin wing that may inadvertently introduce unwanted wash-in or wash-out that makes it turn too tightly in the glide, so carefully check the flying surfaces for warps before flying.
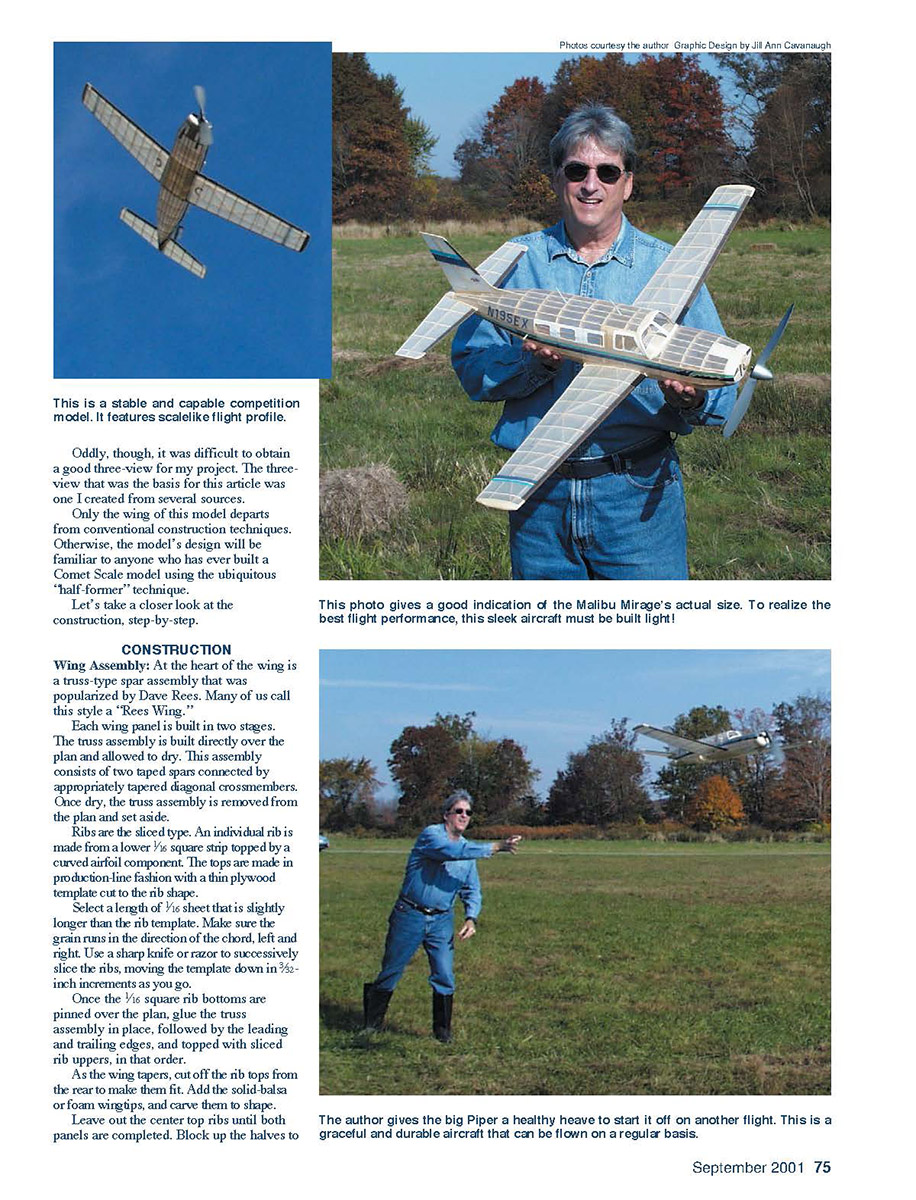
The model presented no unusual flight problems during testing. It will climb out majestically under power, followed by a floating power-and-glide portion.
My Malibu Mirage has only been flown a few times in competition, but it managed to secure third place at the 2000 Flying Aces Club Nationals with flights in excess of 2 minutes.
—Kevin D. Rice, San Jose, Calif.
Transcribed from original scans by AI. Minor OCR errors may remain.

