
Plane Talk: Carl Goldberg Models Tiger 400 ARF
David Adams
When I was offered the Carl Goldberg Products Tiger 400 ARF to review, I wasn't too excited about the project. It is basically an intermediate-type flier and is small, unlike the modern, propeller-hanging, ultra-performance flying machines that are so in vogue.
However, I have changed my mind about the Tiger 400.
The name Carl Goldberg has been associated with modeling for many years. In my model hangar I still have a Carl Goldberg Falcon 56 and a Junior Falcon, both of which were built from the original kits that were purchased when they were first offered to the modeling public. I have also built a Skylark and a twin Junior Skylark.
As do all Carl Goldberg designs they performed beautifully, remembering that they were designed to be nice, stately, flying, gently aerobatic airplanes that could be recommended as advanced trainers for entry into multiengine flying. I also recall these models to have remarkable precision and appointing them as good models for learning advanced aerobatics when powered properly.
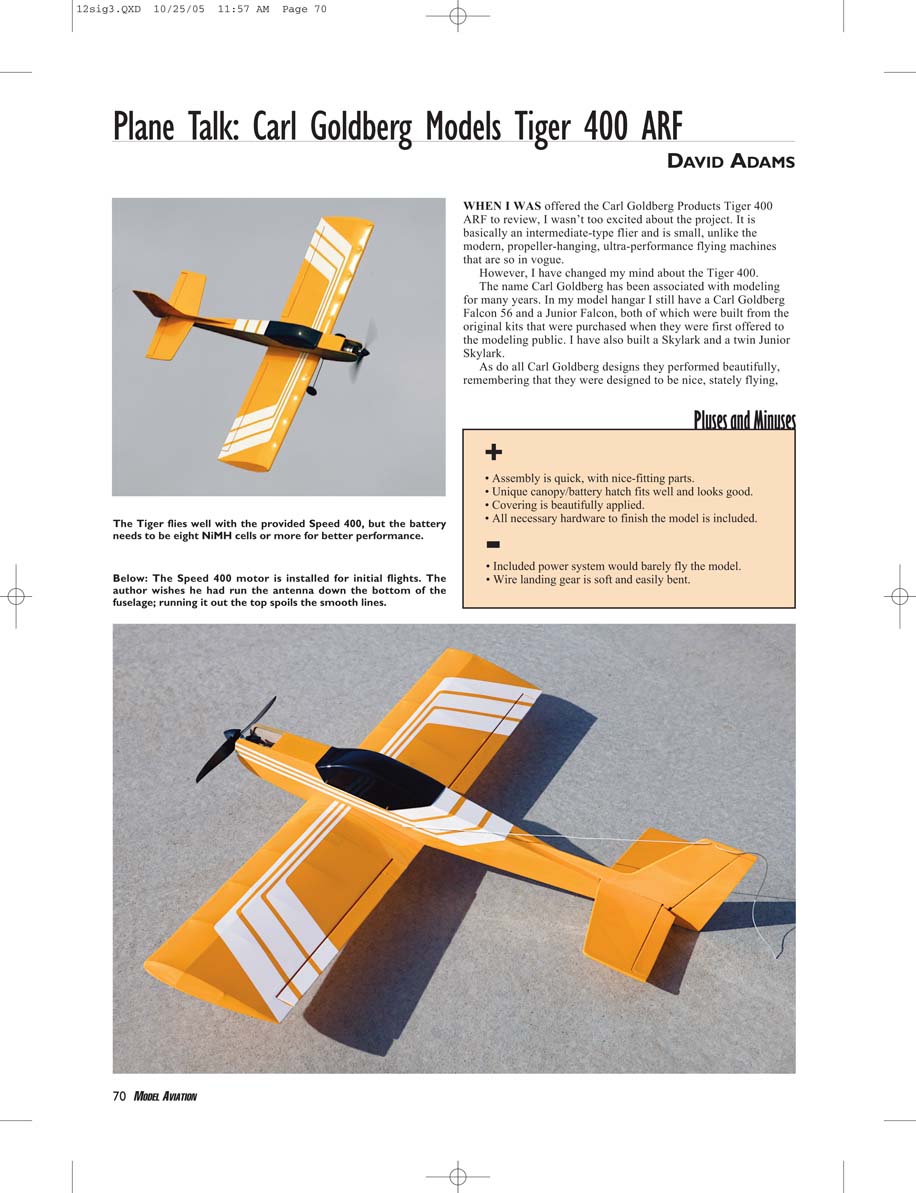
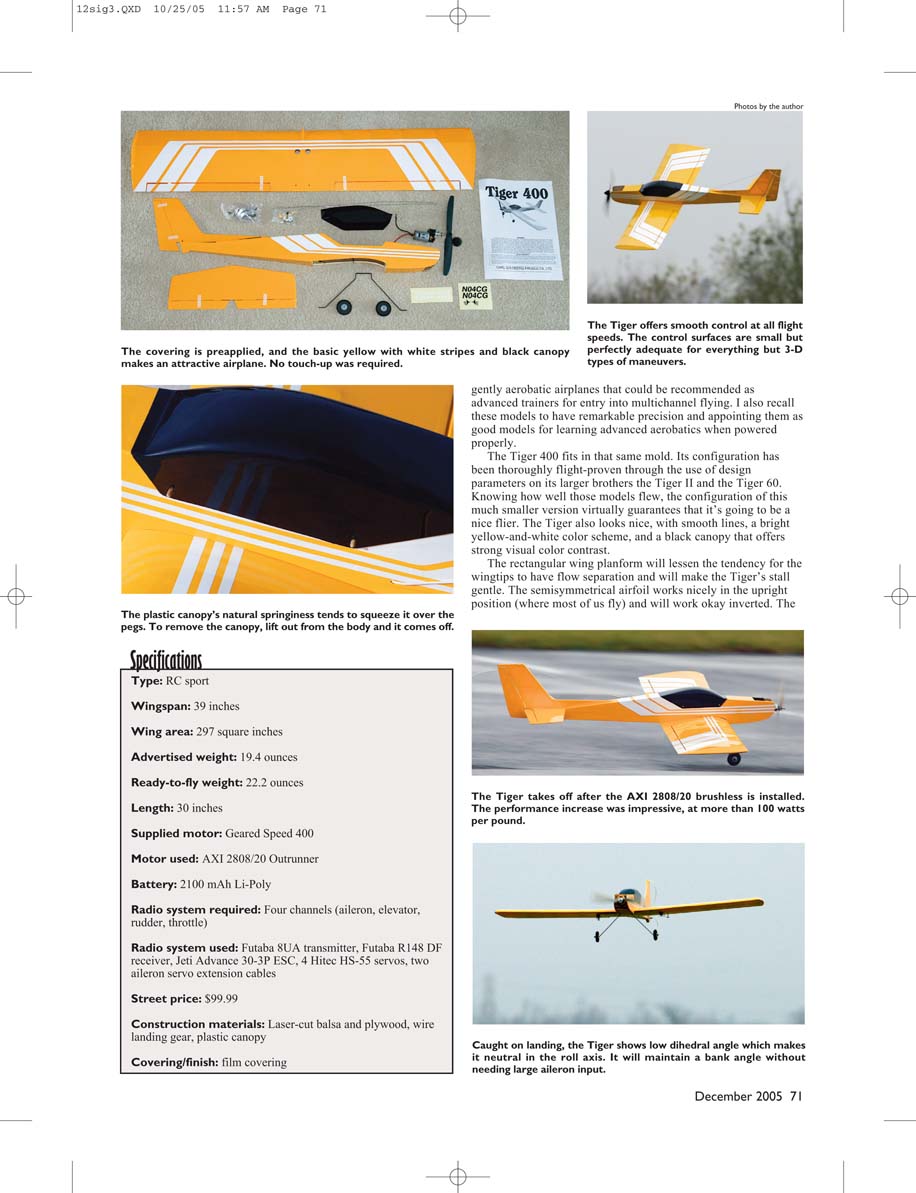
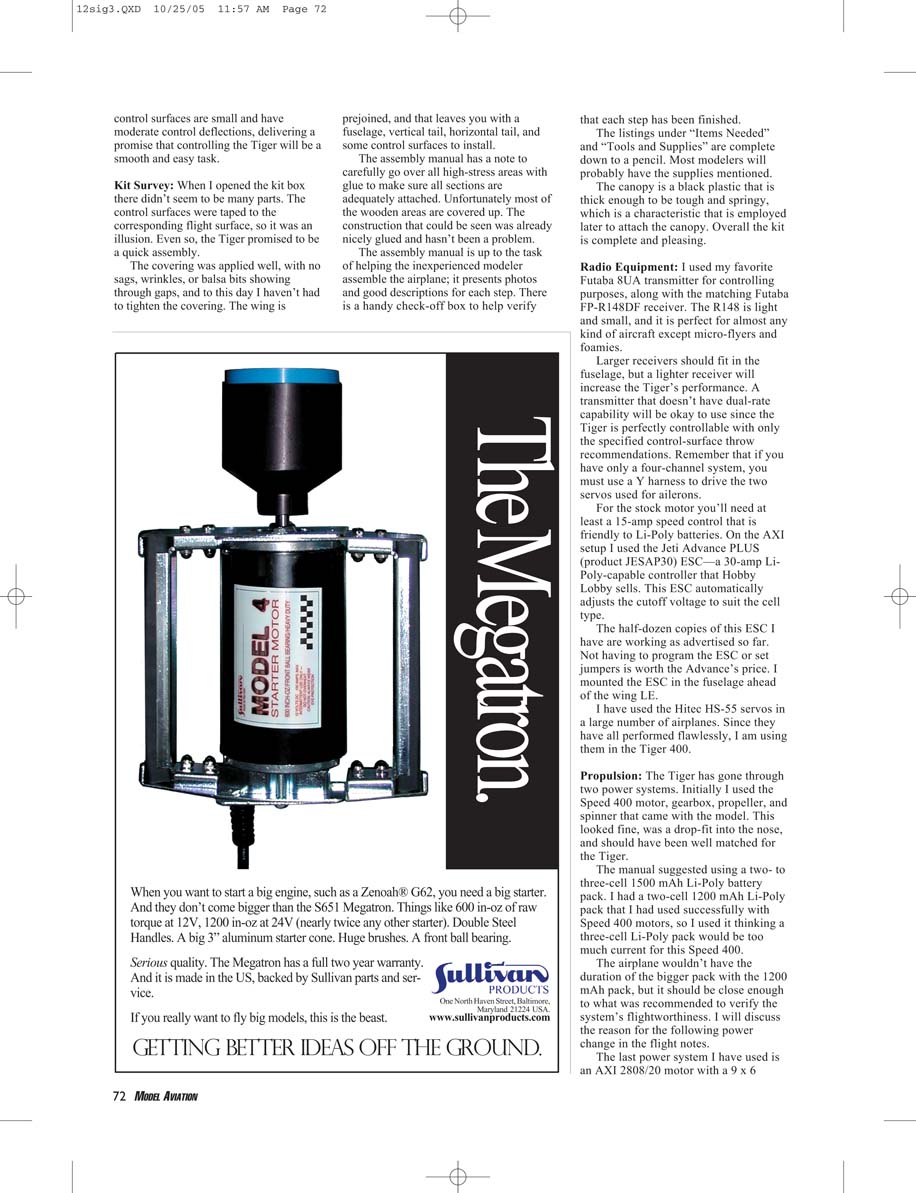
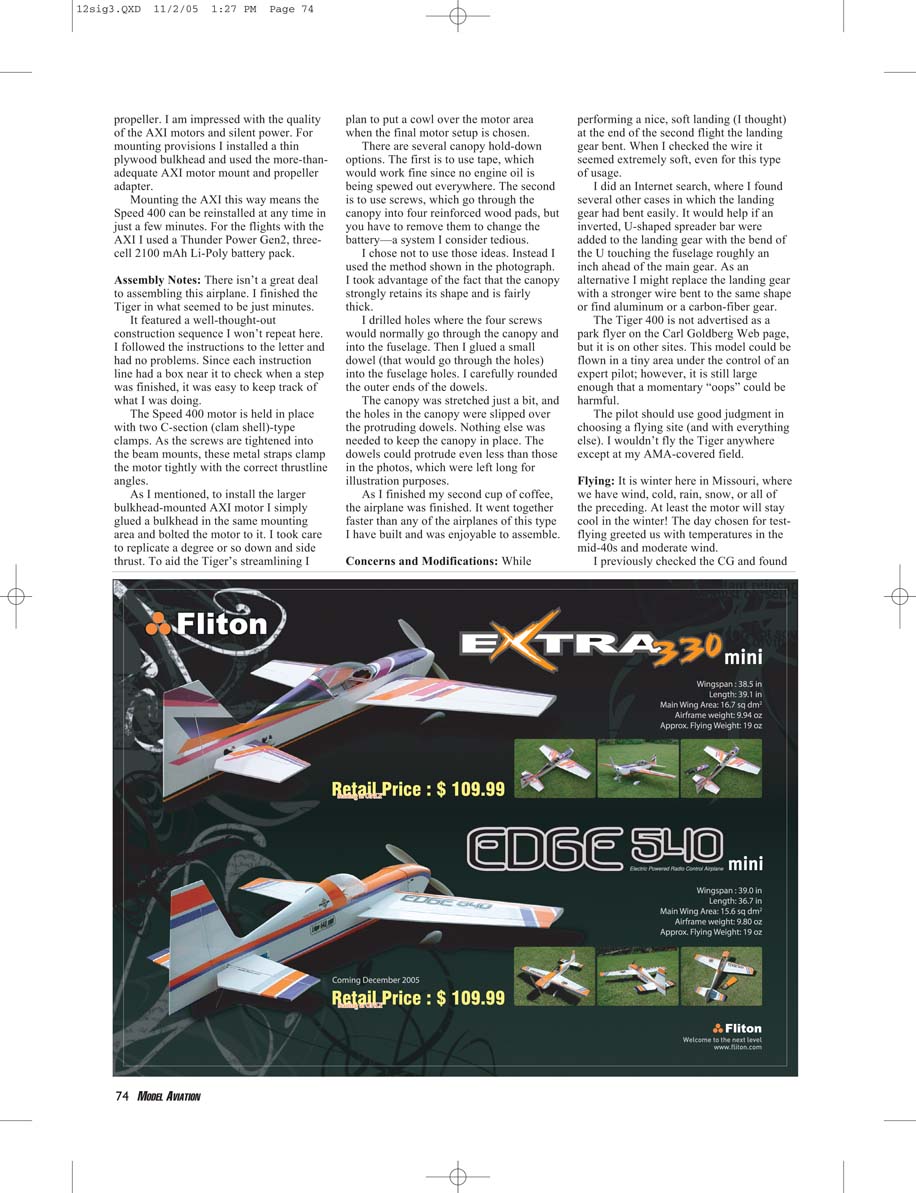
The Tiger 400 fits in that same mold. Its configuration has been thoroughly flight-proven through the use of design parameters on its larger brothers the Tiger II and the Tiger 60. Knowing how well those models flew, the configuration of this much smaller version virtually guarantees that it's going to be a nice flier. The Tiger also looks nice, with smooth lines, a bright yellow-and-white color scheme, and a black canopy that offers strong visual color contrast.
The rectangular wing planform will lessen the tendency for wingtips to have flow separation and will make the Tiger's stall gentle. The semisymmetrical airfoil works nicely in the upright position (where most of us fly) and will work okay inverted. The control surfaces are small and have moderate control deflections, delivering a promise that controlling the Tiger will be a smooth and easy task.
Pluses and Minuses
- Assembly is quick, with nice-fitting parts.
- Unique canopy/battery hatch fits well and looks good.
- Covering is beautifully applied.
- All necessary hardware to finish the model is included.
- Included power system would barely fly the model.
- Wire landing gear is soft and easily bent.
- Type: RC sport
- Wingspan: 39 inches
- Wing area: 297 square inches
- Advertised weight: 19.4 ounces
- Ready-to-fly weight: 22.2 ounces
- Length: 30 inches
- Supplied motor: Geared Speed 400
- Motor used: AXI 2808/20 Outrunner
- Battery: 2100 mAh Li-Poly
- Radio system required: Four channels (aileron, elevator, rudder, throttle)
- Radio system used: Futaba 9UA transmitter, Futaba R148 DF receiver, JetI Advance 30-3P ESC, 4 Hitec HS-55 servos, two aileron servo extension cables
- Street price: $99.99
- Construction materials: Laser-cut balsa and plywood, wire landing gear, plastic canopy
- Covering/finish: film covering
Kit Survey: When I opened the kit box there didn't seem to be many parts. The control surfaces were taped to the corresponding flight surface, so it was an illusion. Even so, the Tiger promised to be a quick assembly.
The covering was applied well, with no sags, wrinkles, or balsa slits showing through gaps, and to this day I haven't had to tighten the covering. The wing is prejoined, and that leaves you with a fuselage, vertical tail, horizontal tail, and some control surfaces to install.
The assembly manual has a note to carefully go over all high-stress areas with glue to make sure all sections are adequately attached. Unfortunately most of the wooden areas are covered up. The construction that could be seen was already nicely glued and hasn't been a problem.
The assembly manual is up to the task of helping the inexperienced modeler assemble the airplane; it presents photos and good descriptions for each step. There is a handy check-off box to help verify that each step has been finished.
The listings under "Items Needed" and "Tools and Supplies" are complete down to a pencil. Most modelers will probably have the supplies mentioned.
The canopy is a black plastic that is thick enough to be tough and springy, which is a characteristic that is employed later to attach the canopy. Overall the kit is complete and pleasing.
Radio Equipment: I used my favorite Futaba 8UA transmitter for controlling purposes, along with the matching Futaba FP-R148DF receiver. The R148 is light and small, and it is perfect for almost any kind of aircraft except micro-flyers and foamies.
Larger receivers should fit in the fuselage, but a lighter receiver will increase the Tiger's performance. A transmitter that doesn't have dual-rate capability will be okay to use since the Tiger is perfectly controllable with only the specified control-surface throw recommendations. Remember that if you have only a four-channel system, you must use a Y harness to drive the two servos used for ailerons.
For the stock motor you'll need at least a 15-amp speed control that is friendly to Li-Poly batteries. On the AXI setup I used the Jeti Advance PLUS (product JESAP30) ESC—a 30-amp Li-Poly-capable controller that Hobby Lobby sells. This ESC automatically adjusts the cutoff voltage to suit the cell type.
The half-dozen copies of this ESC I have are working as advertised so far. Not having to program the ESC or set jumpers is worth the Advance's price. I mounted the ESC in the fuselage ahead of the wing LE.
I have used the Hitec HS-55 servos in a large number of airplanes. Since they have all performed flawlessly, I am using them in the Tiger 400.
Propulsion: The Tiger has gone through two power systems. Initially I used the Speed 400 motor, gearbox, propeller, and spinner that came with the model. This looked fine, was a drop-fit into the nose, and should have been well matched for the Tiger.
The manual suggested using a two- to three-cell 1500 mAh Li-Poly battery pack. I had a two-cell 1200 mAh Li-Poly pack that I had used successfully with Speed 400 motors, so I used it thinking a three-cell Li-Poly pack would be too much current for this Speed 400.
The airplane wouldn't have had the duration of the bigger pack with the 1200 mAh pack, but it should be close enough to what was recommended to verify the system's flightworthiness. I will discuss the reason for the following power change in the flight notes.
The last power system I have used is an AXI 2808/20 motor with a 9 x 6 propeller. I am impressed with the quality of the AXI motors and silent power. For mounting provisions I installed a thin plywood bulkhead and used the more-than-adequate AXI motor mount and propeller adapter.
Mounting the AXI this way means the Speed 400 can be reinstalled at any time in just a few minutes. For the flights with the AXI I used a Thunder Power Gen2, three-cell 2100 mAh Li-Poly battery pack.
Assembly Notes: There isn't a great deal to assembling this airplane. I finished the Tiger in what seemed to be just minutes.
It featured a well-thought-out construction sequence I won't repeat here. I followed the instructions to the letter and had no problems. Since each instruction line had a box near it to check when a step was finished, it was easy to keep track of what I was doing.
The Speed 400 motor is held in place with two C-section (clam shell)-type clamps. As the screws are tightened into the beam mounts, these metal straps clamp the motor tightly with the correct thrustline angles.
As I mentioned, to install the larger bulkhead-mounted AXI motor I simply glued a bulkhead in the same mounting area and bolted the motor to it. I took care to replicate a degree or so down and side thrust. To aid the Tiger's streamlining I plan to put a cowl over the motor area when the final motor setup is chosen.
There are several canopy hold-down options. The first is to use tape, which would work fine since no engine oil is being spewed out everywhere. The second is to use screws, which go through the canopy into four reinforced wood pads, but you have to remove them to change the battery—a system I consider tedious.
I chose not to use those ideas. Instead I used the method shown in the photograph. I took advantage of the fact that the canopy strongly retains its shape and is fairly thick.
I drilled holes where the four screws would normally go through the canopy and into the fuselage. Then I glued a small dowel that would go through the holes into the fuselage holes. I carefully rounded the outer ends of the dowels.
The canopy was stretched just a bit, and the holes in the canopy were slipped over the protruding dowels. Nothing else was needed to keep the canopy in place. The dowels could protrude even less than those in the photos, which were left long for illustration purposes.
As I finished my second cup of coffee, the airplane was finished. It went together faster than any of the airplanes of this type I have built and was enjoyable to assemble.
Concerns and Modifications: While performing a nice, soft landing (I thought) at the end of the second flight the landing gear bent. When I checked the wire it seemed extremely soft, even for this type of usage.
I did an Internet search, where I found several other cases in which the landing gear had bent easily. It would help if an inverted, U-shaped spreader bar were added to the landing gear with the bend of the U touching the fuselage roughly an inch ahead of the main gear. As an alternative I might replace the landing gear with a stronger wire bent to the same shape or find aluminum or a carbon-fiber part.
The Tiger 400 is not advertised as a park flyer on the Carl Goldberg Web page, but it is on other sites. This model could be flown in a tiny area under the control of an expert pilot; however, it is still large enough that a momentary "oops" could be harmful.
The pilot should use good judgment in choosing a flying site (and with everything else). I wouldn't fly the Tiger anywhere except at my AMA-covered field.
Flying: It is winter here in Missouri, where we have wind, cold, rain, snow, or all of the preceding. At least the motor will stay cool in the winter! The day chosen for test-flying greeted us with temperatures in the mid-40s and moderate wind.
I previously checked the CG and found the airplane to be balancing exactly on the spar with the battery positioned all the way forward in the battery area. This balance point has proven to be proper based on the good-flying qualities we experienced.
I used the 1200 mAh two-cell Li-Poly pack. A two-cell 1500 mAh Li-Poly was recommended as the lowest useful power, but the 1200 is close.
I applied throttle slowly and the Tiger slowly accelerated. At the end of the runway I gave the model, which was running on just the two main wheels by this time, enough up-elevator to lift it into the air.
Although the Tiger showed great low-speed handling qualities, it didn't get much higher than 4 feet. After several circuits around the field, scaring the local furry creatures, I brought the model down for a smooth landing.
Pondering it and having an eight-cell 600 mAh NiMH pack handy, I decided to try the higher-voltage battery. It made the flight much better, but the climb rate was still fairly low. I flew back and forth for flight photos and the Tiger was stable and controllable, but I didn't feel that it could loop or roll easily.
That evening I removed the Speed 400 motor, which was easy; all I had to do was remove four screws. The AXI 2808/20 Outrunner brushless electric motor went right in, and I prepped the installation of another one in the morning. This brushless upgrade gave an excess of 100-watts-per-pound power loading, which should be more than adequate for the Tiger.
A number of optional motor upgrades are suitable for this model; some could easily be used with the same motor mount and gearbox assembly. The AXI is my favorite and was chosen mainly for that reason.
I picked up a Thunder Power three-cell 2100 mAh Li-Poly battery pack at the local hobby shop. It fits easily under the canopy, and at 5 ounces it promises to deliver long flights without being overtaxed.
The next day was frigid with more wind, but I really wanted to see how the Tiger would roar. Since I was impressed by a similar-size model powered with the same-size AXI the day before, I had high hopes for the test model's performance since it was a couple ounces lighter.
The balance point was adjusted to be right on the wing spar again, and the control movements from the day before were maintained since the airplane was in trim and responding perfectly.
As I applied the power, the Tiger shot down the runway like a Tiger should. I gently gave a little back stick, and the airplane literally leaped into the air and was off on a flight that was all I had hoped for and more.
It was simply remarkable how nicely flying the Tiger was, and there was remarkably little sound with the direct drive. The airplane was speedy and utterly groovey. It responded to control inputs in a silky smooth manner and performed any-size loop I cared to make.
The roll rate was just right, and at the high speeds that were achieved it took only the slightest breath of down-elevator to stay on line. Pointed up the Tiger would keep going until I decided to quit, and coming down with the power reduced there was a satisfying swish sound that some high-speed gliders make.
I didn't find a single thing wrong with the airplane. It was fast, smooth, and true to its original form, a great deal of fun.
The Tiger is not a 3-D machine by any means; although the power is there, the control effectiveness needed for slow-flight aerobatics is not. With this power setup this model retains the ability to be an aileron trainer when flown at reduced power.
With the speed the AXI allowed the Tiger to achieve, it is definitely not a park flyer; you need more room. It simply goes from Point A to Point B with a smoothness that was enjoyable to experience. Tiger pylon races would be a great time.
The Carl Goldberg Products Tiger 400 is good-looking and well constructed. I think Mr. Goldberg would be smiling if he could see my version of the Tiger flying.
Yes, it will fly with the motor provided, which makes it basically an ordinary but nicely made, good-flying aileron trainer. Put the AXI on the front end, and suddenly you have a tiger in the tank that is even more impressive, with sleek lines and considerable speed, minus any bad flying traits.
I highly recommend the Tiger 400. It has found a permanent home in my model-airplane hangar. MA
David Adams [email protected]
Manufacturer:
Carl Goldberg Products Box 88 Oakwood GA 30566 (687) 450-0085 www.carlgoldbergproducts.com
Products used in review:
Futaba radio system: Great Planes Model Distributors Box 9021 Champaign IL 61826 (217) 398-8970 www.futaba-rc.com/
Hitec HS-55 servos: Hitec RCD USA, Inc. 12115 Paine St. Poway CA 92064 (858) 748-6948 www.hitecrcd.com
Jeti Advance 30-3p ESC, Thunder Power batteries: Hobby Lobby 5614 Franklin Pike Cir. Brentwood TN 37027 (615) 373-1444 www.hobby-lobby.com
Specifications
Transcribed from original scans by AI. Minor OCR errors may remain.

