
Plane Talk: E-flite BAe Hawk 15 DF ARF
Greg Gimlick
DUCTED FANS HAVE always been interesting to me, but I’d resisted because I decided it would have to be in a turbine-powered jet or an electric that had the power to get out of its own way. For a long time, the second criterion didn’t exist on the mass market, but E-flite has corrected that in a big way.
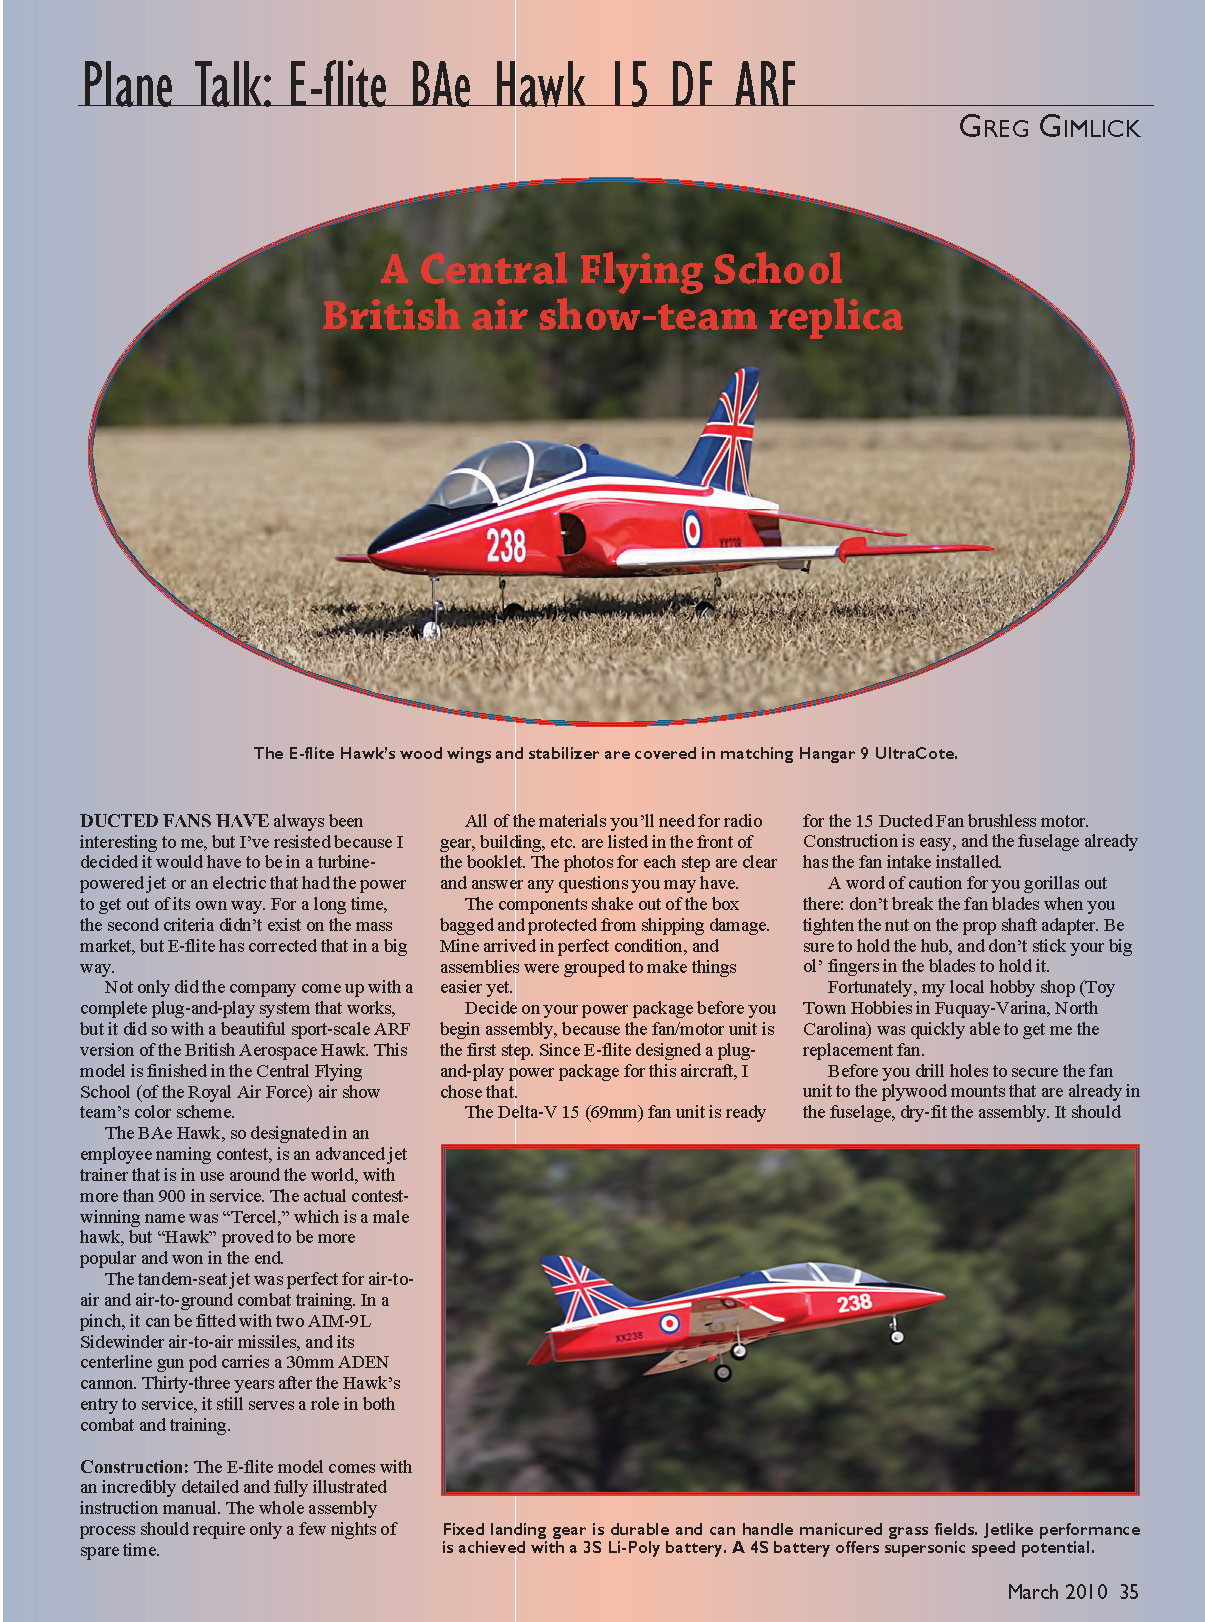
Not only did the company come up with a complete plug-and-play system that works, but it did so with a beautiful sport-scale ARF version of the British Aerospace Hawk. This model is finished in the Central Flying School (of the Royal Air Force) air show team’s color scheme.
The BAe Hawk, so designated in an employee naming contest, is an advanced jet trainer that is in use around the world, with more than 900 in service. The actual contest-winning name was “Tercel,” which is a male hawk, but “Hawk” proved to be more popular and won in the end.
The tandem-seat jet was perfect for air-to-air and air-to-ground combat training. In a pinch, it can be fitted with two AIM-9L Sidewinder air-to-air missiles, and its centerline gun pod carries a 30mm ADEN cannon. Thirty-three years after the Hawk’s entry to service, it still serves a role in both combat and training.
Construction
The E-flite model comes with an incredibly detailed and fully illustrated instruction manual. The whole assembly process should require only a few nights of spare time.
All of the materials you’ll need for radio gear, building, etc., are listed in the front of the booklet. The photos for each step are clear and answer most questions you may have.
The components shake out of the box bagged and protected from shipping damage. Mine arrived in perfect condition, and assemblies were grouped to make things easier.
Decide on your power package before you begin assembly, because the fan/motor unit is the first step. Since E-flite designed a plug-and-play power package for this aircraft, I chose that.
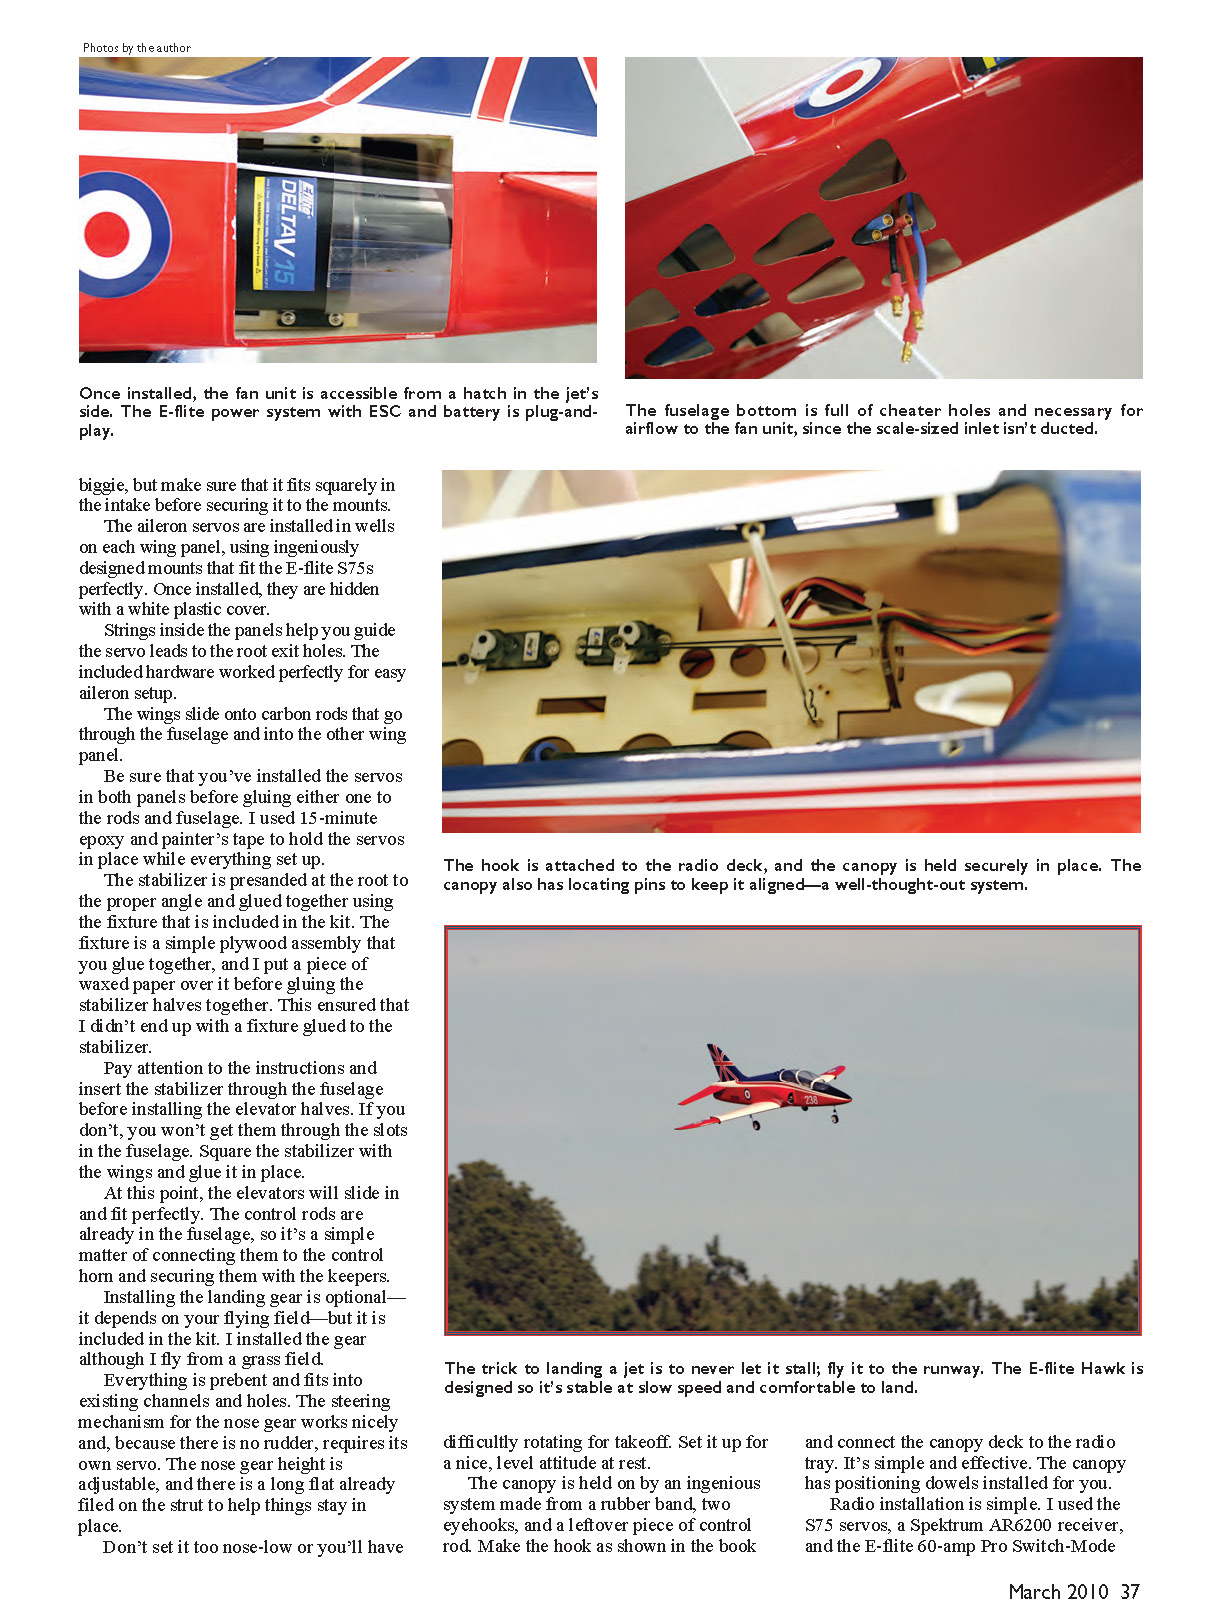
The included Delta-V 15 (69 mm) fan unit accepts the 15-size ducted-fan brushless motor. Construction is easy, and the fuselage already has the fan intake installed.
A word of caution for you gorillas out there: don’t break the fan blades when you tighten the nut on the prop-shaft adapter. Be sure to hold the hub, and don’t stick your fingers in the blades to hold it. Fortunately, my local hobby shop (Toy Town Hobbies in Fuquay-Varina, North Carolina) was quickly able to get me a replacement fan.
Before you drill holes to secure the fan unit to the plywood mounts that are already in the fuselage, dry-fit the assembly. It should slide forward squarely into the intake. In my case, it didn’t.
To get it straight into the intake, I had to put the fan unit’s upper flange behind the plywood mount and the lower flange on top of the mount. This meant slightly rotating the fan unit, which was no problem, but it also meant that merely drilling and screwing to the mount wasn’t going to work for me.
I screwed the bottom flange in place, then drilled a pilot hole on the top mount through to the flange. I pulled the fan out and used a tap to thread the holes on the flange, drilled the hole on the mount slightly larger, and then reinstalled the unit. By doing this I could use a machine screw and thread lock to secure the upper flange to the back of the mount.
The aileron servos are installed in wells on each wing panel using ingeniously designed mounts that fit the E-flite S75 servos perfectly. Once installed, they are hidden with a white plastic cover.
Strings inside the panels help you guide the servo leads to the root exit holes. The included hardware worked perfectly for easy aileron setup.
The wings slide onto carbon rods that go through the fuselage and into the other wing panel. Be sure that you’ve installed the servos in both panels before gluing either one to the rods and fuselage. I used 15-minute epoxy and painter’s tape to hold the servos in place while everything set up.
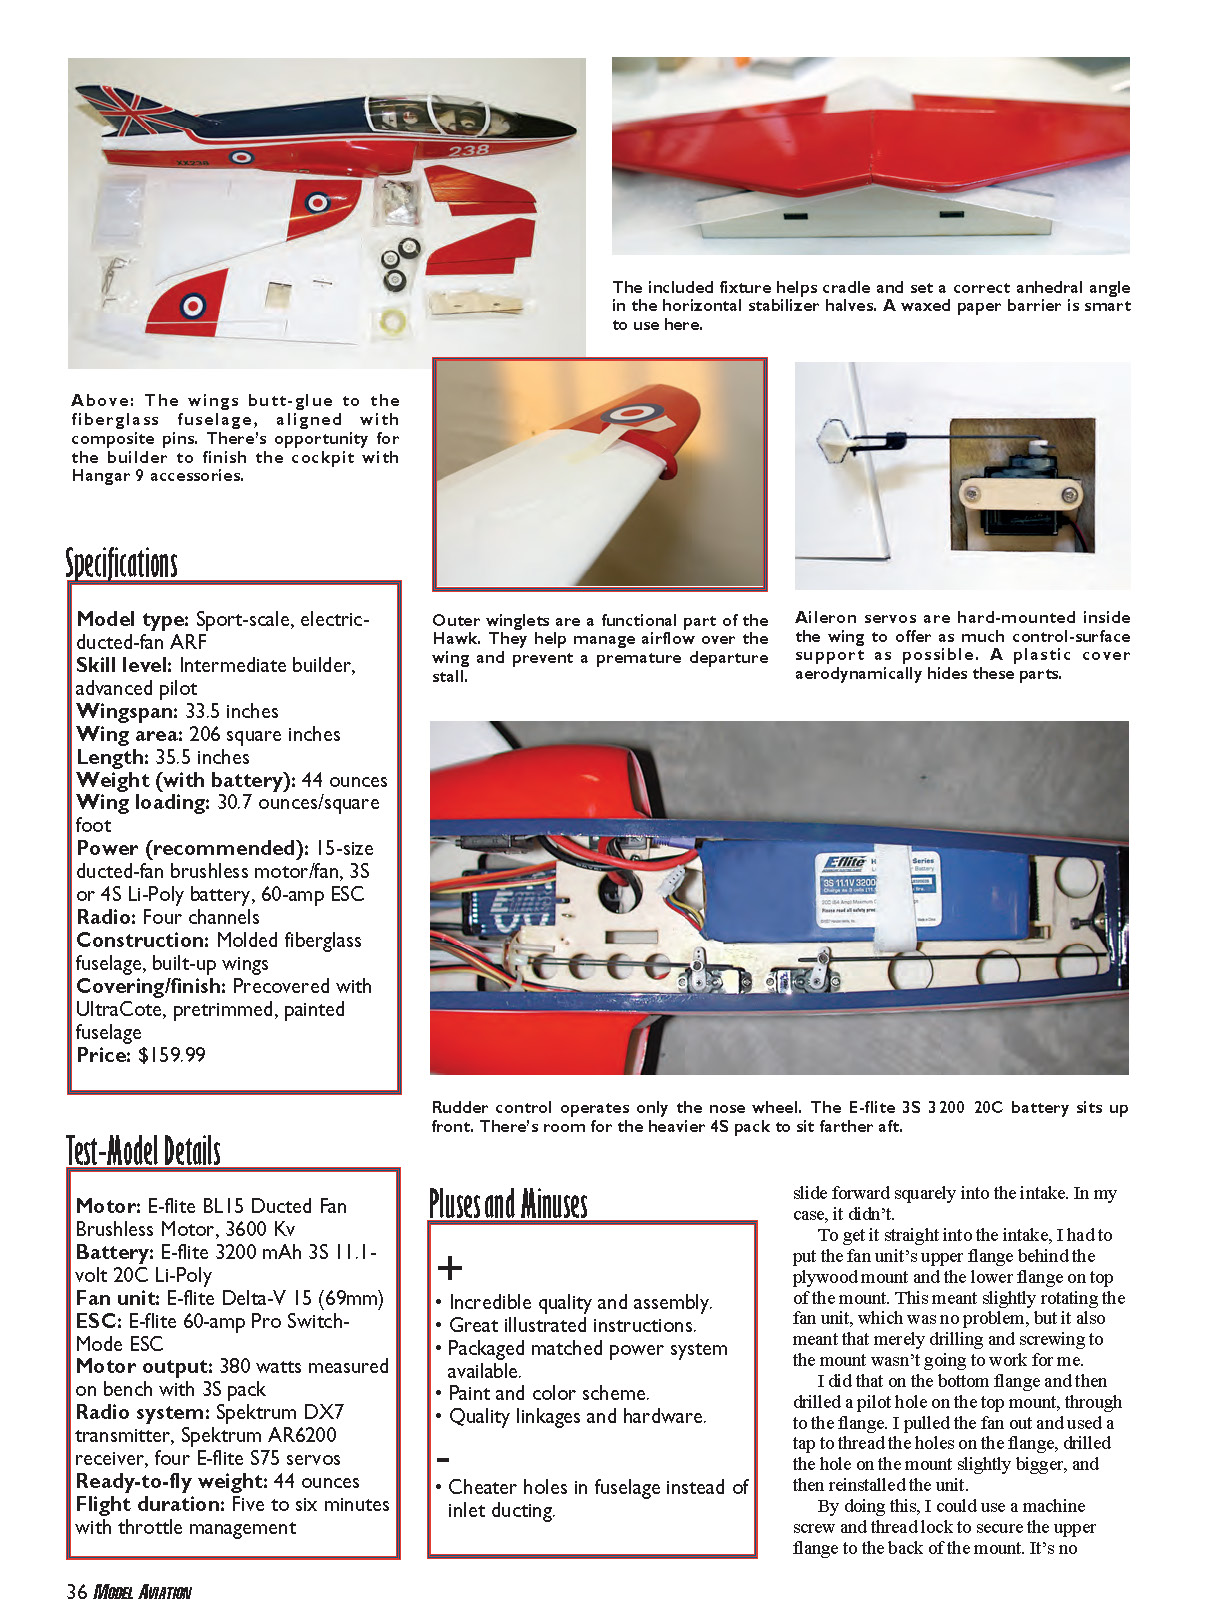
The stabilizer is pre-sanded at the root to the proper angle and glued together using the fixture that is included in the kit. The fixture is a simple plywood assembly that you glue together; I put a piece of waxed paper over it before gluing the stabilizer halves together. This ensured that I didn’t end up with the fixture glued to the stabilizer.
Pay attention to the instructions and insert the stabilizer through the fuselage before installing the elevator halves. If you don’t, you won’t get them through the slots in the fuselage. Square the stabilizer with the wings and glue it in place. At this point, the elevators will slide in and fit perfectly. The control rods are already in the fuselage, so it’s a simple matter of connecting them to the control horn and securing them with the keepers.
Installing the landing gear is optional—it depends on your field—but it is included in the kit. I installed the gear although I fly from a grass field. Everything is predrilled and fits into existing channels and holes. The steering mechanism for the nose gear works nicely and, because there is no rudder, requires its own servo. The nose gear height is adjustable, and there is a long flat already filed on the strut to help things stay in place.
Don’t set it too nose-low or you’ll have difficulty rotating for takeoff. Set it up for a nice, level attitude at rest.
The canopy is held on by an ingenious system made from a rubber band, two eyehooks, and a leftover piece of control rod. Make the hook as shown in the manual and connect the canopy deck to the radio tray. It’s simple and effective. The canopy has positioning dowels installed for you.
Radio and Power Installation
Radio installation is simple. I used E-flite S75 servos, a Spektrum AR6200 receiver, and the E-flite 60-amp Pro Switch-Mode BEC brushless ESC. With the cheater holes in the bottom of the fuselage, you can drop the wires from the motor and controller through and connect them.
If you find that your fan is turning the wrong direction, pull the motor leads back through the holes and swap any two wires. The controller is fastened to the bottom of the fuselage with Velcro and a zip tie for peace of mind.
The servos fit in precut holes that position them to stay out of everything else’s way. The receiver is mounted to the top of the turtledeck, behind the cockpit. The battery for the motor has plenty of room to be mounted to the equipment tray.
Pluses and Minuses
- Incredible quality and assembly
- Great illustrated instructions
- Packaged matched power system available
- Paint and color scheme
- Quality linkages and hardware
- Cheater holes in the fuselage instead of more elaborate inlet ducting (adds drag)
Specifications
- Model type: Sport-scale, electric-ducted-fan ARF
- Skill level: Intermediate builder, advanced pilot
- Wingspan: 33.5 inches
- Wing area: 206 square inches
- Length: 35.5 inches
- Weight (with battery): 44 ounces
- Wing loading: 30.7 ounces/square foot
- Power (recommended): 15-size ducted-fan brushless motor/fan, 3S or 4S Li-Poly battery, 60-amp ESC
- Radio: Four channels
- Construction: Molded fiberglass fuselage, built-up wings
- Covering/finish: Precovered with UltraCote, pretrimmed; painted fuselage
Flying
This is not a trainer. Be sure that you are up to the task of flying a fast, agile jet and double-check everything.
Since my field is grass and dormant because of winter, I was confident that the Hawk had enough power for a running takeoff. It took a long way to get the model off the ground because of the drag on those small wheels from the grass, but it did and climbed out with authority. I had the ailerons on high rate, and it was soon evident that that needed to be changed despite my 30% exponential selection.
I switched to low rates and the aircraft settled down and headed for the distance—which arrives quickly with an airplane this clean and small. After one lap around the pattern to let my knees settle down, it was clear that the Hawk was going to track nicely and had plenty of power.
A check of the stall characteristics showed that it mushes nicely before dropping the nose and falling slightly to one side. With a bit of power it was flying again, so there was nothing scary there. I repeated that several times to get a feel for the model’s speed and to judge distance for the first landing.
I go over everything thoroughly after a test flight, and my flying buddy, Wayne Parrish, double-checked my work. We decided to move the CG back a bit, charged up, and went again. That time Wayne did the honors while I shot photos and video. He’s an experienced jet pilot, and I always use his input to confirm what I think about a new airplane.
This time it got off the ground slightly quicker. Knowing that the ailerons were touchy, Wayne used low rates to make it much nicer. He did tons of low passes and tried some high-alpha attitudes, which worked out well. But with all those cheater holes in the bottom, the Hawk becomes extremely draggy.
I moved the CG back to the aft position the instructions suggested; that proved to be the sweet spot. On subsequent flights with the CG in that position, the jet had even more life. I’m still flying it on 3S, but E-flite claims it’s fine to go to 4S if you want more zip.
I will remove the gear if I continue to fly from my grass field, because it takes too much power from the battery to get the Hawk off the ground. I have not tried hand launching it yet and probably won’t, but I will use a bungee. If I had a paved runway, I don’t think it would take 100 feet to get this model into the air; there is plenty of power.
Rolls are tight and axial, especially on high rate. Loops can be as big as you like and as round as you can make them with proper throttle control. The vertical climb is more than adequate.
Our experience with landing the airplane was better when we flew it all the way to the ground rather than idling back and letting it glide in. I kept having it drop from a couple of feet when I tried that technique, although nothing was damaged. I preferred a higher speed and a deliberate angle to the ground. Your mileage may vary depending on technique.
Conclusion
I am impressed, not only with the quality of the kit and assembly, but also with the total package. The recommended power system flies the airplane beautifully, and there’s no doubt that a 4S pack would liven it up.
The color scheme makes this jet easy to see, which is a plus when you’re flying something this size and fast. E-flite “gets it” and has provided what many of us asked for years ago: a system that can be dropped into an aircraft and work from the start, without our having to tinker and experiment.
The Hawk is not a record-setter in speed, but it’s more than adequate and won’t disappoint. I expect even more performance with the gear removed and a bungee launch. This fed my “need for speed” and has me thinking about getting another jet for the arsenal.
Greg Gimlick [email protected]
Manufacturer / Distributor
E-flite / Horizon Hobby 4105 Fieldstone Rd. Champaign, IL 61822 (217) 355-9511 www.e-flite.com
Sources
Spektrum RC (800) 338-4639 www.spektrumrc.com
Other Printed Reviews
- Backyard Flyer: September 2009
- Model Airplane News: July 2009
Transcribed from original scans by AI. Minor OCR errors may remain.

