
Plane Talk: ElectriFly Siren EP Hotliner
By Peter Oesterwinter
Introduction / What is a hotliner?
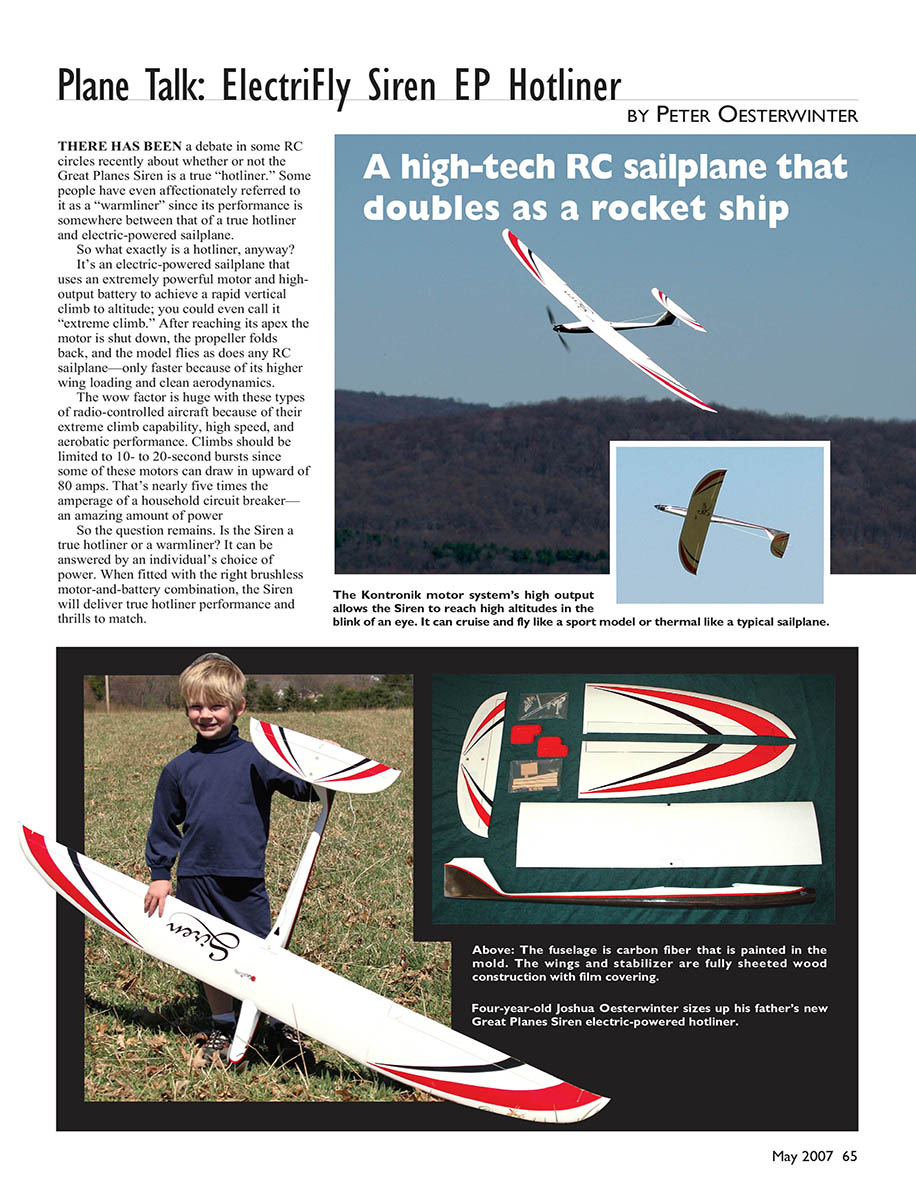
There has been a debate in some RC circles recently about whether the Great Planes Siren is a true “hotliner.” Some people have even affectionately referred to it as a “warmliner” since its performance sits between a true hotliner and an electric-powered sailplane.
A hotliner is an electric-powered sailplane that uses an extremely powerful motor and a high-output battery to achieve a rapid vertical climb to altitude—an “extreme climb.” After reaching its apex, the motor is shut down, the propeller folds back, and the model flies like any RC sailplane—only faster because of higher wing loading and clean aerodynamics.
The wow factor for hotliners is huge: extreme climb capability, high speed, and aerobatic performance. Climbs should be limited to 10–20 second bursts since some motors can draw upward of 80 amps—nearly five times the amperage of a household circuit breaker.
So is the Siren a hotliner or a warmliner? It depends on the power system you choose. Fitted with the right brushless motor and battery combination, the Siren will deliver true hotliner performance.
Overview
The Siren’s clean lines allow it to stretch its glide for landing. Key features include:
- APC folding propeller system that keeps the blades tucked away safely.
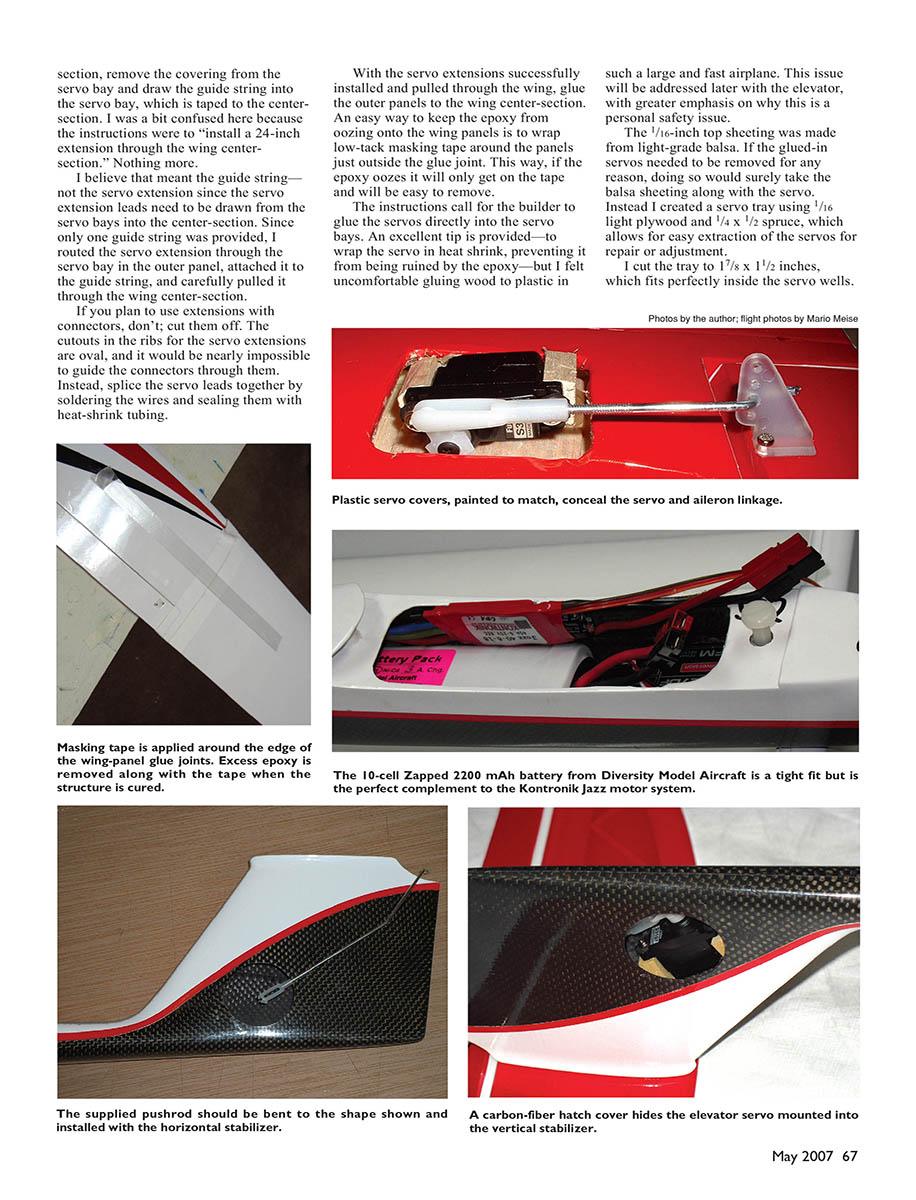
- An air vent on top of the fuselage (aft of the wing mounting bolt) to allow heat from the motor, ESC, and battery to escape.
- A three-piece wing joined with epoxy and supported by two laminated light-plywood dihedral braces.
- The option to add extra 1/16" balsa top sheeting rather than attach servos directly to the upper balsa wing sheeting (author’s modification).
- Low parts count and most of the work pre-done for quick final assembly.
Power options suggested by Great Planes range from a brushed motor with a Ni-Cd pack to brushless motor options with NiMH or Li-Po packs. Performance will vary with the chosen option.
The review airplane used a mid-range power setup:
- Kontronik Fun 480 package (brushless 480-33 motor with 4.2:1 planetary gearbox)
- Jazz 40-6-18 40-amp ESC
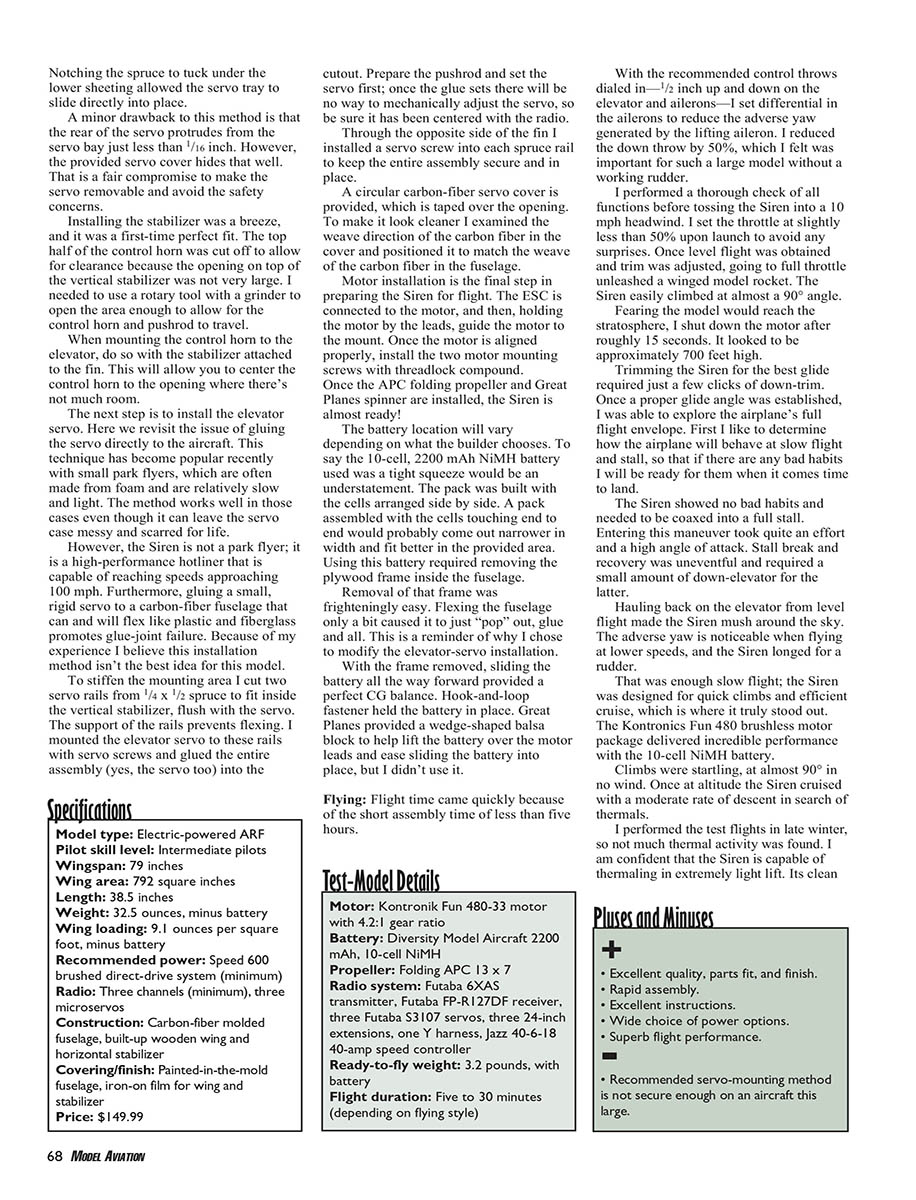
- 10-cell, 2200 mAh NiMH pack (Diversity Model Aircraft)
- APC 13 x 7 propeller
This combination provided true hotliner performance.
The kit/component package:
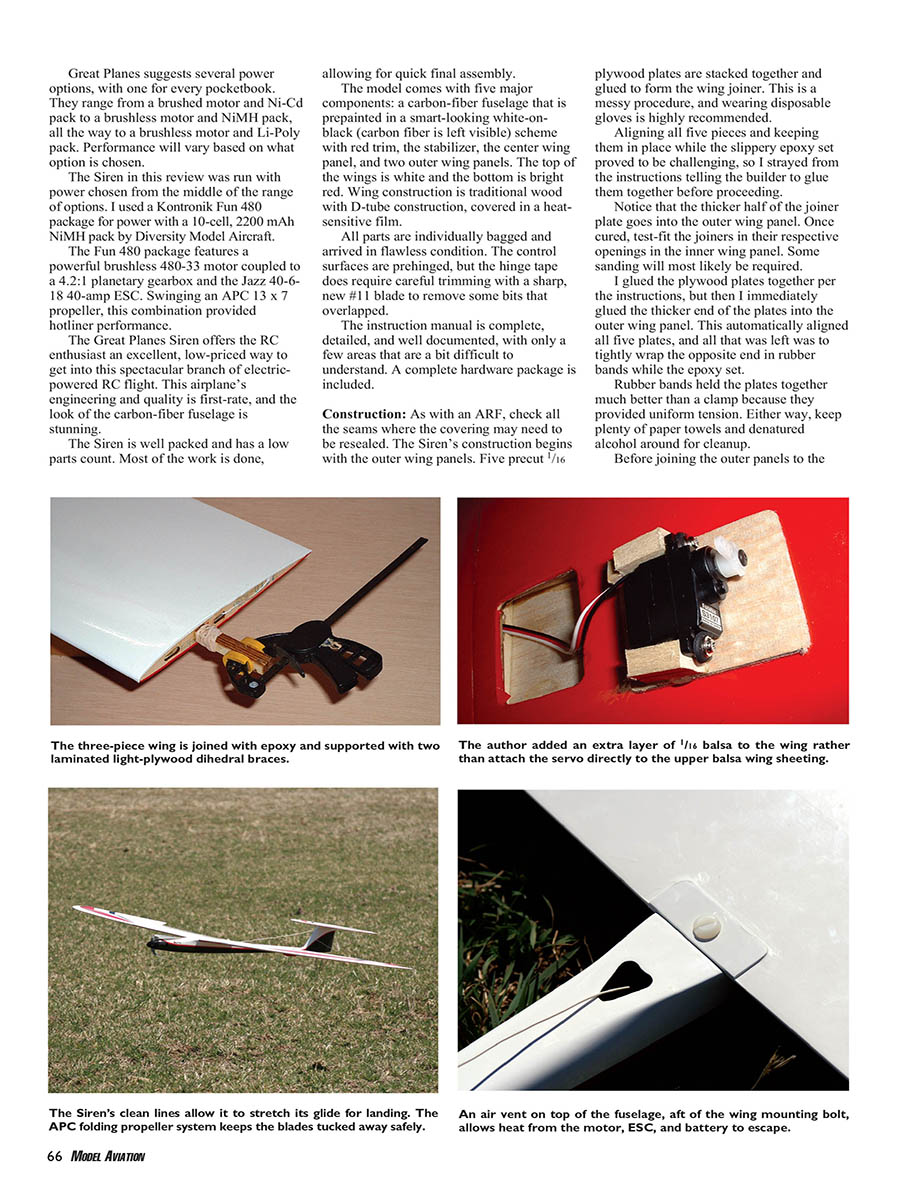
- Carbon-fiber fuselage (prepainted white-on-black with visible carbon-fiber and red trim)
- Stabilizer
- Center wing panel
- Two outer wing panels
- Top of wings white, bottom bright red
- Wing construction: traditional wood D-tube covered in heat-sensitive film
- Control surfaces pre-hinged; minor trimming of hinge tape required
All parts arrived individually bagged and in flawless condition. The instruction manual is complete and detailed, with a few slightly confusing areas. A complete hardware package is included.
Construction
General tips:
- As with any ARF, check seams and reseal covering where necessary.
- Keep paper towels and denatured alcohol handy for cleanup when working with epoxy.
- Wear disposable gloves for messy procedures (epoxy and glue).
Wing joiner assembly:
- Five precut 1/16" plywood plates are stacked and glued to form the wing joiner. Aligning all five pieces while epoxy sets can be tricky.
- The thicker half of the joiner plate belongs in the outer wing panel. Gluing the thicker half into the outer panel first helps alignment.
- Wrap the opposite end in rubber bands while epoxy sets; rubber bands provide uniform tension better than clamps.
- Test-fit the joiners in the inner wing panel openings and sand as needed.
Servo wiring and installation:
- Before joining outer panels to the center section, remove the covering from the servo bay and pull the guide string through the center section into the servo bay.
- The instructions mention "install a 24‑inch extension through the wing centersection," which the author interpreted as referring to the guide string, not the servo extension. Only one guide string is provided.
- Route servo leads from the servo bays into the center section by attaching the servo lead to the guide string and pulling it through the wing.
- If you plan to use servo extensions with connectors, cut the connectors off and splice wires by soldering and sealing with heat-shrink tubing. The rib cutouts are oval and will not accommodate bulky connectors.
Gluing the outer panels:
- Glue the outer panels to the center section. Wrap low-tack masking tape around the panels just outside the glue joint to keep epoxy from oozing onto the wing surface (epoxy will get on the tape and is easy to remove).
Servo mounting (author’s modification and safety considerations):
- The instructions call for gluing servos directly into the servo bays and suggest wrapping the servo in heat shrink to protect it from epoxy. The author prefers not to glue servos directly (especially in a large, high-performance model) because wood sheeting can delaminate with the servo and the airframe may flex differently than the rigid servo case.
- Instead, build a removable servo tray: use 1/16" light plywood and 1/4" x 1/2" spruce rails.
- Tray dimensions used: 1 7/8" x 1 1/2" (fits in servo wells).
- Notch the spruce so the tray tucks under lower sheeting; the tray slides into place.
- The rear of the servo may protrude slightly (~<1/16"), hidden by the provided servo cover—an acceptable compromise for removability and safety.
Stabilizer and elevator servo installation:
- Installing the stabilizer is straightforward and provided a first-time perfect fit. The top half of the control horn was cut off for clearance; opening the vertical stabilizer area may require a rotary tool.
- Mount the control horn to the elevator with the stabilizer attached to the fin to ensure proper centering and clearance.
- For the elevator servo, avoid gluing the servo directly to the carbon-fiber fuselage. The Siren is a high-performance model capable of near 100 mph; flexing of the carbon-fiber fuselage can stress glued servo joints.
- The author cut two servo rails from 1/4" x 1/2" spruce to fit inside the vertical stabilizer flush with the servo. The servo was mounted to these rails with servo screws; the entire assembly (servo plus rails) was then glued into the cutout for rigidity.
- Center the servo with the radio before gluing, since once the assembly is glued there may be no way to mechanically adjust the servo.
- For added security, install a servo screw through the opposite side of the fin into each spruce rail.
- A circular carbon-fiber servo cover is provided; orient it to match the fuselage weave for a clean look.
Motor and battery installation:
- Motor installation: connect the ESC to the motor, guide the motor to the mount by holding it by the leads, align, then install mounting screws with threadlock compound. Install APC folding propeller and spinner.
- Battery location varies by pack. The 10-cell 2200 mAh NiMH pack used was a tight squeeze; some packs built with cells end-to-end would be narrower and fit better.
- Removing an internal plywood frame may be necessary to fit certain batteries; the author removed the frame (it popped out easily) to allow the battery to slide forward for proper CG. Hook-and-loop fastener held the battery in place. Great Plans provides a wedge-shaped balsa block to help slide the battery over the motor leads, though the author did not use it.
Flying
- Assembly time was short—less than five hours.
- Initial recommended control throws: 1/2" up and down on elevator and ailerons.
- Add differential to the ailerons to reduce adverse yaw: author reduced down throw by 50% (important for a large model without a working rudder).
- Preflight: check all functions thoroughly.
- Launch: toss into a 10 mph headwind with throttle slightly less than 50% to avoid surprises. Once level and trim adjusted, full throttle produced an extremely steep climb—almost 90°.
- The author shut the motor after roughly 15 seconds; altitude appeared to be approximately 700 feet.
Handling and performance:
- Trimming required just a few clicks of down trim for best glide.
- Slow flight and stalls: the Siren showed no bad habits and required significant effort to enter a full stall. Stall break and recovery were uneventful and needed a small amount of down elevator to recover.
- At slow speeds, adverse yaw is noticeable and the Siren would benefit from a rudder.
- In its element—climbs and cruise—the Siren excelled. With the Kontronik Fun 480 and the 10-cell NiMH, climbs were startlingly steep. Once at altitude, the Siren cruised with a moderate rate of descent while searching for thermals.
- Test flights were in late winter with little thermal activity; nonetheless, the author believes the Siren can thermal in extremely light lift due to its clean lines and high wing loading, which allow it to stretch glide for landing.
- The APC folding prop keeps blades tucked away, and the fuselage vent helps cool electronics and battery during operation.
Conclusion
So what do we have: a hotliner, a warmliner, or an electric-powered sailplane? The Siren can be all three, depending on your power choice.
Great Planes offers a versatile, well-engineered airplane with true hotliner capability at a modest price. The quality and ease of building are first-rate, and flight performance is equally good. I give the Siren high marks and recommend it to anyone wanting to step into high-performance electric flying.
MA
Peter C. Oesterwinter [email protected]
Manufacturer / Distributor
Great Planes Model Distributors Box 9021 Champaign, IL 61826 (800) 637-7660 (217) 398-3630 [email protected] www.electrifly.com
Card Catalog — Other Articles About This Product
- RC Groups: www.rcgroups.com/forums/showthread.php?t=356191
- Fly RC: June 2005 issue, page 100
- Model Airplane News: June 2006 issue
- Quiet Flyer: October, June 2005 issue, page 32
Items Used In Review
- APC propeller: www.apcprop.com
- 2200 mAh 12-volt battery: www.flydmax.com
Transcribed from original scans by AI. Minor OCR errors may remain.

