

Plane Talk: Great Planes L-39 Albatros Jet EDF ARF
PETER C. OESTERWINTER
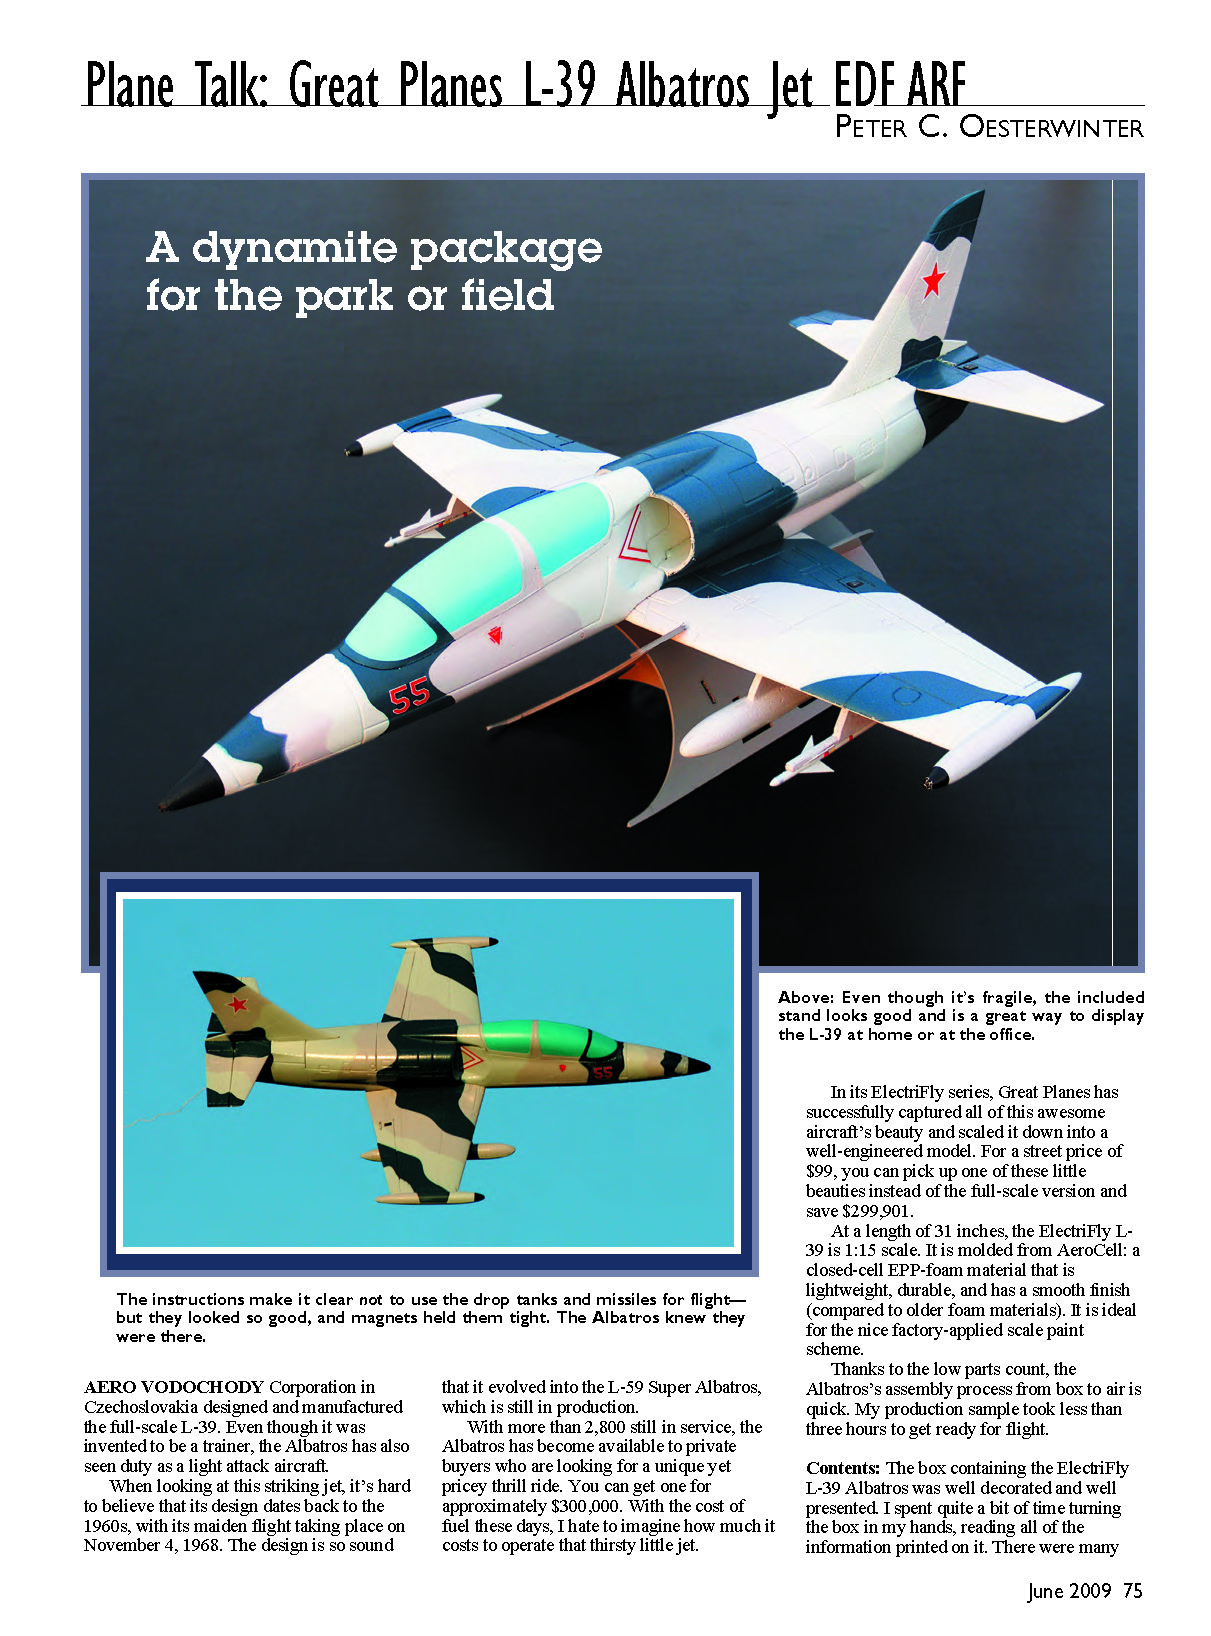
A dynamite package for the park or field
Pluses and Minuses
- Excellent quality and parts fit.
- Quick assembly time.
- Accurate scale outline.
- Stunning performance in all flight envelopes.
- Attractive home-display stand is included.
- Paint adheres poorly to AeroCell foam and will come off with normal use.
Specifications and Equipment Used
- Type: Electric ducted fan sport-scale
- Wingspan: 25 inches
- Length: 31 inches
- Weight: 17.5–18.5 ounces
- Weight as flown: 17.9 ounces
- Wing loading: 17.9–18.9 ounces per square foot
- Radio required: Three channels (aileron, elevator, throttle)
- Motor: Ammo 20-40-3500
- Radio: Futaba T6XA
- Receiver: Corona RD620
- Servos: Futaba S3114
- ESC: ElectriFly Silver Series 25A
- Battery: ElectriFly Power Series 3S 910 mAh
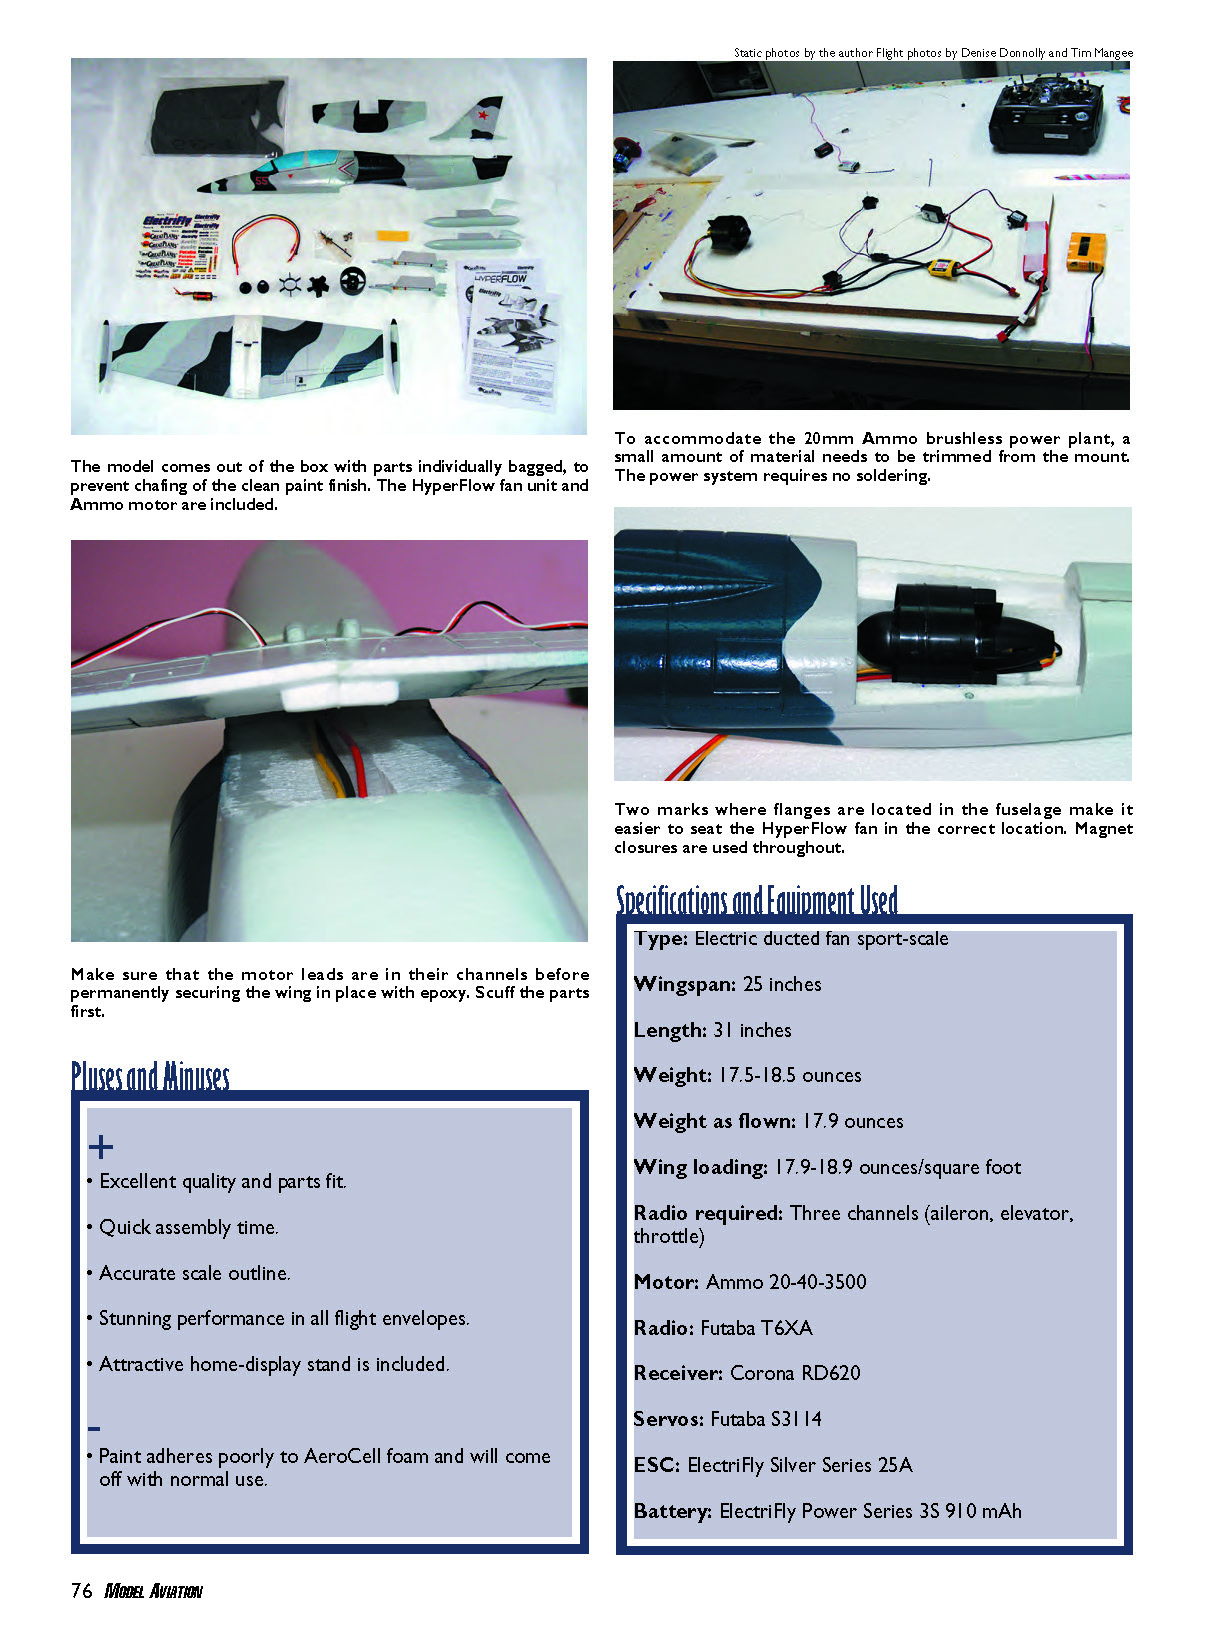
The model comes out of the box with parts individually bagged to prevent chafing of the clean paint finish. The HyperFlow fan unit and Ammo motor are included. To accommodate the 20mm Ammo brushless power plant, a small amount of material needs to be trimmed from the mount. The power system requires no soldering.
Aero Vodochody (then in Czechoslovakia) designed and manufactured the full-scale L-39. Even though it was invented to be a trainer, the Albatros has also seen duty as a light-attack aircraft. When looking at this striking jet, it's hard to believe its design dates back to the 1960s; its maiden flight took place on November 4, 1968. The design is so sound that it evolved into the L-59 Super Albatros, which is still in production.
With more than 2,800 still in service, the Albatros has become available to private buyers looking for a unique (and pricey) thrill ride; you can get one for approximately $300,000. With the cost of fuel these days, I hate to imagine how much it costs to operate that thirsty little jet.
In its ElectriFly series, Great Planes has captured the aircraft's beauty and scaled it down into a well-engineered model. For a street price of about $99, you can pick up one of these little beauties instead of the full-scale version and save roughly $299,901.
At a length of 31 inches, the ElectriFly L-39 is 1:15 scale. It is molded from AeroCell, a closed-cell EPP-foam material that is lightweight, durable, and has a smooth finish compared to older foam materials. It is ideal for the nice factory-applied scale paint scheme.
Thanks to the low parts count, the Albatros's assembly process from box to air is quick. My production sample took less than three hours to get ready for flight.
Contents and First Impressions
The box containing the ElectriFly L-39 Albatros was well decorated and presented. There were many photos, diagrams, and a great deal of technical information to pour over. Once I opened the box, I was delighted with what was inside. All parts were individually bagged and well packed. There were four major airframe components: fuselage, one-piece wing, stabilizer/elevator, and vertical stabilizer.
Because AeroCell is naturally flexible, the typical assembly step of hinging was not required; all flying surfaces were molded in one piece with the control surfaces attached. The only thing I did to them at this point was flex the control surfaces to free them up a bit.
The Ammo brushless motor and HyperFlow ducted fan combination were included with their own instruction manual. Hardware was also supplied and had some good features I explain below.
The paint was applied superbly, and the panel lines were not oversized—a nice touch compared to some foam models. Simulated drop tanks, tip tanks, and missiles were included and attached by powerful rare-earth magnets. The tip tanks could remain for display, but the missiles and drop tanks needed to be removed for flight. The canopy was also held securely by rare-earth magnets.
The included display stand looked elegant and is great for showing the L-39 at home, but it is a bit fragile—handle with care.
Assembly
Locate the manual showing how to assemble the HyperFlow fan unit. The steps are clear and easy to follow. Do not panic when examining all the parts; the front housing flange is not provided, nor is it required for the L-39. I was concerned because that part was missing, but it is required only if the fan unit is used in a nacelle.
Several motor options are available for the HyperFlow fan unit. Slight trimming was needed to fit the included Ammo power plant, and the flange was premolded to act as a guide. Three fan rotor shaft adapters (2mm, 2.3mm, and 3mm) are provided; the Albatros motor has a 2mm shaft. The 2mm fan rotor adapter will sometimes be tight and may need deburring to slide onto the shaft.
When I first tested the motor, at full power the Ammo—and the entire airframe—vibrated severely. This cost me the impeller and a lot of time diagnosing the problem. Great Planes' customer support promptly provided a replacement fan. In my case, the shaft adapter was wobbling because the 2mm adapter had been milled a bit too tight. After a slight deburring, it slid onto the shaft and the vibration issue disappeared.
The L-39's airframe was easy to complete. Futaba S3114 servos fit perfectly into the aileron servo bays, and the servo cables fit directly into the molded servo-lead channels. The instructions recommended cyanoacrylate to secure the servos; I used low-temperature hot glue because it does not permanently scar the servo case and makes them easier to remove later.
I enjoyed using the included thumbscrew pushrod connector; it makes adjusting the aileron to the pushrod easy. Once the ailerons are centered, a quick twist with the fingers locks them in place. Finger-tight is not enough—use a screwdriver to completely secure them.
When the ailerons are centered, glue the aileron pushrod covers in place. Foam-friendly cyanoacrylate worked fine until the first landing, when both covers popped off. I have found an excellent adhesive by Devcon called Plastic Welder. It is a two-part epoxy but welds AeroCell together in a way similar to plastic model cement. Epoxy should work fine as well.
Two grooves molded into the fuselage match the flanges on the fan housing that need to be glued in place. To ensure proper placement, use a pen to mark the grooves' locations on the inside edge of the fuselage. Use 30-minute epoxy for this step.
The motor wires are fed through a hole at the bottom of the fuselage, through a channel in the wing saddle, and then passed through another hole back into the forward fuselage. Ensure that all wires are inserted correctly before gluing the fan assembly in place.
Apply 30-minute epoxy to the wing saddle and glue the wing directly to the fuselage. Make sure the motor wires and aileron-servo cables are properly seated within the wire channels. The alignment keys molded into the wing and saddle assure that the wing is positioned correctly. Set the airframe aside with a weight on top of the fuselage until the adhesive cures.
The horizontal and vertical stabilizers are glued in place with epoxy. Scrape away the paint from the mounting area to provide a stronger bond. The elevator servo sits nicely in a foam servo tray that is glued in place at the factory.
My Corona RD620 receiver from BP Hobbies worked well with the Futaba servos. Inside the fuselage is a guide tube for the servo antenna, but getting the antenna through is a tight squeeze. I used needle-nose pliers and pushed the antenna through 1/4 inch at a time to keep it from bunching up. A small amount of light oil helps it slide through.
Because of the L-39's small size, setting it up for flight is critical. Make sure the CG is correct and that the control throws are set exactly to the instructions' recommendations. My model required 0.5 ounce of weight in the nose to obtain the correct CG. The low rate on the elevator looks small, but little elevator throw is needed for this short-coupled aircraft.
Flying
The L-39 flies wonderfully but is tricky. Having someone with hand-launching experience nearby is helpful. I did not have an assistant for my test flights, so I was on my own. I had never tried an underhand launch before and found the method a bit unorthodox, but the manual recommended it so I tried.
The L-39 came out of my hand much slower than I thought it would, and I was surprised that it kept flying. That's a testament to this design's excellent slow-speed performance. The times I was unable to give it the toss it needed clearly demonstrated the AeroCell's durability.
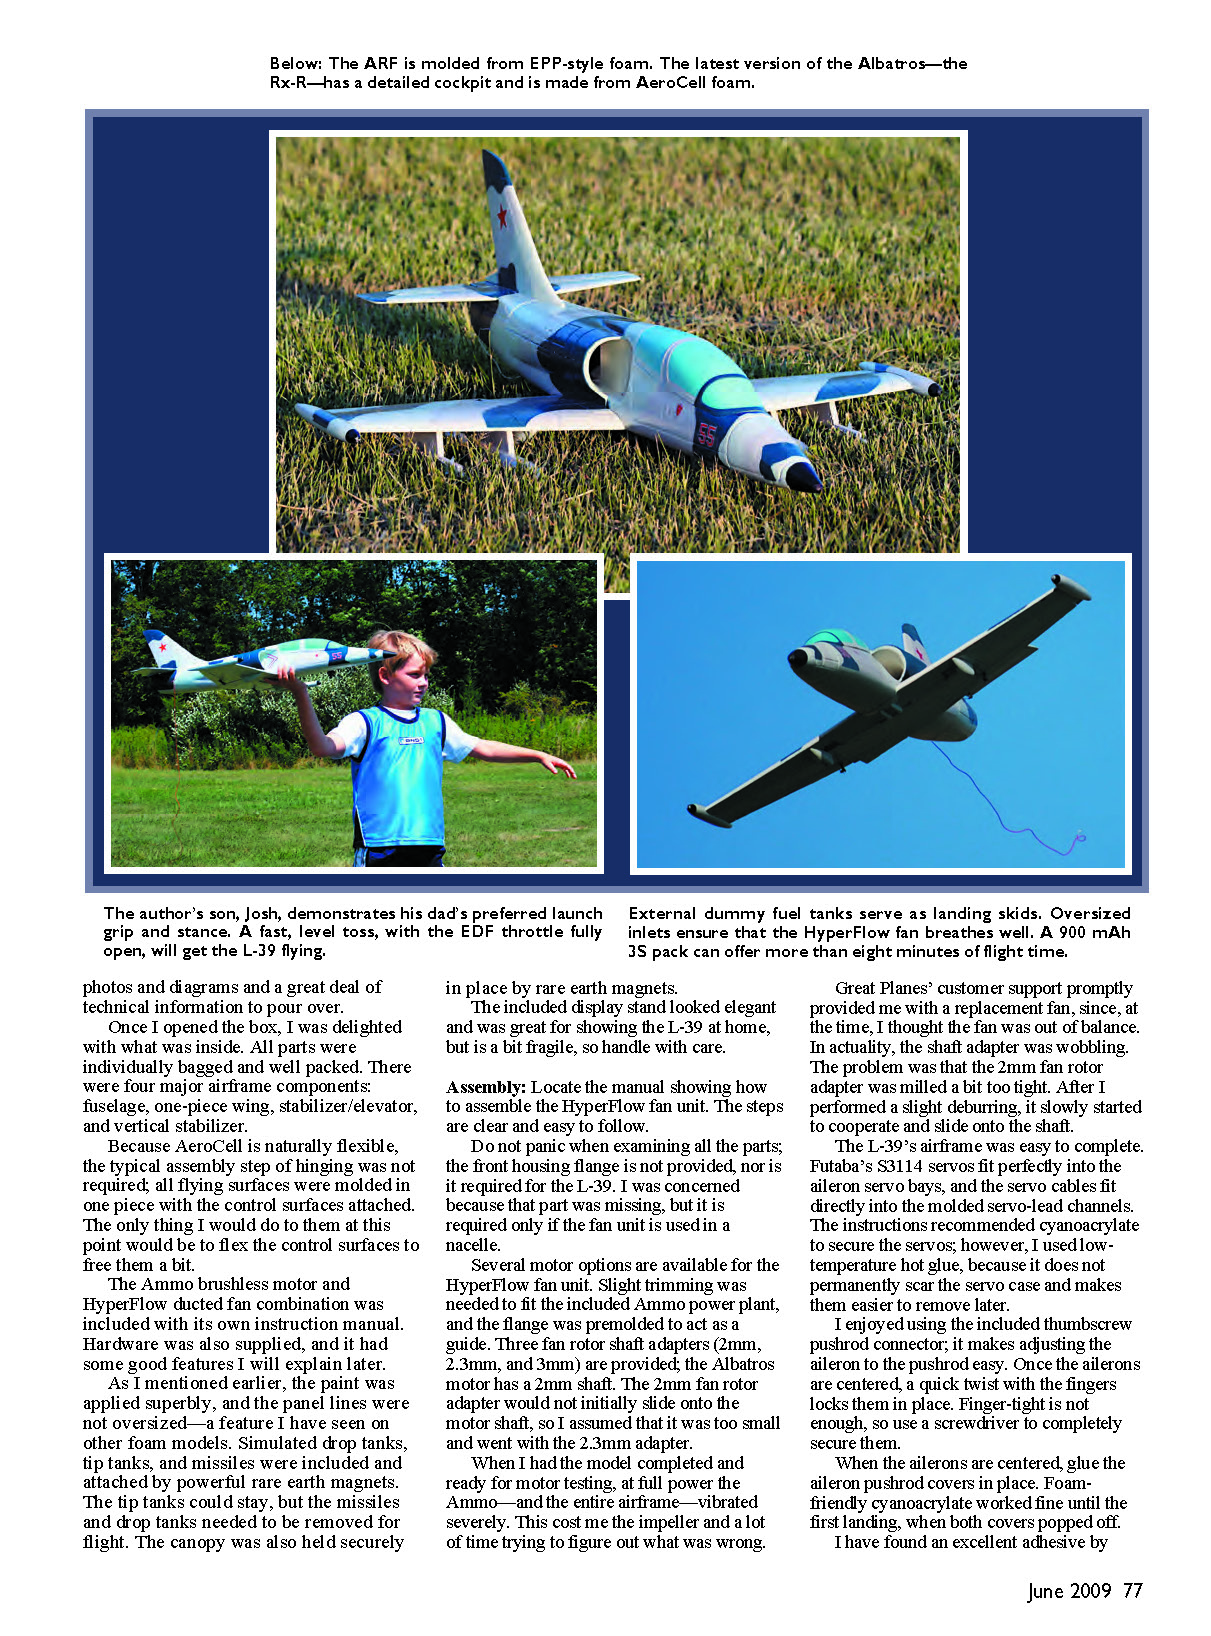
I was more comfortable with the standard overhead toss, gripping the fuselage directly forward of the wing. Once it left my hand, the L-39 needed to build speed before establishing a climb. Launching with a correct angle—approximately 10° nose up—worked well, especially for the first five seconds since there is not much airflow over the stabilizer at very low speed.
Once out of the low-speed takeoff envelope, the Albatros opened up. At full power it slid through the air quickly. Speed was not blistering; I estimated around 60 mph, which is just fast enough for a little jet such as this, since it can quickly fly out of sight.
The recommended low-rate settings are plenty for flying the L-39. The aileron high-rate setting is great for axial rolls at roughly two-and-a-half revolutions per second. I recommend using the low setting for the aileron at first when familiarizing yourself with the flight performance.
Flying inverted demanded a considerable amount of down-elevator, so switching to the high rate for inverted flight made life easier. After several flights I kept the low rate at the recommended 1/8 inch for up but increased the downswing to 5/16 inch.
All aerobatics are possible with aileron and elevator only. Loops require a bit of downhill entry first, but loops are large and look great. Outside loops are also large and scale-looking; make sure to have plenty of airspeed before attempting them.
For a small EDF jet with such a short wing, the slow-speed performance and stability astonished me, as proven by my first attempted hand launch. The L-39 will slow nicely for realistic landing approaches, but it is not a glider—power still needs to be carried on the approach.
Flying the Albatros until the BEC shuts down the motor is a bad idea; with no power the nose needs to drop to maintain a flyable airspeed. Manage your flight time and leave enough battery power in case you need a go-around. Average flight times with the ElectriFly three-cell, 900 mAh battery are around seven minutes; with good power management, 10-minute flight times are possible.
At the low elevator setting it took some effort to coax the L-39 into a stall. A full stall will result in a sudden nose drop and require approximately 15 feet of altitude to recover (with full power). Be cautious if flying slowly at the high rates, especially in turns, because a stall can occur suddenly.
Conclusion
From box to flight, my Albatros was an enjoyable project. Quality is excellent, all parts fit well, and I had no trouble building it aside from my goof with the motor adapter. Despite being a small scale jet, it is well behaved. If you can handle an aileron/elevator aircraft and want jet action at your field, try the ElectriFly L-39. I doubt you will be disappointed with the quality, looks, performance, or durability.
Peter C. Oesterwinter [email protected]
Manufacturer/Distributor
ElectriFly/Great Planes Box 9021 Champaign, IL 61826 (217) 398-3630 www.electrifly.com
Sources
- Futaba — (217) 398-3630 — www.futaba-rc.com
- BP Hobbies — (732) 287-3933 — www.bphobbies.com
- Devcon — (800) 933-8266 — www.devcon.com
Other Published Reviews
- Backyard Flyer: September 2008
- RC Sport Flyer: October 2008
- R/C Report: October 2008
- Fly RC: November 2008
Transcribed from original scans by AI. Minor OCR errors may remain.

