

Plane Talk: Hangar 9 Funtana 125 ARF
Shawn Rubush
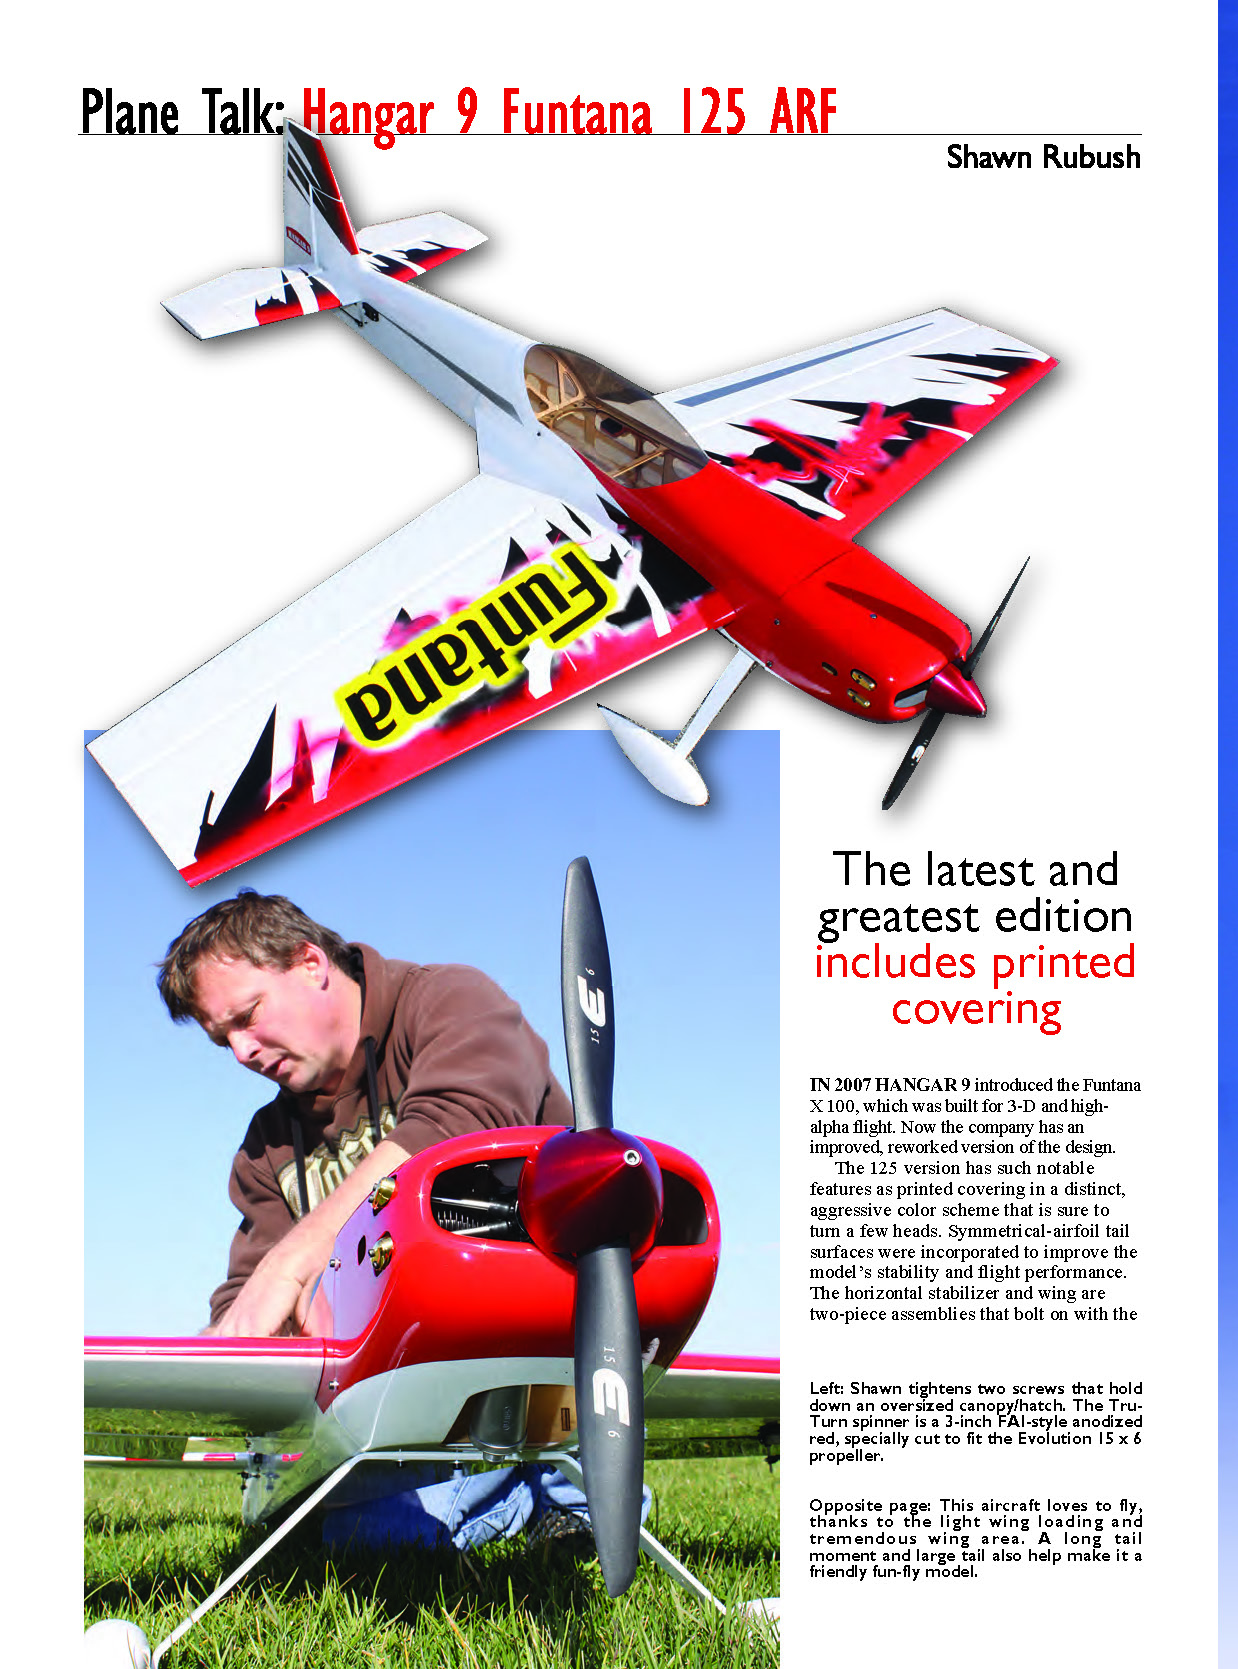
The latest and greatest edition includes printed covering
In 2007 Hangar 9 introduced the Funtana X 100, which was built for 3-D and high-alpha flight. Now the company has an improved, reworked version of the design.
The 125 version has notable features such as printed covering in a distinct, aggressive color scheme that is sure to turn a few heads. Symmetrical-airfoil tail surfaces were incorporated to improve the model’s stability and flight performance. The horizontal stabilizer and wing are two-piece assemblies that bolt on with the support of carbon-fiber tube spars. The Funtana’s horizontal tail sections bolt into recessed pockets to ensure correct alignment. Transporting or storing this airplane is easier because its alignment is assured.
The canopy and top hatch assembly are one piece; molded plastic forms the entire structure, which is reinforced with a framework of preinstalled laser-cut plywood. The hatch is a nice touch of engineering that not only allows easy access to everything in the airframe, but also has a great fit to the fuselage. Only two 3 x 12 mm hex-head bolts lock the hatch.
One feature that stood out was that during the factory assembly process, blind nuts were preinstalled in the fuselage wherever needed. Four blind nuts were also installed in the fuselage to mount the engine cowl. Anyone who has had to locate blind nuts by feel can appreciate the significance of that courtesy. It also meant that the mounting holes in the cowling were located. I was happy about that, because I’ve never mounted a prepainted cowl without risking damage.
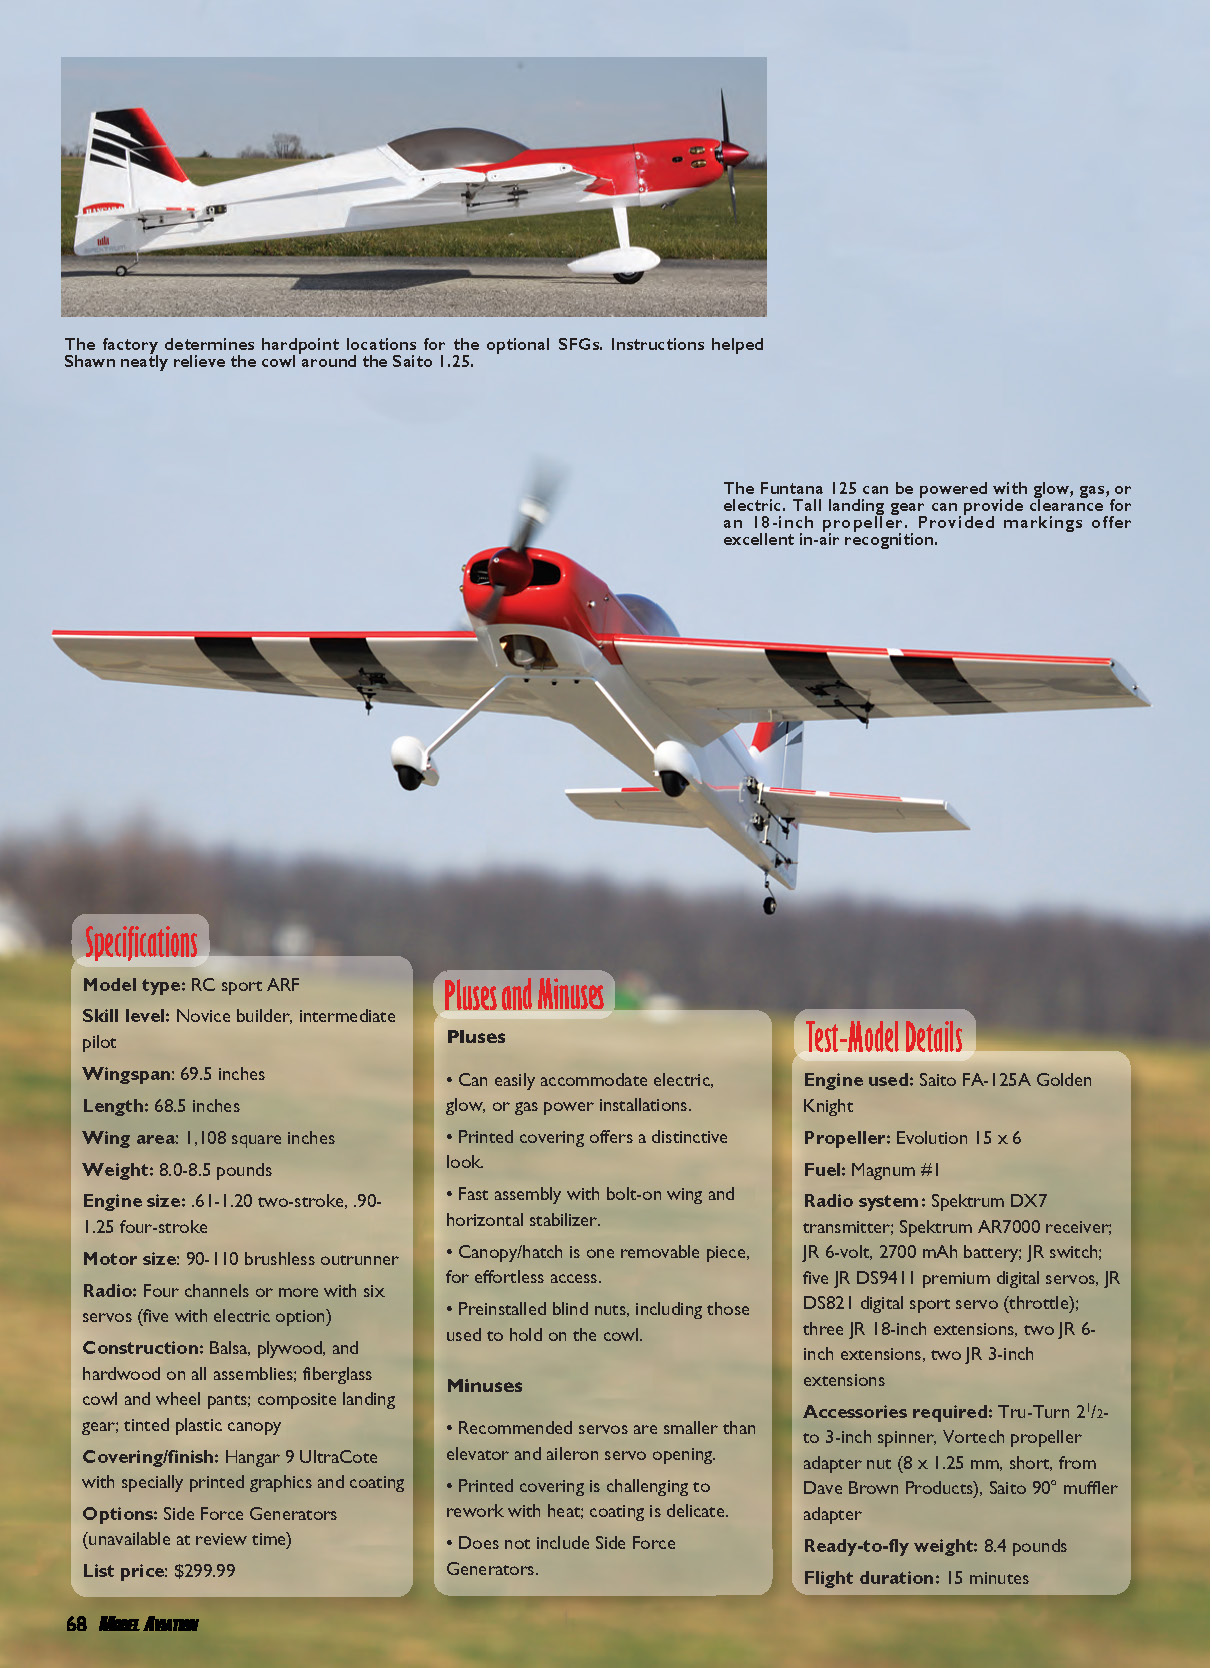
After an inventory and inspection of all parts, I realized that the Funtana 125 does not include Side Force Generators (SFGs), which are referred to in the manual. Then I realized they were not forgotten but are an option you can purchase separately from Hangar 9 for $24.95. SFGs are definitely on my list of items to buy as soon as they become available. They are also removable, to suit either 3-D or sport flying.
Before starting assembly you must decide what power plant to use. The Funtana 125 has been designed for two-stroke glow, four-stroke glow, four-stroke gas, or electric (an E-flite Power 110EP outrunner). I chose the Saito FA-125A Golden Knight glow engine—there is nothing like the meaty sound of a four-stroke.
Along with the power choices, there are two options for setting up the ailerons:
- Option A: Two digital servos, a Y harness, and one 6-inch servo extension. No transmitter mixing is required.
- Option B: Two digital servos, two 3-inch extensions, and two 6-inch extensions. Mixing is required.
Knowing I would be setting up the Funtana 125 with a Spektrum DX7 transmitter and Spektrum AR7000 receiver, I chose the latter (Option B) aileron arrangement.
You also have three elevator options:
- One digital servo and one reverse digital servo. No mixing required.
- Two digital servos and two 18-inch extensions. Mixing is required.
- Two digital servos and either a Y harness or JR MatchBox servo matching/power system.
I selected the second option. With a DX7, programming using P-mix 5 or 6 allows the elevator servos to have set endpoints and offset independently. More important, the master (elevator)-channel trim lever works both channels in unison. This way, while flying, the model can easily be trimmed for level flight.
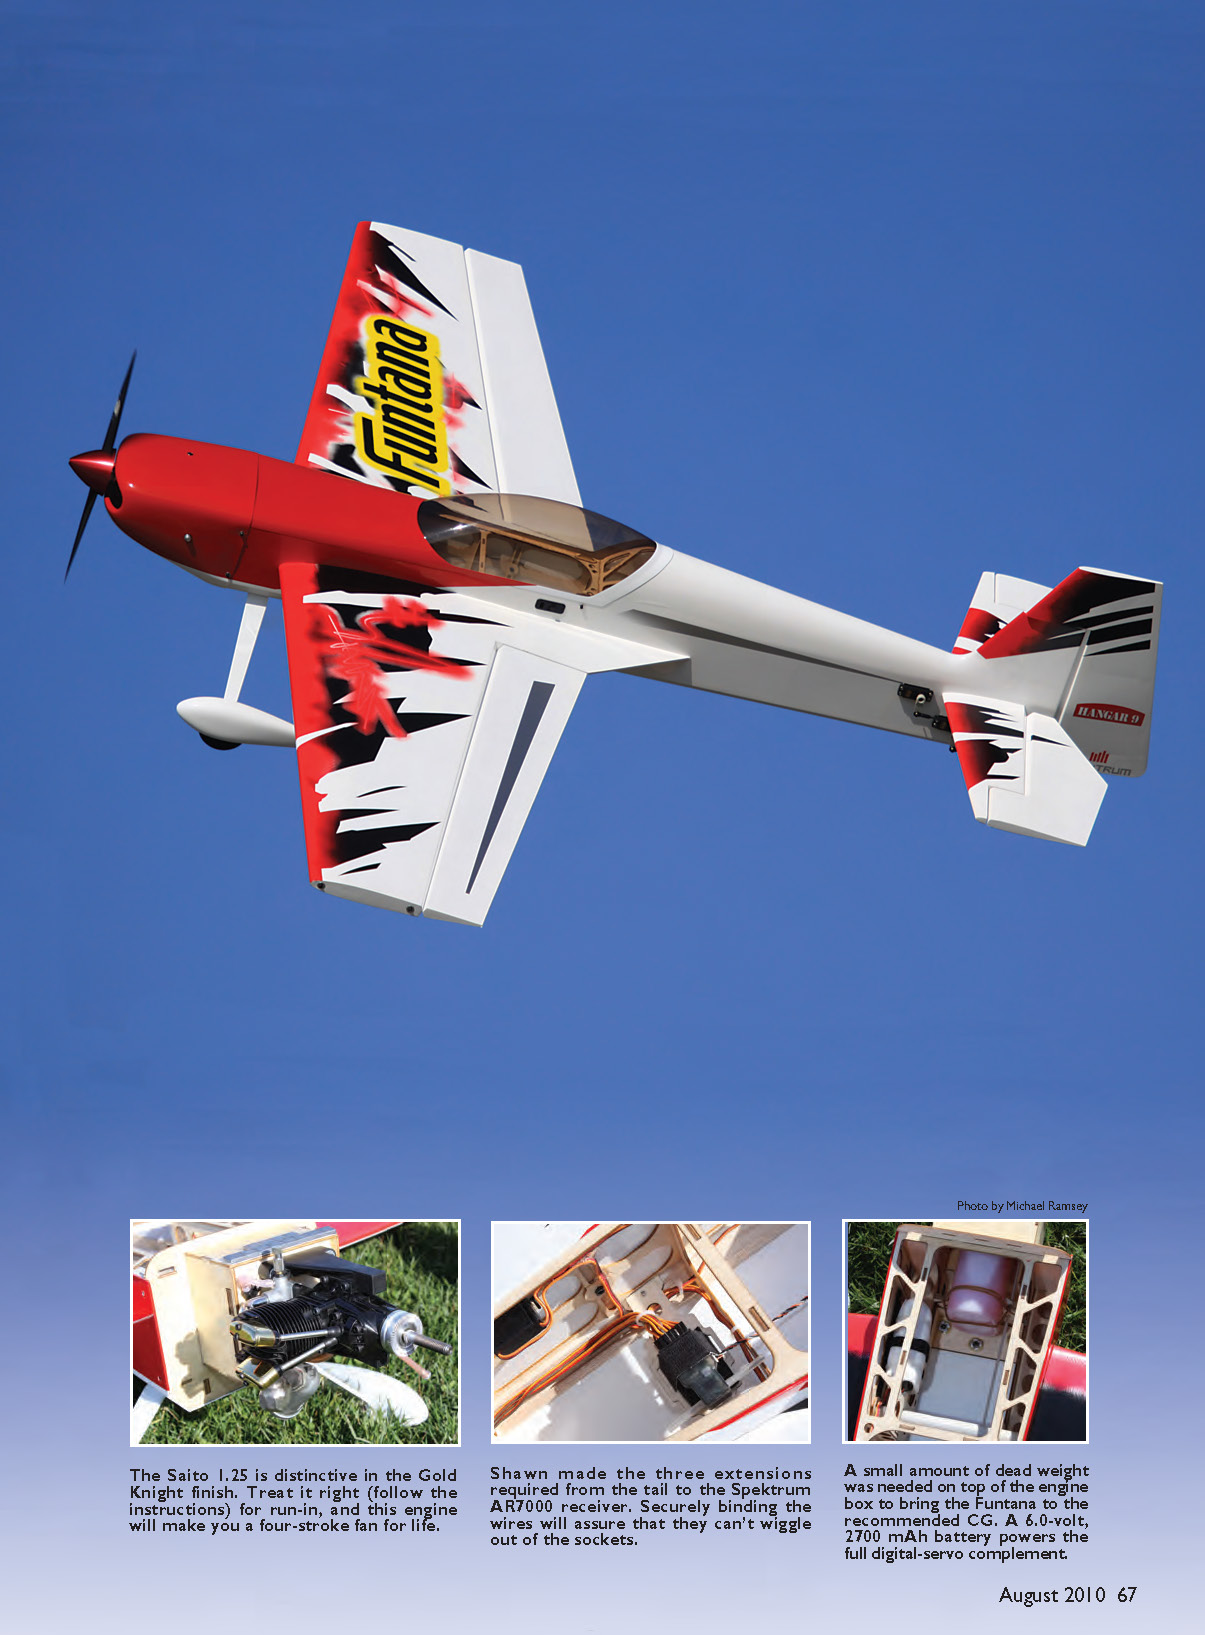
I made the three extensions required from the tail to the Spektrum AR7000 receiver. Securely binding the wires will assure that they can't wiggle out of the sockets. A small amount of dead weight was needed on top of the engine box to bring the Funtana to the recommended CG. A 6.0-volt, 2700 mAh battery powers the full digital-servo complement.
The Saito 1.25 is distinctive in the Gold Knight finish. Treat it right (follow the instructions) for run-in, and this engine will make you a four-stroke fan for life.
Construction
Initial steps involve installing rudder and elevator servos. Using the recommended JR DS9411 digital servos, I found the elevator and rudder servo openings to be too large lengthwise, leaving no margin for error on the screw-hole locations. If not centered with the utmost care, you could be left with no material on either end into which the mounting screws could be inserted. Hardening screw holes with CA is a must. Unfortunately, the openings for the ailerons were too large as well.
A simple solution was to install 1/16-inch plywood supports under the balsa wing sheeting on both ends of the servo to reduce the opening, and then place balsa pieces on top of the extended plywood to be flush with the existing wing sheeting. The resulting mounting area is double the original thickness, providing a rock-solid mount.
After installing the servos in their respective positions, the only electronics that remained were the receiver, battery, and switch. Note which switch you are using: the Funtana 125 is designed for various power combinations. Three places are premade in the fuselage to mount the switch; which one you use depends on what mode of power you choose.
Hinging control surfaces is straightforward; the covering was well done, with the exception of a few wrinkles here and there. After the parts were acclimatized, I used a covering iron to rework the UltraCote. The printed covering on the wing and tail surfaces required a bit more heat to achieve a wrinkle-free finish. Be careful not to overheat or overwork the printed surfaces. Even with a new sock on the covering iron, the printed covering had a tacky feel that hindered smoothly sliding the iron.
As the manual states, sealing the control-surface hinge gaps is necessary to prevent flutter on large control surfaces, and it improves stability in high-alpha flight. I used white Hangar 9 UltraCote to match the covering. Although not required, I sealed both sides of all the hinges—cleanup is easier and it prevents fuel-soaked hinges.
After quickly installing the landing gear, the engine is installed on the included beams—or the standoff motor-box assembly is used for the electric option. There is a template in the back of the manual in case you decide to go gas, specifically the Saito FG-20. The recommended 90° exhaust elbow for the Saito 125 muffler is incorrect in the manual. The elbow part that Saito 125 users need is SA125A140.
With the engine properly mounted, it was time to cut the holes in a fiberglass engine cowl. Following the steps in the manual, I used card stock (poster board) to make templates for the cutouts required to accommodate the Saito. That template method produced one of the cleanest-mounted engine cowls I had ever seen. I had to admire the enclosed engine with the sparkling gold rocker covers peeking out—I couldn't help but smile.
Since I had jumped ahead and installed the aileron servos, the only step remaining to complete the wings was to attach the fillets. Carbon-fiber alignment dowels were preinstalled in the fillets and wing panels, which made assembly and alignment a no-brainer. Although identical in appearance, after trial-fitting the fillets I improved the fit between the wing and fuselage by switching them from one side to the other. A dab of epoxy sealed the deal on the wings, and the build was almost complete.
Installing servo arms and control rods was one of the last steps before finalizing the build. I opted to use Du-Bro super-strength long servo arms. With all control rods in place, I programmed the Funtana 125 to have the factory-recommended high and low rates specified in the manual. I put approximately 40% exponential on low rates and 60% exponential on high rates as a starting point.
The instructions are to mount the battery under the wing tube. I found that this left the model tail-heavy. Not wanting to add more weight than necessary, I moved the battery forward to the left side of the fuselage to put the CG at 167 mm behind the wing leading edge.
Flying
With the engine break-in procedure, range check, and flight control check complete, it was time to burn some fuel. Initial taxi on the asphalt tarmac made it evident that the Saito FA-125 had plenty of power—only two clicks of throttle had the Funtana moving quickly. Slightly tightening the wheels would be in order to assure the landing would come to a halt.
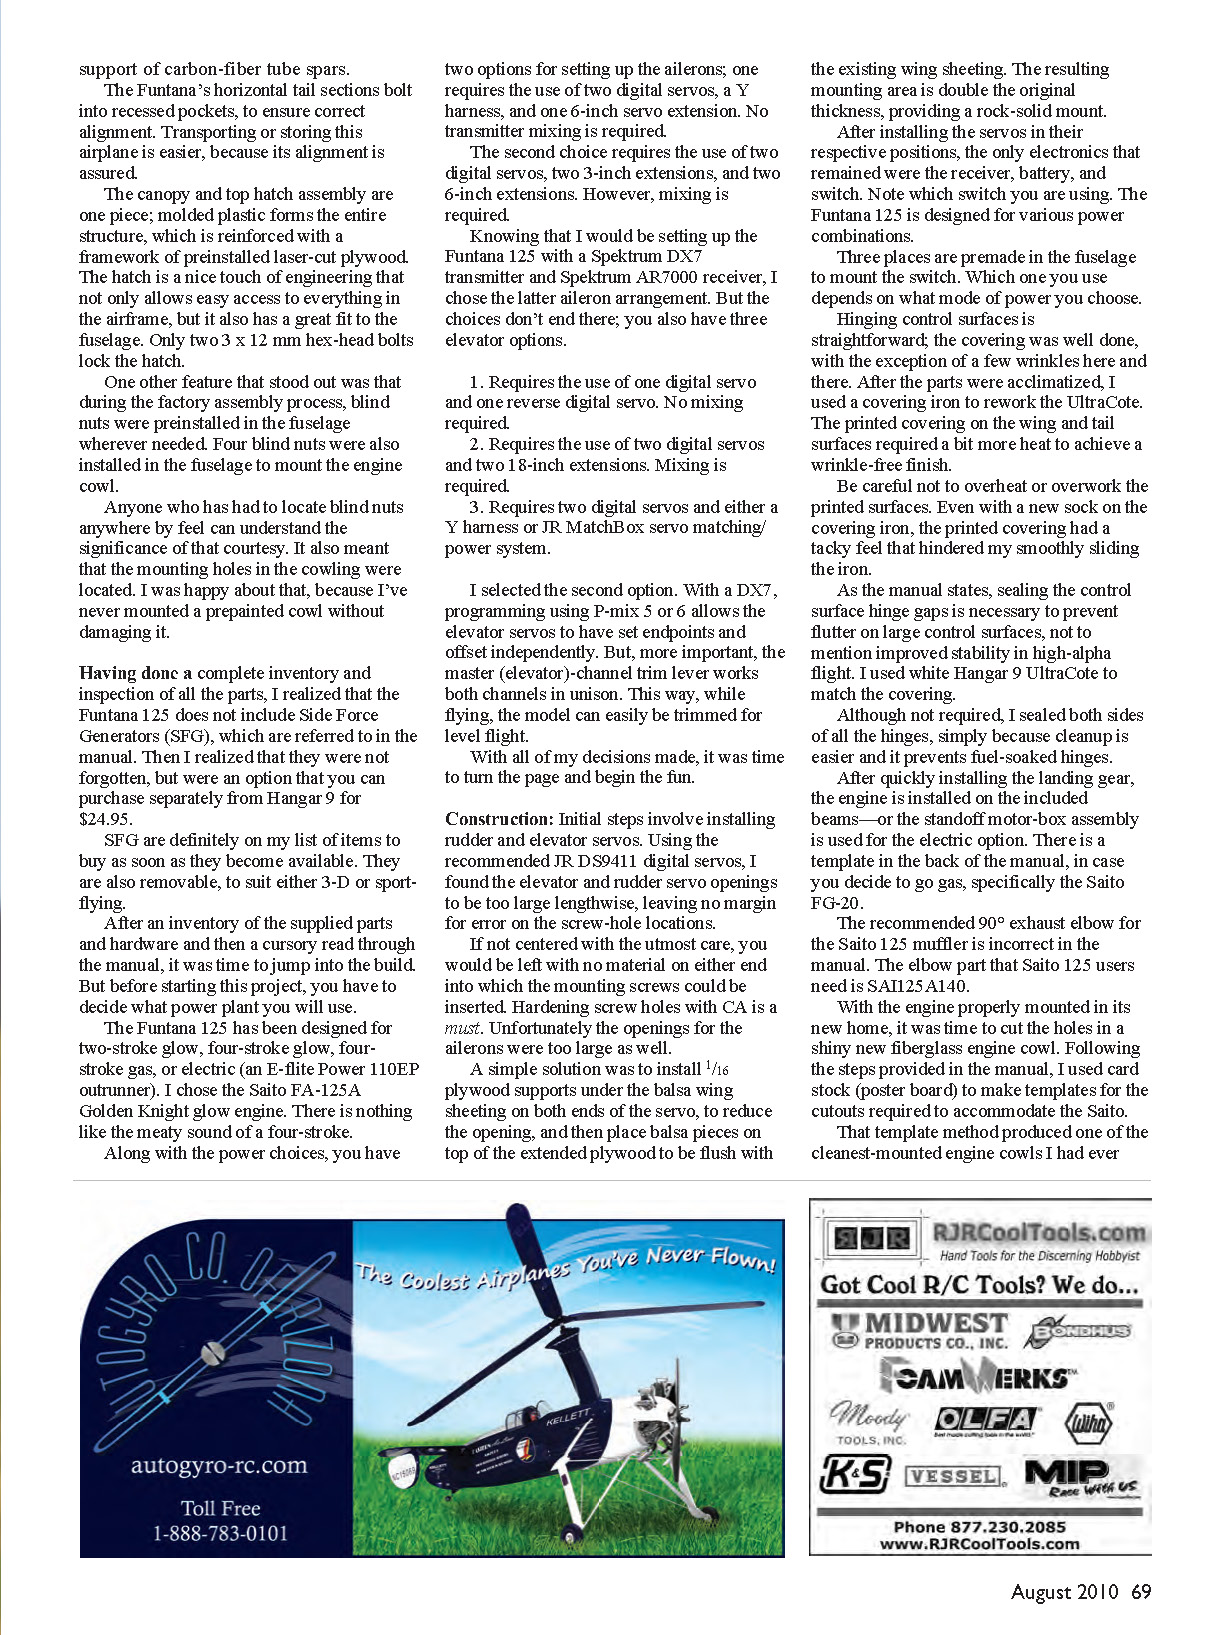
Bringing up the throttle, the Funtana smoothly lifted off in a short distance with a solid feel. It usually takes me a while to work off maiden-flight nerves and get friendly with a new airplane, but I immediately felt as if I had flown this model forever. After a few test laps and only one click of right rudder to trim it out, it was time to see what it could do.
Inverted flight with the CG at 167 mm seems to reflect a neutral balance point; little stick input is needed to maintain level flight. On low rates the Funtana performs precisely with no unwanted characteristics—perfect for practicing precision maneuvers.
Moving to high rates, the Funtana 125 can perform any 3-D maneuver you throw at it, including Harriers, hovers, and Blenders. Toward the end of the second flight, I noticed a slight jitter or wiggle when pushing over hard from inverted. It was manageable, but I'll check into it nonetheless; it's a sign of instability. Perhaps the SFGs will help.
That giant wing likes to fly. Every high-alpha maneuver still has a little wing in it and, by design, the Funtana has more than most. That wide-body fuselage adds to the lifting area as well.
However, the Funtana gives it up more than I'd like in knife-edge. A great deal of rudder throw is needed to carry knife-edge flight, and the more that is used, the worse the model couples—typically pushing toward the gear and perversely rolling. It looks like I'll be using some of the lower-number P-mixing in the DX7 to cure that.
The Saito 1.25 provides enough power to stand the Funtana on its tail in a hover at roughly 60% power. Approach to a Harrier needs almost no power, even to arrest a descent. The power combination is healthy, and I can pull this model out of a hover in style with 40% throttle waiting.
The Funtana 125 is an excellent wind airplane. Yes, it does have ample wing to make it a floater, but it also has lots of control authority and oodles of power to loosen the grip of any gust that comes along. A pretty flying day is going to be windy more often than not. My favorite maneuver to perform in the wind with this aircraft is a Zero Roller—where the airplane continuously rolls without gaining or losing altitude, has no ground speed, and stays on heading. The model loves it.
The Funtana 125 has quickly climbed the list as one of my favorite airplanes. I can't wait to get the SFGs to see the difference in knife-edge performance.
Shawn Rubush [email protected]
Specifications
- Model type: RC sport ARF
- Skill level: Novice builder, intermediate pilot
- Wingspan: 69.5 inches
- Length: 68.5 inches
- Wing area: 1,108 square inches
- Weight: 8.0–8.5 pounds
- Engine size: .61–1.20 two-stroke, .90–1.25 four-stroke
- Motor size: 90–110 brushless outrunner
- Radio: Four channels or more with six servos (five with electric option)
- Construction: Balsa, plywood, and hardwood on all assemblies; fiberglass cowl and wheel pants; composite landing gear; tinted plastic canopy
- Covering/finish: Hangar 9 UltraCote with specially printed graphics and coating
- Options: Side Force Generators (unavailable at review time)
- List price: $299.99
Pluses and Minuses
Pluses
- Can easily accommodate electric, glow, or gas power installations.
- Printed covering offers a distinctive look.
- Fast assembly with bolt-on wing and horizontal stabilizer.
- Canopy/hatch is one removable piece, for effortless access.
- Preinstalled blind nuts, including those used to hold on the cowl.
Minuses
- Recommended servos are smaller than elevator and aileron servo openings.
- Printed covering is challenging to rework with heat; coating is delicate.
- Does not include Side Force Generators.
Test-Model Details
- Engine used: Saito FA-125A Golden Knight
- Propeller: Evolution 15 x 6
- Fuel: Magnum #1
- Radio system: Spektrum DX7 transmitter; Spektrum AR7000 receiver; JR 6-volt, 2700 mAh battery; JR switch; five JR DS9411 premium digital servos; JR DS821 digital sport servo (throttle); three JR 18-inch extensions; two JR 6-inch extensions; two JR 3-inch extensions
- Accessories required: Tru-Turn 2½- to 3-inch spinner; Vortech prop adapter nut (8 x 1.25 mm, short, from Dave Brown Products); Saito 90° muffler adapter (SA125A140 elbow recommended)
- Ready-to-fly weight: 8.4 pounds
- Flight duration: 15 minutes
Manufacturer/Distributor
Hangar 9 / Horizon Hobby 4105 Fieldstone Rd. Champaign, IL 61822 (800) 338-4639 www.hangar-9.com
Sources
- Saito — (800) 338-4639 — www.saitoengines.com
- Spektrum — (800) 338-4639 — www.spektrumrc.com
- JR — (800) 338-4639 — www.jrradios.com
- Tru-Turn — (281) 479-9600 — www.truturn.com
- Dave Brown Products — (513) 738-1576 — www.dbproducts.com
- E-flite — (800) 338-4639 — www.e-fliterc.com
- Du-Bro Products — (800) 848-9411 — www.du-bro.com
Transcribed from original scans by AI. Minor OCR errors may remain.

