

Plane Talk: Hangar 9 ShowTime 4D 90 ARF
Michael Ramsey
An ARF sport model with the grace of a Pattern airplane and the out-of-this-world performance of a Freestyle model.
If you're through throwing your transmitter's control sticks around haphazardly and are looking for an aircraft that will help you hone your skills as a proficient RC pilot (as opposed to being mostly lucky), you're in the market for an RC Aerobatics (Pattern) airplane. Because Pattern models are designed to perform challenging maneuvers gracefully, they have been known to "make the pilot look good."
If there's a Pattern pilot at your field, perhaps you've taken the time to appreciate that style of flying. The giant loops, slow rolls that go from one end of the field to the other, and snaps that start and finish crisply from the same heading are beautiful — as they should be; a proficient pilot practices regularly. If you enjoy how well these people fly, be sure to let them know; they'll appreciate it. If you talk with these pilots for a while, you might decide that flying precision aerobatics is your next step.
The Hangar 9 ShowTime 4D from Horizon Hobby has all the goods of a Pattern model, but it is also capable of being a fantastic tumbling 3-D aerobatics performer. This model is appropriately sized for those who don't want to commit to a large 2-meter-class Pattern airplane but want the full flavor of graceful, precise flying and freestyle performance.
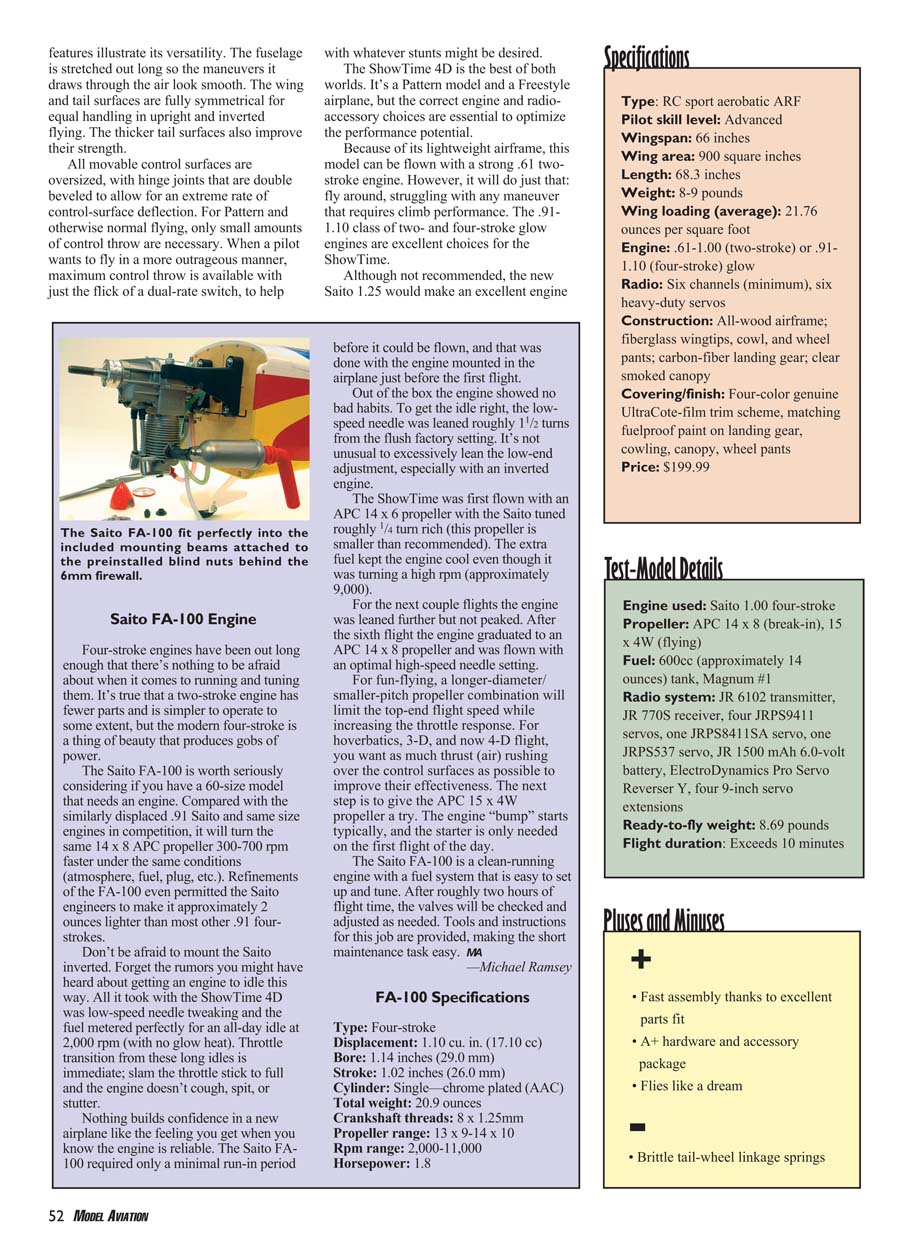
A number of the ShowTime's key stabilizer halves are supported with an anodized aluminum spar tube and located with aluminum pins at the root. Elevator linkage uses snap-on ball links. Wing halves plug into the fuselage and are drawn tight with 1/4-20 nylon thumbscrews. All the parts are prealigned at the factory. The recommended CG is spot-on for the author: almost no down-stick pressure is required to maintain an inverted cruise. Even at half throttle this model requires little top rudder to maintain a heading. Almost no cross-control mixing is needed. The ShowTime is both a Pattern model and a Freestyle airplane.
Features and Design
- Fuselage stretched for smooth maneuvers and graceful lines.
- Wing and tail surfaces fully symmetrical for equal handling upright and inverted.
- Thicker tail surfaces for improved strength.
- All movable control surfaces are oversized with double-beveled hinge joints to allow extreme control-surface deflection.
- Dual-rate capability: small throws for precision Pattern flying, large throws available for 3-D/freestyle.
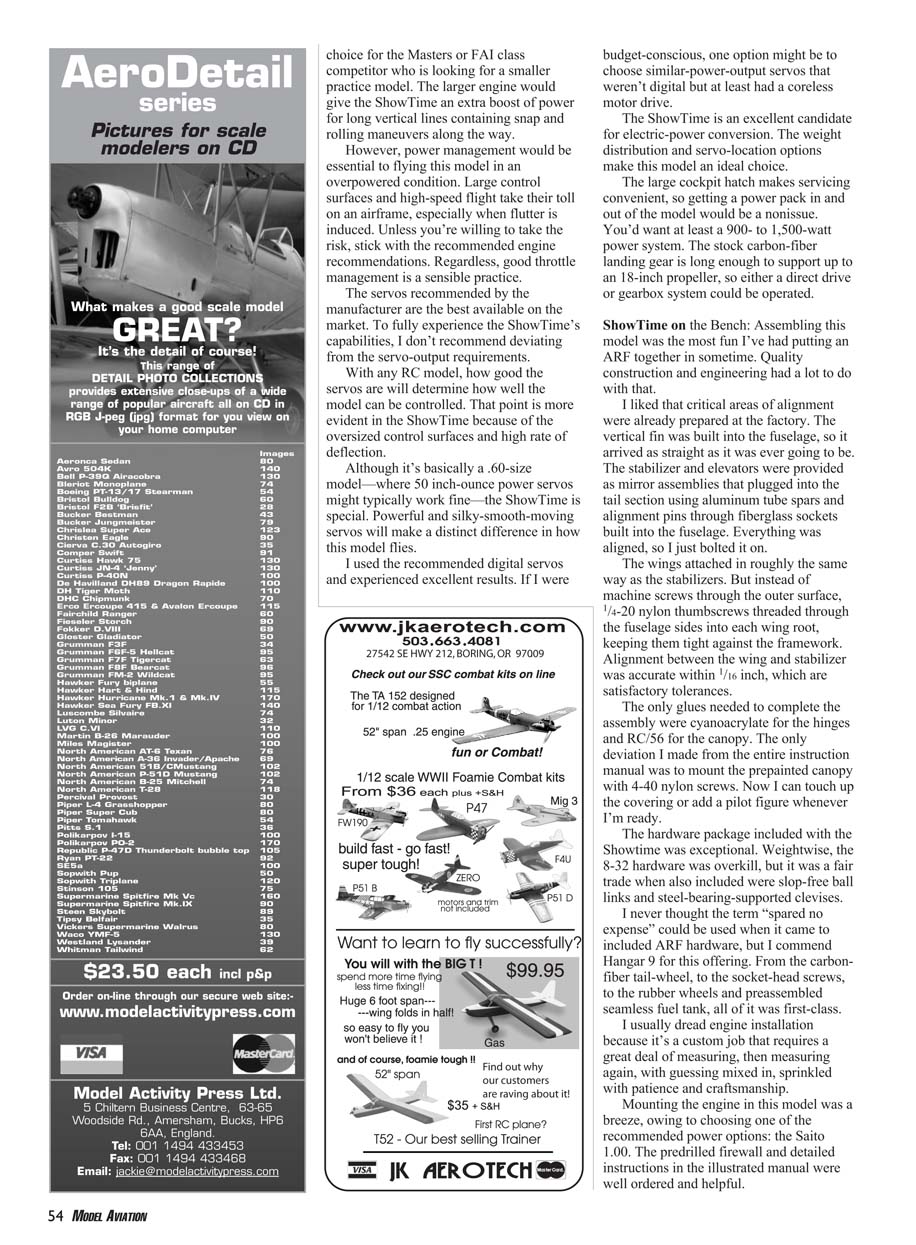
- Construction highlights: all-wood airframe; fiberglass wingtips, cowl, and wheel pants; carbon-fiber landing gear; clear smoked canopy.
- Covering/finish: four-color genuine UltraCote film trim scheme, matching fuelproof paint on landing gear, cowling, canopy, and wheel pants.
- Price: $199.99.
The ShowTime’s lightweight airframe allows operation with a strong .61 two-stroke, but that setup will give only modest climb performance. The .91–1.10 class of two- and four-stroke glow engines are excellent choices for maximizing the model’s potential. The correct engine and radio-accessory choices are essential to optimize performance.
Pluses and Minuses
- Brittle tail-wheel linkage springs.
Test-Model Details
- Engine used: Saito 1.00 four-stroke
- Propeller: APC 14 x 8 (break-in), APC 15 x 4W (flying)
- Fuel: 600 cc (approximately 14 oz) tank, Magnum #1
- Radio system: JR 6102 transmitter, JR 770S receiver; four JR PS9411 servos, one JR PS8411SA servo, one JR PS537 servo; JR 1500 mAh 6.0V battery; ElectroDynamics Pro Servo Reverser Y; four 9-inch servo extensions
- Ready-to-fly weight: 8.69 lb
- Flight duration: exceeds 10 minutes
Specifications
- Type: RC sport aerobatic ARF
- Pilot skill level: Advanced
- Wingspan: 66 in
- Wing area: 900 in²
- Length: 68.3 in
- Weight: 8–9 lb
- Wing loading (average): 21.76 oz/ft²
- Engine: .61–1.00 two-stroke or .91–1.10 four-stroke glow
- Radio: six channels (minimum), six heavy-duty servos
- Construction: all-wood airframe; fiberglass wingtips, cowl, and wheel pants; carbon-fiber landing gear; clear smoked canopy
- Covering/finish: four-color UltraCote film trim scheme; matching fuelproof paint on landing gear, cowl, canopy, wheel pants
Power and Propeller Notes
The ShowTime was first flown with an APC 14 x 6 prop on the Saito tuned roughly 1/4 turn rich (this prop was smaller than recommended). The extra fuel kept the engine cool even though it was turning a high RPM (approximately 9,000). Subsequent flights leaned the engine further and, after the sixth flight, it graduated to an APC 14 x 8 and was flown with an optimal high-speed needle setting.
For fun-flying, a larger-diameter, smaller-pitch propeller will limit top-end speed while improving throttle response. For hover, 3-D and 4-D flight you want as much thrust as possible to increase airflow over the control surfaces; an APC 15 x 4W is a good option. The engine typically had bumpy starts, but the starter was only needed on the first flight of the day. The Saito FA-100 is a clean-running engine with a fuel system that is easy to set up and tune. After roughly two hours of operation, the valves should be checked and adjusted as needed; tools and instructions are provided.
Saito FA-100 Engine
Four-stroke engines have been around long enough that there’s nothing to be afraid of when it comes to running and tuning them. Two-strokes have fewer parts and are simpler in some ways, but the modern four-stroke produces excellent power and smoothness.
The Saito FA-100 is worth serious consideration if you have a 60-size model that needs an engine. Compared with the slightly displaced .91 Saito and similar-sized engines, it will turn the same 14 x 8 APC prop 300–700 rpm faster under equal conditions. Refinements permit the FA-100 to be approximately 2 oz lighter than most other .91 four-strokes.
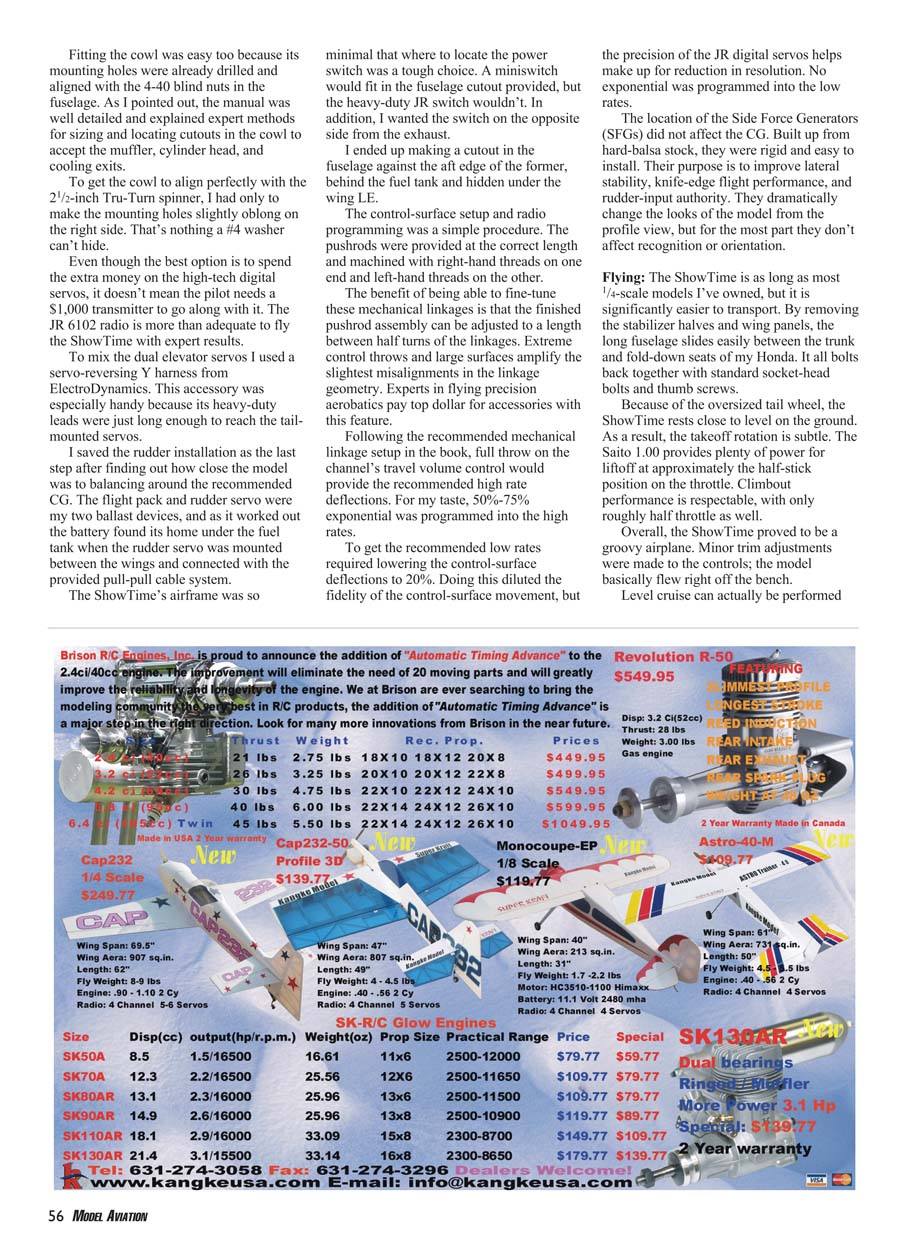
Don’t be afraid to mount the Saito inverted. Forget the rumors about getting an engine to idle inverted: on the ShowTime 4D it only took low-speed needle tweaking to achieve a stable all-day idle at 2,000 rpm (with no glow heat). Throttle transition from long idles is immediate; slam the throttle to full and the engine doesn’t cough, spit, or stutter. Nothing builds confidence in a new airplane like a reliable engine. The FA-100 required only a minimal run-in period.
FA-100 Specifications
- Type: Four-stroke
- Displacement: 1.10 cu in (17.10 cc)
- Bore: 1.14 in (29.0 mm)
- Stroke: 1.02 in (26.0 mm)
- Cylinder: Single, chrome plated (AAC)
- Total weight: 20.9 oz
- Crankshaft threads: 8 x 1.25 mm
- Propeller range: 13 x 9 – 14 x 10
- RPM range: 2,000–11,000
- Horsepower: 1.8
The larger engine options would give the ShowTime extra power for long vertical lines, snaps, and rolling maneuvers, which might appeal to pilots practicing for Masters or FAI class competition looking for a smaller practice model. However, power management becomes essential with an overpowered setup; large control surfaces and high-speed flight increase the risk of structural issues and flutter. Unless you're willing to accept that risk, stick with the recommended engine sizes and practice good throttle management.
Servos, Radio and Power Options
The servos recommended by the manufacturer are excellent. To fully experience the ShowTime's capabilities, do not deviate from the servo-output requirements. With any RC model, servo quality determines how well the model can be controlled; this is especially evident on the ShowTime because of its oversized control surfaces and high rates. Although a .60-size model might typically be fine with 50 in-oz servos, the ShowTime benefits significantly from powerful, silky-smooth digital servos. If budget-conscious, choose similar-power analog servos with coreless motors rather than cheap weak units.
The ShowTime is also an excellent candidate for electric conversion. Weight distribution and servo locations make installation straightforward. The large cockpit hatch makes battery and ESC access easy. You'd want at least a 900–1,500 W power system. The stock carbon-fiber landing gear is long enough to support up to an 18-inch propeller, so either direct drive or a gearbox system is feasible.
ShowTime on the Bench (Assembly)
Assembling this model was enjoyable. Quality construction and engineering made setup straightforward. Critical alignment areas were prepared at the factory: the vertical fin was built into the fuselage, stabilizer and elevator assemblies were mirror units that plugged into the tail using aluminum tube spars and alignment pins through fiberglass sockets. Everything was aligned, so installation was simple.
Wings attach similarly: 1/4-20 nylon thumbscrews threaded through the fuselage sides into each wing root draw the panels tight. Alignment between wing and stabilizer was accurate within 1/16 inch.
Only cyanoacrylate (for hinges) and RC/56 (for the canopy) were needed as glue. One personal deviation from the manual was mounting the prepainted canopy with 4-40 nylon screws so the canopy can be removed for future touch-ups or to add a pilot figure.
The included hardware package was excellent: slop-free ball links, steel-bearing-supported clevises, carbon-fiber tail-wheel, socket-head screws, rubber wheels, preassembled seamless fuel tank — all first-class. The 8-32 hardware felt overkill weight-wise but was acceptable given the quality.
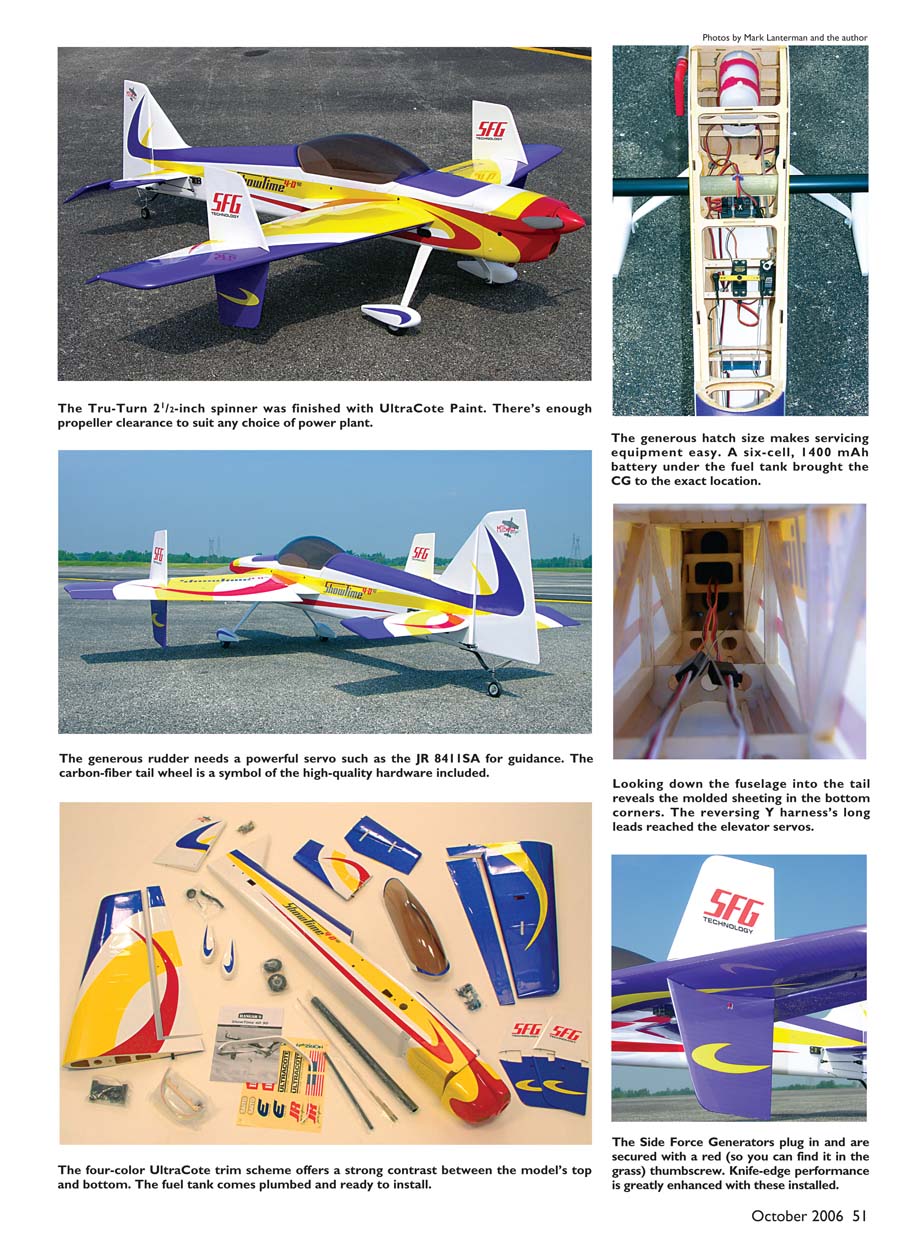
Engine installation was easy thanks to the predrilled firewall and detailed manual instructions; mounting the Saito 1.00 was straightforward. The cowl fit well because its mounting holes were already aligned with the 4-40 blind nuts in the fuselage. The manual explained sizing and locating cutouts for the muffler, cylinder head, and cooling exits. To align the cowl perfectly with the 2-1/2-inch Tru-Turn spinner I made the right-side mounting holes slightly oblong and hidden the small gap with a #4 washer.
Although high-tech digital servos are recommended, you don't need an expensive transmitter to fly the ShowTime. The JR 6102 radio worked very well. To mix the dual elevator servos I used a servo-reversing Y harness from ElectroDynamics; its heavy-duty leads were long enough to reach the tail servos.
Balance and CG were checked before final rudder installation. The flight pack and rudder servo served as ballast; the battery found its home under the fuel tank when the rudder servo was mounted between the wings and connected using the provided pull-pull cable system.
Locating the power switch took some thought: a mini-switch fit in the fuselage cutout provided, but the heavy-duty JR switch did not. I made a cutout against the aft edge of the former, behind the fuel tank and hidden under the wing leading edge.
Control-surface setup and radio programming were simple. Pushrods were provided at correct lengths with right-hand threads on one end and left-hand threads on the other, allowing fine mechanical adjustment. Following the recommended linkage setup, full travel on the channel's travel volume control provided the recommended high-rate deflections. I programmed 50%–75% exponential on the high rates and set the low rates to 20% (no exponential), which diluted resolution slightly, but the fidelity of the JR digital servos made up for that.
Side Force Generators (SFGs), built from hard balsa, were rigid and easy to install. Their purpose is to improve lateral stability, knife-edge performance, and rudder authority. They change the model’s profile but do not significantly affect orientation.
Flying
The ShowTime is as long as most 1/4-scale models I've owned, but it's significantly easier to transport. Removing stabilizer halves and wing panels allows the fuselage to fit easily in a car. It all bolts back together with socket-head bolts and thumb screws.
The oversized tail wheel keeps the ShowTime nearly level on the ground, making takeoff rotation subtle. The Saito 1.00 provides plenty of power for liftoff at roughly half throttle. Climbout performance is respectable at about half throttle.
Overall, the ShowTime proved to be a groovy airplane. Minor trim adjustments were needed, but the model basically flew right off the bench.
—Michael Ramsey
Transcribed from original scans by AI. Minor OCR errors may remain.

