

Plane Talk: Helicopter Hobbies Quick QJ8 (EP-8v2SP)
BY GREG GIMLICK
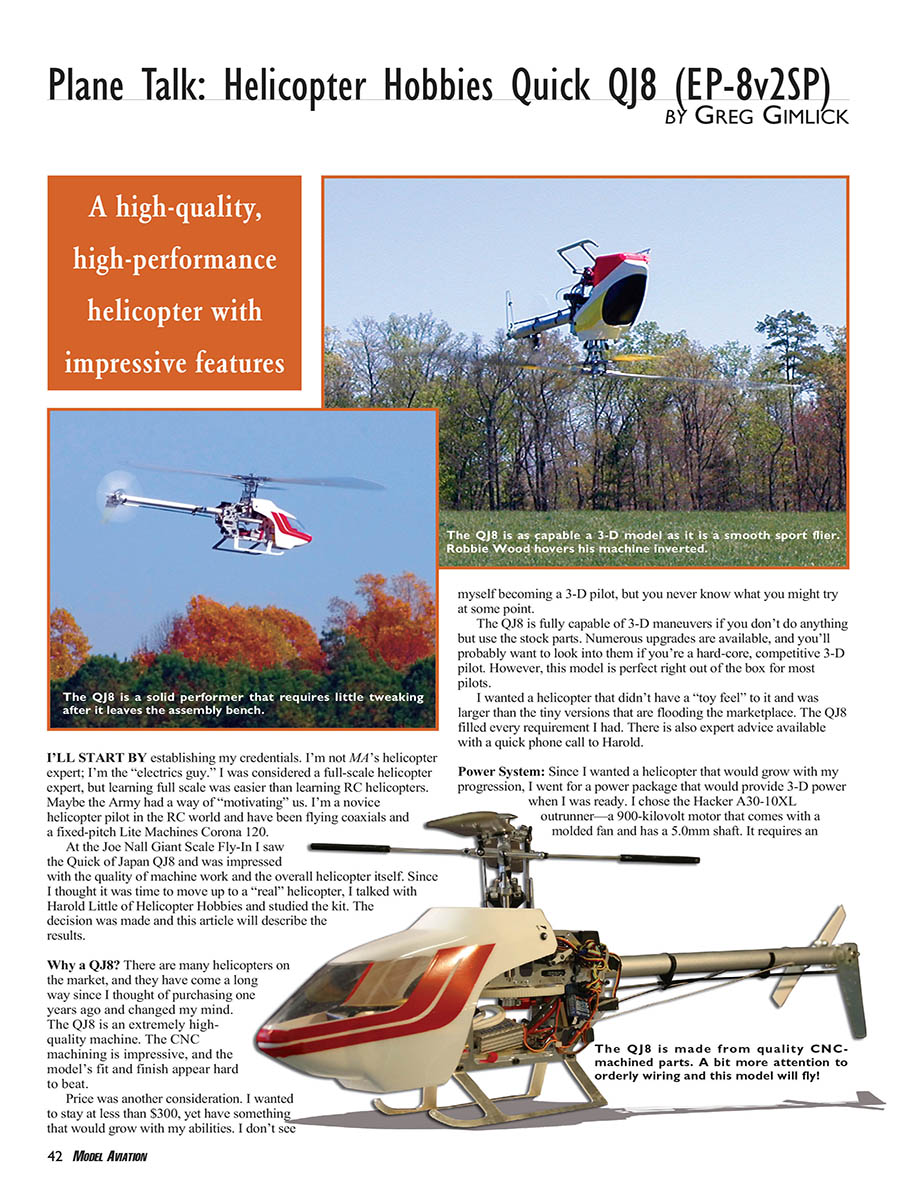
I'll start by establishing my credentials. I'm not MA's helicopter expert; I'm the "electrics guy." I was considered a full-scale helicopter expert, but learning full scale was easier than learning RC helicopters. Maybe the Army had a way of "motivating" us. I'm a novice helicopter pilot in the RC world and have been flying coaxials and a fixed-pitch Lite Machines Corona 120. At the Joe Nall Giant Scale Fly-In I saw the Quick of Japan QJ8 and was impressed with the quality of machine work and the overall helicopter itself. Since I thought it was time to move up to a "real" helicopter, I talked with Harold Little of Helicopter Hobbies and studied the kit. The decision was made and this article will describe the results.
Why a QJ8? There are many helicopters on the market, and they have come a long way since I thought of purchasing one years ago and changed my mind. The QJ8 is an extremely high-quality machine. The CNC machining is impressive, and the model's fit and finish appear hard to beat.
Price was another consideration. I wanted to stay at less than $300, yet have something that would grow with my abilities. I don't see myself becoming a 3-D pilot, but you never know what you might try at some point.
The QJ8 is fully capable of 3-D maneuvers if you don't do anything but use the stock parts. Numerous upgrades are available, and you'll probably want to look into them if you're a hard-core, competitive 3-D pilot. However, this model is perfect right out of the box for most pilots.
I wanted a helicopter that didn't have a "toy feel" to it and was larger than the tiny versions that are flooding the marketplace. The QJ8 filled every requirement I had. There is also expert advice available with a quick phone call to Harold.
Power System
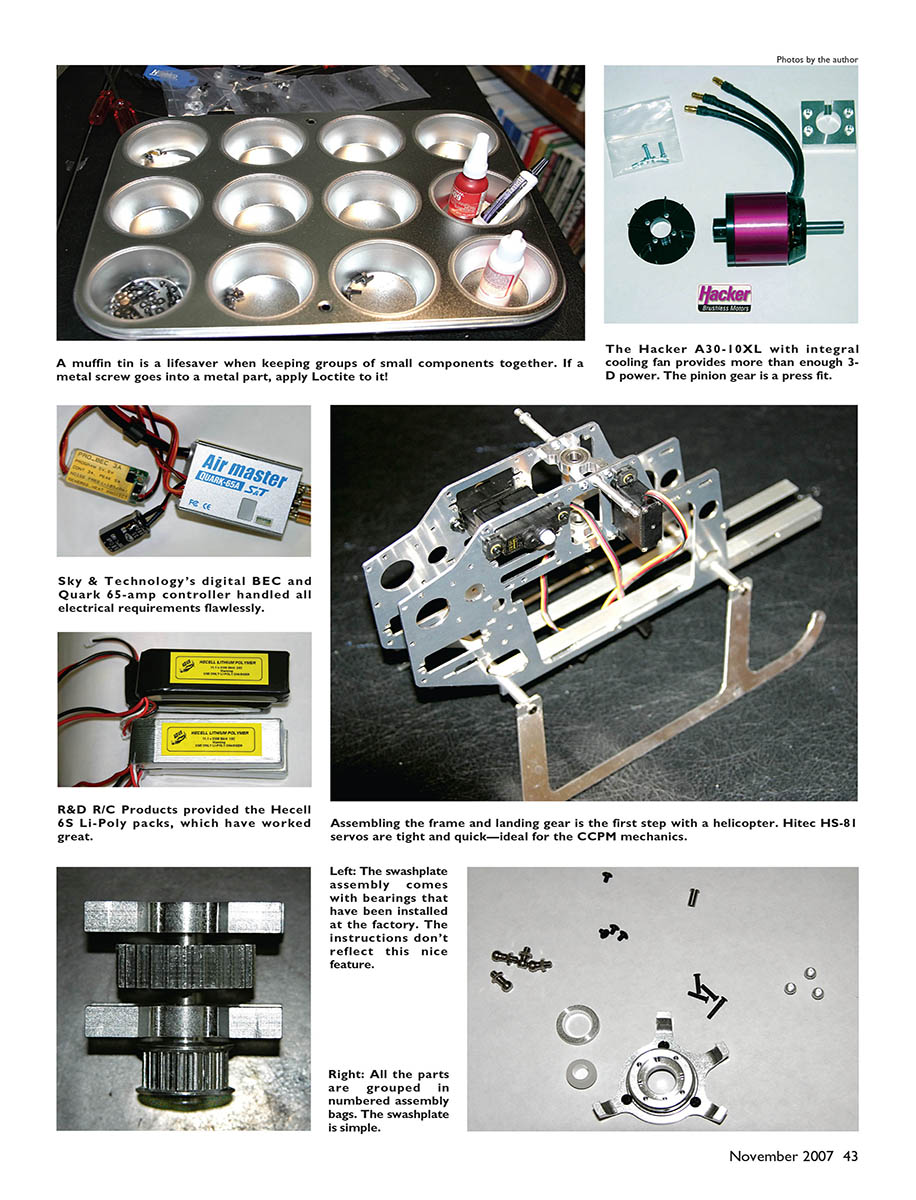
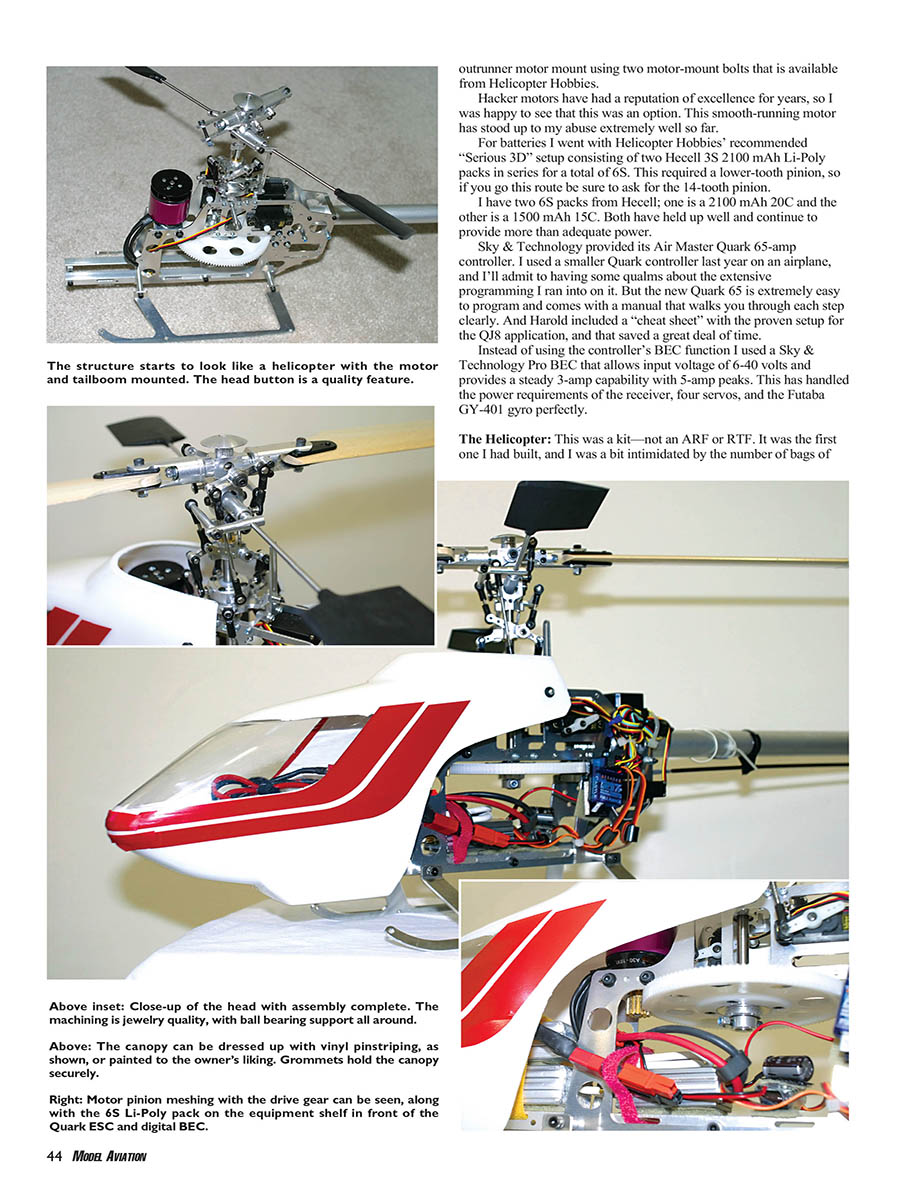
Since I wanted a helicopter that would grow with my progression, I chose a power package that would provide 3-D power when I was ready. I selected the Hacker A30-10XL outrunner — a 900-kilovolt motor that comes with a molded fan and has a 5.0 mm shaft. It requires an outrunner motor mount using two motor-mount bolts (available from Helicopter Hobbies). The pinion gear is a press fit.
Hacker motors have had a reputation for excellence for years, and this smooth-running motor has stood up to my abuse extremely well so far.
For batteries I went with Helicopter Hobbies’ recommended "Serious 3D" setup consisting of two Hecell 3S 2100 mAh Li-Poly packs in series for a total of 6S. This required a lower-tooth pinion, so if you go this route be sure to ask for the 14-tooth pinion.
I have two 6S packs from Hecell; one is a 2100 mAh 20C and the other is a 1500 mAh 15C. Both have held up well and continue to provide more than adequate power.
Sky & Technology provided its Air Master Quark 65-amp controller. I used a smaller Quark controller last year on an airplane and initially had some qualms about the extensive programming. The new Quark 65 is extremely easy to program and comes with a manual that walks you through each step clearly. Harold included a "cheat sheet" with the proven setup for the QJ8 application, which saved a great deal of time.
Instead of using the controller’s BEC function I used a Sky & Technology Pro BEC that allows input voltage of 6–40 volts and provides a steady 3-amp capability with 5-amp peaks. This has handled the power requirements of the receiver, four servos, and the Futaba GY-401 gyro perfectly.
The Helicopter
This was a kit—not an ARF or RTF. It was the first one I had built, and I was a bit intimidated by the number of bags of parts. Coming out of the box the components didn't resemble anything that might end up looking like a helicopter.
I was told that it would take approximately 18 hours to complete the model. That was a good estimate—even for someone who had never constructed one from the ground up.
Harold provided an excellent CD full of color photos to go along with the well-illustrated manual that had been translated to English. You might not think this is a big deal if you've built helicopters before, but it's huge from a beginner's standpoint!
Organization is everything when building a helicopter from a kit. I credit Jim Ryan of Ryan Aircraft for suggesting that I get a muffin pan to put the parts in as I unbagged them. It made life much easier when handling hundreds of tiny screws, washers, etc.
Before unbagging anything I highly recommend that you go through the parts lists and label each bag with the corresponding assembly numbers. This will avoid a lot of confusion later and make your life easy.
As you get ready to assemble, don't look at the big picture of a completed helicopter; look at the project as a bunch of smaller sets of parts. This makes the process less intimidating, and before you know it you'll be putting completed assemblies together and end up with a helicopter. I worked on the project a bit each evening and would target completing one assembly each time. I ended up getting excited and doing several each night.
Hitec HS-81 servos are tight and quick—ideal for the CCPM mechanics. I used Hitec HS-81 servos for the head and an HS-81MG on the tail rotor. This size fit into the servo mounting holes perfectly. Don't forget your Loctite on each screw and bolt.
Specifications
- Pinion gear: 14 teeth for use with Hacker A30-10XL and 6S Li-Poly
- Parts: CNC-machined aluminum
- Bearings: High-quality Japanese; most preinstalled
- Head: Metal hub, single spindle
- Blade grips: Metal
- Pitch arms: Metal
- Swashplate: Metal
- Main shaft: 6 mm
- Bearing blocks: Metal with bearings preinstalled
- Flybar: 3 mm
- Flybar arms: Metal
- Tailboom length: 18 inches
- Ready-to-fly weight: 53 ounces with 6S Hecell Li-Poly pack
- Tail rotor: Belt driven
- Tail-rotor blades: Plastic
- Main rotor disc diameter: 35.25 inches
- Total length: 32 inches
- Total height: 11 inches
- Tail-rotor diameter: 7 inches
- Main gear-to-tail rotor ratio: 1:4.8
- Frame: Rigid aluminum
- Vertical fin: Fiberglass
- Canopy: Clear polycarbonate
- Main rotor blades: 400 mm Japanese wood
Assembly
The translated manual and photo CD guided me through each step, and knowing there was a real person on the other end of the phone at Helicopter Hobbies really helped.
For this project make sure you don't forget your thread locker of choice, and gather all the tools you'll need. Read the manual and study the photos. Then read through it again.
Assembly began with building the frame, so you'll need your servos handy to bolt into place as you go. Don't forget your Loctite on each screw and bolt.
A few assembly tips and notes:
- When you build the tail-rotor drive assembly, the side of the gear with the retaining pin faces down. It can be assembled either way physically, but it won't line up properly if you put the pins on the wrong side.
- There is a circlip used on the bottom of the shaft to hold the assembly together. It is in the bag of parts—don't forget it.
- Make sure you have the right motor mount for whatever motor you choose. If you forgot, you can use the one in the kit since the distance between the sides of the frame remains the same, but you won't be able to fit some motors until you change mounts.
- The instructions show the swashplate assembly as having more parts than you'll find in the bag because some bearings are already preinstalled at the factory.
- Use two O-rings on each side when assembling the seesaw head. Order a couple of spares when you buy your kit; they will eventually deteriorate and you'll notice slop when flying.
- When assembling the blade grips the instructions mention that some heat may be required. I didn't find this necessary in my kit, but if you do use heat, use only a little—definitely not a torch.
- Do not over-tighten the tail belt. These cogged belts don't like to be stretched tight and will wear parts excessively, draw more current, and stress components. If the belt is too loose it will jump the cogs; look for roughly 3/16 inch of deflection and tighten the adjustment screws. Also check that the tail rotor turns the correct direction—if not, you probably have a twist in the belt inside the tailboom.
- All the rod linkages for the controls are depicted in the instructions with proper starting lengths. These are measured from the center of the ball link to the center of the opposite ball link and are "starting lengths." You will need to adjust them to properly align everything with your particular equipment choices.
- The canopy is a two-piece clear polycarbonate assembly that you cut from the carrier sheets, paint, and install grommets in. The instructions provide templates for the holes. I painted the inside of the canopy before gluing the top and bottom halves together. Note: there's a protective film on the outside that is almost impossible to detect—be sure to remove it before you glue the pieces together.
Follow the small addendum sheet Harold includes in each kit. It contains trimming recommendations and suggests moving mounting holes back to allow for more battery room—follow those steps as they will prevent mistakes.
Pluses and Minuses
Pluses:
- Quality of machine work
- Parts fit during assembly
- Illustrated manual with photo CD
- Phone support from Helicopter Hobbies
- Flight characteristics
- Power-system recommendation
Minuses:
- No spare ball links or balls included
- Two-piece canopy requires more work to finish
Final Details
There is one universal truth when it comes to helicopters, whether you're flying full scale or models: check everything twice and then check it again. Rotary-wing aircraft have many moving parts, and everything is subject to vibrating loose at some point. Take nothing for granted and double-check everything.
My setup isn't for extreme 3-D. I set my pitch range to be -3° to +8°. I added some exponential on my cyclic to help with overcontrolling—roughly -20%—and left the tail rotor with no exponential so the gyro would not be confused.
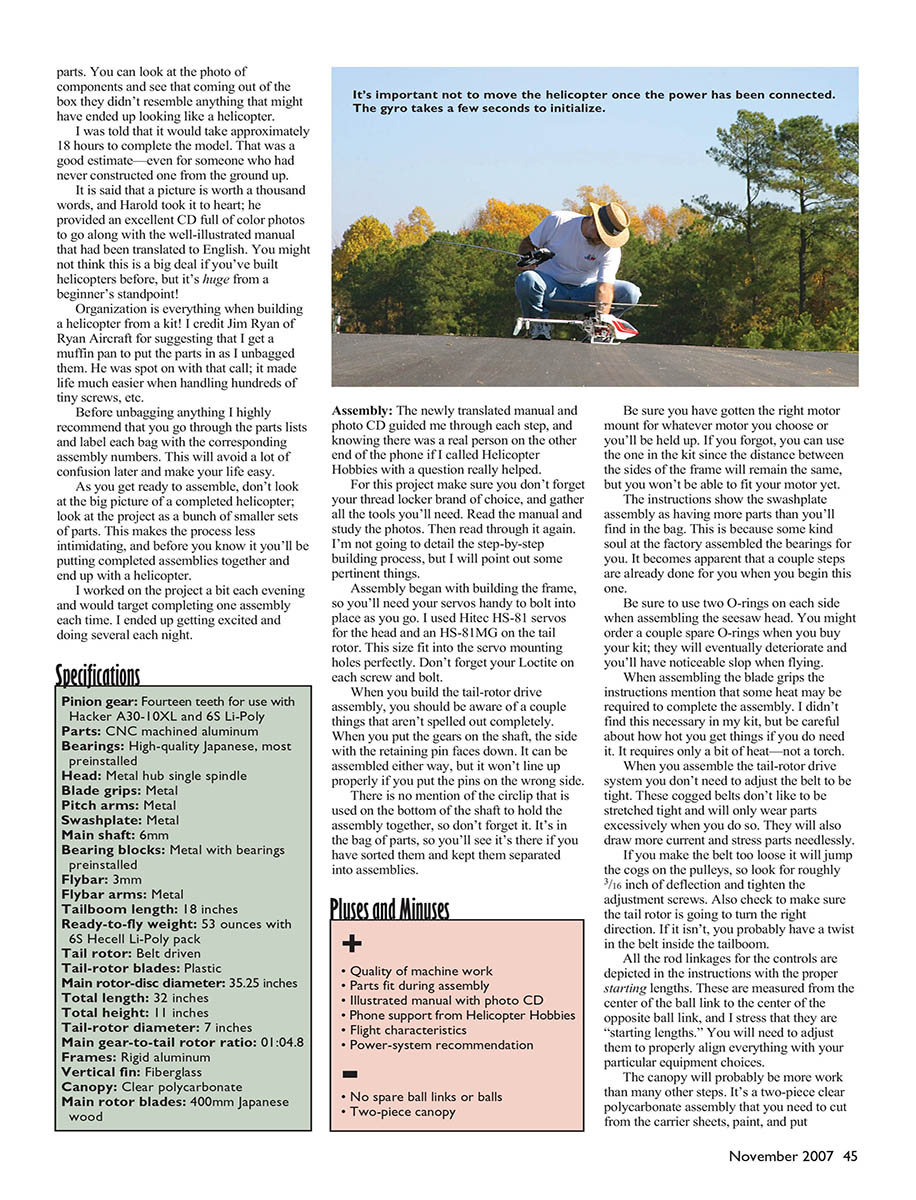
There are many gyros on the market, but I'm convinced that the best one out there right now is the Futaba GY-401; I've put one on each of my helicopters. These are not the easiest to set up, but you'll be rewarded with a rock-solid tail if you take your time and follow the instructions. If you run into problems you can find numerous online sources to guide you through the setup process.
Flying
This is why we started this journey. When I took my QJ8 to the field the first time I made a set of training gear from crossed dowels and plastic golf balls. I've been flying my other helicopters but thought a bit of insurance against clumsy fingers might be in order until I got the feel of the new model.
Right off the bat I found that I love collective-pitch helicopters. Holding altitude at a hover is so much easier when every move of the collective/throttle doesn't cause the aircraft to jump or descend.
After tuning the tail/gyro a bit, my hovering became rock solid and transition to forward flight was smooth and controllable. When descending and returning to a hover the gyro in its heading-hold position holds the tail beautifully without the requisite chasing of the tail when you apply power to check the descent. You'll need to stay on top of it, but it's extraordinarily solid.
This kit doesn't have a driven tail, so if you perform an autorotation be aware that there is no tail-rotor control. At the bottom of the autorotation you may experience yaw when initial pitch is applied. It won't be a problem during descent because there is no torque from the main rotor system requiring compensation.
I have not put my helicopter in a 3-D pilot's hands yet and haven't tried extreme 3-D myself because it's well beyond my skill level right now. I have seen several QJ8s fly 3-D and they were set up similarly to mine, with the exception of additional pitch and radio programming. One day I'll get up the nerve to let someone twist mine out, but for now I'm happy with what it's doing.
I don't see how I could have made a better choice for my first real collective-pitch helicopter. It's big enough to be stable and easy to see at a distance. This machine is responsive enough to be sporty and stable enough not to induce fear.
Building the kit was enjoyable and instructive. By building a model from a kit a newbie learns much more about how the helicopter works, which pays off when it's time to repair it.
I finally had my first big mishap: I lost control and put the model firmly onto a paved surface, landing on the left rear corner of the landing gear. It hit hard enough to bend the gear significantly and then laid on its side. Even though I had pulled the throttle off, things happened quickly.
In the end I only needed to replace the main blades, the tail-rotor blades, and the tail-rotor servo arm, and bend the gear straight. I couldn't believe that's all it took.
Have I mentioned that this is one great helicopter?
Greg Gimlick [email protected]
Manufacturer/Distributor
- Quick of Japan / Helicopter Hobbies
- Box 123, Pageland, SC 29728
- Phone: (704) 624-6473
- Email: [email protected]
- Web: www.helicopterhobbies.com
Transcribed from original scans by AI. Minor OCR errors may remain.

