
Plane Talk: Kangke USA Dragon 90 ARF
By Jerry Smith
This simple sport model will add fire to 3-D flight.
The Dragon 90 is another in a long line of ARFs that Kangke Industrial USA, Inc. has manufactured to attract the wannabe and experienced 3-D pilot. It is not a trainer, but a true aerobatic aircraft purposely designed to fulfill the needs of those craving fun and excitement while showing their skills to the crowd.
RC airplanes are a wide-ranging field that engenders passion in its practitioners, and like all great forms of expression it creates skills and provides fun and excitement.
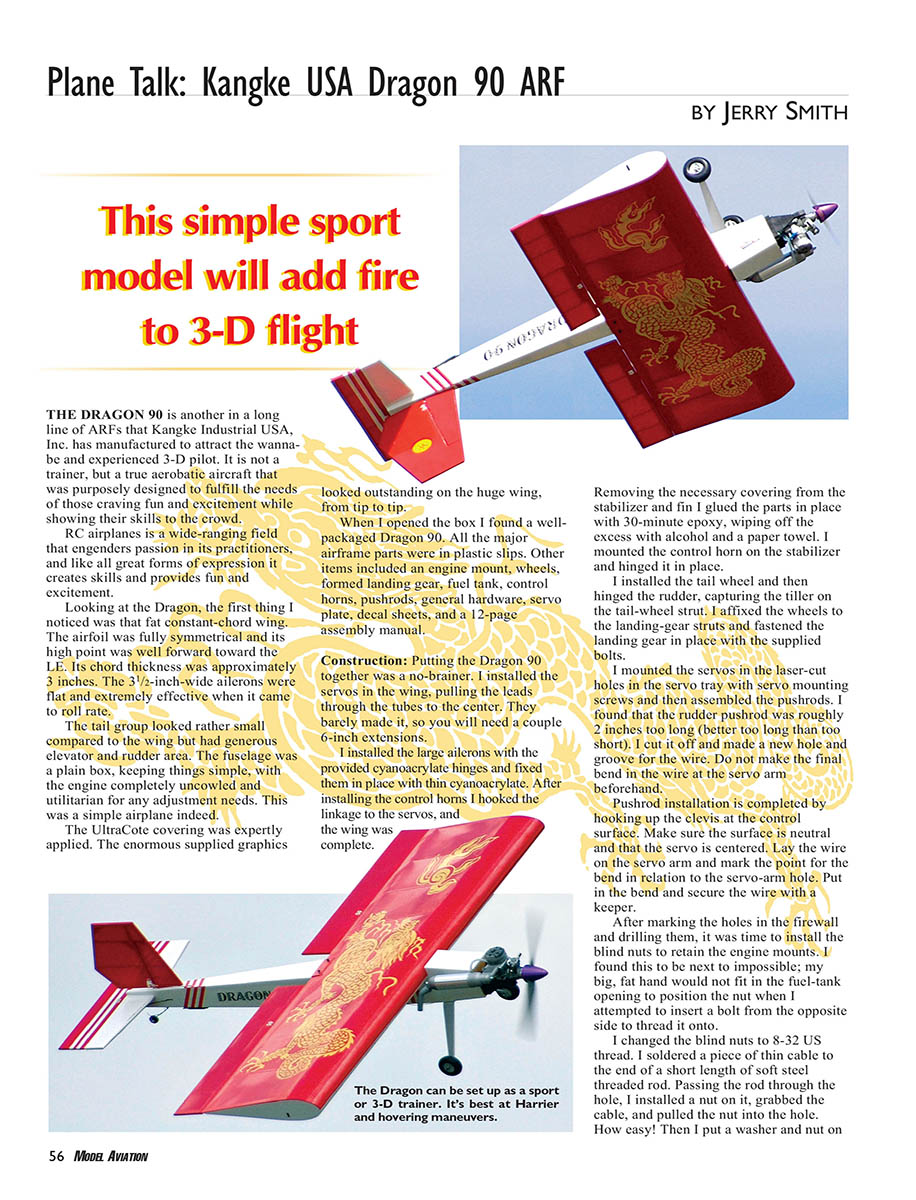
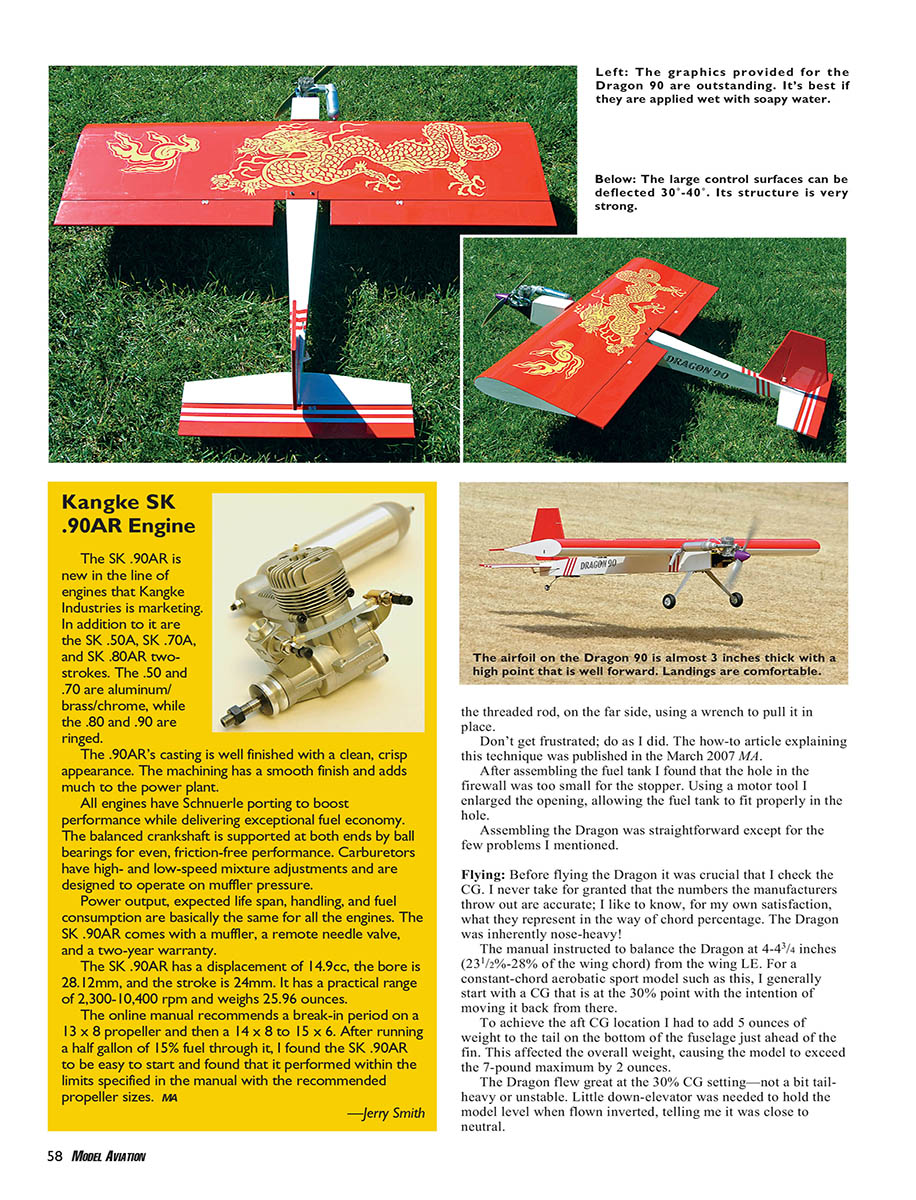
Looking at the Dragon, the first thing I noticed was the fat constant-chord wing. The airfoil is fully symmetrical and its high point is well forward toward the leading edge (LE). Its chord thickness is approximately 3 inches. The 3½-inch-wide ailerons are flat and extremely effective when it comes to roll rate.
The tail group looked rather small compared to the wing but has generous elevator and rudder area. The fuselage is a plain box, keeping things simple, with the engine completely uncowled and utilitarian for any adjustment needs. This is a simple airplane indeed.
The UltraCote covering was expertly applied. The enormous supplied graphics look outstanding on the huge wing, from tip to tip.
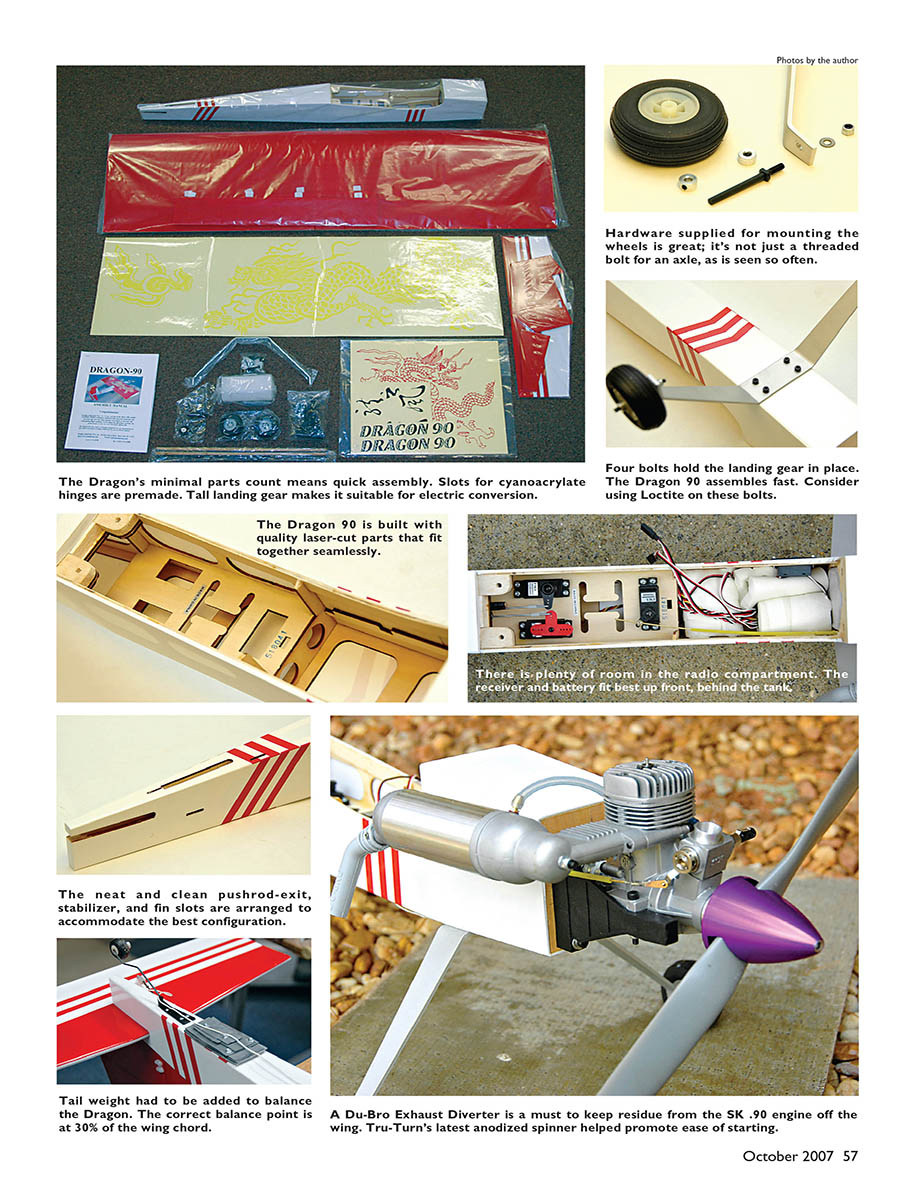
When I opened the box I found a well-packaged Dragon 90. All the major airframe parts were in plastic slips. Other items included:
- Engine mount
- Wheels and formed landing gear
- Fuel tank
- Control horns and pushrods
- General hardware and servo plate
- Decal sheets
- 12-page assembly manual
Construction
Putting the Dragon 90 together was a no-brainer. I installed the servos in the wing and pulled the leads through the tubes to the center. They barely made it, so you will need a couple of 6-inch extensions.
I installed the large ailerons with the provided cyanoacrylate hinges and secured them in place with thin cyanoacrylate. After installing the control horns I hooked the linkage to the servos, and the wing was complete.
I removed the necessary covering from the stabilizer and fin and glued the parts in place with 30-minute epoxy, wiping off the excess with alcohol and a paper towel. I mounted the control horn on the stabilizer and hinged it in place.
I installed the tail wheel and then hinged the rudder, capturing the tiller on the tail-wheel strut. I affixed the wheels to the landing-gear struts and fastened the landing gear in place with the supplied bolts.
I mounted the servos in the laser-cut holes in the servo plate and then assembled the pushrods. I found that the rudder pushrod was roughly 2 inches too long (better too long than too short). I cut it down and made a new hole and groove for the wire. Do not make the final bend in the wire at the servo arm beforehand. Pushrod installation is completed by hooking up the clevis at the control surface. Make sure the surface is neutral and that the servo is centered. Lay the wire on the servo arm and mark the point for the bend in relation to the servo-arm hole. Put in the bend and secure the wire with a keeper.
After marking the holes in the firewall and drilling them, it was time to install the blind nuts to retain the engine mounts. I found this next to impossible; my big hand would not fit in the fuel-tank opening to position the nut when I attempted to insert a bolt from the opposite side to thread it on. I changed the blind nuts to 8-32 US thread.
I soldered a piece of thin cable to the end of a short length of soft-steel threaded rod. Passing the rod through the hole, I installed a nut on it, grabbed the cable, and pulled the nut into the hole. I held the threaded rod on the far side and used a wrench to pull it in place. Then I put on a washer and nut. How easy! Don't get frustrated; do as I did. The how-to article explaining this technique was published in the March 2007 MA.
After assembling the fuel tank I found that the hole in the firewall was too small for the stopper. Using a motor tool I enlarged the opening, allowing the fuel tank to fit properly.
Assembling the Dragon was straightforward except for the few problems I mentioned.
Flying
Before flying the Dragon it was crucial that I check the CG. I never take for granted that the numbers the manufacturers provide are accurate; I like to know, for my own satisfaction, what they represent in terms of percent of wing chord. The Dragon was inherently nose-heavy!
The manual instructed balancing the Dragon at 4-3/4 inches (23½%–28% of the wing chord) from the LE. For a constant-chord aerobatic sport model such as this, I generally start with a CG at the 30% point with the intention of moving it back from there.
To achieve that CG location I had to add 5 ounces of weight to the tail on the bottom of the fuselage just ahead of the fin. This affected the overall weight, causing the model to exceed the 7-pound maximum by 2 ounces.
The Dragon flew great at the 30% CG setting—not a bit tail-heavy or unstable. Little down-elevator was needed to hold the model level when flown inverted, telling me it was close to neutral.
The Kangke SK .90 engine had enough power to haul the Dragon straight up and pull out of hovers. You can perform most 3-D maneuvers, from mild to wild, with this aircraft if you have the skills. It is stable and goes where you point it; it's easy to fly.
Most of the time I flew the Dragon at half throttle. I used full throttle only when going vertical and low idle when heading for earth.
The first few flights were with an APC 15 x 6 propeller. Then I switched to a 14 x 6, and the SK .90 seemed to run happier but may have needed more break-in time.
I installed one of Tru-Turn's latest anodized spinners to facilitate starting. They look cool, and the engine performed when told to.
I mounted the engine upright, which gave the muffler exhaust an issue with the wing. I installed a Du-Bro exhaust deflector (item 697) and that did the trick, leaving just a bit of exhaust residue on the stabilizer to wipe off. A Du-Bro exhaust diverter is a must to keep residue from the SK .90 engine off the wing.
If you are an intermediate or expert pilot who is looking to improve your skills or you just like to burn around the sky, the Dragon 90 will give you your RC fix in no time. Paired with a good, strong engine it will satisfy you with any 3-D maneuvers you have in mind.
This model is low in cost, high in pleasure, and simple to maintain. You won't go wrong with one in your hangar.
Jerry Smith [email protected]
Manufacturer/Distributor: Kangke Industrial USA 65 East Jefryn Blvd. Deer Park, NY 11729 (631) 274-3058 [email protected] www.kangkeusa.com
Sources:
- FMA Direct servos: www.fmadirect.com
- Du-Bro hardware: www.dubro.com
- Tru-Turn spinner: www.truturn.com
- Futaba transmitter/receiver: www.futabarc.com
- SR Batteries flight battery: www.srbatteries.com
Other Review Sources:
- None on record
Specifications
- Type: Fun-Fly ARF
- Pilot skill level: Intermediate to expert
- Wingspan: 53 inches
- Wing area: 892 square inches
- Length: 53 inches
- Weight: 5.5–6.5 pounds
- Wing loading: At 6.5 pounds, 16.7 ounces/square foot
- Engine: .70–1.10 two-stroke glow
- Radio: Four channels, five servos
- Construction: Balsa and light plywood
- Covering/finish: Oracover (UltraCote)
- Price: $179.77
Test-Model Details
- Engine used: Kangke SK .90AR
- Propeller: APC 13 x 8 (break-in), APC 15 x 6 (flight)
- Fuel: 15% Riches Brew
- Radio system: Futaba 9CA transmitter; Futaba FM receiver; four FMA Direct PS705MBB, Futaba S148 servos; 1000 mAh SR Batteries flat pack; two 6-inch servo extensions
- Ready-to-fly weight: 7 pounds, 2 ounces (18.4 ounces/square foot)
- Flight duration: 10–15 minutes
Pluses and Minuses
- Great flight characteristics
- Outstanding graphics
- Easy to transport
- Quick assembly at the field
- Engine-mount blind nuts hard to install
- Rudder pushrod too long
- Fuel-tank stopper does not fit hole in firewall
Transcribed from original scans by AI. Minor OCR errors may remain.

