

Plane Talk: Laser Design Services JetMach 60
Pete Oochroma
THERE ARE PLENTY of similar balsa jet trainer kits out there, some of which are very nice, but the turbine-powered JetMach is simple, straightforward, and economical.
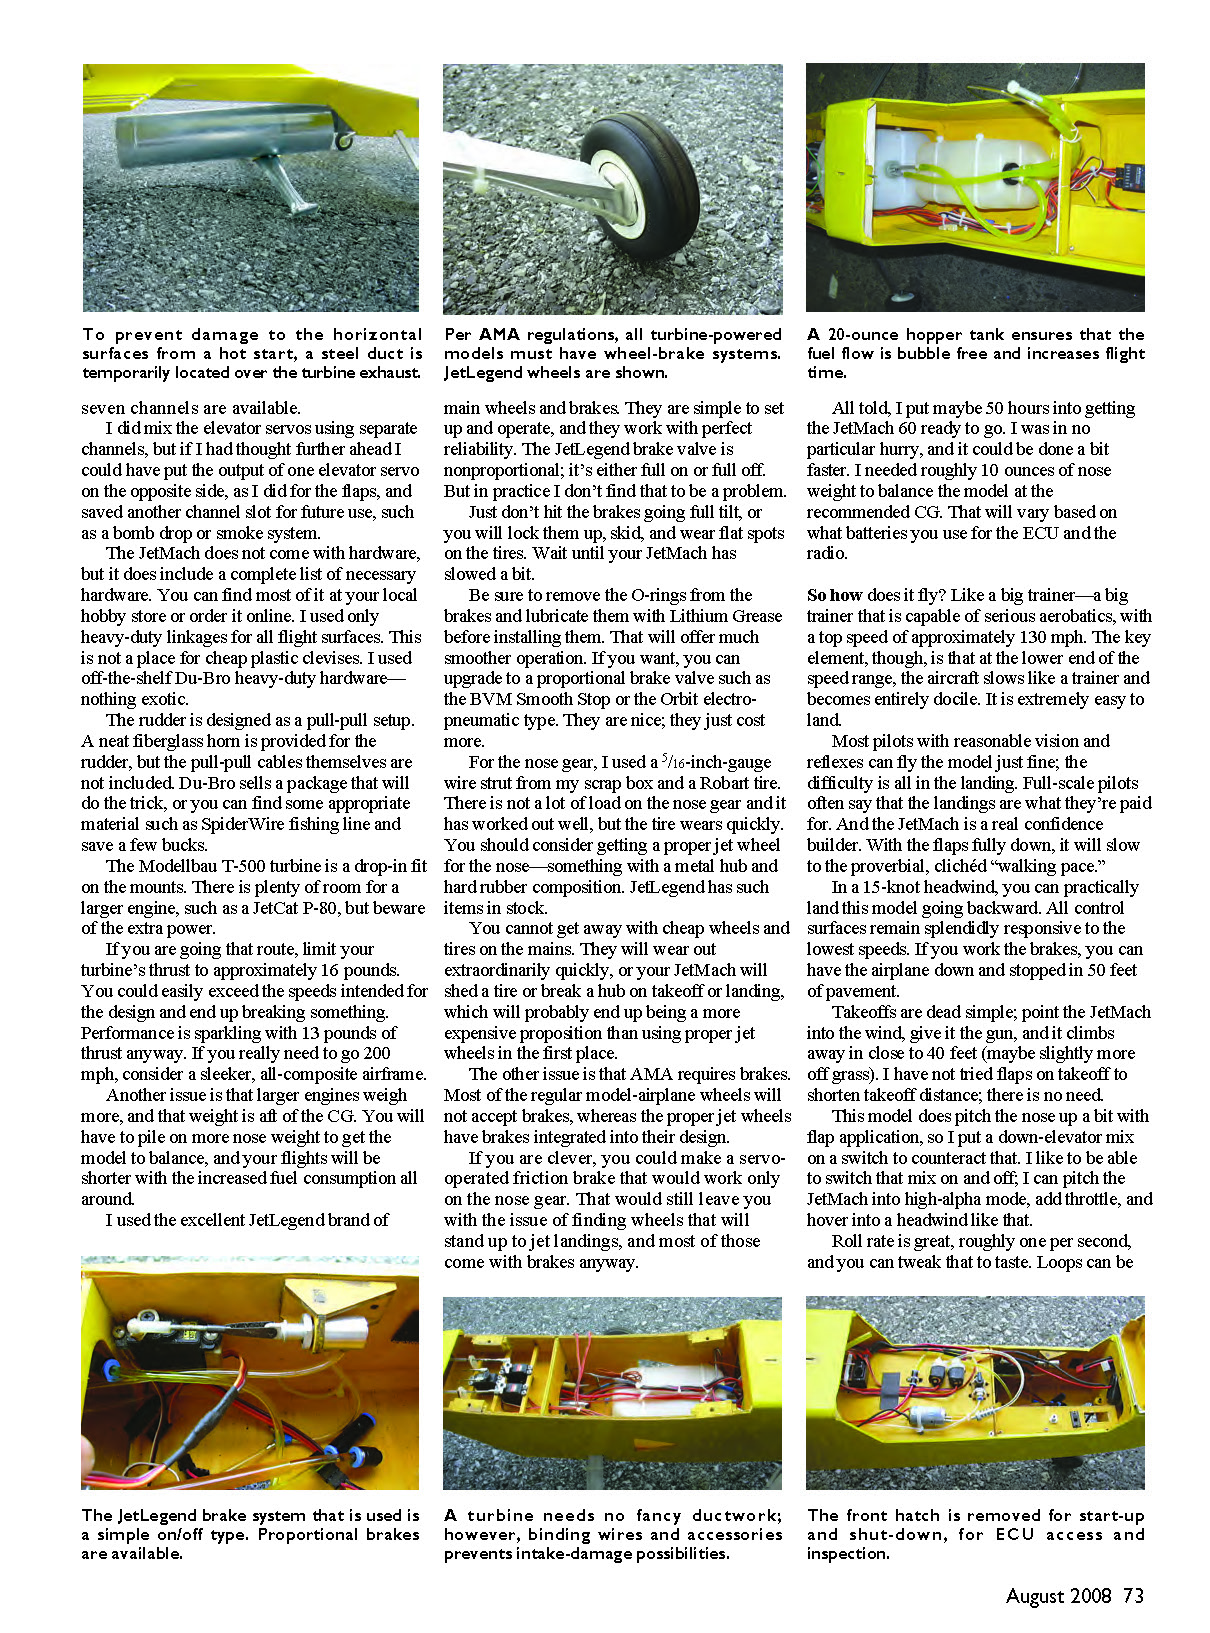
This high-wing airplane is of all-balsa, laser-cut construction. For the most part, it's entirely conventional; it builds identically to any other balsa kit. The only major difference is that the propulsion system is mounted in the middle of the fuselage and exhausts out the bottom of the fuselage. A metal plate protects the fuselage from hot exhaust gases.
The JetMach 60 features fixed tricycle gear. You could modify it to fit retracts, but you would have to design the installation yourself and, frankly, retracts are probably the biggest source of headaches and maintenance with jet aircraft. You will have enough on your plate for now; leave the retracts for the next model.
This aircraft does have flaps, as most (but not all) model jets do. The flaps are easy to build in and set up and operate, and they generally go a long way toward slowing the landing speeds and making life easier on both the pilot and the landing gear.
This project will use pneumatic brakes. Brakes are required for AMA flying. The basic reason is that most turbine engines produce too much thrust at idle for the model to sit still on the ground. That means as soon as you let go of it, the airplane will not stop rolling until it is either airborne or hits something, such as a fence, a car, or a human being. Unless you land with the engine stopped, the same thing is going to happen on landing.
Brakes let you stop a model when and where you want. They also let you use a much smaller runway, both on takeoff and landing. You can taxi to the beginning of the runway, hit the brakes, run the engine up to full power, and take off. On landing you can stop the model within 50 feet as soon as it touches down.
If this is your first time dealing with pneumatic brakes, have no fear; all will be revealed. They are simple to set up and maintain, not too expensive, and do not have to be dealt with while flying—only before takeoff and after landing. So although this is technically a six-channel model, you only have to deal with five (throttle, aileron, rudder, elevator, and flaps) while flying. If you want, and if your field is big enough, you can ignore the flap switch altogether.
Construction
I do not intend to do a blow-by-blow account of the building and covering. A good manual and a CD full of pictures are provided. If you are unfamiliar with the basic rib-and-spar balsa construction this model has, find a similar balsa kit; you need to be confident in your ability to do quality, sturdy construction on the airframe.
The JetMach 60 will be capable of 120–140 mph; loose glue joints and sloppy workmanship are an accident waiting to happen. However, you should be able to have it framed up and ready to cover in a week of evenings.
I used conventional MonoKote; you may select something similar. The structure is designed to be strong enough with only plastic covering. You could fiberglass and paint this model if you like; it does not care about a little extra weight. I used four rolls of Yellow MonoKote and a little Chrome UltraCote for the canopy area. I trimmed it out a little with a black trim sheet—just a few stripes here and there.
The manufacturer provided an exceptional photo-illustrated instruction manual that covers every aspect of construction, setup, and flying. The included CD contains videos and more construction photos—top-notch stuff.
If you have the experience of a bunch of balsa kits under your belt, you can forge ahead and build the model in the sequence you prefer. Not much can trip you up. My enormous kit box of balsa was reduced to a ready-to-cover airframe in approximately 10 hours of furious gluing and wood-thrashing with various carving and sculpting tools.
The only modifications I made included constructing the wing leading edges from 1/2-inch stock I had instead of laminating them from two layers of supplied 1/4" balsa. I also fully sheeted the wings instead of leaving open bays between the ribs. It's not that I thought the wing was too weak as it was—my method was just easier than cutting the sheeting to the plans. The upside of fully sheeting the wing is that you can fiberglass the aircraft instead of covering it, and it may be a bit stronger. The downside is slightly more weight.
The designer will be adding the option of full sheeting to the plans and instructions for those who want it.
The kit was a delight, with superb parts fit, clever engineering, quality materials, great instructions, and fast assembly. Laser-cutting is so nice.
Pay attention to the adhesives. Cyanoacrylate does a poor job of gluing these plywood parts; aliphatic resin does much better. I used cyanoacrylate, aliphatic, or epoxy, depending on the particular application. A nice thing about most turbine models is that weight is not such a big issue. So go ahead and use enough glue; strength is more critical than lightness. I took extra care gluing in the main gear mounts, and I took the designer's advice of beefing it up with scrap basswood.
There is a ton of room for installing the turbine gear. For a turbine-powered model, you need a header tank of some sort to keep bubbles from getting to the engine. You can use a commercial unit, such as the Bob Viotto Models (BVM) Ultimate Air Trap, but I simply used a Du-Bro 20-ounce tank with a geometrically centered pickup. As long as that tank is at least half full of fuel, the clunk will be sitting in fuel.
The 50-ounce Du-Bro main tank and half the header tank equals 60 ounces of fuel—plenty for a seven- to 10-minute flight with mixed throttle usage. If your JetMach is tooling around at low throttle, you can go much longer than that.
There is not much in the directions about where to install engine accessories. It's not that big of a deal, though. Look at the pictures and see where I put the engine control unit (ECU), fuel pump, solenoids, and propane tank. It's easy, and it's not particularly critical. But try to keep the fuel pump away from the ECU and receiver to prevent electromagnetic interference from the pump.
Exhaust and Start Tube
I made a start tube with a $5 piece of metal ducting from The Home Depot and some scrap aluminum. It prevents the bottom of the airplane from getting scorched if you ever overprime the engine and have a wet start with flames coming out the back. I did that once, before I made the start tube, and had to replace the elevator linkages, the metal heat shield, and a bunch of covering on the bottom. Live and learn.
The requirement for a start tube is unique for this aircraft configuration, with the engine sticking out the bottom; most aircraft don't need this sort of thing. The start tube solves the problem. I stick the tube under the model when I start it. As soon as the engine is up and going, and I am sure there is no wet start, I remove the tube while wearing a protective glove, and off we go.
The provided heat shielding for the bottom of the airplane is fine for normal use. The only time the heat shield comes into play is in the event of a wet start, which is almost invariably the user's fault—from getting too much fuel to the engine before starting. Make sure you shut off the main fuel valve to the engine before fueling. And if you have any ideas that the engine might be wet, hold the model up and shake any fuel out of the engine's tailpipe before starting.
Brakes, Wheels, and Landing Gear
I used the JetLegend brand of main wheels and brakes. They are simple to set up and operate, and they work with perfect reliability. The JetLegend brake valve is nonproportional; it's either full on or full off. But in practice I don't find that to be a problem. Just don't hit the brakes going full tilt, or you will lock them up, skid, and wear flat spots on the tires. Wait until your JetMach has slowed a bit.
Be sure to remove the O-rings from the brakes and lubricate them with lithium grease before installing them. That will offer much smoother operation. If you want, you can upgrade to a proportional brake valve such as the BVM Smooth Stop or the Orbit electro-pneumatic type. They are nice; they just cost more.
For the nose gear, I used a 5/16-inch-gauge wire strut from my scrap box and a Robart tire. There is not a lot of load on the nose gear and it has worked out well, but the tire wears quickly. You should consider getting a proper jet wheel for the nose—something with a metal hub and hard rubber composition. JetLegend has such items in stock.
You cannot get away with cheap wheels and tires on the mains. They will wear out extraordinarily quickly, or your JetMach will shed a tire or break a hub on takeoff or landing, which will probably end up being more expensive than using proper jet wheels in the first place. The other issue is that AMA requires brakes. Most regular model-airplane wheels will not accept brakes, whereas the proper jet wheels have brakes integrated into their design.
If you are clever, you could make a servo-operated friction brake that would work only on the nose gear. That would still leave you with the issue of finding wheels that will stand up to jet landings, and most of those come with brakes anyway.
Servos, Radio, and Electrics
I used the Spektrum DX7 radio. It has plenty of programming features and is more than adequate for this airplane. The stock radio package includes four nice digital servos that I put on my JetMach's elevators and ailerons. The rest of the servo suite is rounded out with four standard servos—for flaps, rudder, and nose-gear steering—and a microservo for the brake valve.
One nice thing about the JetMach is that it calls for only standard servos. Many jets require six or more expensive high-powered digitals; this one has been flight-tested and proven with standards.
I used two 2000 mAh five-cell Ni-Cd packs going through two standard switches to the receiver for redundancy. Later I ditched the switches entirely and plugged the batteries directly into the receiver. You could go with even larger packs; I had to add some lead to the nose anyway. The model might as well carry battery power instead of dead weight. You don't need the battery power—2000 mAh is good for flying all day—but if you are ordering new packs anyway (you should because this is no place to use old gear from your scrap box), get something with 2500 mAh or more. There is plenty of room in the nose.
I mounted the flap servos with both servos' arms going the same direction; that is, both servos' horns point to the left side of the airplane. This lets me operate with a Y-harness and a single channel without using a MatchBox or a reversed servo or mixing them with the radio. After all, only seven channels are available.
I did mix the elevator servos using separate channels, but if I had thought further ahead I could have put the output of one elevator servo on the opposite side, as I did for the flaps, and saved another channel slot for future use, such as a bomb drop or smoke system.
Hardware
The JetMach does not come with hardware, but it does include a complete list of necessary hardware. You can find most of it at your local hobby store or order it online. I used only heavy-duty linkages for all flight surfaces. This is not a place for cheap plastic clevises. I used off-the-shelf Du-Bro heavy-duty hardware—nothing exotic.
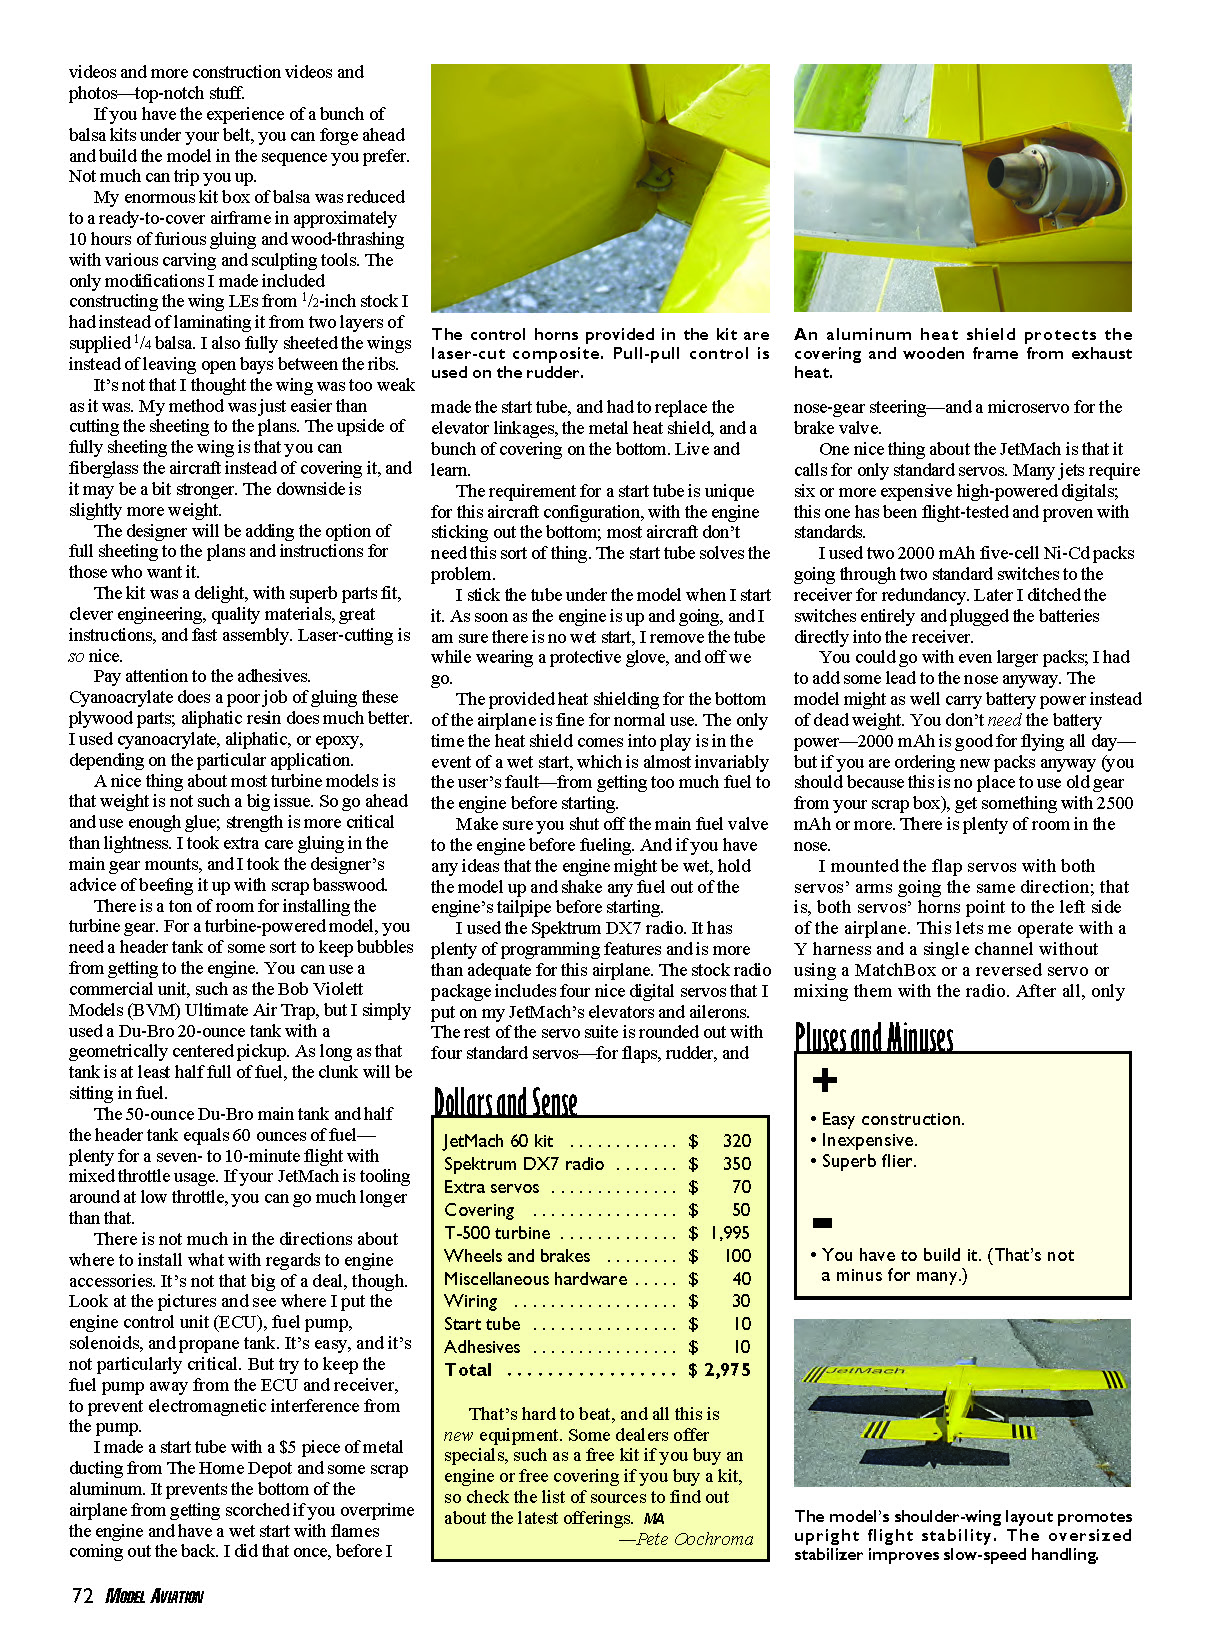
The rudder is designed as a pull-pull setup. A neat fiberglass horn is provided for the rudder, but the pull-pull cables themselves are not included. Du-Bro sells a package that will do the trick, or you can find some appropriate material such as SpiderWire fishing line and save a few bucks.
Turbine Options and Installation
The Modellbau T-500 turbine is a drop-in fit on the mounts. There is plenty of room for a larger engine, such as a JetCat P-80, but beware of the extra power. If you are going that route, limit your turbine's thrust to approximately 16 pounds. You could easily exceed the speeds intended for the design and end up breaking something. Performance is sparkling with 13 pounds of thrust anyway. If you really need to go 200 mph, consider a sleeker, all-composite airframe.
Another issue is that larger engines weigh more, and that weight is aft of the CG. You will have to pile on more nose weight to get the model to balance, and your flights will be shorter with the increased fuel consumption.
I used the excellent JetLegend brand of main wheels and brakes. They are simple to set up and operate, and they work with perfect reliability.
Build Time, Balance, and Weight
All told, I put maybe 50 hours into getting the JetMach 60 ready to go. I was in no particular hurry, and it could be done a bit faster. I needed roughly 10 ounces of nose weight to balance the model at the recommended CG. That will vary based on what batteries you use for the ECU and the radio.
Flight Characteristics
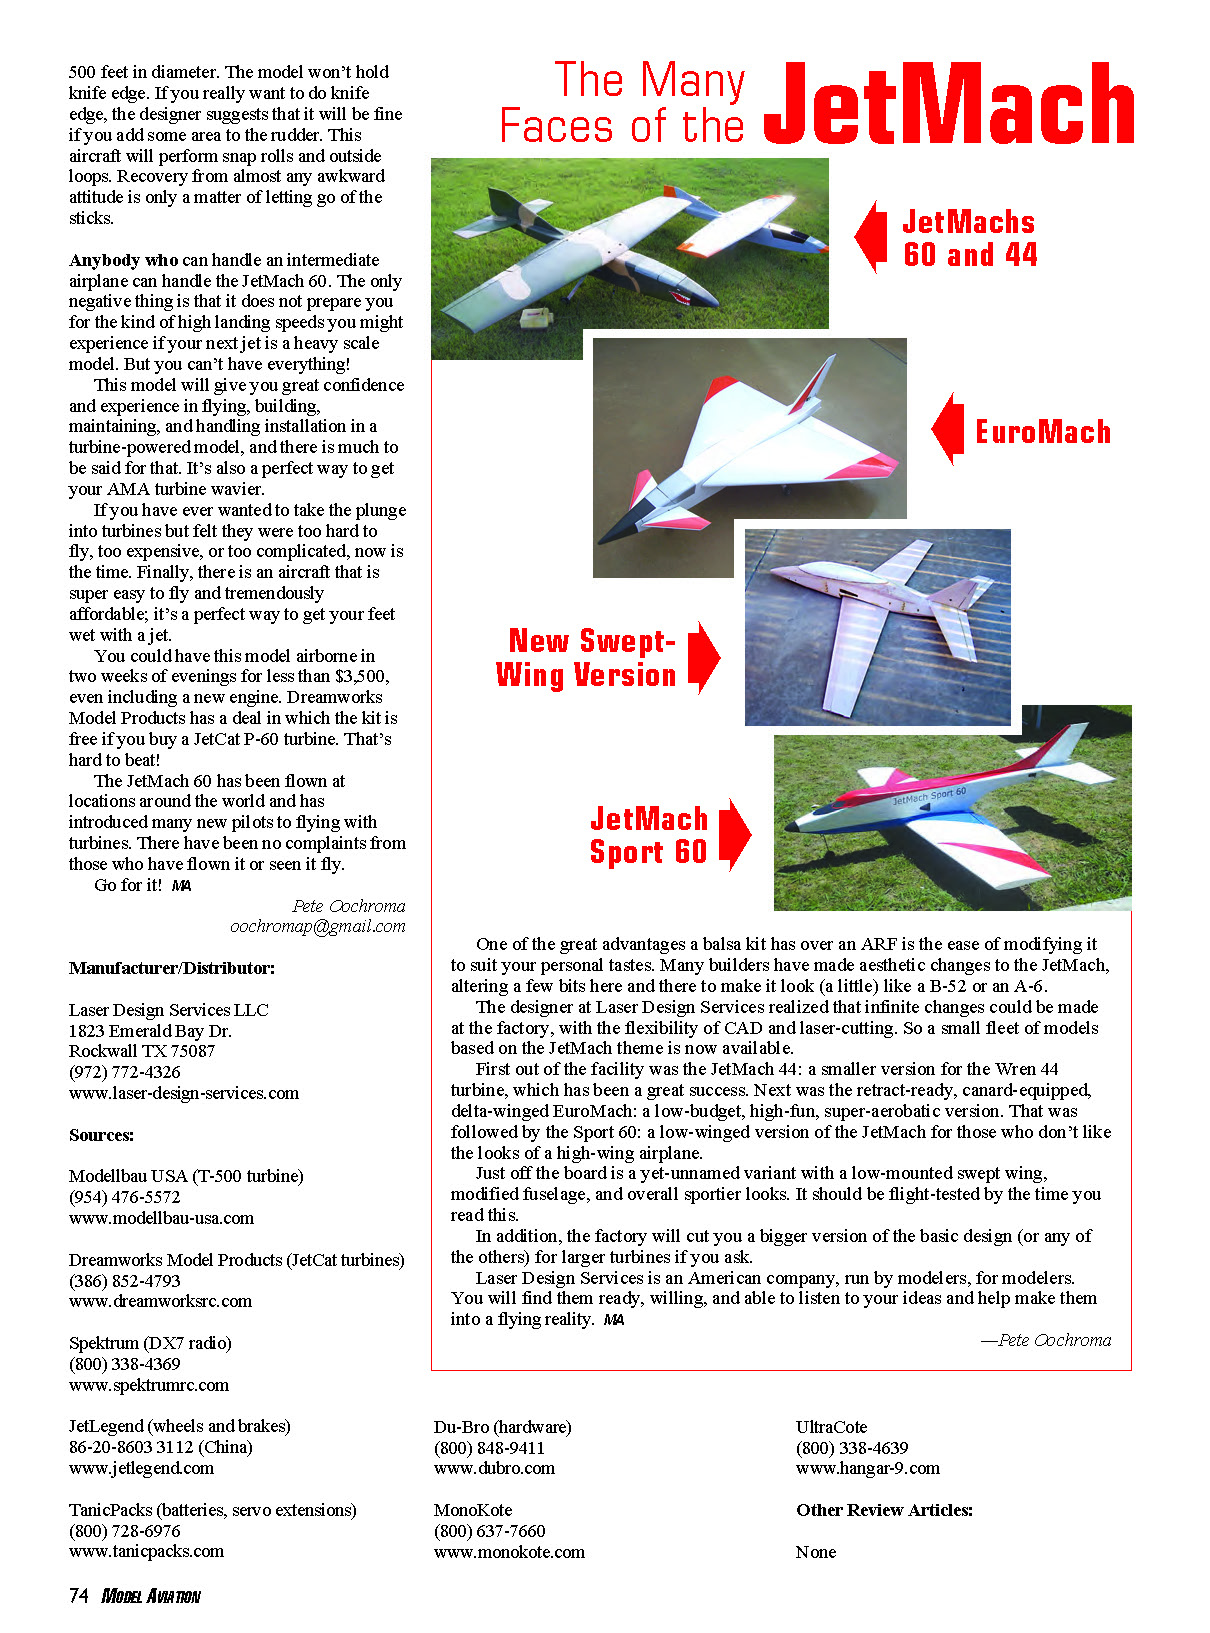
So how does it fly? Like a big trainer—a big trainer that is capable of serious aerobatics, with a top speed of approximately 130 mph. The key element, though, is that at the lower end of the speed range, the aircraft slows like a trainer and becomes entirely docile. It is extremely easy to land.
Most pilots with reasonable vision and reflexes can fly the model just fine; the difficulty is all in the landing. Full-scale pilots often say that the landings are what they're paid for. And the JetMach is a real confidence builder. With the flaps fully down, it will slow to the proverbial, clichéd "walking pace."
In a 15-knot headwind, you can practically land this model going backward. All control surfaces remain splendidly responsive to the lowest speeds. If you work the brakes, you can have the airplane down and stopped in 50 feet of pavement.
Takeoffs are dead simple; point the JetMach into the wind, give it the gun, and it climbs away in close to 40 feet (maybe slightly more off grass). I have not tried flaps on takeoff to shorten takeoff distance; there is no need.
This model does pitch the nose up a bit with flap application, so I put a down-elevator mix on a switch to counteract that. I like to be able to switch that mix on and off; I can pitch the JetMach into high-alpha mode, add throttle, and hover into a hard landing if I have to—however that is just me being silly.
Roll rate is great, roughly one per second, and you can tweak that to taste. Loops can be 500 feet in diameter. The model won't hold knife edge. If you really want to do knife edge, the designer suggests that it will be fine if you add some area to the rudder. This aircraft will perform snap rolls and outside loops. Recovery from almost any awkward attitude is only a matter of letting go of the sticks.
Anybody who can handle an intermediate airplane can handle the JetMach 60. The only negative thing is that it does not prepare you for the kind of high landing speeds you might experience if your next jet is a heavy scale model. But you can't have everything!
This model will give you great confidence and experience in flying, building, maintaining, and handling installation in a turbine-powered model, and there is much to be said for that. It's also a perfect way to get your AMA turbine waiver.
If you have ever wanted to take the plunge into turbines but felt they were too hard to fly, too expensive, or too complicated, now is the time. Finally, there is an aircraft that is super easy to fly and tremendously affordable; it's a perfect way to get your feet wet with a jet.
You could have this model airborne in two weeks of evenings for less than $3,500, even including a new engine. Dreamworks Model Products has a deal in which the kit is free if you buy a JetCat P-60 turbine. That's hard to beat!
The JetMach 60 has been flown at locations around the world and has introduced many new pilots to flying with turbines. There have been no complaints from those who have flown it or seen it fly.
Go for it! MA
Pete Oochroma [email protected]
Manufacturer / Distributor
Laser Design Services LLC
- 1823 Emerald Bay Dr.
- Rockwall, TX 75087
- (972) 772-4326
- www.laser-design-services.com
Sources
- Modellbau USA (T-500 turbine)
- (954) 476-5572
- www.modellbau-usa.com
- Dreamworks Model Products (JetCat turbines)
- (386) 852-4793
- www.dreamworksrc.com
- Spektrum (DX7 radio)
- (800) 338-4639
- www.spektrumrc.com
- JetLegend (wheels and brakes)
- 86-20-8603 3112 (China)
- www.jetlegend.com
- TanicPacks (batteries, servo extensions)
- (800) 728-6976
- www.tanicpacks.com
- Du-Bro (hardware)
- (800) 848-9411
- www.dubro.com
- MonoKote
- (800) 637-7660
- www.monokote.com
- UltraCote
- (800) 338-4639
- www.hangar-9.com
Other Review Articles:
- None
The Many Faces of the JetMach
One of the great advantages a balsa kit has over an ARF is the ease of modifying it to suit your personal tastes. Many builders have made aesthetic changes to the JetMach, altering a few bits here and there to make it look (a little) like a B-52 or an A-6.
The designer at Laser Design Services realized that infinite changes could be made at the factory, with the flexibility of CAD and laser-cutting. So a small fleet of models based on the JetMach theme is now available.
Variants and Options
- JetMach 44
- A smaller version for the Wren 44 turbine, which has been a great success.
- EuroMach
- Retract-ready, canard-equipped, delta-winged: a low-budget, high-fun, super-aerobatic version.
- Sport 60
- A low-winged version of the JetMach for those who don't like the looks of a high-wing airplane.
- Upcoming variant
- A yet-unnamed version with a low-mounted swept wing, modified fuselage, and overall sportier looks. It should be flight-tested by the time you read this.
In addition, the factory will cut you a bigger version of the basic design (or any of the others) for larger turbines if you ask.
Laser Design Services is an American company, run by modelers, for modelers. You will find them ready, willing, and able to listen to your ideas and help make them into a flying reality. MA
—Pete Oochroma
Transcribed from original scans by AI. Minor OCR errors may remain.

