


Plane Talk: Sig Sun Dancer ARF
Overview
The Sun Dancer arrived in a large box and was well packed to prevent shipping damage. All components were present on inspection. The model is built from plywood and balsa using traditional construction techniques. The structure is well designed — strong where required and light where stresses are lower. Access to the radio gear is through the bottom wing opening and a cover that screws onto the bottom just behind the firewall.
The wings come as four panels with symmetrical airfoils and four ailerons. The wings are joined permanently with epoxy; plywood joiners are used. The cabanes are assembled with a machined-nylon top wing mount installed and finished in white.
Each elevator has its own servo mounted in the rear. Because the aft fuselage is too narrow to mount the elevator servos opposite each other, they are staggered, with the right servo mounted just behind the left. The rudder is controlled by a pull-pull system and an interior-mounted servo. Guide tubes are already installed in the fuselage at the pull-pull wire exits; note the cables cannot be removed once installed because the ends will not fit back through the tubes.
The cowl and wheel pants are fiberglass and come painted to match the covering. The airframe is covered in an extraordinarily bright three-color scheme (hence the name Sun Dancer) using Oracover/UltraCote:
- Cad Yellow (Oracover 33 / UltraCote 872)
- Bright Yellow (Oracover 32 / UltraCote 889)
- Ferrari Red (Oracover 23 / UltraCote 866)
Supplied hardware is of terrific quality; everything required is included except servo horns. The landing gear is aluminum, nicely finished and appears stiff enough for the projected weight.
Pluses and Minuses
- Exceptionally nice construction
- Beautiful covering job
- Great flight characteristics
- Throttle pushrod issues (see text)
- Top and bottom covering is the same (can cause orientation confusion)
- Instructions could use more detail (see assembly notes)
Specifications
- Model type: ARF
- Wingspan: 71.5 inches
- Wing area: 1,668 square inches
- Length: 66 inches
- Projected flying weight: 17–18 pounds
- Weight as tested: 16 pounds, 15.5 ounces (dry)
- Recommended engine: 3.2–4.2 cu. in. gas
- Engine used: Brison 3.2
- Recommended radio: Four channels with eight servos
- Radio used: Hitec Eclipse 7 QPCM, Fusion 9 receiver; four HS-625MG servos, two HS-5625MG servos, one HS-5645MG servo, one HS-425BB servo
- Construction materials: Balsa, Lite Ply
- Street price: $349.99
Assembly
Preparation and instructions
I made a list of everything needed before beginning construction and ordered the necessities. The instructions assume you have building experience; this is not a beginner model. An addendum for a change in the wing structure is included — be sure you find it in your kit.
The covering was perfect except for a few loose edges that took less than five minutes to secure with a covering iron. Pay careful attention to the wingtips, aileron edges, and edges around the bottom hatch. There is little overlap, so set the iron hot enough (I set mine to about 225°F) to just activate the glue; otherwise the covering can shrink and expose the wood beneath.
Wing assembly and alignment
As with most ARFs, the instructions have you epoxy the four wing panels into two wings. The upper wing has the cabane mounts; it is vital to get the mount holes centered or the wing will not be square to the fuselage. There are no alignment stops in the ends of the wing slots to prevent the cabane mount from sliding in too far, and there are no notches or indicating marks. Take your time and align the holes directly over what will be the wing center joint.
There are two wing joiners — one for each wing. The upper wing is built flat; the lower wing has 3° of dihedral. The remainder of the assembly is straightforward.
When mounting the cabanes to the fuselage, orient the wing-mount Allen-head bolts properly: the front, upper wing-mount Allen head should point forward and the rear head should point backward. If not, you will have difficulty getting the top wing on and tightening the bolts because the airfoil's bottom curve can contact the screws.
Control surfaces and hardware
Control horns are not through-bolted; they are held with four wood screws that thread into a heavy plywood plate inside the control surface. Initially I was concerned about durability under vibration and loads from a gas engine, but repeated checks during test flights showed no loosening or pullout.
The kit includes point-type hinges that are predrilled for alignment. Be sure to coat the pivot with petroleum jelly to prevent epoxy from locking the hinge pivot.
The supplied hardware set is very good, but you will need to provide your own servo horns.
Engine, exhaust, and firewall clearance
I used a Brison 3.2 engine, which is at the lower end of the recommended range but performed well. The instructions show the small exhaust header that comes with some engines (for example, FPE), but it can be loud. I ordered a Pitts muffler to quiet the engine and improve appearance, but it did not fit between the engine and the firewall.
I then ordered a side mount, but that also initially contacted the cowl at the bottom of the chamber. I cut a small eyebrow in the front of the cowl to clear the corner of the chamber — be sure the muffler does not touch the cowl, as vibration could cause cracks.
Throttle linkage and other issues
I installed the throttle servo and fabricated the control rod using the supplied components. The threaded coupler that connects the clevis to the nylon control rod was too small; once threaded in, it could be pulled out by hand. I replaced the control rod with a medium-size Nyrod from my bench.
When mounting the stabilizer I found it leaned about 2° to the left relative to the main wing. I spent roughly 30 minutes dressing the stabilizer mount with a file and sandpaper to correct the problem — double-check that the stabilizer is both square and parallel to the main wing.
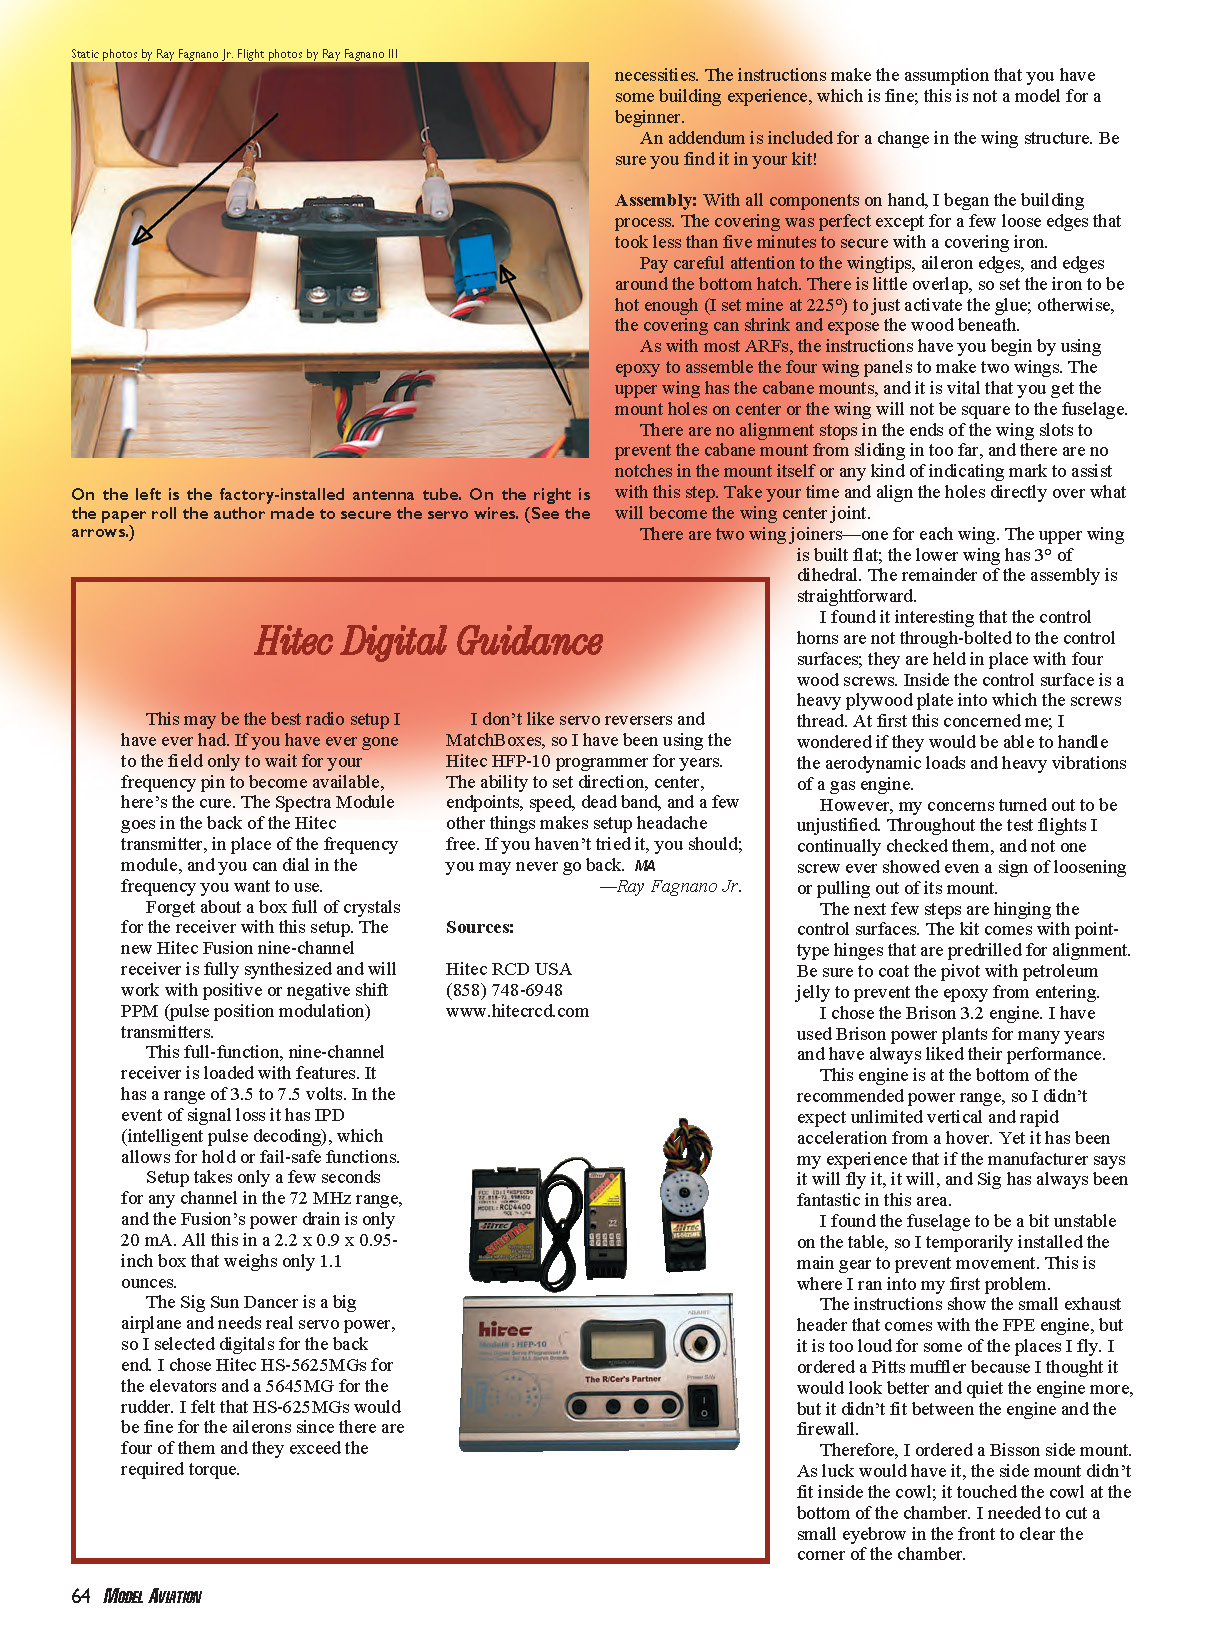
Wiring and antenna
The factory installed a tube for the antenna wire that exits the bottom of the fuselage — a very nice feature. A tip: coat the antenna wire with cornstarch or baby powder and it will slide through the tube easily.
I prefer not to have servo wires loose inside the fuselage. I roll a paper tube around a 5/8-inch dowel and glue it to the inside of the fuselage so the wires can’t flop around.
Final setup and weights
No ballast was needed. With a 2000 mAh, 6-volt NiMH receiver battery and a 1500 mAh, 4.8-volt Ni-Cd ignition battery, the ready-to-fly weight was 16 pounds, 15.5 ounces — just under the factory projected 17–18 pounds.
The First Flight
Preflight
As models get bigger and heavier, the potential for damage or injury increases; a careful preflight is mandatory. I checked all screws, battery status, and performed a range check with the engine off. After starting the Brison I checked range again and slowly cycled the throttle at the range limit to watch for vibration or RFI problems. None were present.
The CG was set at 4.9 inches back from the top wing’s leading edge (approximately 27% MAC). All control throws were programmed to factory spec.
Slow taxi tests indicated the tail wheel needed its center adjusted because the Sun Dancer turned right with the rudder centered, throttle at idle, and the model rolling slowly. I shut down and corrected this before proceeding.
Takeoff and trimming
For takeoff I lined up on the runway and applied power. Acceleration on asphalt was brisk; a touch of right rudder kept it on the centerline. After roughly a 50-foot roll the tail came up, and 25 feet later the mains were off the ground. Climb was brisk. At about 100 feet I began trimming: a touch of down on the elevator, a touch of right rudder, and the ailerons were neutral.
Stalls were straightforward with a hint of left wing drop. I repeated stalls several times with consistent results.
Landing
On final I held a bit of power and was rock steady. At about 2 feet above the runway I cut to idle and gradually applied elevator as speed bled off. The Sun Dancer settled to a three-point landing without a hint of bounce.
After the flight I inspected the airframe top to bottom; there were no problems or loose screws. I strongly recommend using a thread locker like Loctite on critical screws.
Handling and aerobatics
With the first-flight jitters gone, I pushed the airframe. The Sun Dancer is a barnstormer’s delight:
- Loops (inside or outside) are large and graceful.
- Rolls are surprisingly axial and fast thanks to four ailerons; altitude loss is minimal. Rolls can be flown from horizon to horizon with slight rudder and elevator compensation. Note: the top and bottom wing coloring is identical, so orientation can be confusing.
- Knife edge at higher speeds showed some coupling in pitch and roll but was manageable (could be trimmed with radio mixing).
- Four-point rolls were easy. Rudder authority is strong — it can yaw the fuselage without severe roll coupling.
- Flat turns, figure eights, and tail wags are enjoyable.
- Hammerheads require a small burst of power at the top and appear to pivot around the wingtip; stay on the elevator during the downline as there is some divergence toward the canopy.
- Snaps are easy but tend to over-rotate slightly (about 10°); after a few attempts this becomes predictable and controllable.
Overall, the Sun Dancer is a wonderful airplane to fly, and it does not take long to become comfortable with its handling. In bright sunlight its colors are striking — it has the majestic beauty only a biplane can generate.
Advanced 3-D Flight
The Sun Dancer was not primarily designed for 3-D flying, and as delivered it does not excel in this area. Some 3-D maneuvers were surprisingly possible, but with limitations:
- Hinge beveling limits control surface throw to roughly 35°.
- Elevators are solid with little wing rock, but more power is required than some 3-D designs; roughly 25% power was needed to prevent the stall from breaking and the nose from dropping.
- The model’s attitude in elevator flight is notably more nose-high than many dedicated 3-D airframes.
If serious 3-D performance is desired, consider additional modifications (hinge work, power upgrade, and control-throw changes where the structure allows).
Conclusion
The Sun Dancer is a well-built ARF with excellent hardware and a striking finish. It requires some builder experience and attention to detail during assembly (especially wing mount alignment, stabilizer fit, exhaust clearance, and throttle linkage). In flight it is stable, agile, and a joy for sport and precision aerobatics, though not a dedicated 3-D performer without modification. For pilots who want a beautiful, strong, and enjoyable biplane that handles like a classic barnstormer, the Sig Sun Dancer is an excellent choice.
Transcribed from original scans by AI. Minor OCR errors may remain.

