

Plane Talk: Stevens AeroModel Edge 540 3D Kit
Michael Ramsey
A Stevens AeroModel project is a modern affirmation that the rewards of constructing an airplane from a kit are alive and well. This experience may also be considered solid proof that many of the torturous tasks involved in building are a thing of the past.
A skilled engineer and draftsman, Bill Stevens has produced an RC kit line that is solely electric-power based. The models range in size from those that are suitable for inside a school gym to those that are fully 3-D-capable and suitable for the club field.
Although Bill's packaging methods are minimalist (a plastic bag for a kit container), the sweet filling is in the kit parts' exquisitely detailed engineering and production. It's a good trade, if you ask me.
The Stevens AeroModel Edge 540 appealed to me the most because it is much like many ARFs that are available. Silly, huh? Why buy the kit if you can purchase the ARF?
Those other models are fine, but Bill engineered his Edge to be an excellent performer in the precision and 3-D styles of flight. I wouldn't have to compromise laser-cutting technology that is found in many ARFs to build the model myself, exactly as I wanted it to be. Furthermore, this model would offer a personal look into the evolution of design and construction techniques.
This Edge incorporates much of what laser cutting has brought to the production of current models in weight savings and strength techniques. With its provided full-size plans and clearly written and illustrated instruction and flight manual, the model is not only easy to complete, but it is also well built, requires minimal experience, and doesn't call for elaborate tools from the builder.
The wood parts use tab-lock construction. When glued into place, very little carving or fancy sanding is required to complete the airframe's finished shape. The Edge is built primarily with 1/16- and 1/8-inch balsa and 1mm and 3mm plywood. To keep weight down, plywood is used only where stress is expected to be high.
The clear canopy is vacuum-formed and fits neatly, with a flanged front that offers plenty of gluing area. The cowling is two pieces of vacuum-formed ABS plastic that require careful trimming and fitting, since the material is purposefully thin and flexible.
Specifications and Test-Model Details
- Model type: RC Scale Unlimited 3-D kit
- Skill level: Beginner builder, intermediate pilot
- Wingspan: 50 inches
- Wing area: 440 square inches
- Length: 45 inches
- Weight: 28–32 ounces (kit spec)
- Wing loading: 9.8 ounces/square foot
- Power (recommended): 350-watt system
- Radio: Four channels (minimum), four mini servos
- Construction: Balsa, light plywood, ABS cowl, clear canopy
- Covering/finish: Iron-on film (So-Lite recommended)
- Price: $147.99
Test model equipment and measured performance:
- Motor: Hacker A30-16M (1060 Kv)
- Speed control: Hacker X-40
- Battery: 3S Thunder Power Extreme 2070 mAh
- Propeller: APC 12 x 6E
- Motor current: Highest draw 32 amps
- Motor voltage: 10.4 V under load
- Motor output: 354 watts
- Radio system: JR 6102 transmitter, JR R610UL receiver, JR Sport SM22 mini servos, two 6-inch servo extensions
- Finish: Navy, red, white, and transparent yellow So-Lite; matching Rust-Oleum paint
- Weight (test model): 38.8 ounces (33.9 ounces without battery)
- Flight duration: Five to eight minutes
Pluses and Minuses
- Comes as a complete laser-cut kit with all necessary hardware.
- All-wood airframe construction with laser etching for added accuracy.
- Tab-lock construction for a strong airframe and components that build according to plan.
- Exceptionally well-written and illustrated instruction manual includes flight instruction and total setup requirements.
- Recommended motor system leaves nothing to be desired by Unlimited and 3-D pilots.
- Edge 540's practical size is stable enough for the intermediate RC pilot.
- Model is easy enough to build for the first-time modeler.
- Entire construction process requires only one 0.5-ounce bottle of thin cyanoacrylate.
- Leading-edge (LE) sheeting joint is fragile.
- Two-piece ABS cowling (fiberglass would be heavier, though).
The builder has the option of dressing the prebent music-wire landing gear with scrap-balsa fairings. It's a nice finishing touch.
I take back the comment about carving and shaping: the wheel pants are made from 1/4-inch balsa layers that include 1mm and 3mm plywood reinforcement. So you might be able to build the model on the dining room table and not get yelled at; the wheel pants, on the other hand, need to be taken out to the porch for shaping. It makes a mess.
When finished, these wheel pants are close to indestructible. The satisfaction of the result was so gratifying that I forgot about the small amount of work it took to make them look nice. Covering them with matching So-Lite wasn't difficult either.
The equipment I chose for the project mostly consists of items offered on Stevens AeroModel's website. You can purchase everything you need for this model from one source.
I used my JR 6102 transmitter and JR Sport servos, since I had them on hand and they matched the specifications. But the power system is exactly what Bill recommends and designed the model around.
The Hacker A30-16M is a beautiful motor. I went with the matching Hacker X-40 brushless controller, even though the system was expected to pull only 30 amps. I found this system to be every bit as good as other reviews have claimed it is.
For such a small package, I have yet to find a setup that is as capable—or as quiet. And, quite frankly, a 175-watt-per-pound airplane was an experience I didn't want to pass up. That kind of high-end performance is often too expensive and/or impractical. This is a small model with a big attitude.
Construction
Only the parts needed for the specific assembly are removed from the wood sheets, which keeps everything organized. All of the components are laser cut and fit exactly; no fiddling is necessary.
The tail surfaces are built first, which is a perfect catalyst for getting those building brain cells activated. When completed, those flat tailframe pieces are 1/8-inch thick, with 1mm plywood laminated over the joiner-wire stress points. I was able to pick up the assembly from the full-size plans sheet and handle it almost as if it were all glued together. I have to admit that this made me giggle; the security of the parts led to premonitions of a fun and successful build project — and a short one at that.
The laser cut leaves a beveled edge, which is accounted for by the engineer. The correct orientation of the parts will produce a tight glue joint on both sides of the assembly. Thin cyanoacrylate is the best glue for securing the joints — all the parts, actually. Dry-fitting is good for confirming the accuracy of alignment before joinery is made permanent.
Provided with my kit as a gift (maybe everyone gets one) was a Sanding Block Dual Grit 60/100. Its semisoft inner material allows the user to easily hold the tool and quickly rough out round LEs and bevel hinge areas. Later I wrapped the block with 220- and 400-grit paper for finish-sanding.
The fuselage takes shape from the bottom up, starting with constructing the lower frame. This assembly includes the magnetically secured battery hatch. Only two magnets (don't get the polarity wrong) are included, but you have the option of securing the wing panels with magnets as well. Slick.
The laser-cut holes in the parts for the magnet are basically a "snap-tight" fit. Again, this part-fit phenomenon assures the builder; there is little opportunity for the sometimes delicate framework to go crooked, although it did happen once.
I got a little forceful while attaching the wing-root sheeting on the left wing panel. My excessive pressure warped the trailing edge downward, which was obvious after following the laser-etched hinge lines that pointed straight to my blunder. It was easily corrected.
The front half of the fuselage includes a light-plywood box that carries the stress loads of the power system, landing gear, and wing spar. All of the fuselage subassemblies build off of that inner frame.
Besides being cut accurately, the cool thing about the forward and aft turtledeck sheeting is the laser-etched kerf cuts that allow the material to wrap around without requiring a time-consuming molding technique.
The build was fun, almost like plug-and-play. When a part was needed, I plugged it onto the tab-lock location and moved forward. I found it helpful to use a long glue-tip extender on the bottle of thin cyanoacrylate to precisely apply the adhesive. Overapplying glue can be a major weight-gain point.
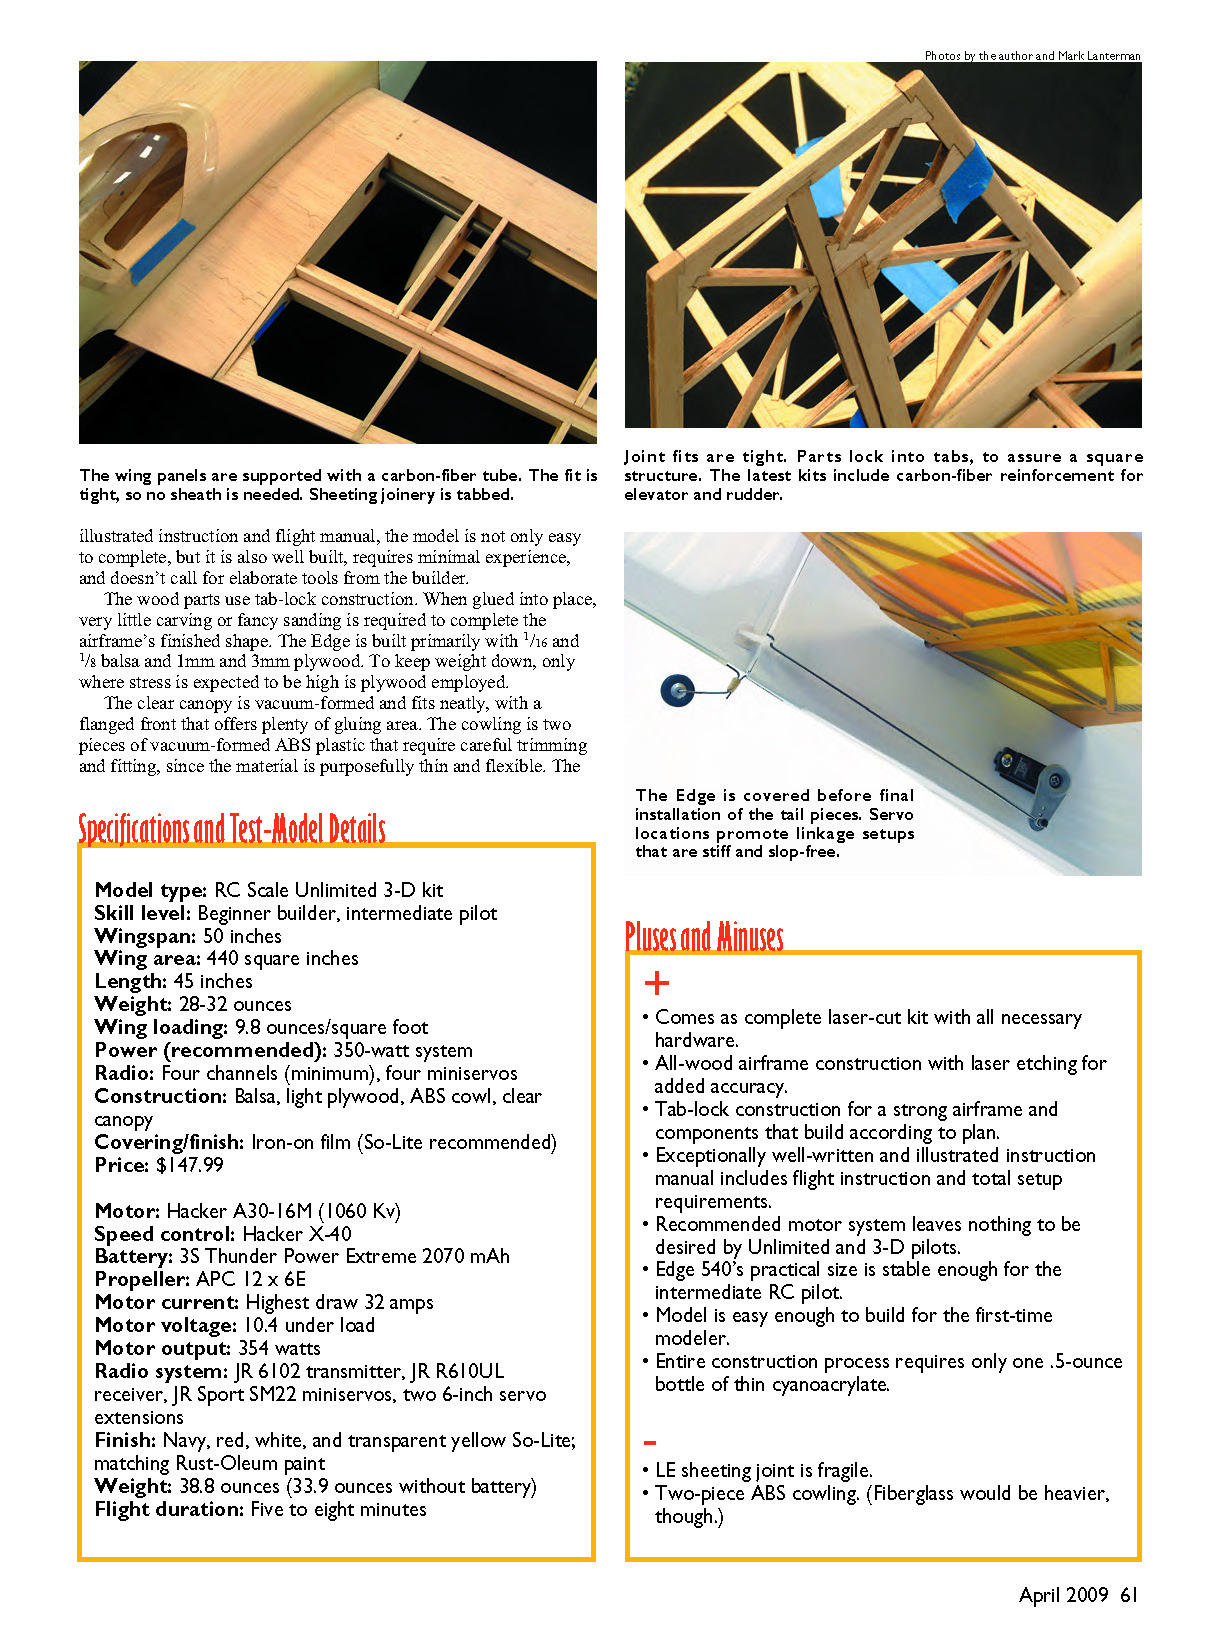
The wings are built and installed as a two-piece system. Each half plugs into a carbon-fiber tube that fits inside a light-plywood box within the fuselage. The fit is tight on the carbon-fiber tube, making removal of the wings difficult.
I soaped the tube for easier installation and secured each wing half with a 6-32 thumbscrew through the root — not an optional magnet. I can change my mind later.
The motor box is mounted to the fuselage with 4-40 socket-head screws. The box itself also locks in the music-wire landing gear. Saturate the plywood gear-strut channel with lots of thin cyanoacrylate. This will ensure that the bangs and bumps of rough-field flying won't loosen their satisfyingly tight fit.
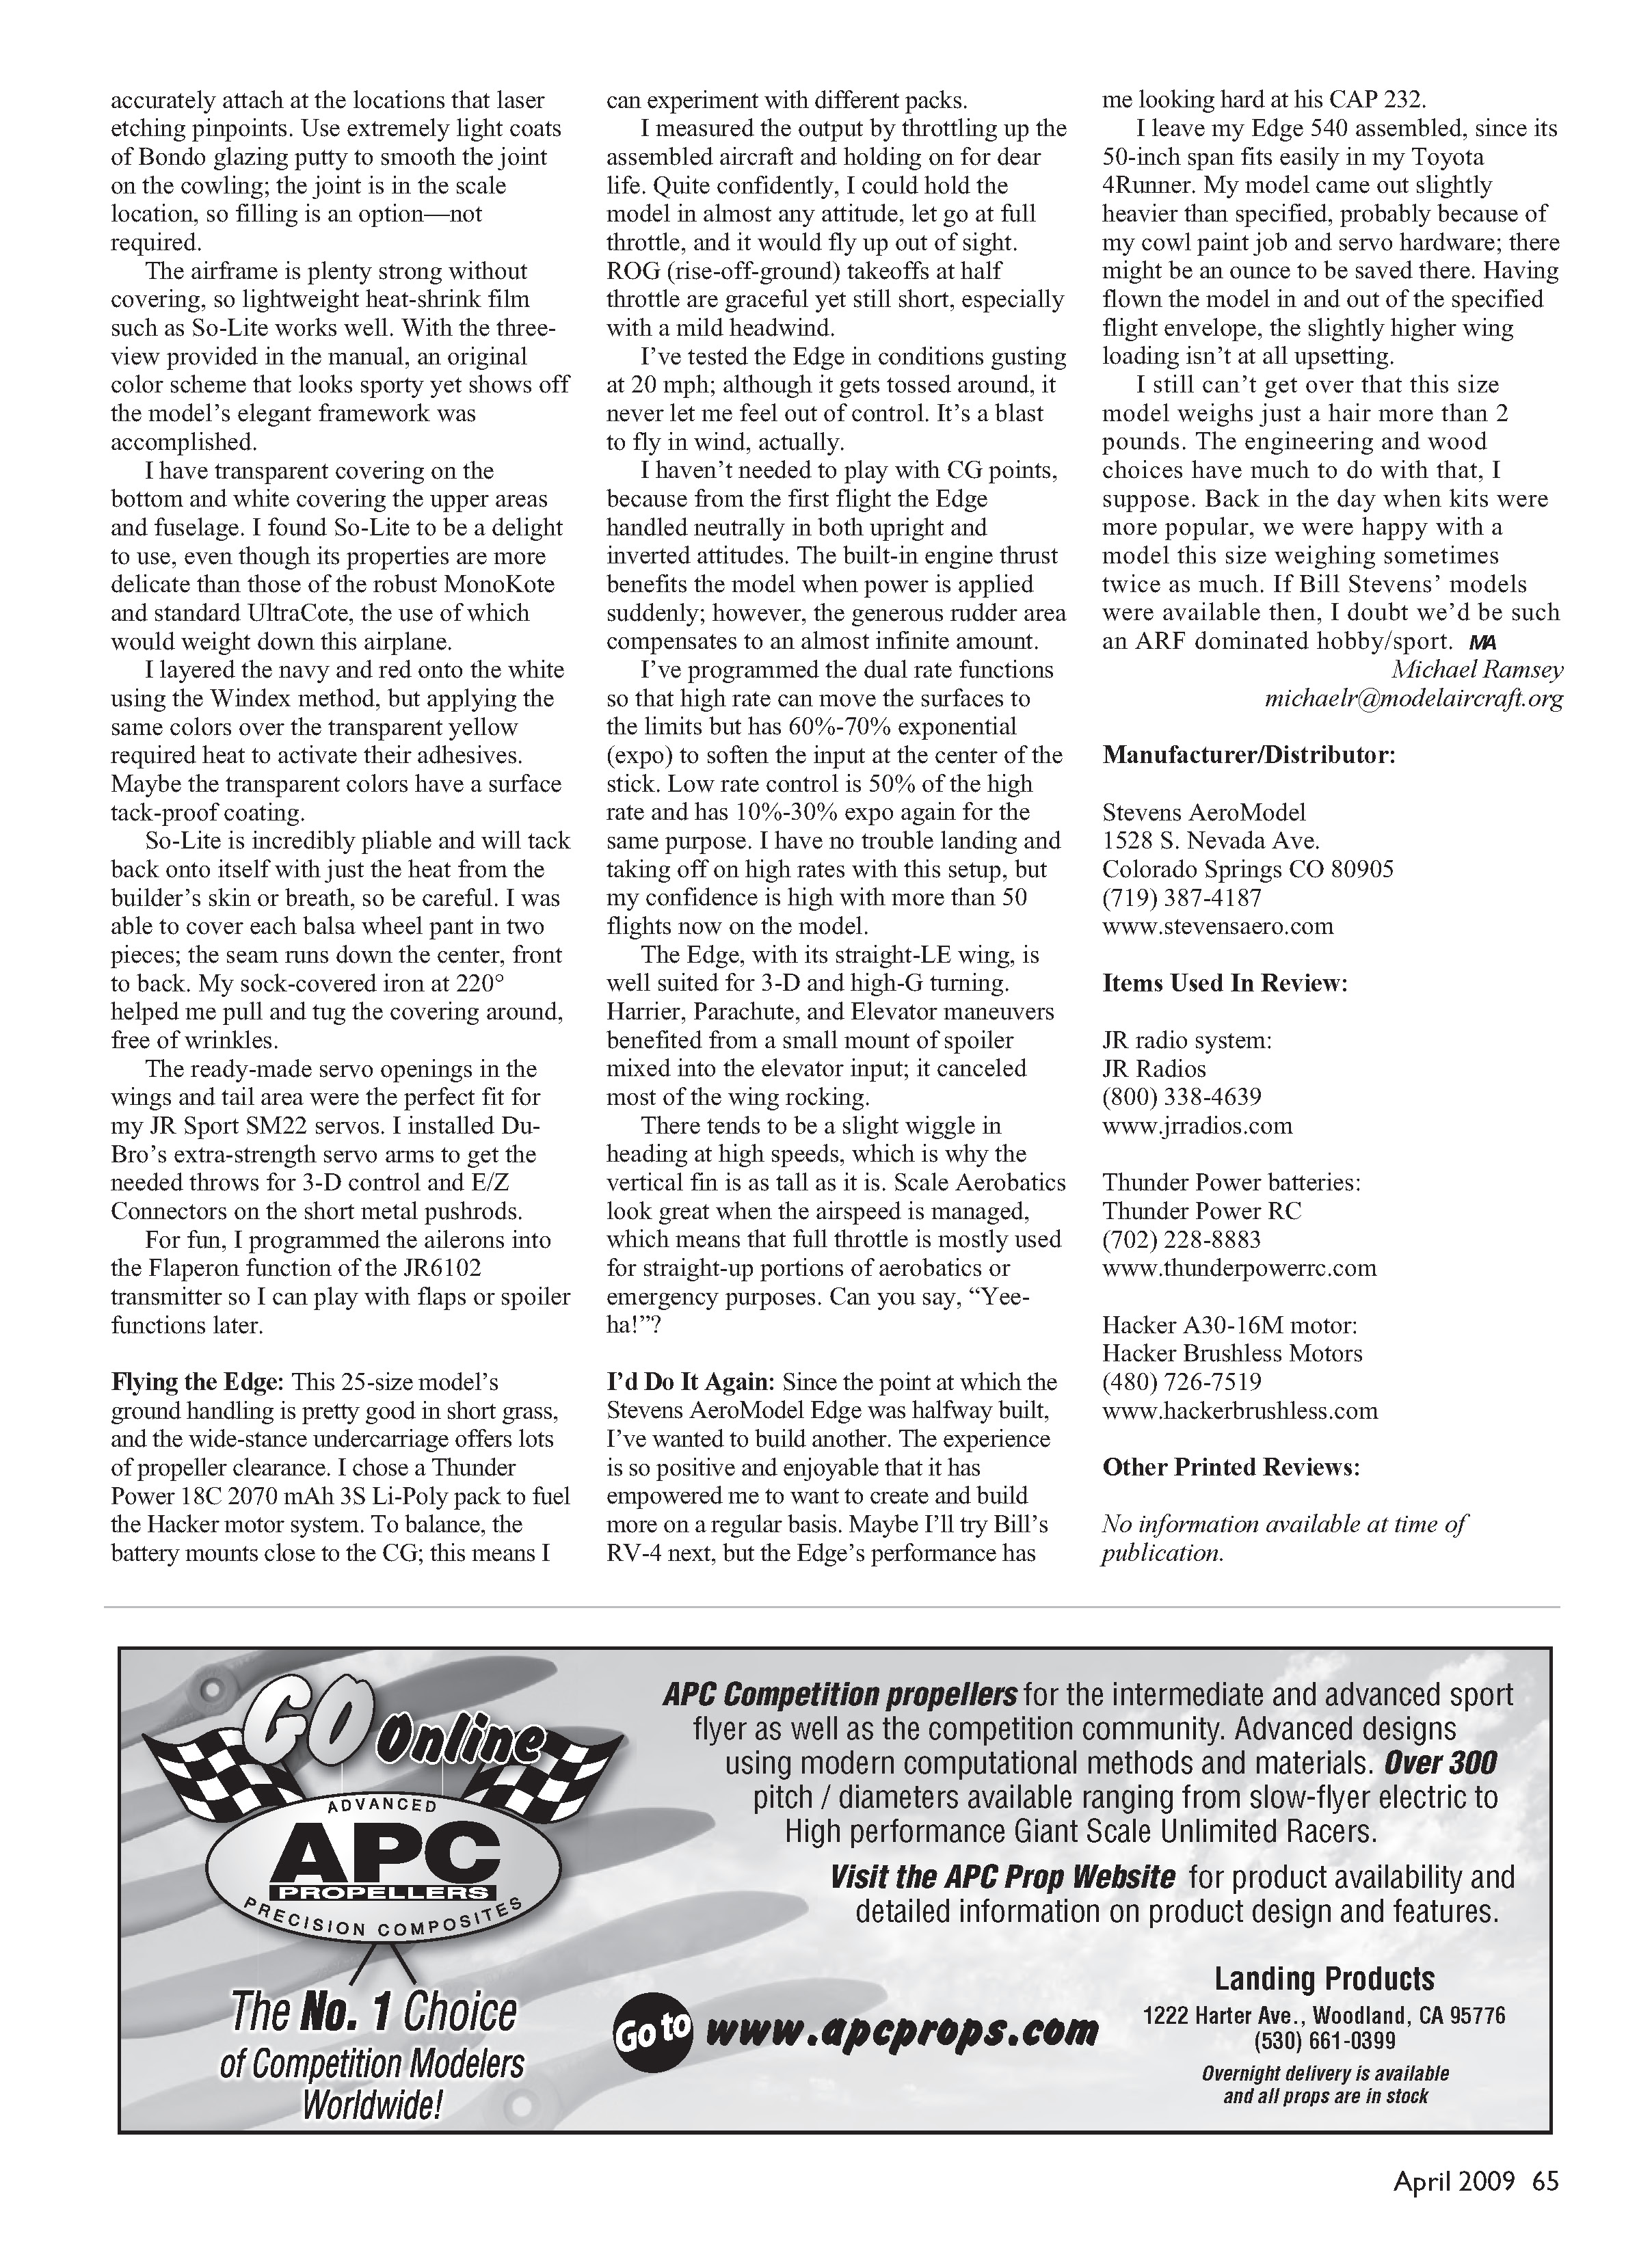
Even the wing LE sheeting is tabbed onto the ribs; it's a beautiful thing! The one part I didn't like (and it's about the only thing) is that the sheeting on my kit was too short at the LE to be sanded flush with the ribs. This meant that only the top corner of the LE cap touched the sheeting. Maybe I sanded too much, but I had to resecur the sheeting several times while blending in the LE shape. The easy fix would be to add a 1/16-inch square strip to the sheeting and sand the area flush.
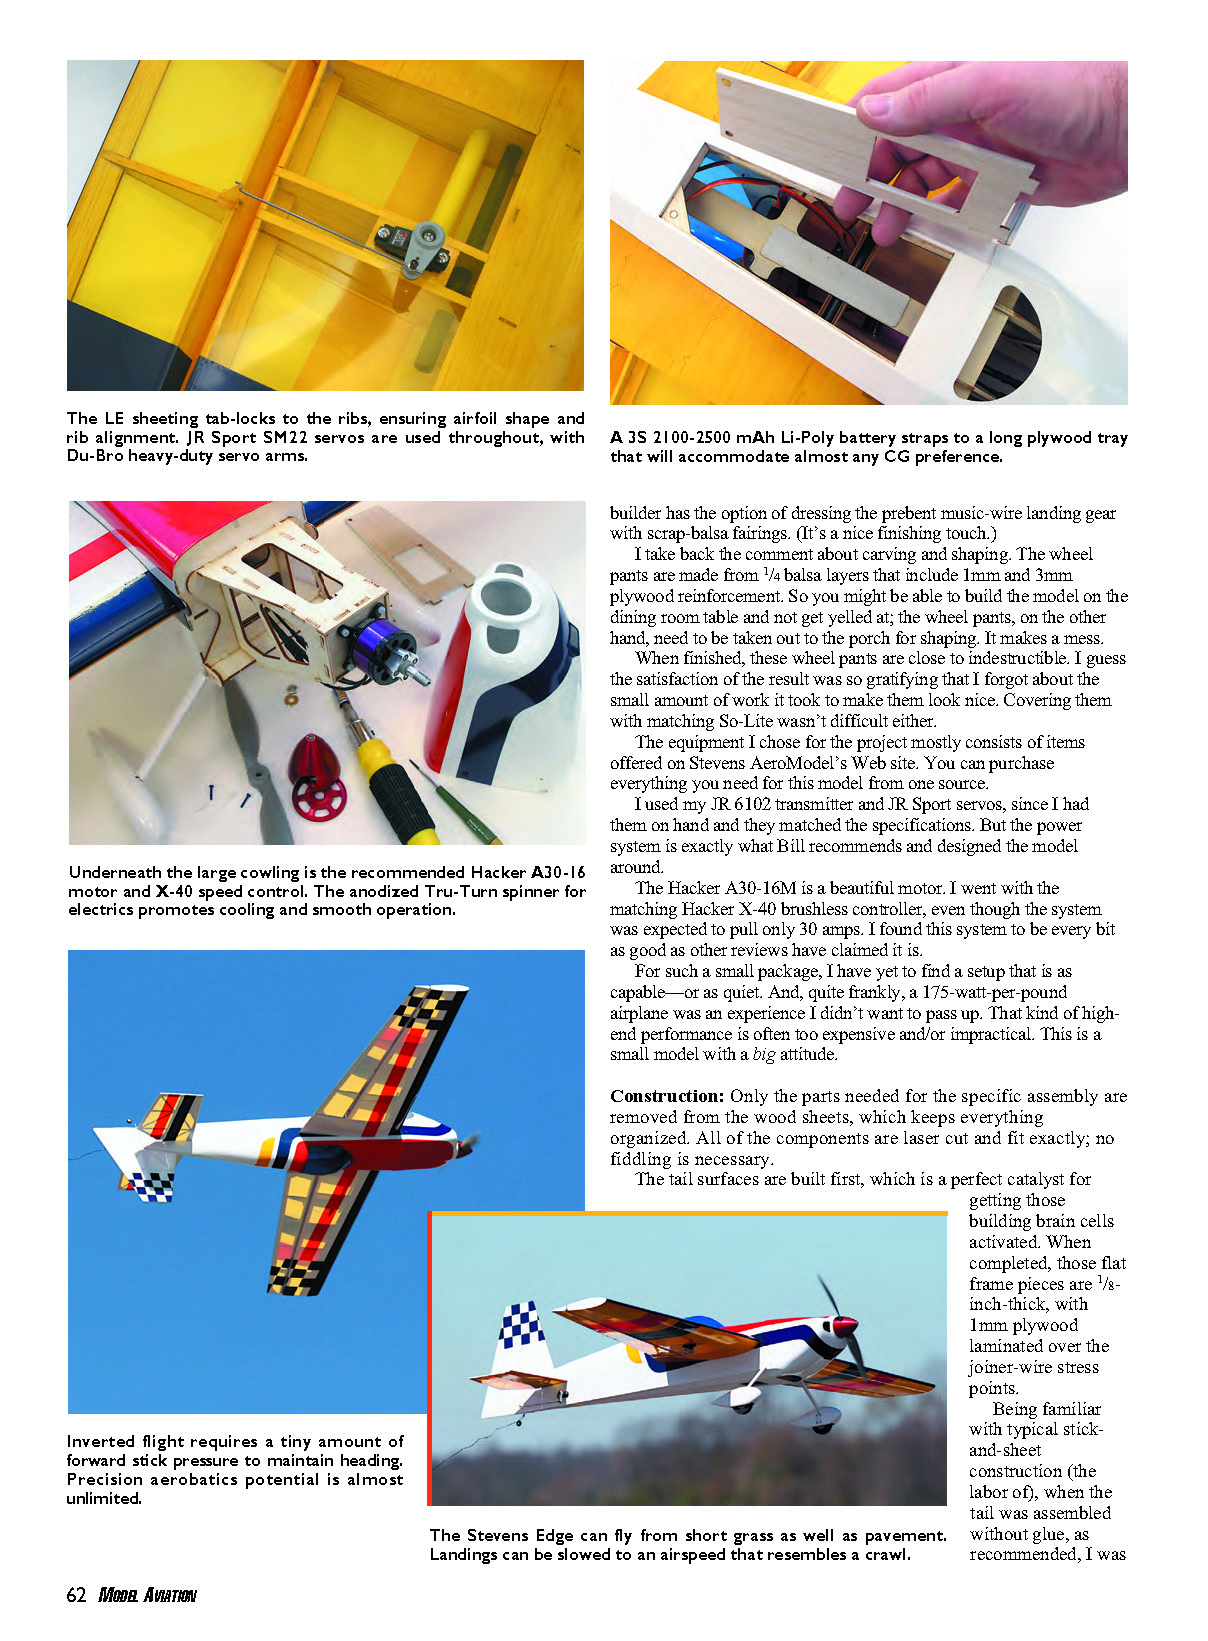
Carbon-fiber strips on the TEs of the ailerons, elevator, and rudder keep those surfaces from warping during the build and while covering. The ailerons themselves are works of art; the hinge area is built up — not a solid, thick piece of balsa that needs to be carved and sanded to a beveled edge; the bevel is built in.
The kit supplies all hardware needed to complete the Edge. These pieces are a mixture of laser-cut and Du-Bro parts that accurately attach at the locations that laser etching pinpoints. Use extremely light coats of Bondo glazing putty to smooth the joint on the cowling; the joint is in the scale location, so filling is an option—not required.
The airframe is plenty strong without covering, so lightweight heat-shrink film such as So-Lite works well. With the three-view provided in the manual, an original color scheme that looks sporty yet shows off the model's elegant framework was accomplished.
I used transparent covering on the bottom and white covering on the upper areas and fuselage. I found So-Lite to be a delight to use, even though its properties are more delicate than those of robust MonoKote and standard UltraCote, the use of which would weigh down this airplane.
I layered navy and red onto the white using the Windex method, but applying the same colors over the transparent yellow required heat to activate their adhesives. Maybe the transparent colors have a surface tack-proof coating.
So-Lite is incredibly pliable and will tack back onto itself with just the heat from the builder's skin or breath, so be careful. I was able to cover each balsa wheel pant in two pieces; the seam runs down the center, front to back. My sock-covered iron at 220°F helped me pull and tug the covering around, free of wrinkles.
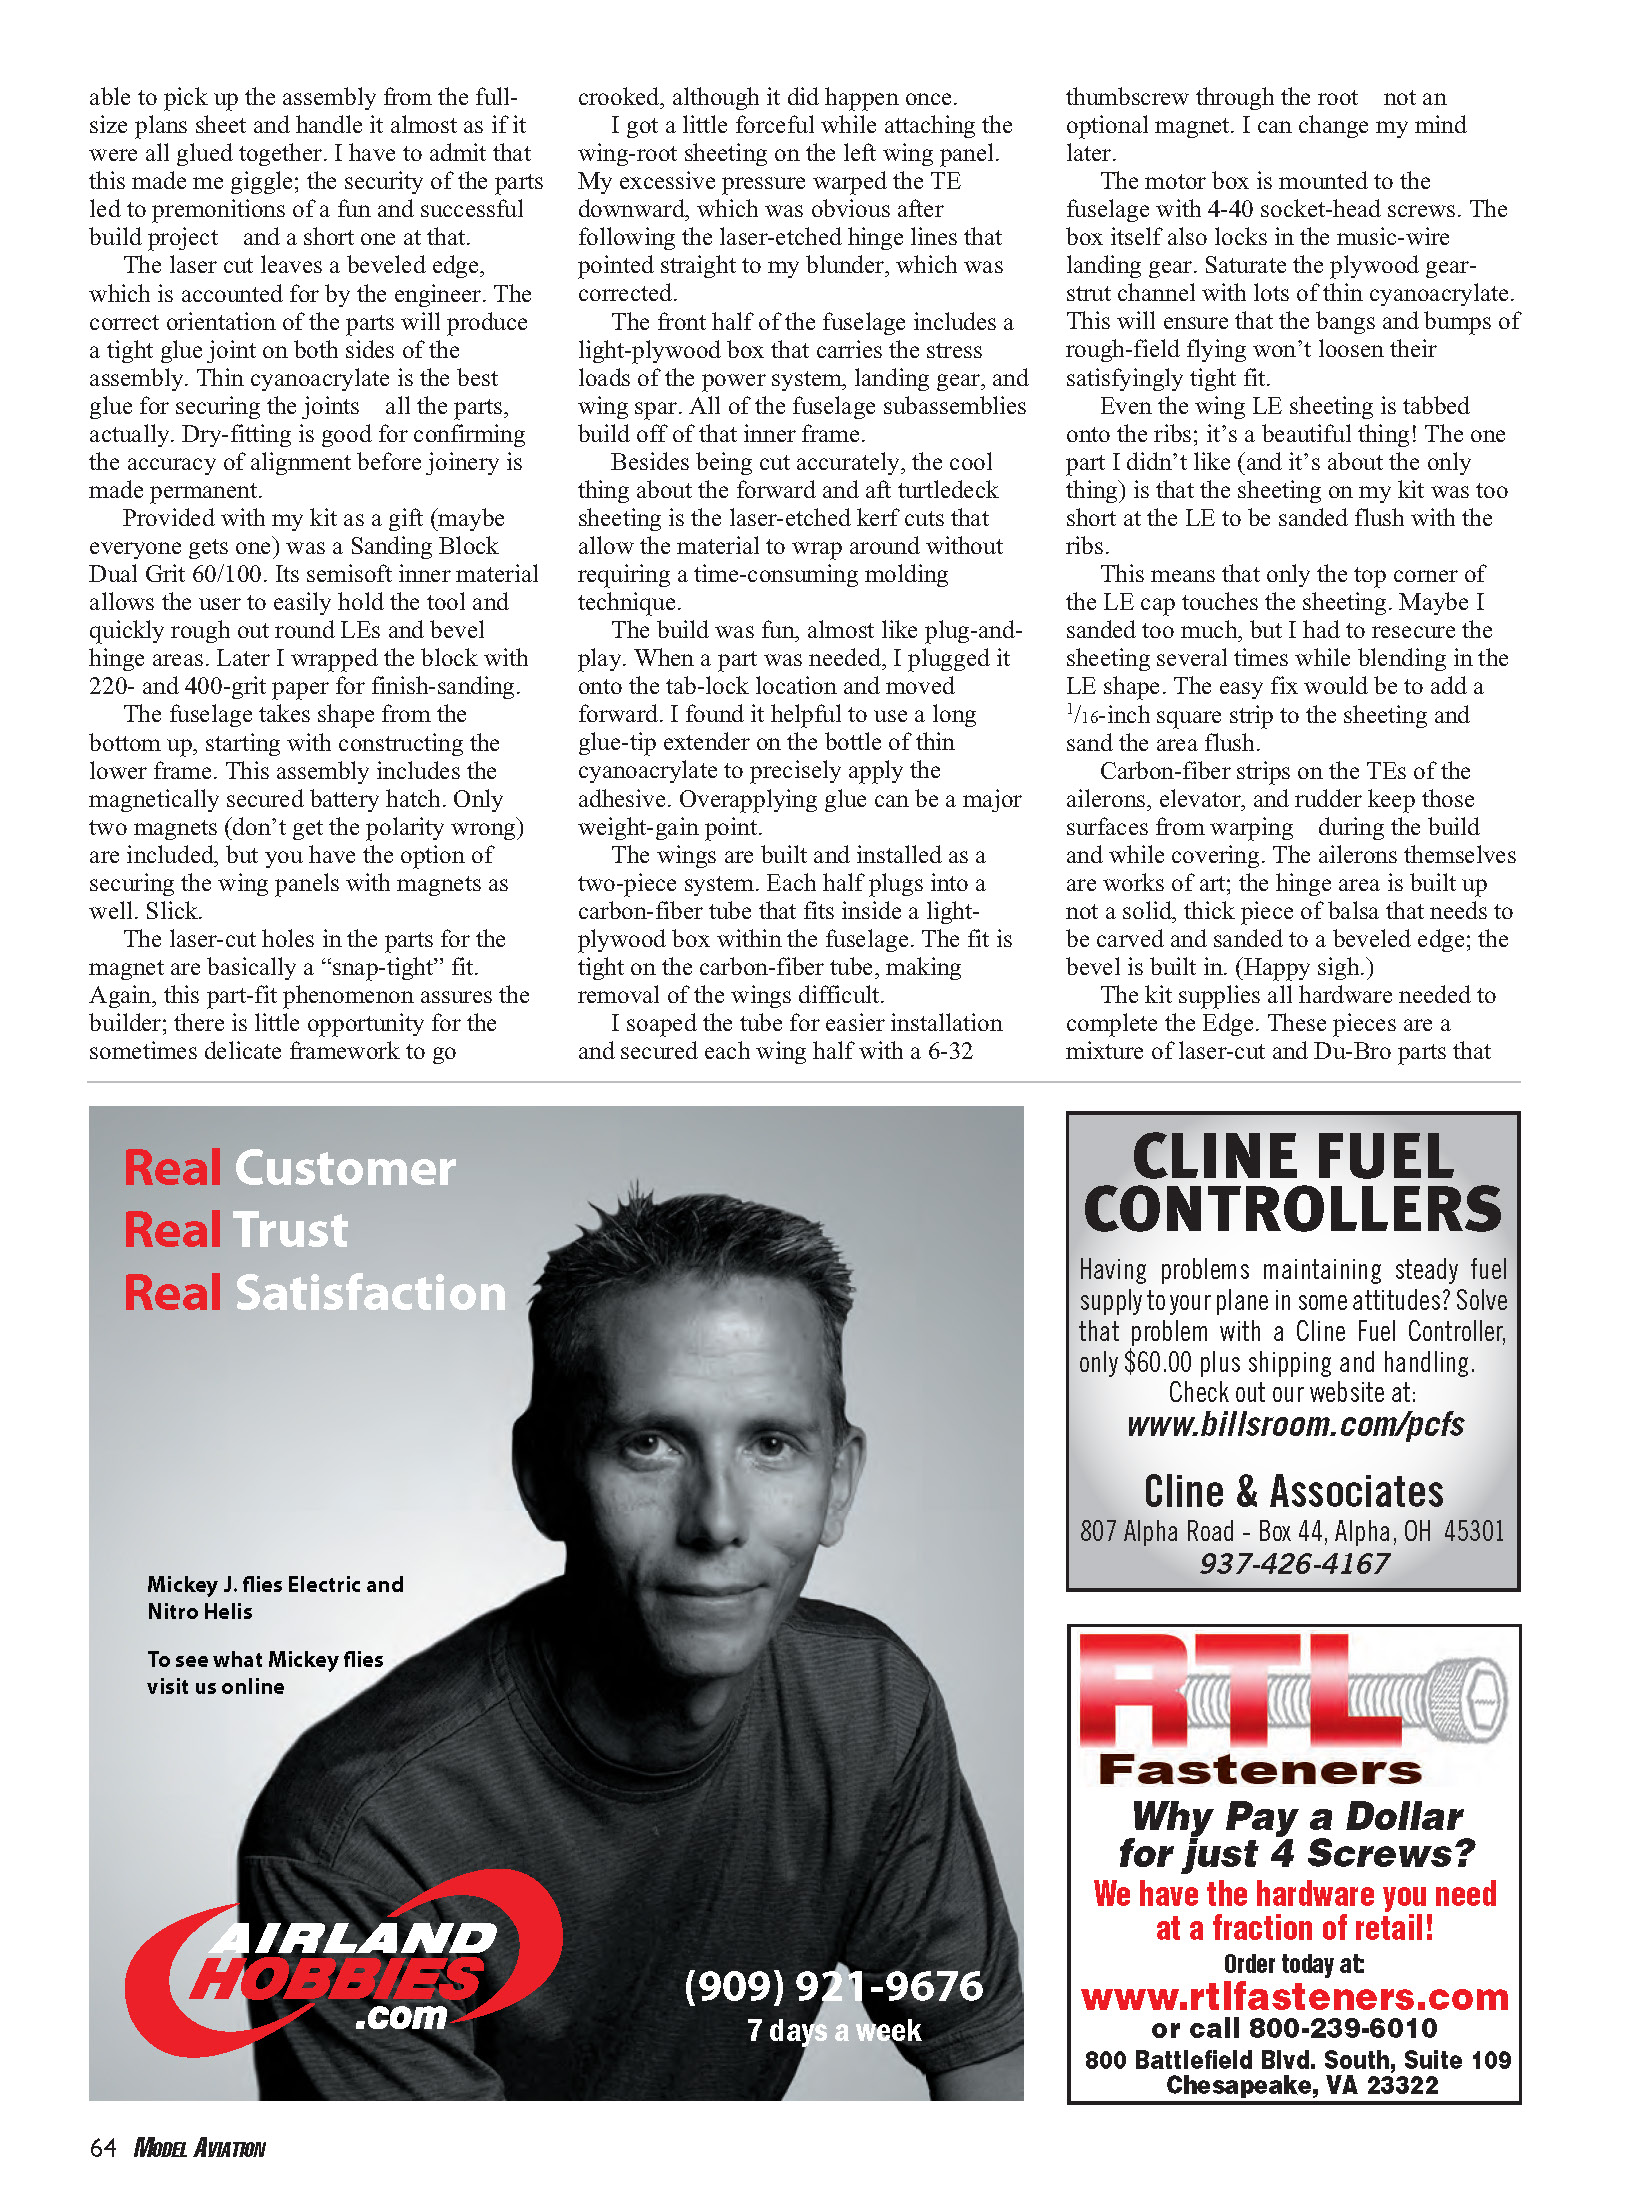
The ready-made servo openings in the wings and tail area were the perfect fit for my JR Sport SM22 servos. I installed Du-Bro's extra-strength servo arms to get the needed throws for 3-D control and E/Z Connectors on the short metal pushrods.
For fun, I programmed the ailerons into the Flaperon function of the JR6102 transmitter so I can play with flaps or spoiler functions later.
Flying the Edge
This 25-size model's ground handling is pretty good in short grass, and the wide-stance undercarriage offers lots of propeller clearance. I chose a Thunder Power 18C 2070 mAh 3S Li-Poly pack to fuel the Hacker motor system. To balance, the battery mounts close to the CG; this means I can experiment with different packs.
I measured the output by throttling up the assembled aircraft and holding on for dear life. Quite confidently, I could hold the model in almost any attitude, let go at full throttle, and it would fly up and out of sight. ROG (rise-off-ground) takeoffs at half throttle are graceful yet still short, especially with a mild headwind.
I've tested the Edge in conditions gusting at 20 mph; although it gets tossed around, it never let me feel out of control. It's a blast to fly in wind, actually.
I haven't needed to play with CG points, because from the first flight the Edge handled neutrally in both upright and inverted attitudes. The built-in engine thrust benefits the model when power is applied suddenly; however, the generous rudder area compensates to an almost infinite amount.
I've programmed the dual-rate functions so that high rate can move the surfaces to the limits but has 60%–70% exponential (expo) to soften the input at the center of the stick. Low rate control is 50% of the high rate and has 10%–30% expo again for the same purpose. I have no trouble landing and taking off on high rates with this setup, but my confidence is high with more than 50 flights now on the model.
The Edge, with its straight-LE wing, is well suited for 3-D and high-G turning. Harrier, Parachute, and Elevator maneuvers benefited from a small amount of spoiler mixed into the elevator input; it canceled most of the wing rocking.
There tends to be a slight wiggle in heading at high speeds, which is why the vertical fin is as tall as it is. Scale aerobatics look great when the airspeed is managed, which means that full throttle is mostly used for straight-up portions of aerobatics or emergency purposes. Can you say, "Yee-ha!"?
I'd Do It Again
Since the point at which the Stevens AeroModel Edge was halfway built, I've wanted to build another. The experience is so positive and enjoyable that it has empowered me to want to create and build more on a regular basis. Maybe I'll try Bill's RV-4 next, but the Edge's performance has me looking hard at his CAP 232.
I leave my Edge 540 assembled, since its 50-inch span fits easily in my Toyota 4Runner. My model came out slightly heavier than specified, probably because of my cowl paint job and servo hardware; there might be an ounce to be saved there. Having flown the model in and out of the specified flight envelope, the slightly higher wing loading isn't at all upsetting.
I still can't get over that this size model weighs just a hair more than 2 pounds. The engineering and wood choices have much to do with that, I suppose. Back in the day when kits were more popular, we were happy with a model this size weighing sometimes twice as much. If Bill Stevens' models were available then, I doubt we'd be such an ARF-dominated hobby/sport.
MA
Michael Ramsey [email protected]
Manufacturer/Distributor
Stevens AeroModel 1528 S. Nevada Ave. Colorado Springs, CO 80905 (719) 387-4187 www.stevensaero.com
Items Used in Review
- JR radio system:
- JR Radios
- (800) 338-4639
- www.jrradios.com
- Thunder Power batteries:
- Thunder Power RC
- (702) 228-8883
- www.thunderpowerrc.com
- Hacker A30-16M motor:
- Hacker Brushless Motors
- (480) 726-7519
- www.hackerbrushless.com
Other Printed Reviews
No information available at time of publication.
Transcribed from original scans by AI. Minor OCR errors may remain.

