


Power Switch: Futaba 8FGA FASST System
Jay Smith
Overview
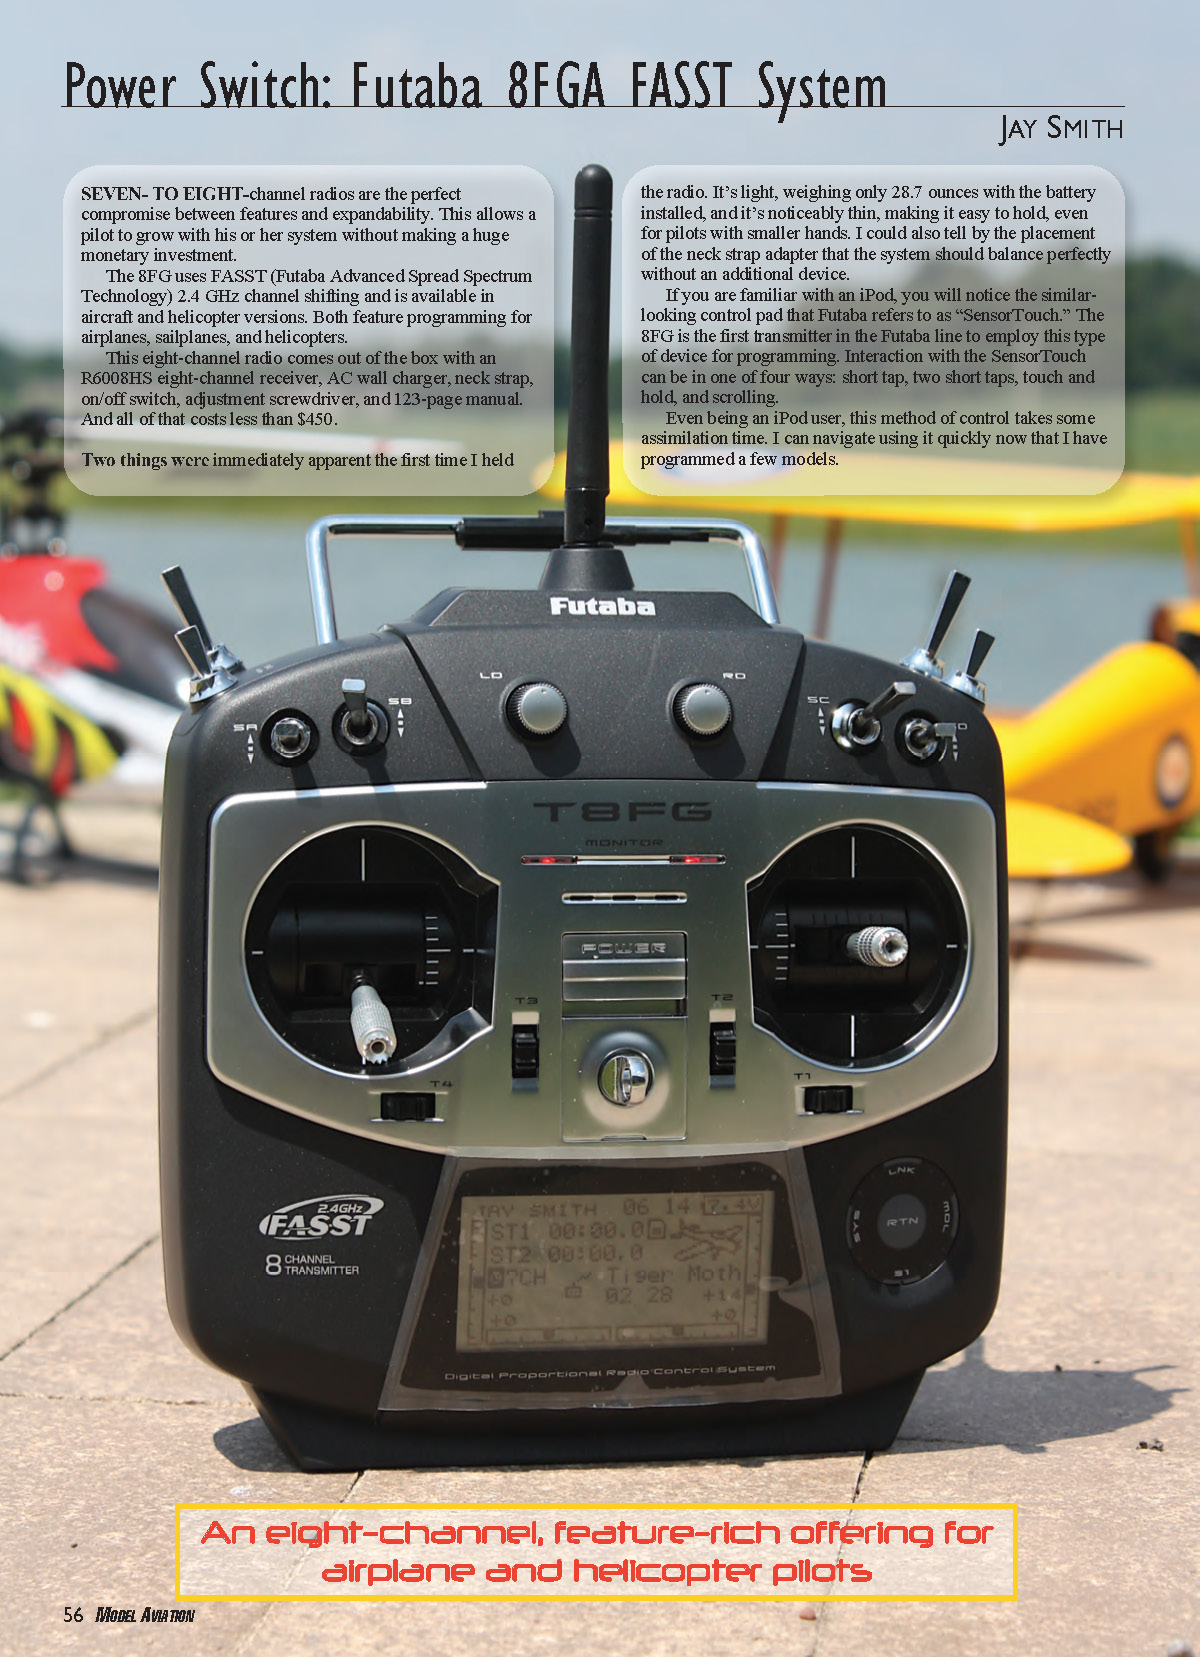
Seven- to eight-channel radios are the perfect compromise between features and expandability. They allow a pilot to grow with a system without making a huge monetary investment.
The Futaba 8FG uses FASST (Futaba Advanced Spread Spectrum Technology) 2.4 GHz channel shifting and is available in aircraft and helicopter versions. Both versions feature programming for airplanes, sailplanes, and helicopters. This eight-channel radio ships with an R6008HS eight-channel receiver, AC wall charger, neck strap, on/off switch, adjustment screwdriver, and a 123-page manual — all for less than $450.
The radio is light, weighing only 28.7 ounces with the battery installed, and noticeably thin, making it easy to hold even for pilots with smaller hands. The neck strap adapter placement helps it balance perfectly without an additional device.
Design and Controls
- Futaba's SensorTouch control pad (similar to an iPod control pad) is used for programming. Interaction methods: short tap, double tap, touch and hold, and scrolling. It takes some acclimation but becomes quick with use.
- The transmitter has eight switches, two knobs, and two sliders, all assignable:
- Three three-position switches and one two-position switch on the top left.
- Three three-position switches and one momentary switch on the right side.
- Knobs on the upper front; sliders on the back within easy reach of fingers.
- Ball-bearing control sticks come with a factory tension setting; changing tension requires removing the back case. The airplane version has a ratcheted left stick; the helicopter version has a smooth throttle action. Both can be adjusted for tension preference.
- The backlit 128 x 64 LCD offers adjustable contrast and brightness with auto-off timer and display-size options for timers.
SD Card and Firmware Updates
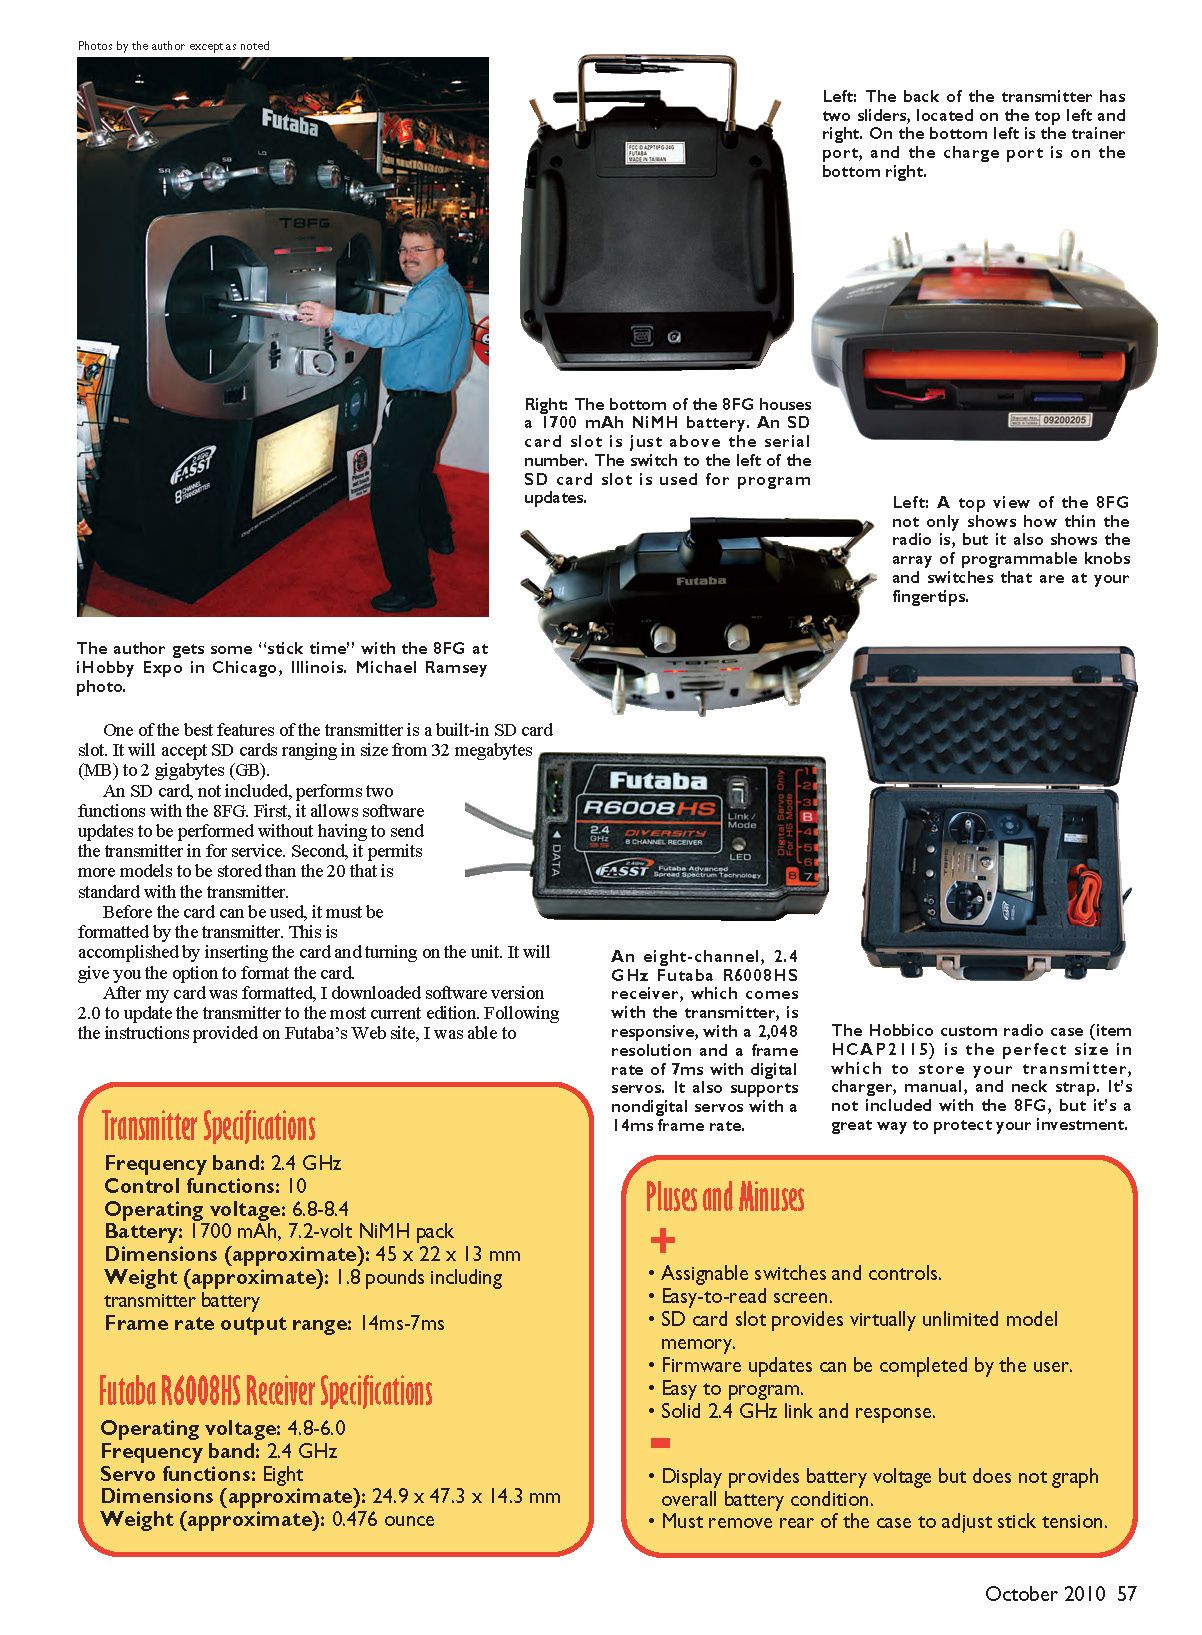
- The built-in SD card slot accepts SD cards from 32 MB to 2 GB.
- An SD card (not included) enables two main functions:
- User-performed firmware/software updates without sending the transmitter in for service.
- Expanded model memory beyond the default 20 models.
- To use a card, insert it and power on the unit; the transmitter will offer to format it.
- Example: After formatting a 512 MB card, the System Menu displayed "966," indicating an additional 966 model memories available. Updating to software version 2.0 (following Futaba’s website instructions) took less than five minutes. After updating, the System Menu > Info confirms firmware version and card/model capacity.
- A useful firmware addition: a power-on warning if the throttle stick is above one-third throttle, allowing you to lower throttle or permit transmission at the current setting — a helpful safety feature.
Programming Basics
The manual provides basic settings for airplanes and helicopters to get users flying quickly, but it only scratches the surface of the 8FG’s extensive features. The radio includes programming options commonly found in higher-priced models. The Home screen displays digital trims, system timer, key lock indicator, battery indicator, model type and name, model timer, FASST mode, radio frequency indicator, and user name (useful for identifying ownership).
The System menu configures transmitter-wide functions (no model data). Key System menu features include:
- Trainer function with advanced options: the instructor can select channels/functions assigned to the student and allow instructor corrections while the student retains control.
- Display settings, user name, and H/W (hardware) settings to change transmitter mode and reverse directions of sticks, switches, trim levers, and knobs.
- Info shows Product I.D., firmware version, and language (English, Japanese, German, Dutch, French, Spanish, Czech, Russian, Italian).
Linkage, Models, and Servo Monitor
- The Linkage menu handles model addition, type selection, basic model settings (including throttle cut), endpoint settings, and other essentials.
- Throttle cut: crucial for electrics and for gas/glow models (kills or sets the throttle to a preset level). You can assign and configure a switch (for example, program the SF switch to set POS to 0%).
- The Function option in the Linkage menu lets you reassign actual channel mappings (e.g., move ailerons from Channel 1 to any other channel).
- The Model menu contains dedicated mixes for the selected model type, including dual rates, flight conditions, programming mixes, differential, and exponential. Dual rate supports up to five rates per flight condition; exponential is included in the dual rate menu.
- Servo Monitor provides graphical testing of servo movement and fixed positions, showing the signal being sent to each servo. Neutral testing assists with locating servo horn neutral positions and setup.
Receiver and Frame Rates
- The included Futaba R6008HS receiver offers 2,048 resolution (available with Futaba receivers supporting more than eight channels) and two frame-rate modes:
- Normal mode: 14 ms frame rate — compatible with most servos.
- High-speed mode: 7 ms frame rate for digital servos on channels 1–6.
- To change receiver mode: hold the Link/Mode button and power on the receiver. LEDs indicate mode: red for normal; green/red flash for two seconds then red for high speed.
Program Features
- Eight proportional channels
- Two switched channels
- Integrated FASST 2.4 GHz design
- 2,048 resolution
- SensorTouch programming
- Airplane, helicopter, and glider software
- 20-model internal memory (compatible with 32 MB–2 GB SD memory cards)
- Mode 1–4 selectable
- Direct access to timers, channel mode, and model selection
- Two-touch access to system, linkage, and model menus
- Assignable switches/functions
- 10-character user and model naming
- Model select, copy, and reset
- Data transfer
- All-channel and battery fail-safes
- Subtrims, servo reversing, dual rates, exponential, and EPA (endpoint adjustment) with limits
- Digital trims and memory, with step and percentage options
- 128 x 64 backlit LCD with auto-off timer, normal/large timer display options, adjustable contrast and brightness
- Servo monitor with bar graph displays and cycle function
- Model and system timers
- Trainer system with channel/function options
- Sticks with ball-bearing gimbals, length, and tension adjustments
Transmitter Specifications
- Frequency band: 2.4 GHz
- Control functions: 10
- Operating voltage: 6.8–8.4 V
- Battery: 1700 mAh, 7.2 V NiMH pack
- Dimensions (approximate): 45 x 22 x 13 mm
- Weight (approximate): 1.8 pounds including transmitter battery
- Frame rate output range: 14 ms–7 ms
Futaba R6008HS Receiver Specifications
- Operating voltage: 4.8–6.0 V
- Frequency band: 2.4 GHz
- Servo functions: Eight
- Dimensions (approximate): 24.9 x 47.3 x 14.3 mm
- Weight (approximate): 0.476 ounce
Pluses and Minuses
Pluses:
- Assignable switches and controls
- Easy-to-read screen
- SD card slot provides virtually unlimited model memory
- Firmware updates can be completed by the user
- Easy to program
- Solid 2.4 GHz link and response
Minuses:
- Display provides battery voltage but does not graph overall battery condition
- Must remove rear of the case to adjust stick tension
Conclusion
The Futaba 8FG is a bargain with plenty of programming features to satisfy airplane, helicopter, and sailplane pilots. The SD card slot and user-installable firmware updates make the radio future-proof with virtually unlimited model memories. The manual, with many pictures of the transmitter and programming screens, is helpful; more real-world examples for some advanced settings would be beneficial. SensorTouch has proven to be a quick programming interface, and the overall light weight and balance make the transmitter comfortable for long flying sessions.
— Jay Smith [email protected]
Manufacturer / Distributor:
- Futaba / Hobbico
- Box 9021
- (800) 637-7660
- Champaign, IL 61821
- www.futaba-rc.com
Transcribed from original scans by AI. Minor OCR errors may remain.

