
Product Review
FMA Direct Co-Pilot
Pros:
- Self-stabilizing concept (like an autopilot) works flawlessly
- Excellent for training beginning Radio Control (RC) pilots
- Lightweight
- The infrared sensor works in most weather conditions. It is not dependent on sunlight.
- The Co-Pilot can be controlled on the ground via an extra channel on the RC transmitter.
Con:
- The infrared sensor and control processor plus cabling are somewhat bulky in size, making it difficult for installation on certain smaller park-flyer-size models.
THE FMA DIRECT Co-Pilot is described as a flight-stabilization system. It employs infrared thermal technology in such a way that your RC model will constantly right itself to level flight. If your fixed-wing aircraft or helicopter pitches (up or down) or rolls (right or left), the Co-Pilot will automatically provide corrective control commands to bring it back to a level attitude.
The primary purpose of the Co-Pilot is to help beginners who are learning to fly RC. It is also intended to help fly the more demanding models with less conscious effort. If you have always been a "nervous pilot," it will make your aircraft look much better in the sky.
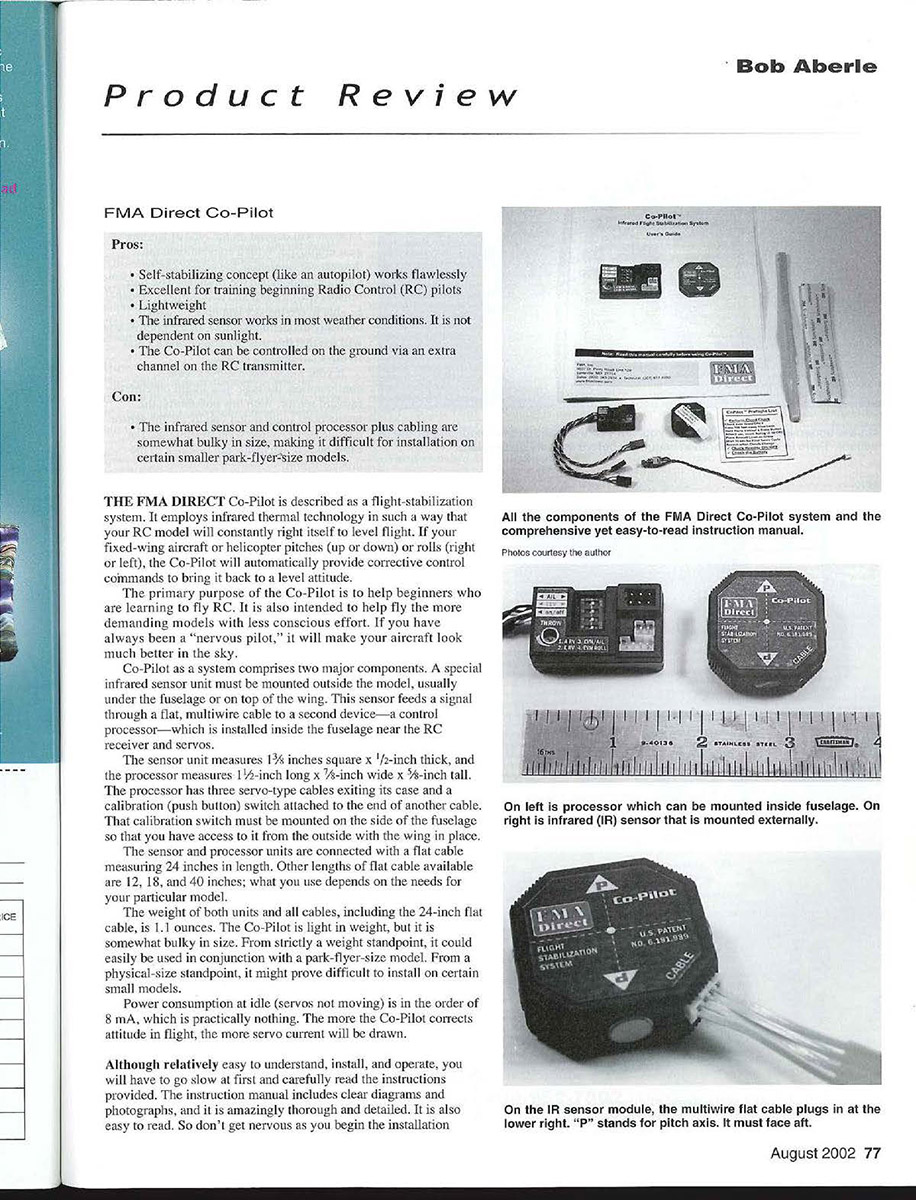
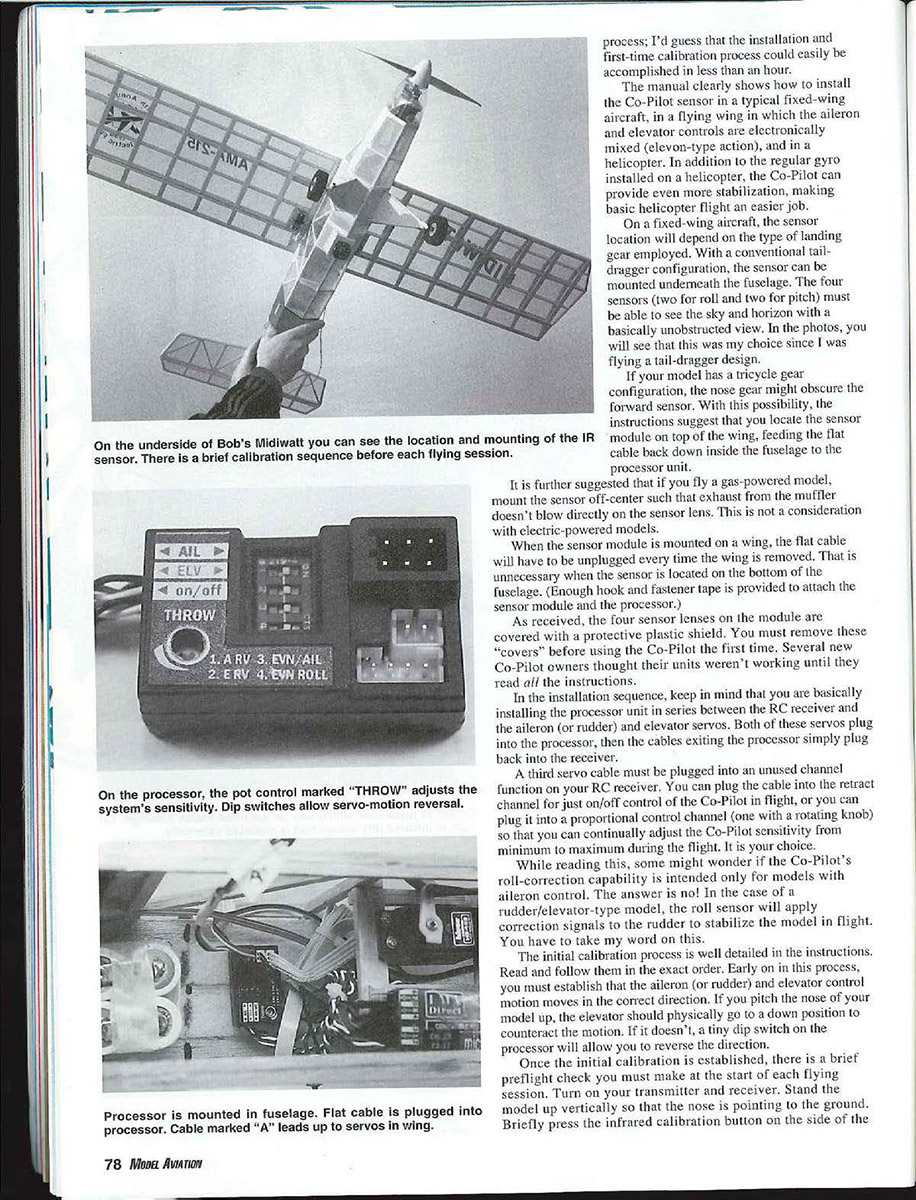
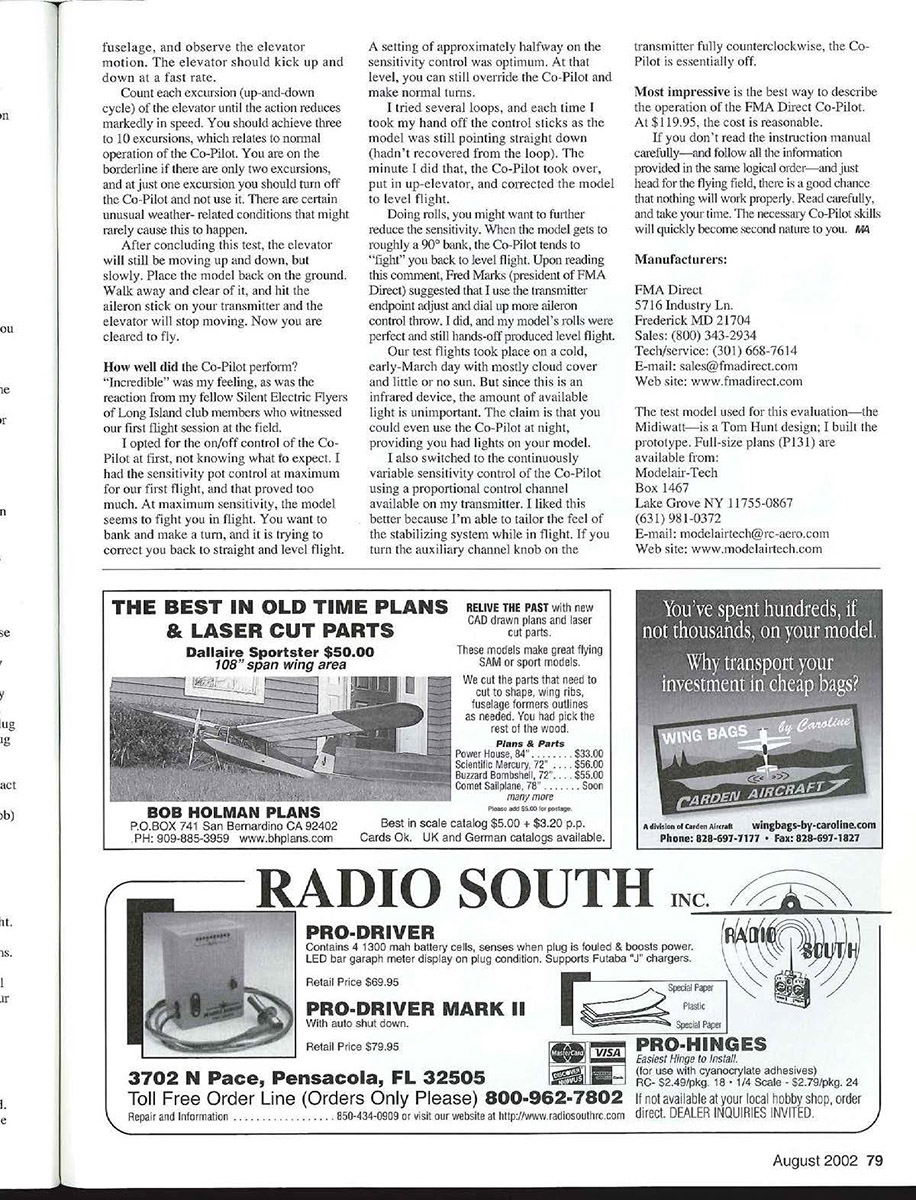
Co-Pilot as a system comprises two major components. A special infrared sensor unit must be mounted outside the model, usually under the fuselage or on top of the wing. This sensor feeds a signal through a flat, multiwire cable to a second device—a control processor—which is installed inside the fuselage near the RC receiver and servos.
The sensor unit measures 1 3/8 inches square x 1/2-inch thick, and the processor measures 1 1/2-inch long x 1/2-inch wide x 5/8-inch tall. The processor has three servo-type cables exiting its case and a calibration (push button) switch attached to the end of another cable. That calibration switch must be mounted on the side of the fuselage so that you have access to it from the outside with the wing in place.
The sensor and processor units are connected with a flat cable measuring 24 inches in length. Other lengths of flat cable available are 12, 18, and 40 inches; what you use depends on the needs for your particular model.
The weight of both units and all cables, including the 24-inch flat cable, is 1.1 ounces. The Co-Pilot is light in weight, but it is somewhat bulky in size. From strictly a weight standpoint, it could easily be used in conjunction with a park-flyer-size model. From a physical-size standpoint, it might prove difficult to install on certain small models.
Power consumption at idle (servos not moving) is in the order of 8 mA, which is practically nothing. The more the Co-Pilot corrects attitude in flight, the more servo current will be drawn.
Although relatively easy to understand, install, and operate, you will have to go slow at first and carefully read the instructions provided. The instruction manual includes clear diagrams and photographs, and it is amazingly thorough and detailed. It is also easy to read. So don't get nervous as you begin the installation process; I'd guess that the installation and first-time calibration process could easily be accomplished in less than an hour.
The manual clearly shows how to install the Co-Pilot sensor in a typical fixed-wing aircraft, in a flying wing in which the aileron and elevator controls are electronically mixed (elevon-type action), and in a helicopter. In addition to the regular gyro installed on a helicopter, the Co-Pilot can provide even more stabilization, making basic helicopter flight an easier job.
On a fixed-wing aircraft, the sensor location will depend on the type of landing gear employed. With a conventional tail-dragger configuration, the sensor can be mounted underneath the fuselage. The four sensors (two for roll and two for pitch) must be able to see the sky and horizon with a basically unobstructed view. In the photos, you will see that this was my choice since I was flying a tail-dragger design.
If your model has a tricycle gear configuration, the nose gear might obscure the forward sensor. With this possibility, the instructions suggest that you locate the sensor module on top of the wing, feeding the flat cable back down inside the fuselage to the processor unit.
It is further suggested that if you fly a gas-powered model, mount the sensor off-center such that exhaust from the muffler doesn't blow directly on the sensor lens. This is not a consideration with electric-powered models.
When the sensor module is mounted on a wing, the flat cable will have to be unplugged every time the wing is removed. That is unnecessary when the sensor is located on the bottom of the fuselage. (Enough hook and fastener tape is provided to attach the sensor module and the processor.)
As received, the four sensor lenses on the module are covered with a protective plastic film. You must remove these "covers" before using the Co-Pilot the first time. Several new Co-Pilot owners thought their units weren't working until they read all the instructions.
In the installation sequence, keep in mind that you are basically installing the processor unit in series between the RC receiver and the aileron (or rudder) and elevator servos. Both of these servos plug into the processor, then the cables exiting the processor simply plug back into the receiver.
A third servo cable must be plugged into an unused channel function on your RC receiver. You can plug the cable into the retract channel for just on/off control of the Co-Pilot in flight, or you can plug it into a proportional control channel (one with a rotating knob) so that you can continually adjust the Co-Pilot sensitivity from minimum to maximum during the flight. It is your choice.
While reading this, some might wonder if the Co-Pilot's roll-correction capability is intended only for models with aileron control. The answer is no! In the case of a rudder/elevator-type model, the roll sensor will apply correction signals to the rudder to stabilize the model in flight. You have to take my word on this.
The initial calibration process is well detailed in the instructions. Read and follow them in the exact order. Early on in this process, you must establish that the aileron (or rudder) and elevator control motion moves in the correct direction. If you pitch the nose of your model up, the elevator should physically go to a down position to counteract the motion. If it doesn't, a tiny dip switch on the processor will allow you to reverse the direction.
Once the initial calibration is established, there is a brief preflight check you must make at the start of each flying session. Turn on your transmitter and receiver. Stand the model up vertically so that the nose is pointing to the ground. Briefly press the infrared calibration button on the side of the processor. The Co-Pilot will flash the LEDs and you'll hear a tone. Then slowly rotate the model to the upright position. If the Co-Pilot was properly calibrated, you will see about ten degrees (give or take) of elevator throw in the opposite direction of the pitch. The Co-Pilot will then be ready to fly.
Count each excursion (up-and-down cycle) of the elevator until the action reduces markedly in speed. You should achieve three to ten excursions, which relates to normal operation of the Co-Pilot. You are on the borderline if there are only two excursions, and at just one excursion you should turn off the Co-Pilot and not use it. There are certain unusual weather-related conditions that might rarely cause this to happen.
After concluding this test, the elevator will still be moving up and down, but slowly. Place the model back on the ground. Walk away and clear of it, and hit the aileron stick on your transmitter and the elevator will stop moving. Now you are cleared to fly.
How well did the Co-Pilot perform? "Incredible" was my feeling, as was the reaction from my fellow Silent Electric Flyers of Long Island club members who witnessed our first flight session at the field.
I opted for the on/off control of the Co-Pilot at first, not knowing what to expect. I had the sensitivity pot control at maximum for our first flight, and that proved too much. At maximum sensitivity, the model seems to fight you in flight. You want to bank and make a turn, and it is trying to correct you back to straight and level flight.
A setting of approximately halfway on the sensitivity control was optimum. At that level, you can still override the Co-Pilot and make normal turns.
I tried several loops, and each time I took my hand off the control sticks as the model was still pointing straight down (hadn't recovered from the loop). The minute I did that, the Co-Pilot took over, put in up-elevator, and corrected the model to level flight.
Doing rolls, you might want to further reduce the sensitivity. When the model gets to roughly a 90° bank, the Co-Pilot tends to "light" you back to level flight. Upon reading this comment, Fred Marks (president of FMA Direct) suggested that I use the transmitter endpoint adjust and dial up more aileron control throw. I did, and my model's rolls were perfect and still hands-off produced level flight.
Our test flights took place on a cold, early-March day with mostly cloud cover and little or no sun. But since this is an infrared device, the amount of available light is unimportant. The claim is that you could even use the Co-Pilot at night, providing you had lights on your model.
I also switched to the continuously variable sensitivity control of the Co-Pilot using a proportional control channel available on my transmitter. I liked this better because I'm able to tailor the feel of the stabilizing system while in flight. If you turn the auxiliary channel knob on the transmitter fully counterclockwise, the Co-Pilot is essentially off.
Most impressive is the best way to describe the operation of the FMA Direct Co-Pilot. At $119.95, the cost is reasonable.
If you don't read the instruction manual carefully—and follow all the information provided in the same logical order—and just head for the flying field, there is a good chance that nothing will work properly. Read carefully, and take your time. The necessary Co-Pilot skills will quickly become second nature to you.
Manufacturers:
FMA Direct 5716 Industry Ln. Frederick MD 21704 Sales: (800) 343-2934 Tech/service: (301) 668-7614 E-mail: [email protected] Web site: www.fmadirect.com
The test model used for this evaluation—the Midwatt—is a Tom Hunt design; I built the prototype. Full-size plans (P131) are available from: Modelair-Tech Box 1467 Lake Grove NY 11755-0867 (631) 981-0372 E-mail: [email protected] Web site: www.modelairtech.com
Transcribed from original scans by AI. Minor OCR errors may remain.

