
Product Review
Tom Sullivan
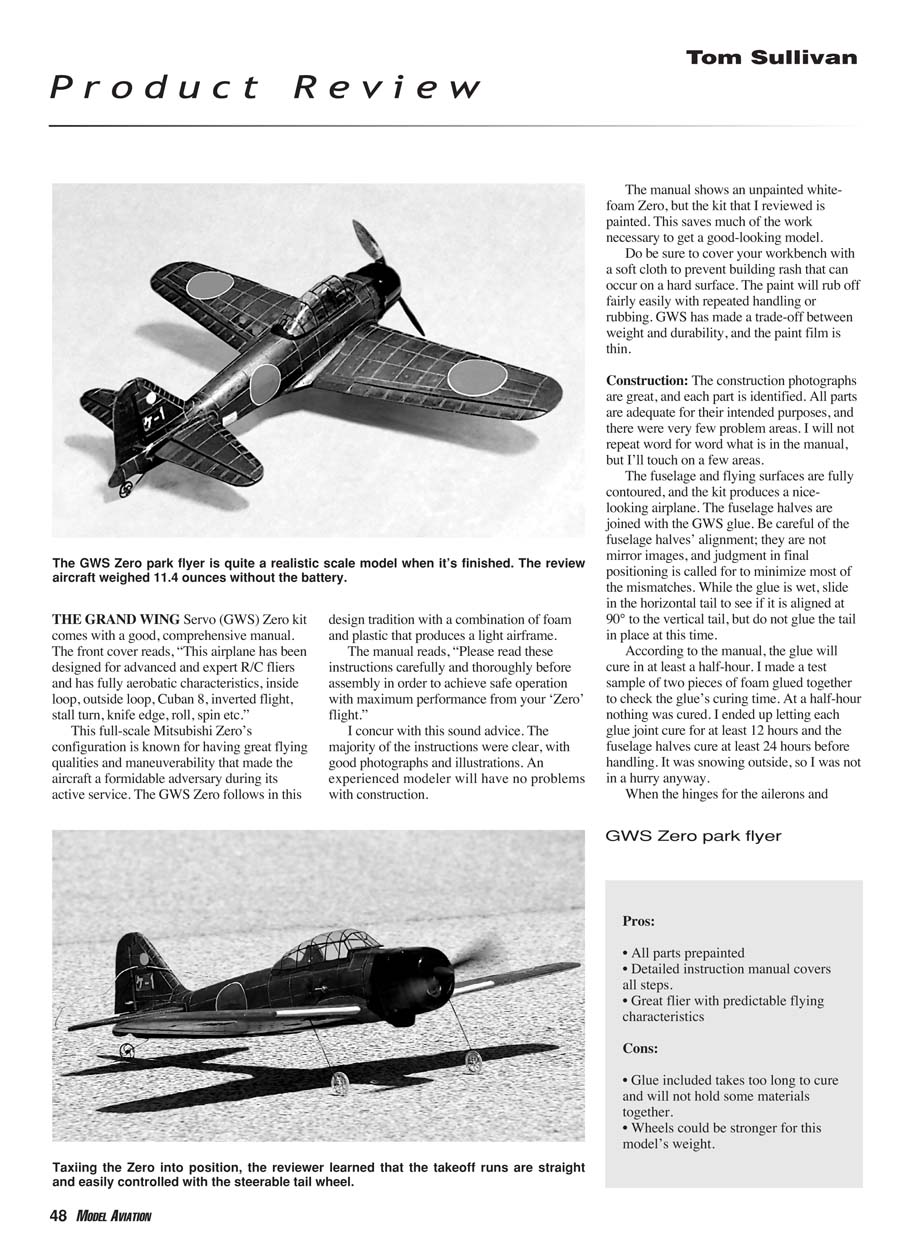
The GWS (Grand Wing Servo) Zero kit comes with a good, comprehensive manual. The front cover reads, "This airplane has been designed for advanced and expert R/C fliers and has fully aerobatic characteristics, inside loop, outside loop, Cuban 8, inverted flight, stall turn, knife edge, roll, spin etc."
This full-scale Mitsubishi Zero configuration is known for great flying qualities and maneuverability that made the aircraft a formidable adversary during its active service. The GWS Zero follows that design tradition with a combination of foam and plastic that produces a light airframe.
The manual advises, "Please read these instructions carefully and thoroughly before assembly in order to achieve safe operation with maximum performance from your 'Zero' flight." I concur. The majority of the instructions are clear, with good photographs and illustrations; an experienced modeler will have no problems with construction.
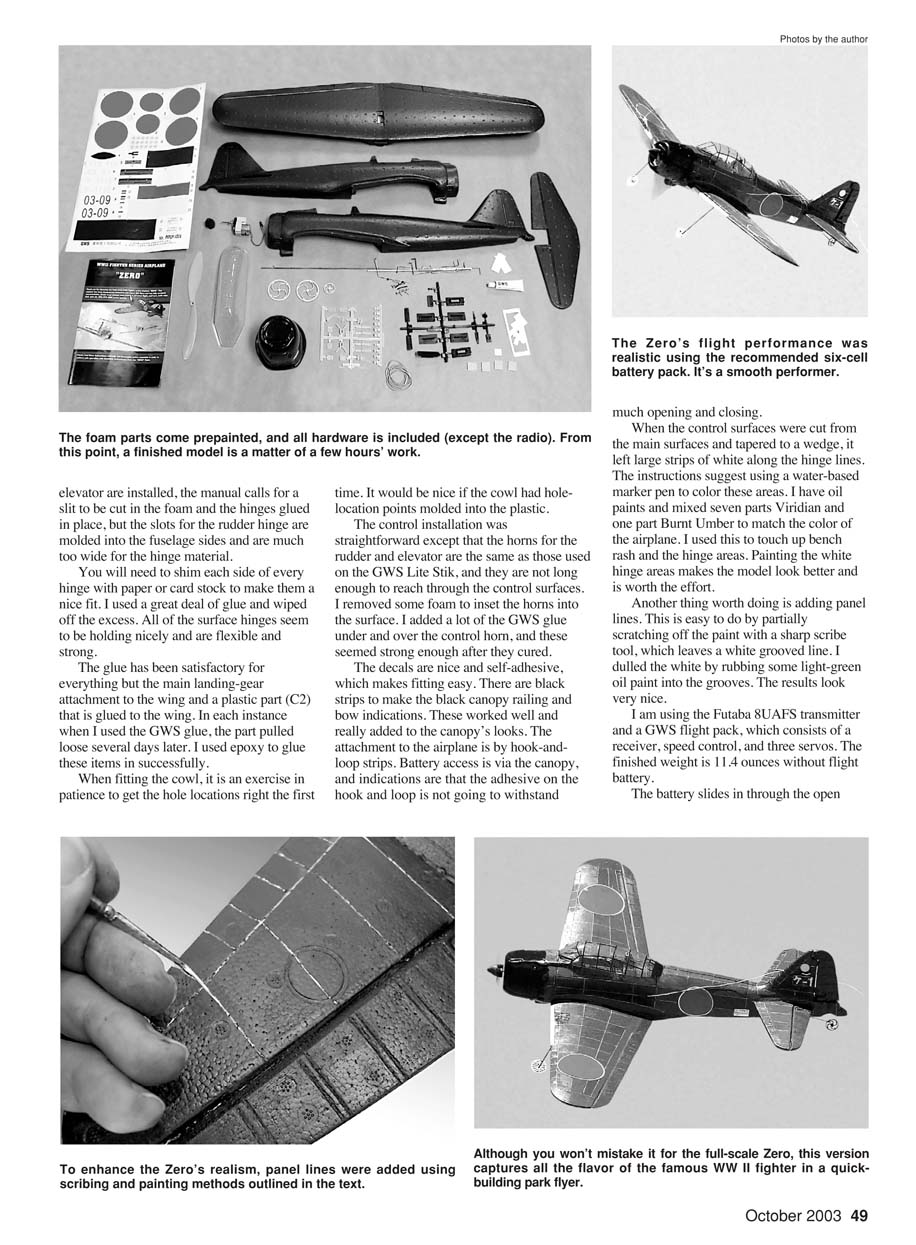
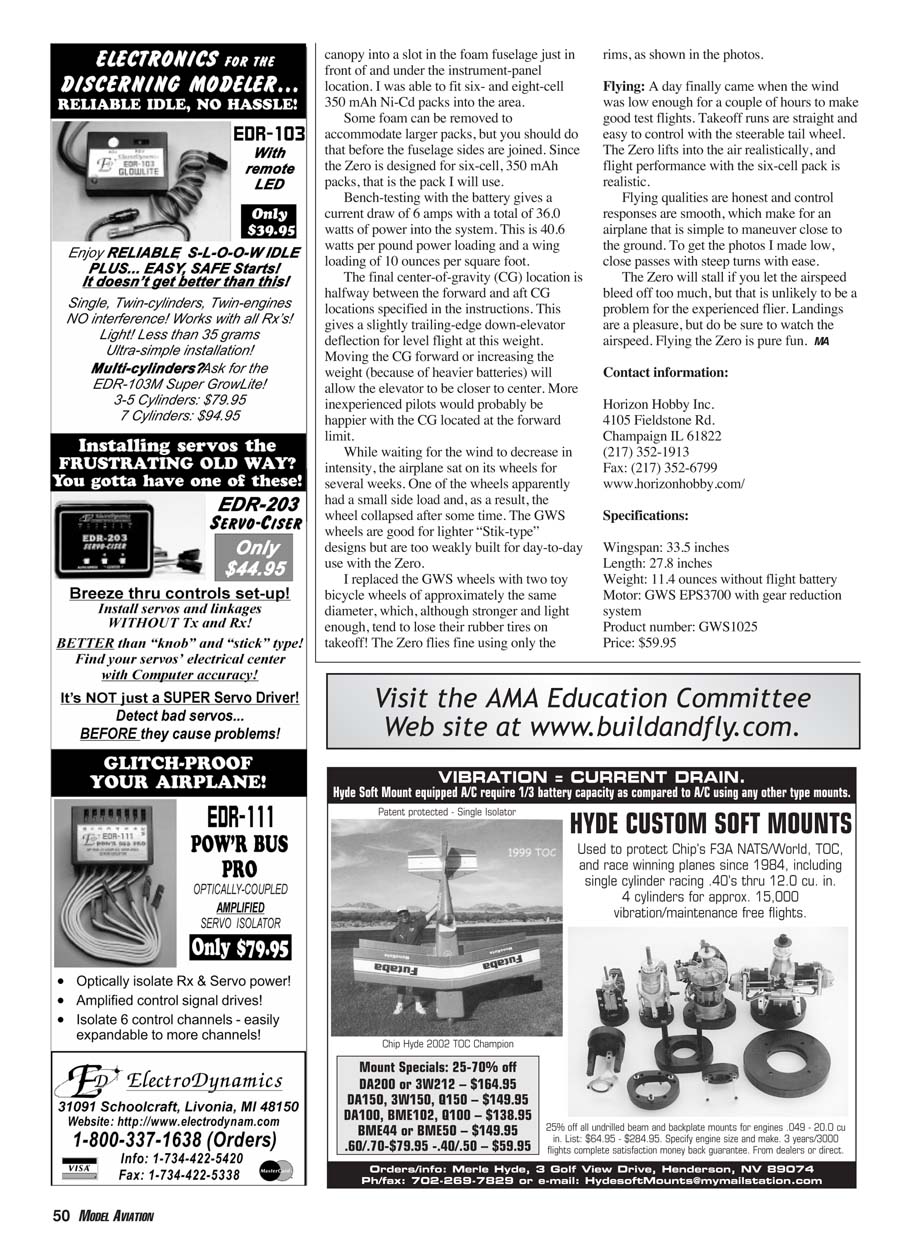
Although you won't mistake it for the full-scale Zero, this version captures the flavor of the famous WWII fighter in a quick-building park flyer. To enhance realism, panel lines were added using scribing and painting methods outlined in the manual. The foam parts come prepainted, and all hardware is included (except the radio). From this point, a finished model is a matter of a few hours' work. The Zero's flight performance was realistic using the recommended six-cell battery pack — it's a smooth performer.
The manual shows an unpainted white-foam Zero, but the kit I reviewed is painted. This saves much of the work necessary to get a good-looking model.
Do be sure to cover your workbench with a soft cloth to prevent "building rash" that can occur on a hard surface. The paint will rub off fairly easily with repeated handling. GWS has made a trade-off between weight and durability, and the paint film is thin.
Construction
The construction photographs are great, and each part is identified. All parts are adequate for their intended purposes, and there were very few problem areas. I will not repeat the manual verbatim, but I'll touch on a few areas.
The fuselage and flying surfaces are fully contoured, and the kit produces a nice-looking airplane. The fuselage halves are joined with the GWS glue. Be careful of the fuselage halves' alignment; they are not mirror images, and judgment in final positioning is needed to minimize mismatches. While the glue is wet, slide in the horizontal tail to see if it is aligned at 90° to the vertical tail, but do not glue the tail in place at this time.
According to the manual, the glue will cure in at least a half hour. I made a test sample of two pieces of foam glued together to check curing time. At a half hour nothing was cured. I ended up letting each glue joint cure for at least 12 hours and the fuselage halves cure at least 24 hours before handling. It was snowing outside, so I was not in a hurry anyway.
When the hinges for the ailerons and elevator are installed, the manual calls for a slit to be cut in the foam and the hinges glued in place, but the slots for the rudder hinge are molded into the fuselage sides and are much too wide for the hinge material. You will need to shim each side of every hinge with paper or card stock to make them a nice fit.
The glue has been satisfactory for everything but the main landing-gear attachment to the wing and a plastic part (C2) that is glued to the wing. In each instance when I used the GWS glue, the part pulled loose several days later. I used epoxy for these items successfully.
Fitting the cowl is an exercise in patience to get the hole locations right the first time. It would be nice if the cowl had hole-location points molded into the plastic.
Control installation was straightforward except that the control horns for the rudder and elevator are the same as those used on the GWS Lite Stik, and they are not long enough to reach through the control surfaces. I removed some foam to inset the horns into the surface and added a lot of the GWS glue under and over the control horn; these seemed strong enough after they cured.
The decals are self-adhesive, which makes fitting easy. There are black strips to indicate the canopy railing and bow. These worked well and added to the canopy's looks. Attachment to the airplane is by hook-and-loop strips. Battery access is via the canopy, and the adhesive on the hook and loop may not withstand much repeated opening and closing.
When the control surfaces were cut from the main surfaces and tapered to a wedge, it left large strips of white along the hinge lines. The instructions suggest using a water-based marker pen to color these areas. I used oil paints — mixing seven parts Viridian and one part Burnt Umber — to match the airplane color and touched up bench rash and the hinge areas. Painting the white hinge areas makes the model look better and is worth the effort.
Adding panel lines is easy: partially scratch off the paint with a sharp scribe tool to leave a white grooved line, then dull the white by rubbing some light-green oil paint into the grooves. The results look very nice.
I am using a Futaba 8UAFS transmitter and a GWS flight pack consisting of a receiver, speed control, and three servos. The finished weight is 11.4 ounces without flight battery.
The battery slides in through the open canopy into a slot in the foam fuselage just in front of and under the instrument-panel location. I was able to fit six- and eight-cell 350 mAh Ni-Cd packs into the area. Some foam can be removed to accommodate larger packs, but you should do that before the fuselage sides are joined. Since the Zero is designed for six-cell, 350 mAh packs, that is the pack I will use.
Bench-testing with the battery gives a current draw of 6 amps with a total of 36.0 watts of power into the system. This is 40.6 watts per pound power loading and a wing loading of 10 ounces per square foot.
The final center-of-gravity (CG) location I settled on is halfway between the forward and aft CG locations specified in the instructions. This gives a slightly trailing-edge-down elevator deflection for level flight at this weight. Moving the CG forward or increasing the weight (because of heavier batteries) will allow the elevator to be closer to center. Less experienced pilots would probably be happier with the CG at the forward limit.
While waiting for the wind to decrease, the airplane sat on its wheels for several weeks. One of the wheels apparently had a small side load and the wheel collapsed after some time. The GWS wheels are good for lighter "Stik-type" designs but are too weakly built for day-to-day use with the Zero.
I replaced the GWS wheels with two toy bicycle wheels of approximately the same diameter. These are stronger and light enough, but they tend to lose their rubber tires on takeoff. The Zero flies fine using only the rims, as shown in the photos.
GWS Zero park flyer
Pros:
- All parts prepainted
- Detailed instruction manual covering all steps
- Great flier with predictable flying characteristics
Cons:
- Glue included takes too long to cure and will not hold some materials together
- Wheels could be stronger for this model's weight
Flying
A day finally came when the wind was low enough for a couple of hours of test flights. Takeoff runs are straight and easy to control with the steerable tail wheel. The Zero lifts into the air realistically, and flight performance with the six-cell pack is authentic.
Flying qualities are honest and control responses are smooth, making the airplane simple to maneuver close to the ground. I made low, close passes with steep turns with ease to get photos.
The Zero will stall if you let the airspeed bleed off too much, but that is unlikely to be a problem for the experienced flier. Landings are a pleasure, but do be sure to watch the airspeed. Flying the Zero is pure fun.
Contact information
Horizon Hobby Inc. 4105 Fieldstone Rd. Champaign, IL 61822 (217) 352-1913 Fax: (217) 352-6799 www.horizonhobby.com
Specifications
- Wingspan: 33.5 inches
- Length: 27.8 inches
- Weight: 11.4 ounces without flight battery
- Motor: GWS EPS3700 with gear reduction system
- Product number: GWS1025
- Price: $59.95
Transcribed from original scans by AI. Minor OCR errors may remain.

