
Product Review - 2004/03
Bob Aberle
Funtec Models Sky Scooter Pro II
Pros:
- Complete RTF package at an attractive price.
- Well-thought-out design.
- Docile flying characteristics with good slow-speed capability. Performance can be enhanced with a larger-capacity battery pack. (See text.)
Cons:
- Instructions did not specify a center-of-gravity point. It was determined to be 4-1/4 inches back from the wing’s leading edge. (See text.)
ROUGHLY THREE YEARS ago the Funtec Models division of Hitec RCD introduced its Sky Scooter Ready-to-Fly (RTF) radio-control (RC) electric sport flier. It was an immediate success as a beginner’s trainer. Surprisingly, it was also a big hit with many RC clubs, which bought Scooters in quantities and staged single-model contests for fun.
After the initial introduction, Funtec released an enhanced Sky Scooter Pro. More recently a third version, the Sky Scooter Pro II, was released.
For previous Sky Scooter pilots, the most important differences in this latest version are: it now has three-channel control, including motor throttle and the ability to cut off the motor at any time in flight; the propeller diameter and pitch have been increased, producing more thrust at a higher current level (originally 5.6 amps, now 7.9 amps); and the battery pack was increased from 300 to 600 mAh cells to provide reasonable flight times. Funtec also removed the safety switch that was located under the nose since throttle control is now employed. Everything else is essentially as on the original version.
What You Get
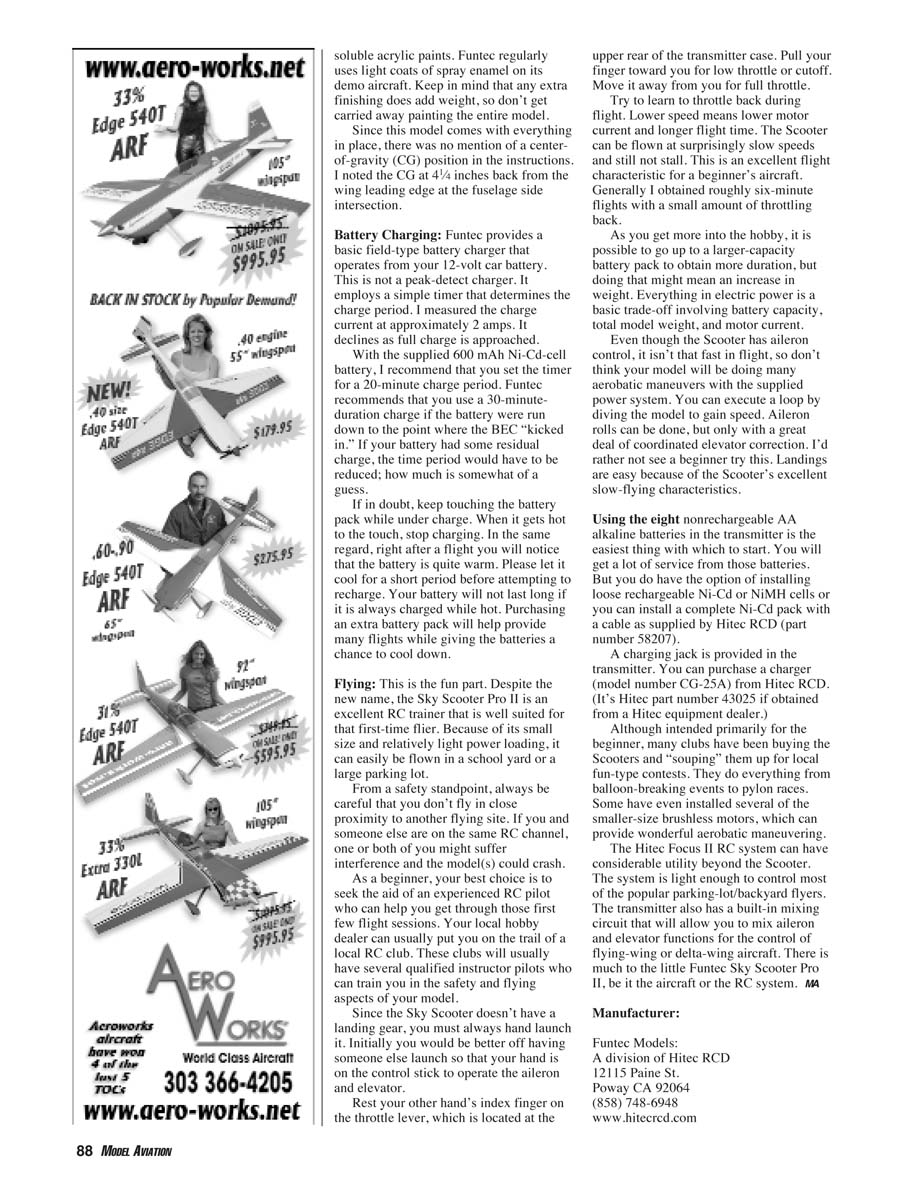
The Sky Scooter Pro II is classified as RTF. You will not need cements or even a modeler’s knife to assemble this model. The shipping box contains essentially everything necessary to fly the aircraft, including a complete radio system and an electric motor already installed. Also included are the matching RC transmitter, a rechargeable aircraft battery, and a field-type fast charger. The only purchase required is a set of eight AA alkaline batteries to power the transmitter. From opening the box to ready-to-fly takes less than 30 minutes. As soon as the aircraft battery is charged, you can make the first flight. Best of all, the entire airplane, radio, battery, and charger can be purchased for an average street price of less than $200.
More About the Scooter
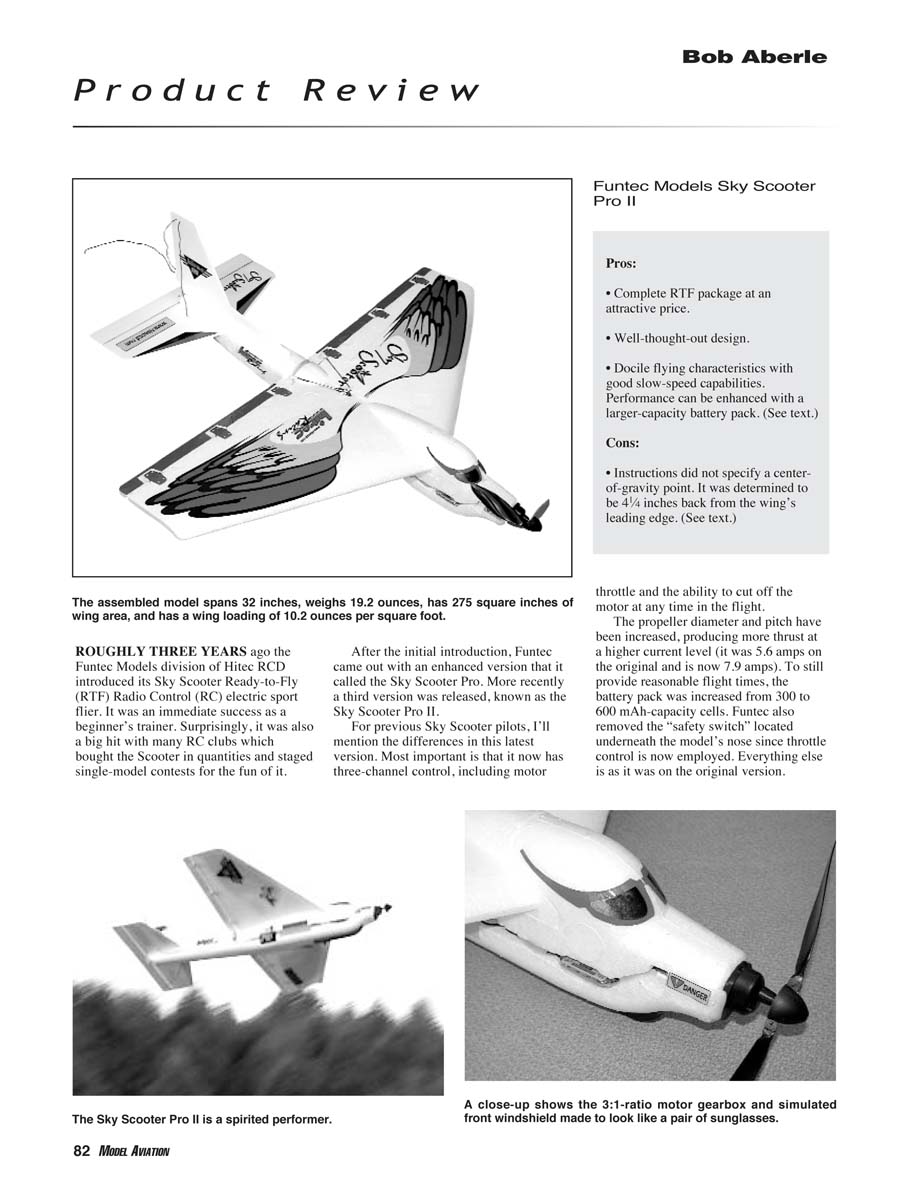
The elevator and vertical and horizontal stabilizers are manufactured from a polystyrene foamboard material, and the rest of the model is constructed from a molded expanded-propylene-foam-derivative white foam. The material bounces more than it breaks, easily absorbing impact loads. The wingspan measures 32 inches and the wing area is 275 square inches. With a total weight of 19.2 ounces, the wing loading is about 10.1 ounces per square foot. The overall length is 32 inches.
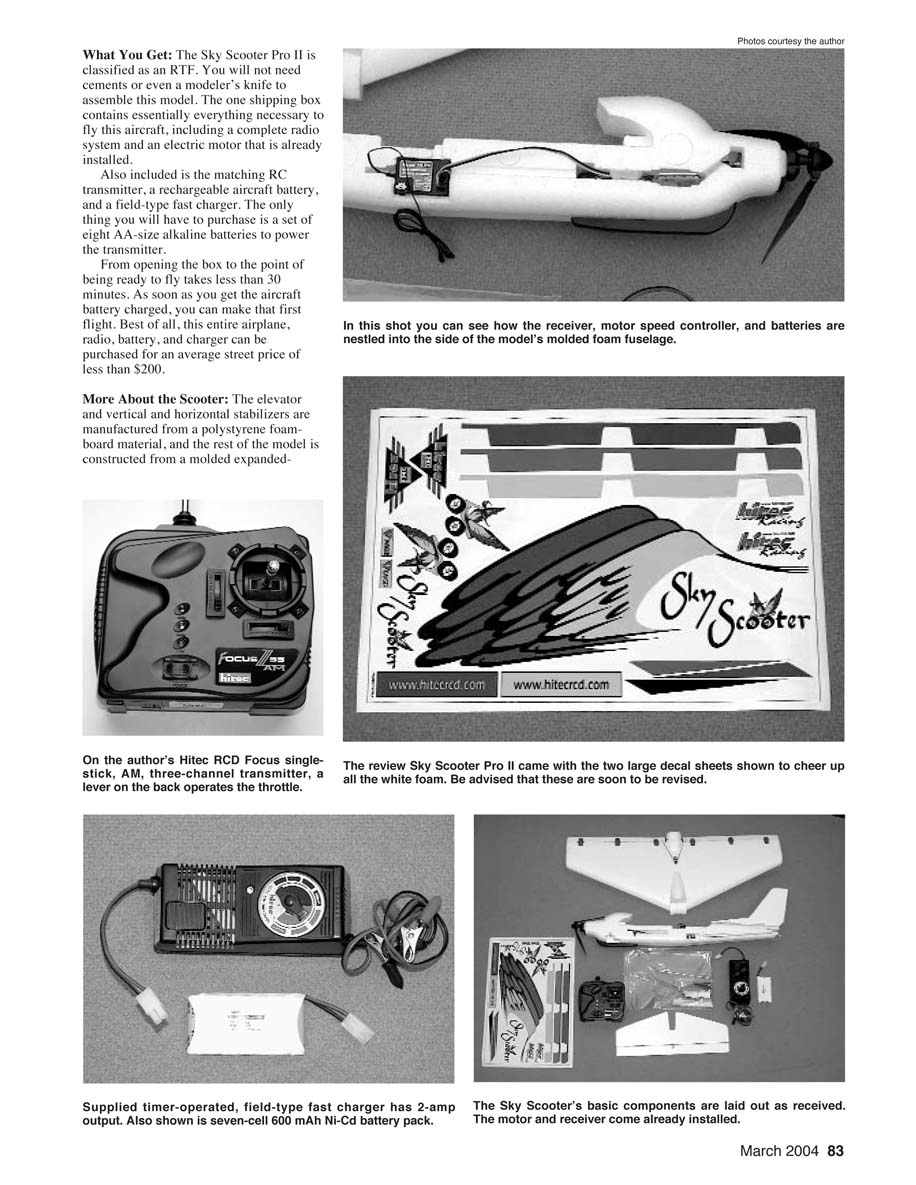
The electric motor is a Speed 400 size with a 6-volt winding and a 3:1 gearbox. The supplied battery consists of seven 600 mAh Ni-Cd cells weighing 5.6 ounces. Connectors on the model, battery, and charger are the Tamiya variety, common in the RC car hobby; you could change to Anderson Power Poles if preferred.
The cutoff switch on the original Scooter has been replaced by a proportional electric motor speed controller (Hitec model SP-1010). This controller includes a Battery Eliminator Circuit (BEC) with a cutoff. That means the single rechargeable battery onboard supplies power to the motor and the RC system in flight. As the battery charge wears down, the controller will cut off the motor at a preset voltage level while still leaving enough power to run the RC system so you can set up and make a safe landing.
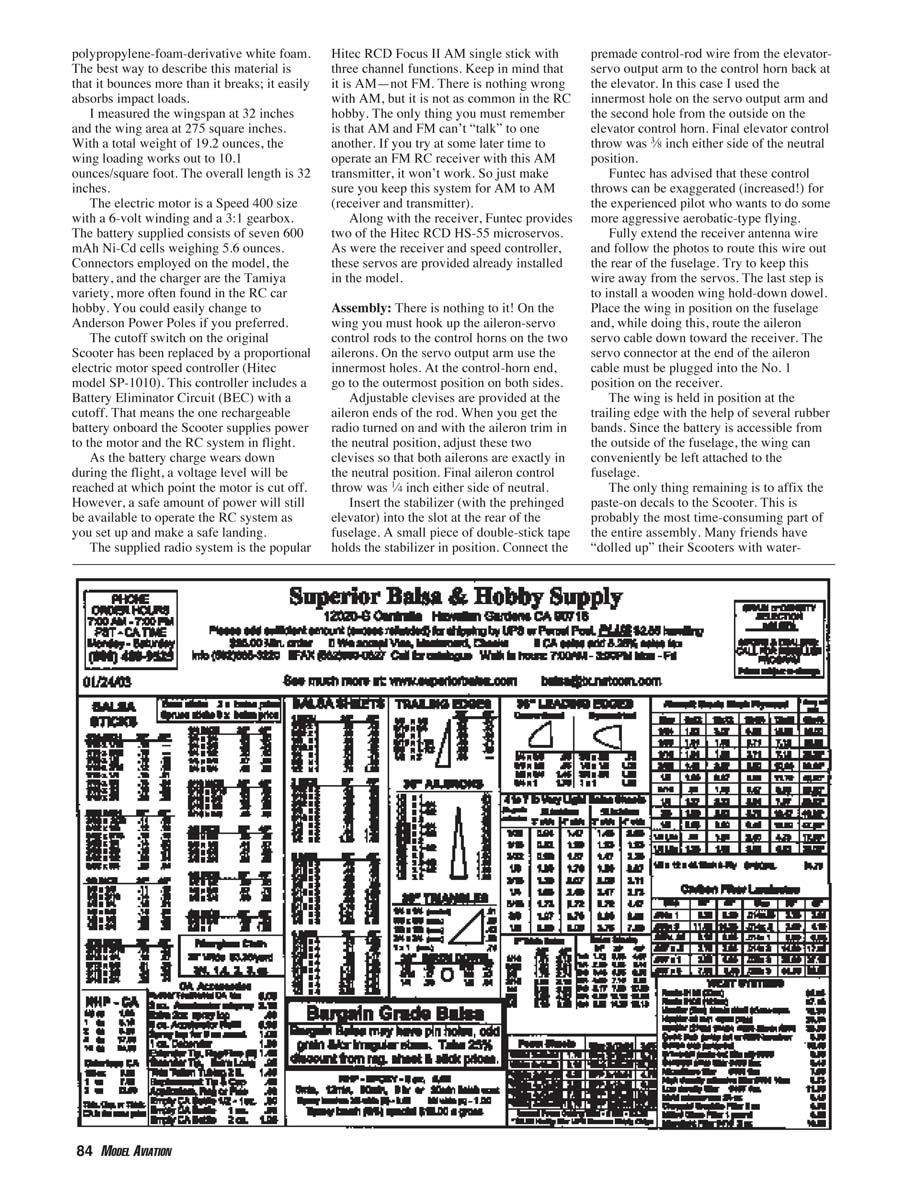
The supplied radio system is the Hitec RCD Focus II AM single-stick transmitter with three-channel functions. Note that it is AM — not FM. AM is still fine, but AM and FM receivers are not compatible with each other. Along with the receiver, Funtec provides two Hitec RCD HS-55 microservos. The receiver and servos, like the speed controller, are preinstalled in the model.
Assembly
There is very little to assemble. On the wing, hook up the aileron-servo control rods to the control horns on the two ailerons. On the servo output arm use the innermost holes; at the control-horn end use the outermost position on both sides. Adjustable clevises are provided at the aileron ends of the rod. With the radio on and aileron trim neutral, adjust the clevises so both ailerons are exactly neutral. Final aileron control throw is 1/4 inch each side of neutral.
Insert the stabilizer (with the pre-hinged elevator) into the slot at the rear of the fuselage. A small piece of double-stick tape holds the stabilizer in position. Connect the premade control-rod wire from the elevator-servo output arm to the elevator control horn; in this test configuration the innermost hole on the servo arm and the second hole from the outside on the elevator control horn were used. Final elevator control throw is 3/8 inch each side of neutral.
Funtec advises that these control throws can be increased for experienced pilots who want more aggressive aerobatic flying.
Fully extend the receiver antenna wire and route it out the rear of the fuselage per the photos. Try to keep this wire away from the servos. Install the wooden wing hold-down dowel: place the wing on the fuselage while routing the aileron servo cable down toward the receiver. The aileron servo connector must be plugged into the No. 1 position on the receiver. The wing is held at the trailing edge with several rubber bands. Since the battery is accessible from outside the fuselage, the wing can conveniently be left attached.
The last assembly step is to affix the pre-cut iron-on decals. This can be the most time-consuming part of the assembly. Many owners have "dolled up" their Scooters with water-slide decals, spray-on color, or custom paint. Funtec regularly uses light coats of spray enamel on demo aircraft. Keep in mind that extra finishing adds weight, so avoid excessive painting.
Because the model comes preassembled, there was no mention of a center-of-gravity (CG) position in the instructions. The CG noted here is 4-1/4 inches back from the wing leading edge at the fuselage side intersection.
Battery Charging
Funtec provides a basic field-type charger that operates from a 12-volt car battery. This is not a peak-detect charger; it uses a simple timer to determine the charge period. Measured charge current is approximately 2 amps, declining as full charge is approached.
With the supplied 600 mAh Ni-Cd battery, set the timer for a 20-minute charge period. Funtec recommends a 30-minute charge if the battery was run down to the point where the BEC kicked in. If the battery had some residual charge, the time should be reduced; the exact amount is a guess. If in doubt, touch the battery while charging — when it’s hot to the touch, stop charging. After a flight the battery will be warm; let it cool before recharging. Repeatedly charging while hot shortens battery life. Purchasing an extra battery pack provides more flights while allowing packs to cool between charges.
Flying
This is the fun part. Despite the new name, the Sky Scooter Pro II is an excellent RC trainer well suited for a first-time flier. Because of its small size and relatively light power loading, it can be flown in a schoolyard or a large parking lot.
From a safety standpoint, avoid flying near another flying site. If you and someone else are on the same RC channel, interference could cause a crash. As a beginning flier, seek the aid of an experienced RC pilot for initial flight sessions. Your local hobby dealer can usually connect you with an RC club that provides qualified instructor pilots.
The Sky Scooter has no landing gear and must be hand-launched. Initially have someone else launch while you keep a hand on the controls. Rest your index finger on the throttle lever at the upper rear of the transmitter: pull toward you for low throttle/cutoff, push away for full throttle.
Learn to throttle back during flight. Lower speed uses lower motor current and increases flight time. The Scooter can be flown at surprisingly slow speeds without stalling, an excellent trait for beginners. Typical flights were roughly six minutes with moderate throttling back.
As you progress, you can use a larger-capacity battery pack for more duration, but that increases weight. Electric power is a trade-off between battery capacity, model weight, and motor current.
Although the Scooter has aileron control, it isn’t fast enough for many aerobatic maneuvers with the supplied power system. You can fly a loop by gaining speed; aileron rolls require considerable coordinated elevator correction and are not recommended for beginners. Landings are easy because of the Scooter’s excellent slow-flight characteristics.
Using eight nonrechargeable AA alkaline batteries in the transmitter is the easiest starting option and provides good service. You can also install loose rechargeable Ni-Cd or NiMH cells, or a complete Ni-Cd pack with cable (Hitec part number 58207). A charging jack is provided in the transmitter; Hitec’s charger model CG-2SA is part number 43025.
Although intended primarily for beginners, clubs often modify Scooters for fun-fly contests (balloon-breaking, pylon races, etc.). Some install smaller brushless motors for enhanced aerobatic performance.
The Hitec Focus II R/C system has utility beyond the Scooter. It is light enough to control many popular parking-lot/backyard flyers and has a built-in mixing circuit that allows mixing aileron and elevator functions for flying-wing and delta-wing aircraft. There is much to like in the Funtec Sky Scooter Pro II, both the aircraft and the RC system.
Manufacturer
Funtec Models A division of Hitec RCD 12115 Paine St. Poway, CA 92064 (858) 748-6948 www.hitecrcd.com
Transcribed from original scans by AI. Minor OCR errors may remain.

