
Product Review
Mark Lanterman 5655 David Pl., Fairfield OH 45014; E-mail: [email protected]
Sig 1/5-Scale Piper J-3 Cub
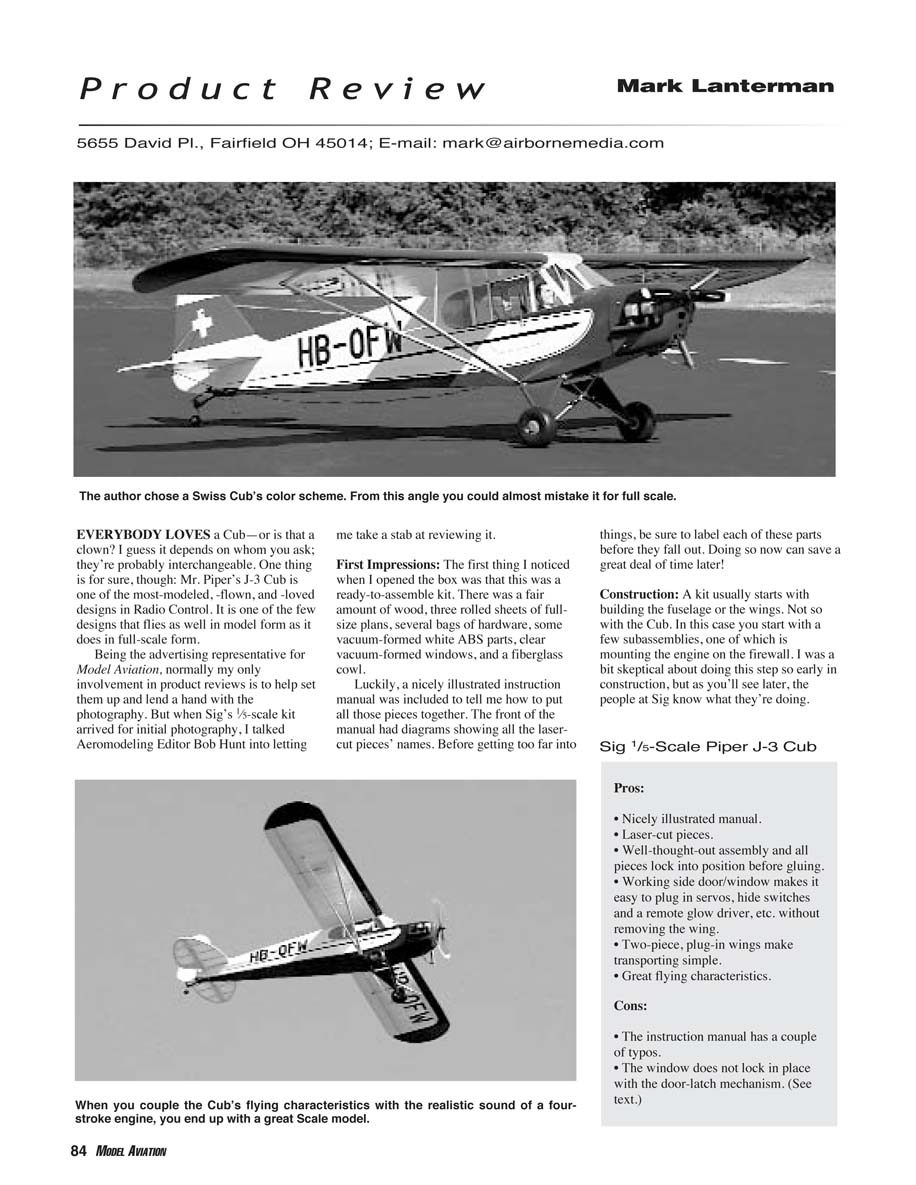
Everybody loves a Cub—or is that a clown? Either way, Mr. Piper’s J-3 Cub is one of the most modeled, flown, and loved designs in radio control. It’s also one of the few designs that flies nearly as well in model form as it does full scale.
Normally my involvement with product reviews is limited to setup and photography for Model Aviation. When Sig’s 1/5-scale kit arrived for initial photography, I convinced Aeromodeling Editor Bob Hunt to let me review it.
First Impressions
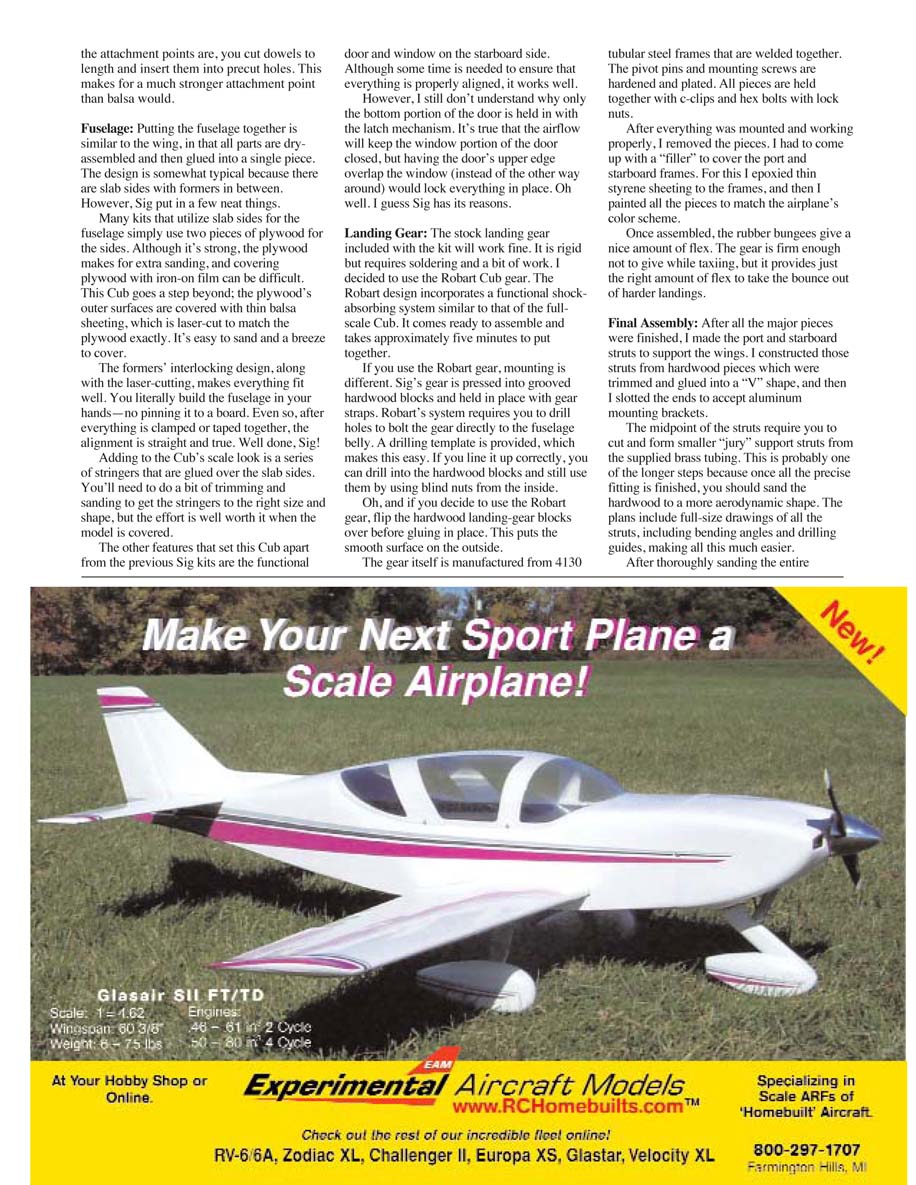
The kit arrives as a ready-to-assemble package: a fair amount of wood, three rolled full-size plans, several bags of hardware, vacuum-formed white ABS parts and clear windows, and a fiberglass cowl. A nicely illustrated instruction manual is included, with diagrams naming all the laser-cut pieces. Label those parts as you unpack them—doing so now will save time later.
Construction
This kit emphasizes subassemblies early. You begin by mounting the engine on the firewall and building the fuselage servo tray and mounting the throttle, rudder, and elevator servos. That may feel out of order compared with other kits, but Sig’s sequence makes later assembly easier.
The kit’s parts are high quality and fit together quickly thanks to accurate laser cutting. After a few nights of work (a couple of hours per evening), the airframe was complete, sanded, and ready for covering—about a week to this point. The interlocking construction produces straight, true assemblies with minimal sanding.
Wing
The Cub uses two-piece, plug-in wings; each half is built separately using standard rib-and-spar construction. Laser cuts ensure everything locks into place without additional fitting. After truing and gluing, you sheet the leading edge and inboard sections, add capstrips, glue in strut-mount preassemblies, and finish the bottom. The wingtip pieces are glued in and the half is sanded. The interlocking construction yields a strong wing with good resistance to flex.
Ailerons are built using formers that fit into precut top and bottom sheeting; this method produces lighter ailerons than solid balsa.
Tail Surfaces
The fin, stabilizer, rudder, and elevator halves are straightforward. The tail surfaces are braced, and attachment points use dowels cut to length and inserted into precut holes—creating stronger joints than balsa alone.
Fuselage
Fuselage construction follows slab sides with formers in between, but Sig adds thoughtful touches. Instead of bare plywood exterior, the plywood sides are covered with thin, laser-cut balsa sheeting that matches the plywood exactly—easy to sand and easier to cover. The interlocking formers and laser cutting make it possible to build the fuselage in your hands without pinning to a board.
Scale stringers are glued over the slab sides; they require trimming and sanding but add significantly to the finished scale appearance. The starboard side includes a functional side door and window that provide excellent access to servos, switches, and a remote glow driver without removing the wing. Note: only the bottom portion of the door uses the latch mechanism; Sig designed the upper window to stay closed under compression from the lower door. The reviewer found this odd but Sig reports the doors remain firmly closed in normal use.
Landing Gear
The stock landing gear is rigid and workable but requires soldering. I chose Robart Cub gear for its functional shock-absorbing system similar to the full-scale Cub. Robart’s gear bolts to the fuselage belly; a drilling template is provided. If you use Robart gear, flip the hardwood landing-gear blocks before gluing to put the smooth surface outside.
Robart gear uses 4130 tubular steel frames, hardened pivot pins and mounting screws, and is assembled with c-clips and hex bolts with lock nuts. The rubber bungee system provides firm taxiing behavior while absorbing harder landings, and with 2.25-inch wheels handles rough grass well. After mounting the Robart frames I epoxied thin styrene sheeting over the openings and painted to match the scheme.
Final Assembly
Struts are built from hardwood glued into V shapes, fitted into aluminum mounting brackets. Midpoint “jury” struts are formed from supplied brass tubing; plans include full-size drawings, bending angles, and drilling guides to ease fitting. Sand the hardwood struts to a more aerodynamic shape once fitted.
After sanding the airframe, I covered the model with Coverite’s 21st Century fabric. I used a white-and-blue scheme with red trim for a strong scale appearance.
Trim the windows and glue them into position—expect a bit of trial and error for the windshield so it clears the wing leading edge. The one-piece fiberglass cowl arrives without cutouts; take your time measuring and cutting holes for the engine, muffler, and exhaust. Vacuum-formed ABS dummy engine halves add a bit of scale detail when trimmed and painted.
Control hookups are straightforward: flexible pushrods for elevator and throttle, and a pull-pull wire system for the rudder. The pull-pull installation can be time-consuming and tricky to thread inside the covered fuselage without catching on formers—another reason Sig recommends mounting servos and engine early.
All mounting access considerations make the early-installation steps (engine and servo tray) reasonable—later access behind the firewall and inside the assembled fuselage would be difficult.
Flying
The review model used a Saito 56 four-stroke after an initial RCV .56 installation failed to run reliably (the RCV would not restart on the test bench despite plugs, tank changes, etc.). The Saito 56 fit the cowl with some modifications.
Assembling the Cub at the field takes roughly five minutes: slide each wing half into position with the aluminum tube in the phenolic tube, secure a 10-32 bolt, attach struts with 4-40 screws, and install the top hatch. The functional side door makes it easy to plug in aileron servos and hide switches or a remote glow driver in the cockpit.
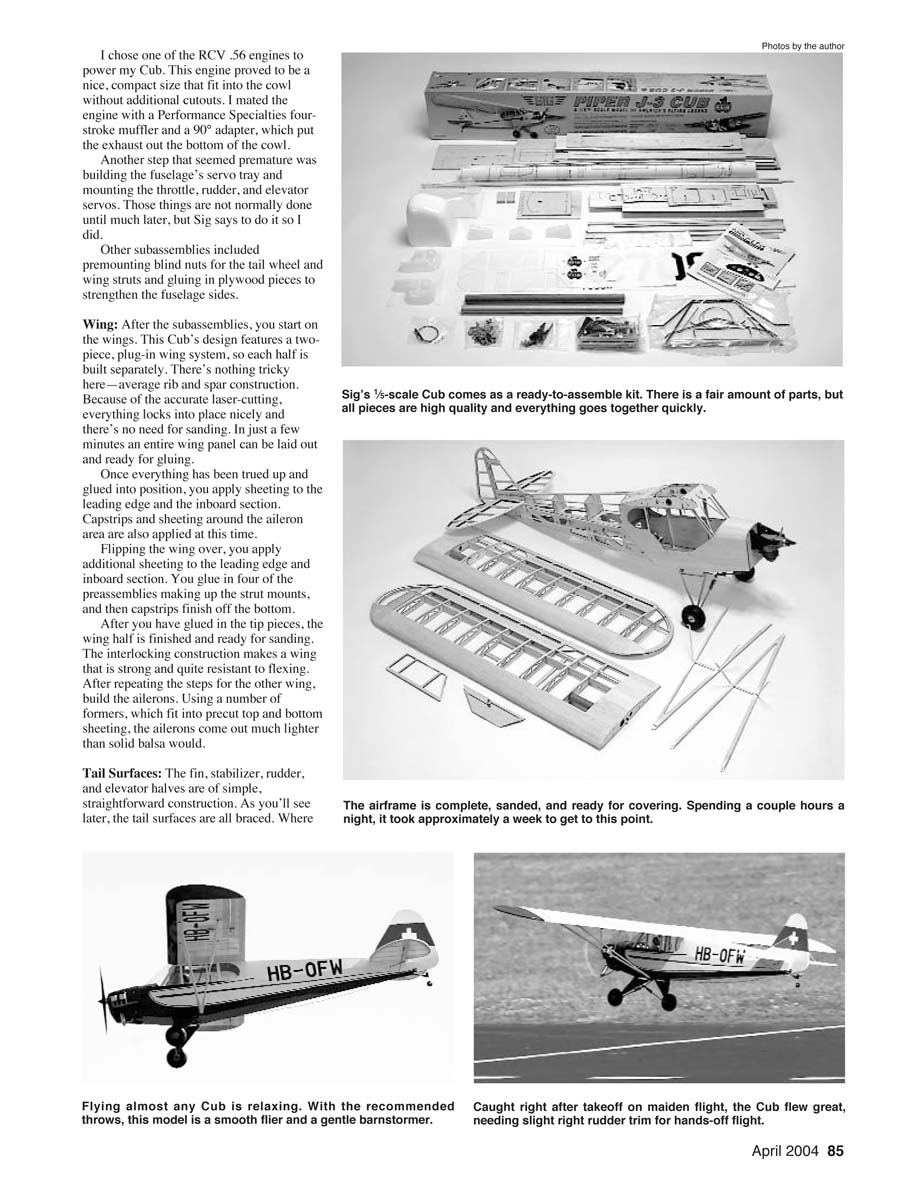
On the maiden flight the Cub lifted off cleanly and required a slight right-rudder trim for hands-off flight. Using the suggested control throws, it flew smoothly and predictably. Mild aerobatics—loops, barrel rolls, stall turns—are scale-like and well within the model’s character. The model slows well under reduced power and remains responsive near stall speed.
A few landings showed a tendency to balloon during the flare; reducing engine downthrust and beginning the flare at a slightly higher speed cured this. The Robart gear and larger wheels provided bounce-free landings and good ground handling. The tailwheel is steerable, and the recommended radio installation (four-channel with five servos) left ample room for receiver, battery, and switches. I used a 1100 mAh battery and a lightweight receiver for long flight times.
The final ready-to-fly weight was 8 pounds with the heavier fabric covering, the Robart gear, Du-Bro wheels, and the larger battery.
Final Thoughts
Sig’s 1/5-scale Piper J-3 Cub kit is an excellent representation of the classic Cub. Laser-cut parts, thoughtful design, and included hardware make the build straightforward for moderate-skill modelers. The kit requires patience fitting the cowl and installing the pull-pull rudder system, but the results are rewarding. Paired with a four-stroke engine in the 56–61 range it provides good power and a convincing scale sound. If you’re an RC pilot who’s never tried kit building, this is a great choice.
Pros:
- Nicely illustrated manual.
- Laser-cut pieces that lock into position before gluing.
- Thoughtful assembly sequence.
- Functional side door/window for easy radio access and servicing without removing the wing.
- Two-piece, plug-in wings for easy transport.
- Excellent flying characteristics and scale presence.
Cons:
- The instruction manual contained a couple of typos (now corrected by Sig).
- The window does not mechanically lock with the door-latch mechanism; Sig reports the upper door stays closed under compression and has not been a problem in practice.
Editor's note
It is our policy to send a copy of each review to the manufacturer. Sig Manufacturing responded to the author’s comments:
- The typos in the instruction booklet have been corrected.
- Sig explained that the upper side door has no retainer because in practice it stays firmly in place under compression by the lower hinged door. After flying several of these models, Sig reports the hinged doors remained closed unless purposely opened for access.
Specifications
- Wingspan: 84.5 in
- Wing area: 947 sq in
- Length: 55.25 in
- Model weight recommended: 7–7.5 lb
- Review model weight (ready to fly): 8 lb (with items added for Scale competition)
- Engine recommended: .40–.46 two-stroke or 45–65 four-stroke
- Engine used: Saito 56 four-stroke
- Radio recommended: four-channel with five servos
- Radio used: JR 8103 transmitter, JR R700 receiver, five Expert SL571 servos, JR Extra 1100 mAh battery
- Materials used: balsa, plywood, fiberglass (cowl)
- Street price: $129
Manufacturer/distributor
Sig Manufacturing Box 520 Montezuma IA 50171 (641) 623-5154 www.sigmfg.com
Products used
- JR 8103 radio system, Saito 56 engine, 1/5-scale civilian pilot
Horizon Hobby Distributors 4105 Fieldstone Rd. Champaign IL 61822 (217) 352-1913 www.horizonhobby.com
- 1/5-scale Cub gear
Robart Manufacturing, Inc. 625 N. 12th St. Saint Charles IL 60174 (630) 584-7616 www.robart.com
- Fill-It Fueling System, 1/5-scale Cub wheels
Du-Bro Products Box 815 Wauconda IL 60084 (847) 526-2136 www.dubro.com
- Master Airscrew 12 x 6 two-blade propeller
Windsor Propeller Co., Inc. Box 250 Rancho Cordova CA 95741 www.masterairscrew.com
- 10-ounce fuel tank
Sullivan Products 1 North Haven St. Baltimore MD 21224 (410) 732-3500 www.sullivanproducts.com
MA
Transcribed from original scans by AI. Minor OCR errors may remain.

