
Kyosho Gee Bee
Pros:
- The instruction manual is well-illustrated and covers steps in detail.
- The kit includes a solid, complete hardware package.
- The quality of prebuilding is very high.
- The kit utilizes many fiberglass parts rather than plastic.
- Flying characteristics: when going fast and smooth, it looks great in the air.
- Good ground handling.
Cons:
- Several scuffs and scratches were apparent on my model, although they could not be seen when more than four or five feet away.
- It would be nice if the control horns were molded from yellow plastic (rather than white). These would blend into the natural color scheme.
- Flying characteristics: the Gee Bee's fast and smooth flying style needs higher takeoff and landing speeds than you may be accustomed to. Although not a problem in experienced hands, it could be a handful at times.
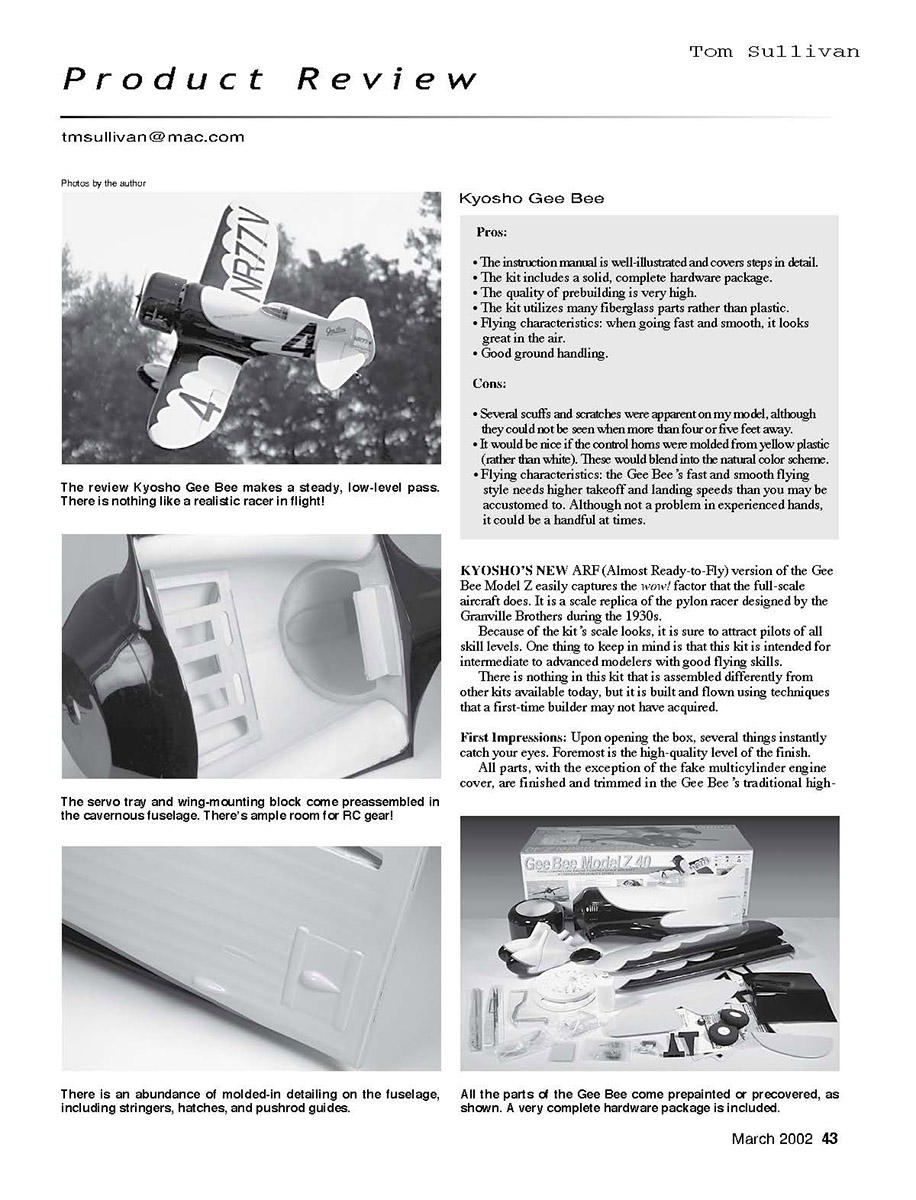
KYOSHO'S NEW ARF (Almost Ready-to-Fly) version of the Gee Bee Model Z easily captures the wow! factor that the full-scale aircraft does. It is a scale replica of the pylon racer designed by the Granville Brothers during the 1930s.
Because of the kit's scale looks, it is sure to attract pilots of all skill levels. One thing to keep in mind is that this kit is intended for intermediate to advanced modelers with good flying skills.
There is nothing in this kit that is assembled differently from other kits available today, but it is built and flown using techniques that a first-time builder may not have acquired.
First Impressions: Upon opening the box, several things instantly catch your eyes. Foremost is the high-quality level of the finish.
All parts, with the exception of the fake multicylinder engine cover, are finished and trimmed in the Gee Bee's traditional high-gloss black-and-yellow color scheme, with red trim accents.
The quality of the finish is very good (there were a few scrapes in the cowlings, which probably happened during shipping). You might expect the fuselage, cowlings, and wheel pants to be molded from some type of plastic, but they're not; they are made from fiberglass.
Small items, such as louvered vents, the look of fabric over framing, and the little bump and panel, are nicely duplicated.
The wing, elevator, stabilizer, and rudder are built-up. All were nicely finished and precovered with an iron-on film. (The wing had several scuffs on the top and bottom surfaces—again, probably from shipping.)
A complete hardware package is supplied. Included are foam mainwheel, hinges, wheel collars, pushrods, fuel tank, screws, control horns, tail-wheel assembly with a hard rubber wheel, and many plywood and hardwood pieces that are used during assembly.
Construction begins with assembling the wing. The hinge material is used in the precut slots in the wing halves and ailerons. Mounting blocks for the aileron servos are glued onto the box of the servo hatches, then the servos are installed (one servo per aileron).
Once the servos are in and connected, the wings are joined by first separating the center spar in position, then epoxying the wing halves together.
While the wing is curing, work starts on the landing gear. Each main gear consists of several pieces surrounding the main strut. These pieces are fiberglass, and they require cutting to allow for clearance of the main strut when it flexes.
Because of the high amount of prebuilding, there's not a great deal to finish the fuselage. Several plywood formers and a few styrene pieces are preinstalled in the fuselage.
And because of the shape of the Gee Bee's fuselage, there's a surprising amount of room for even the biggest hands (approximately eight inches in diameter).
The stabilizer is inserted through its slot and glued in position. The movable surfaces and tail wheel are mounted next. Once mounted, the pushrods, control horns, servos, and fuel tank are installed rather quickly.
The radio installed in my Gee Bee was the Futaba SkySport 4. It is a simple, standard four-channel system. Although it does not have the "bells and whistles" of the higher-end computer systems, it worked fine with this kit.
If you use the same system, make sure you set an expo and a "Y" if a flaperon setup is used; flaperons are standard.
I chose to use the O.S. .46 LA engine with my Gee Bee. This is an inexpensive ringed engine with a remote needle-valve assembly. After looking through the instructions, it seems as though the kit was designed with this engine in mind.
If you could rather use a four-stroke engine, don't despair; there are separate instructions for mounting a four-stroke.
Before installation, the engine was bench run per the directions. During this break-in procedure, I was surprised to notice that the engine required almost no adjustment.
The .46 LA starts quickly and develops good power, and the carburetor design has a good, quick transition in all power settings.
One thing about the .46 LA was the lack of an idle stop screw. Although it's a common feature on most Radio Control carburetors, the precision of today's radio systems allows you to set this precisely with your radio. What's more, you can adjust the idle trim without removing the cowlings!
Mounting the engine and cowlings is a very straightforward process. The engine mount aligns with markings on the front of the firewall.
If you use a two-stroke engine, a section of the fuselage is cut out to allow for muffler clearance. Once removed, a different piece is epoxied into position (the instructions called for a muffler extension, but the clearance of my engine was perfect without one).
Probably the longest step in the entire construction was applying the decals. If you take time in trimming each decal and placing it properly, an hour or more could fly by easily.
After setting the throws to those recommended in the manual and checking the CG (center of gravity), it was time to fly.
Flying: I'm not out during the early morning to attempt the first flights on the Gee Bee. The weather was a bit cooler, and I had the field to myself.
I fueled up, started the engine, and set the idle, then I taxied the model to the runway. Taxiing the Gee Bee is nice and predictable. It turns easily in one-third the width of the runway.
After pointing into the wind and slowly advancing the throttle, the Gee Bee came to life. I decided to let it build plenty of speed before lifting off.
After 150–200 feet, the tail lifted, I pulled back gently, and the Gee Bee climbed out quite nicely. I gained altitude with the model and made several circuits of the field.
The controls were quite touchy for my flying style, but I was able to adapt. Although it's not an acrobatic machine, as long as the speed is kept up it will easily roll and perform good-size loops. When flying at lower speeds, it can readily perform snaps and spins.
The Gee Bee seems to be happiest going with the throttle wide open—just like the full-scale version. When throttling back and bleeding off speed, the controls become a bit sluggish.
This sluggishness, along with a bit of overcontrol, forced me to practice flying at landing speeds with quite a bit of rudder. After I was a bit more comfortable with the controls, I brought it down for a smooth to point "wheel" landing.
Kyosho's Gee Bee is a great-looking kit. It's easy and quick to build and will definitely draw a crowd at the field.
When flying, keep the airplane running flat, and use small, smooth inputs to control it.
Keep in mind that this is an accurate model of a full-scale pylon racer—it's not a trainer or a Pattern model. If the Gee Bee is flown the way it is intended, it should give you quite a bit of satisfaction.
Specifications:
- Length: 36 inches
- Wingspan: 56.4 inches
- Wing area: 511.6 square inches
- Wing loading: 28.5 ounces/square foot
- Weight: 6.4 pounds
- Engine: two-stroke (.46) or four-stroke (S2-53)
- Radio: four channel (five servos—one for each aileron)
Distributor: Great Plains Model Distributors Box 9021 Champaign IL 61825-9021 www.kyosho.com/airplanes/kyosho1058.html
Transcribed from original scans by AI. Minor OCR errors may remain.

