
Arizona Model Aircrafters Fokker Dr.I ARF
Stan Kulesa 3351 Spruce St., Mohegan Lake NY 10547
Pros:
- Above-average quality of materials throughout.
- Most scalelike ARF version of the Dr.I available.
- Deluxe kit loaded with extras—an excellent value.
Cons:
- No instruction manual included.
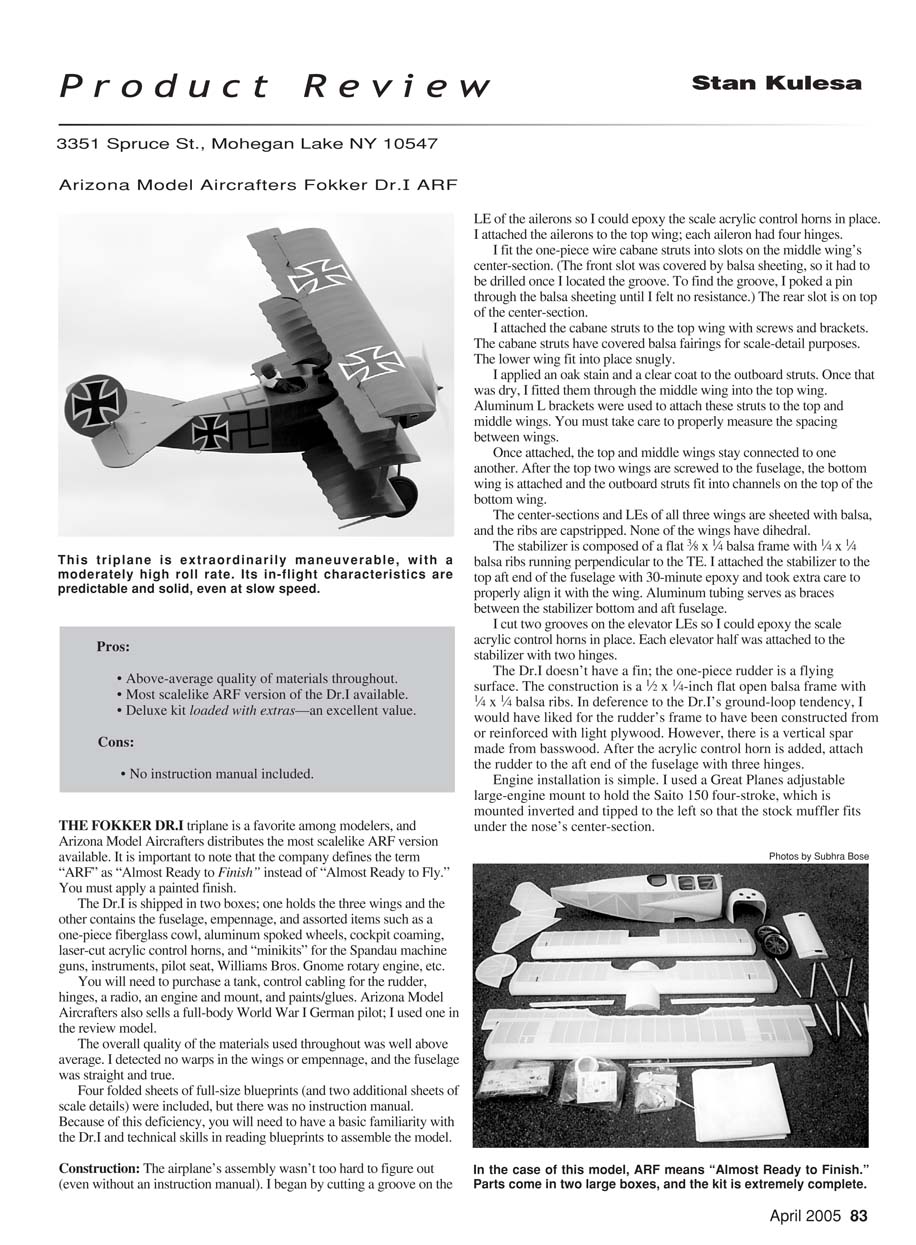
The Fokker Dr.I triplane is a favorite among modelers, and Arizona Model Aircrafters distributes the most scalelike ARF version available. It is important to note that the company defines the term "ARF" as "Almost Ready to Finish" instead of "Almost Ready to Fly." You must apply a painted finish.
The Dr.I is shipped in two boxes; one holds the three wings and the other contains the fuselage, empennage, and assorted items such as a one-piece fiberglass cowl, aluminum spoked wheels, cockpit coaming, laser-cut acrylic control horns, and "minikits" for the Spandau machine guns, instruments, pilot seat, Williams Bros. Gnome rotary dummy engine, etc. You will need to purchase a tank, control cabling for the rudder, hinges, a radio, an engine and mount, and paints/glues. Arizona Model Aircrafters also sells a full-body World War I German pilot; I used one in the review model.
The overall quality of the materials used throughout was well above average. I detected no warps in the wings or empennage, and the fuselage was straight and true.
Four folded sheets of full-size blueprints (and two additional sheets of scale details) were included, but there was no instruction manual. Because of this deficiency, you will need to have a basic familiarity with the Dr.I and technical skills in reading blueprints to assemble the model.
Construction
The airplane's assembly wasn't too hard to figure out (even without an instruction manual). I began by cutting a groove on the leading edge (LE) of the ailerons so I could epoxy the scale acrylic control horns in place. I attached the ailerons to the top wing; each aileron had four hinges.
I fit the one-piece wire cabane struts into slots on the middle wing's center section. The front slot was covered by balsa sheeting, so it had to be opened once I located the groove. To find the groove, I poked a pin through the balsa sheeting until I felt no resistance. The rear slot is on top of the center section.
I attached the cabane struts to the top wing with screws and brackets. The cabane struts have covered balsa fairings for scale-detail purposes. The lower wing fit into place snugly.
I applied an oak stain and a clear coat to the outboard struts. Once that was dry, I fitted them through the middle wing into the top wing. Aluminum L brackets were used to attach these struts to the top and middle wings. You must take care to properly measure the spacing between wings.
Once attached, the top and middle wings stay connected to one another. After the top two wings are screwed to the fuselage, the bottom wing is attached and the outboard struts fit into channels on the top of the bottom wing.
The center sections and leading edges of all three wings are sheeted with balsa, and the ribs are cap-stripped. None of the wings have dihedral.
The stabilizer is composed of a flat 3/8 x 1/4 balsa frame with 1/4 x 1/4 balsa ribs running perpendicular to the trailing edge (TE). I attached the stabilizer to the top aft end of the fuselage with 30-minute epoxy and took extra care to properly align it with the wing. Aluminum tubing serves as braces between the stabilizer bottom and aft fuselage.
I cut two grooves on the elevator leading edges so I could epoxy the scale acrylic control horns in place. Each elevator half was attached to the stabilizer with two hinges.
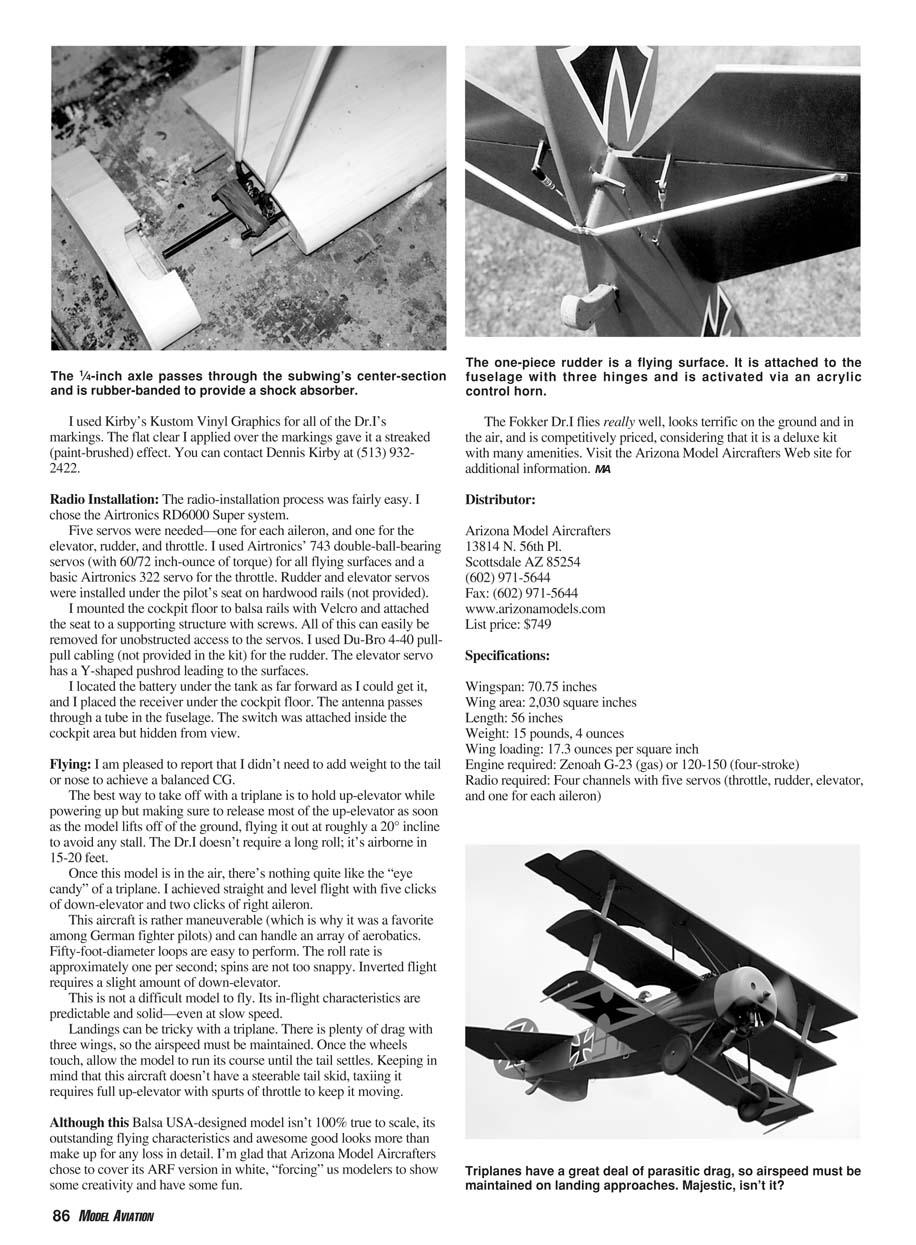
The Dr.I doesn't have a separate fin; the one-piece rudder is a flying surface. The rudder construction is a 1/2 x 1/4-inch flat open balsa frame with 1/4 x 1/4 balsa ribs. In deference to the Dr.I's ground-loop tendency, I would have liked for the rudder's frame to have been constructed from or reinforced with light plywood. However, there is a vertical spar made from basswood. After the acrylic control horn is added, attach the rudder to the aft end of the fuselage with three hinges.
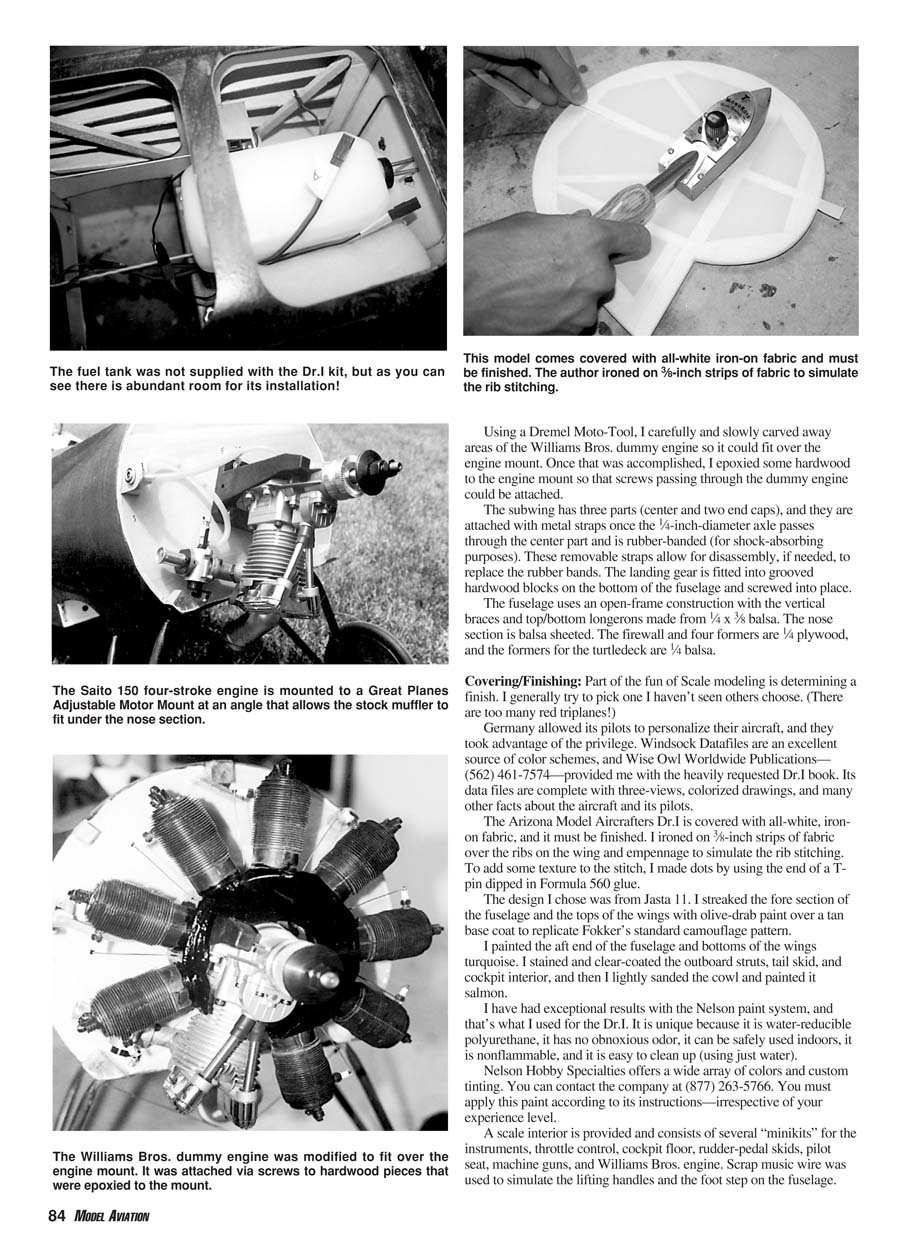
Engine installation is simple. I used a Great Planes adjustable large-engine mount to hold the Saito 150 four-stroke, which is mounted inverted and tipped to the left so that the stock muffler fits under the nose's center section. Using a Dremel Moto-Tool, I carefully and slowly carved away areas of the Williams Bros. dummy engine so it could fit over the engine mount. Once that was accomplished, I epoxied some hardwood to the engine mount so that screws passing through the dummy engine could be attached.
The subwing has three parts (center and two end caps), and they are attached with metal straps once the 1/4-inch-diameter axle passes through the center part and is rubber-banded for shock absorption. These removable straps allow for disassembly, if needed, to replace the rubber bands. The landing gear is fitted into grooved hardwood blocks on the bottom of the fuselage and screwed into place.
The fuselage uses an open-frame construction with the vertical braces and top/bottom longerons made from 1/4 x 3/8 balsa. The nose section is balsa sheeted. The firewall and four formers are 1/4 plywood, and the formers for the turtledeck are 1/4 balsa.
Covering/Finishing
Part of the fun of scale modeling is determining a finish. I generally try to pick one I haven't seen others choose. (There are too many red triplanes!) Germany allowed its pilots to personalize their aircraft, and they took advantage of the privilege. Windsock Datafiles are an excellent source of color schemes, and Wise Owl Worldwide Publications—(562) 461-7574—provided me with the heavily requested Dr.I book. Its data files are complete with three-views, colorized drawings, and many other facts about the aircraft and its pilots.
The Arizona Model Aircrafters Dr.I is covered with all-white, iron-on fabric, and it must be finished. I ironed on 3/8-inch strips of fabric over the ribs on the wing and empennage to simulate the rib stitching. To add some texture to the stitch, I made dots by using the tip of a T-pin dipped in Formula 560 glue.
The design I chose was from Jasta 11. I streaked the fore section of the fuselage and the tops of the wings with olive-drab paint over a tan base coat to replicate Fokker's standard camouflage pattern.
I painted the aft end of the fuselage and bottoms of the wings turquoise. I stained and clear-coated the outboard struts, tail skid, and cockpit interior, and then I lightly sanded the cowl and painted it salmon.
I have had exceptional results with the Nelson paint system, and that's what I used for the Dr.I. It is unique because it is water-reducible polyurethane, it has no obnoxious odor, it can be safely used indoors, it is nonflammable, and it is easy to clean up (using just water).
Nelson Hobby Specialties offers a wide array of colors and custom tinting. You can contact the company at (877) 263-5766. You must apply this paint according to its instructions—irrespective of your experience level.
A scale interior is provided and consists of several "minikits" for the instruments, throttle control, cockpit floor, rudder-pedal skids, pilot seat, machine guns, and Williams Bros. engine. Scrap music wire was used to simulate the lifting handles and the foot step on the fuselage.
I used Kirby's Kustom Vinyl Graphics for all of the Dr.I's markings. The flat clear I applied over the markings gave it a streaked (paint-brushed) effect. You can contact Dennis Kirby at (513) 932-2422.
Radio Installation
The radio-installation process was fairly easy. I chose the Airtronics RD6000 Super system.
Five servos were needed—one for each aileron, and one for the elevator, rudder, and throttle. I used Airtronics 743 double-ball-bearing servos (with 60/72 ounce-inches of torque) for all flying surfaces and a basic Airtronics 322 servo for the throttle. Rudder and elevator servos were installed under the pilot's seat on hardwood rails (not provided).
I mounted the cockpit floor to balsa rails with Velcro and attached the seat to a supporting structure with screws. All of this can easily be removed for unobstructed access to the servos. I used Du-Bro 4-40 pull-pull cabling (not provided in the kit) for the rudder. The elevator servo has a Y-shaped pushrod leading to the surfaces.
I located the battery under the tank as far forward as I could get it, and I placed the receiver under the cockpit floor. The antenna passes through a tube in the fuselage. The switch was attached inside the cockpit area but hidden from view.
Flying
I am pleased to report that I didn't need to add weight to the tail in order to achieve a balanced CG.
The best way to take off with a triplane is to hold up-elevator while powering up but making sure to release most of the up-elevator as soon as the model lifts off the ground, flying it out at roughly a 20° incline to avoid any stall. The Dr.I doesn't require a long roll; it's airborne in 15–20 feet.
Once this model is in the air, there's nothing quite like the "eye candy" of a triplane. I achieved straight and level flight with five clicks of down-elevator and two clicks of right aileron.
This aircraft is rather maneuverable (which is why it was a favorite among German fighter pilots) and can handle an array of aerobatics. Fifty-foot-diameter loops are easy to perform. The roll rate is approximately one per second; spins are not too snappy. Inverted flight requires a slight amount of down-elevator.
This is not a difficult model to fly. Its in-flight characteristics are predictable and solid—even at slow speed.
Landings can be tricky with a triplane. There is plenty of drag with three wings, so the airspeed must be maintained. Once the wheels touch, allow the model to run its course until the tail settles. Keeping in mind that this aircraft doesn't have a steerable tail skid, taxiing it requires full up-elevator with spurts of throttle to keep it moving.
Although this Balsa USA–designed model isn't 100% true to scale, its outstanding flying characteristics and awesome good looks more than make up for any loss in detail. I'm glad that Arizona Model Aircrafters chose to cover its ARF version in white, "forcing" us modelers to show some creativity and have some fun.
The Fokker Dr.I flies really well, looks terrific on the ground and in the air, and is competitively priced, considering that it is a deluxe kit with many amenities. Visit the Arizona Model Aircrafters Web site for additional information.
Distributor
Arizona Model Aircrafters 13814 N. 56th Pl. Scottsdale AZ 85254 (602) 971-5644 Fax: (602) 971-5644 www.arizonamodels.com List price: $749
Specifications
- Wingspan: 70.75 inches
- Wing area: 2,030 square inches
- Length: 56 inches
- Weight: 15 pounds, 4 ounces
- Wing loading: 17.3 ounces per square inch
- Engine required: Zenoah G-23 (gas) or 120–150 (four-stroke)
- Radio required: Four channels with five servos (throttle, rudder, elevator, and one for each aileron)
Transcribed from original scans by AI. Minor OCR errors may remain.

