
Product Review: Great Planes Rapture 40
Dennis Ridenhour E-mail: [email protected]
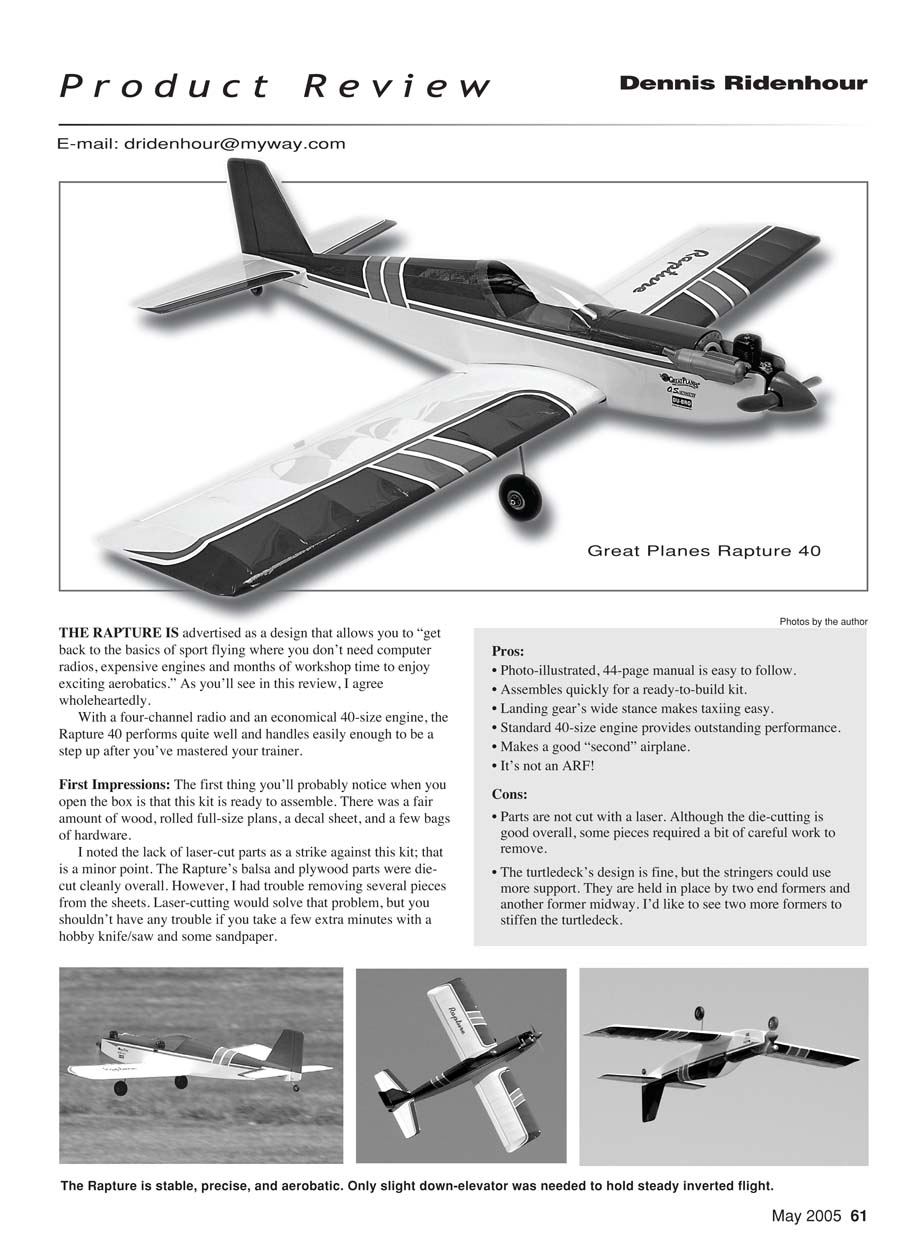
THE RAPTURE IS advertised as a design that allows you to "get back to the basics of sport flying where you don't need computer radios, expensive engines and months of workshop time to enjoy exciting aerobatics." As you'll see in this review, I agree wholeheartedly.
With a four-channel radio and an economical 40-size engine, the Rapture 40 performs quite well and handles easily enough to be a step up after you've mastered your trainer.
First Impressions:
The first thing you'll probably notice when you open the box is that this kit is ready to assemble. There was a fair amount of wood, rolled full-size plans, a decal sheet, and a few bags of hardware. I noted the lack of laser-cut parts as a strike against this kit; that is a minor point. The Rapture's balsa and plywood parts were die-cut cleanly overall. However, I had trouble removing several pieces from the sheets. Laser-cutting would solve that problem, but you shouldn't have any trouble if you take a few extra minutes with a hobby knife/saw and some sandpaper.
- Photo-illustrated, 44-page manual is easy to follow.
- Assembles quickly for a ready-to-build kit.
- Landing gear's wide stance makes taxiing easy.
- Standard 40-size engine provides outstanding performance.
- Makes a good "second" airplane.
- It's not an ARF!
- Parts are not cut with a laser. Although the die-cutting is good overall, some pieces required a bit of careful work to remove.
- The turtledeck's design is fine, but the stringers could use more support. They are held in place by two end formers and another former midway. I'd like to see two more formers to stiffen the turtledeck.
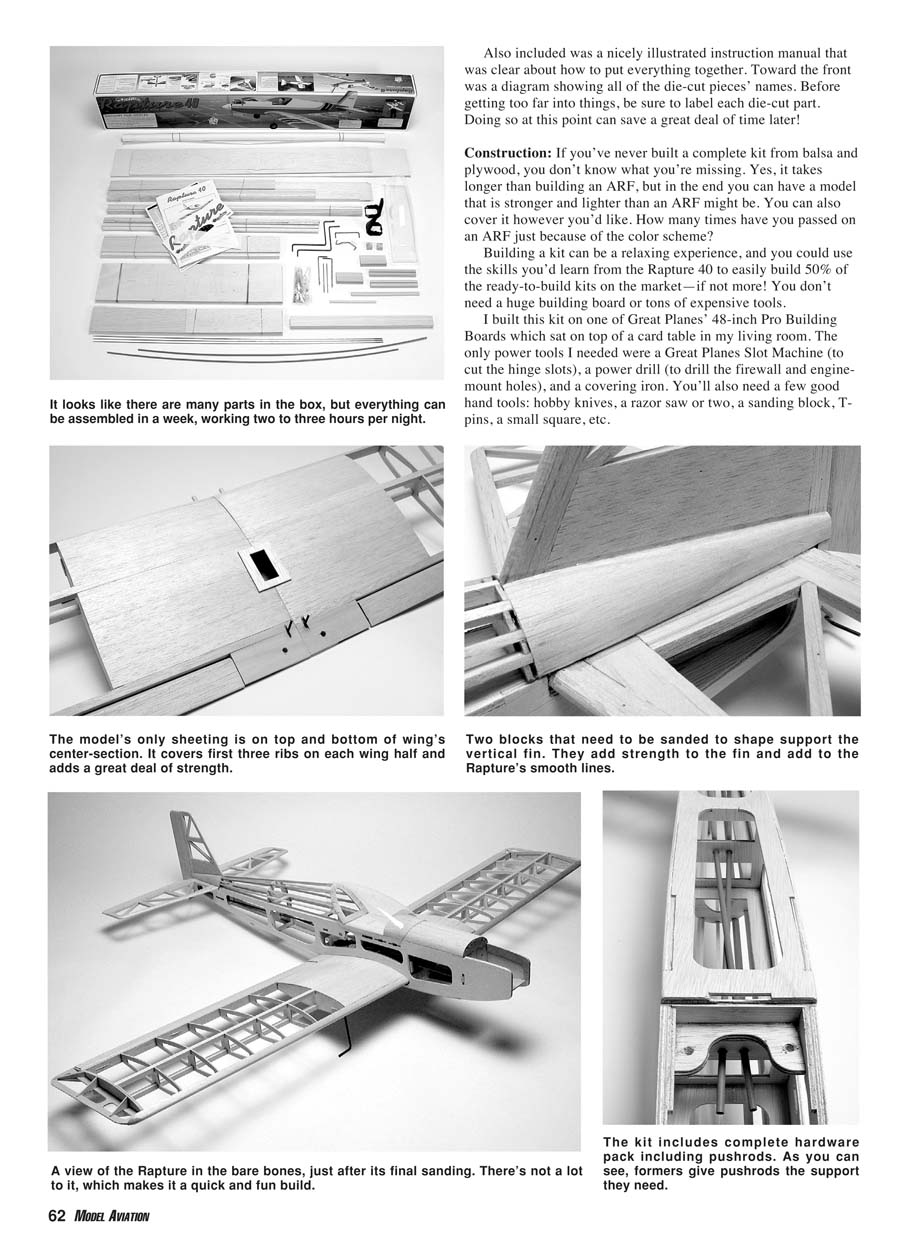
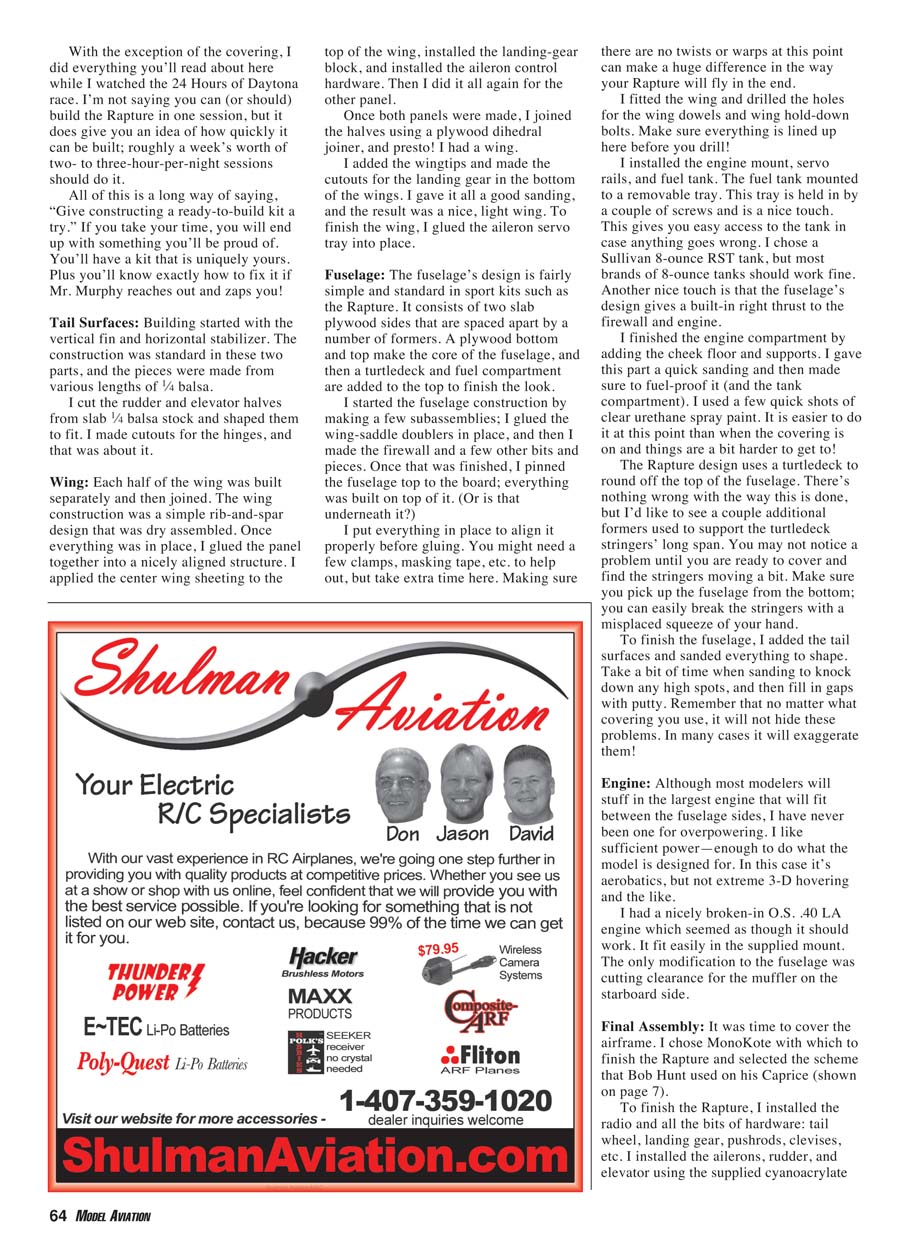
It looks like there are many parts in the box, but everything can be assembled in a week, working two to three hours per night. The model's only sheeting is on the top and bottom of the wing's center section. It covers the first three ribs on each wing half and adds a great deal of strength. Two blocks that need to be sanded to shape support the vertical fin. They add strength to the fin and add to the Rapture's smooth lines. Also included was a nicely illustrated instruction manual that was clear about how to put everything together. Toward the front was a diagram showing all of the die-cut pieces' names. Before getting too far into things, be sure to label each die-cut part. Doing so at this point can save a great deal of time later!
Construction:
If you've never built a complete kit from balsa and plywood, you don't know what you're missing. Yes, it takes longer than building an ARF, but in the end you can have a model that is stronger and lighter than an ARF might be. You can also cover it however you'd like. How many times have you passed on an ARF just because of the color scheme? Building a kit can be a relaxing experience, and you could use the skills you'd learn from the Rapture 40 to easily build 50% of the ready-to-build kits on the market—if not more! You don't need a huge building board or tons of expensive tools. I built this kit on one of Great Planes' 48-inch Pro Building Boards which sat on top of a card table in my living room. The only power tools I needed were a Great Planes Slot Machine (to cut the hinge slots), a power drill (to drill the firewall and engine-mount holes), and a covering iron. You'll also need a few good hand tools: hobby knives, a razor saw or two, a sanding block, T-pins, a small square, etc.
With the exception of the covering, I did everything you'll read about here while I watched the 24 Hours of Le Mans on television. I'm not saying you can (or should) build the Rapture in one session, but it does give you an idea of how quickly it can be built; roughly a week's worth of two- to three-hour-per-night sessions should do it.
All of this is a long way of saying, "Give constructing a ready-to-build kit a try." If you take your time, you will end up with something you'll be proud of. You'll have a kit that is uniquely yours. Plus you'll know exactly how to fix it if Mr. Murphy reaches out and zaps you!
Tail Surfaces:
Building started with the vertical fin and horizontal stabilizer. The construction was standard in these two parts, and the pieces were made from various lengths of 1/4" balsa.
I cut the rudder and elevator halves from slab 1/4" balsa stock and shaped them to fit. I made cutouts for the hinges, and that was about it.
Wing:
Each half of the wing was built separately and then joined. The wing construction was a simple rib-and-spar design that was dry assembled. Once everything was in place, I glued the panel together into a nicely aligned structure. I applied the center wing sheeting to the top of the wing, installed the landing-gear block, and installed the aileron control hardware. Then I did it all again for the other panel.
Once both panels were made, I joined the halves using a plywood dihedral joiner, and presto! I had a wing.
I added the wingtips and made the cutouts for the landing gear in the bottom of the wings. I gave it all a good sanding, and the result was a nice, light wing. To finish the wing, I glued the aileron servo tray into place.
Fuselage:
The fuselage's design is fairly simple and standard in sport kits such as the Rapture. It consists of two slab plywood sides that are spaced apart by a number of formers. A plywood bottom and top make the core of the fuselage, and then a turtledeck and fuel compartment are added to the top to finish the look.
I started the fuselage construction by making a few subassemblies; I glued the wing-saddle doublers in place, and then I made the firewall and a few other bits and pieces. Once that was finished, I pinned the fuselage top to the board; everything was built on top of it. (Or is that underneath it?)
I put everything in place to align it properly before gluing. You might need a few clamps, masking tape, etc. to help out, but take extra time here. Making sure there are no twists or warps at this point can make a huge difference in the way your Rapture will fly in the end.
I fitted the wing and drilled the holes for the wing dowels and wing hold-down bolts. Make sure everything is lined up here before you drill!
I installed the engine mount, servo rails, and fuel tank. The fuel tank mounted to a removable tray. This tray is held in by a couple of screws and is a nice touch. This gives you easy access to the tank in case anything goes wrong. I chose a Sullivan 8-ounce RST tank, but most brands of 8-ounce tanks would work fine. Another nice touch is that the fuselage's design gives a built-in right thrust to the firewall and engine.
I finished the engine compartment by adding the cheek floor and supports. I gave this part a quick sanding and then made sure to fuel-proof it (and the tank compartment). I used a few quick shots of clear urethane spray paint. It is easier to do it at this point than when the covering is on and things are a bit harder to get to!
The Rapture's design uses a turtledeck to round off the top of the fuselage. There's nothing wrong with the way this is done, but I'd like to see a couple additional formers used to support the turtledeck stringers' long span. You may not notice a problem until you are ready to cover and find the stringers moving a bit. Make sure you pick up the fuselage from the bottom; you can easily break the stringers with a misplaced squeeze of your hand.
To finish the fuselage, I added the tail surfaces and sanded everything to shape. Take a bit of time when sanding to knock down any high spots, and then fill in gaps with putty. Remember that no matter what covering you use, it will not hide these problems. In many cases it will exaggerate them!
Engine:
Although most modelers will stuff in the largest engine that will fit between the fuselage sides, I have never been one for overpowering. I like sufficient power—enough to do what the model is designed for. In this case it's aerobatics, but not extreme 3-D hovering and the like.
I had a nicely broken-in O.S. .40 LA engine which seemed as though it should work. It fit easily in the supplied mount. The only modification to the fuselage was cutting clearance for the muffler on the starboard side.
Final Assembly:
It was time to cover the airframe. I chose MonoKote with which to finish the Rapture and selected the scheme that Bob Hunt used on his Caprice (shown on page 7).
To finish the Rapture, I installed the radio and all the bits of hardware: tail wheel, landing gear, pushrods, clevises, etc. I installed the ailerons, rudder, and elevator using the supplied cyanoacrylate hinge material. The only things left were to attach the canopy and apply the decals.
With everything completed, the Rapture 40 balanced as it should have and weighed a respectable 5 pounds ready to fly. It was time to head for the field!
Flying:
After assembly and a quick preflight check, I was ready to go. I started the engine and let it warm up. Then I taxied the model out to the runway, throttled up, and the Rapture was off on its maiden flight in no time.
After a few passes over the field to trim out the Rapture, I found that it needed a couple clicks of left aileron and a touch of down-elevator trim for hands-off flight. Using the suggested throws, the model flew nicely and did everything I wanted it to do. Loops, Rolls, Point Rolls, Figure 8s, Barrel Rolls, Stall Turns, and the like were predictable, and the O.S. .40 LA pulled the Rapture through them with plenty of authority.
Under low power settings, the Rapture slowed surprisingly well yet remained quite responsive, even right up to the stall speed. It had a gentle stall, dropping the nose, and was extraordinarily controllable.
And just like that, it was time to finish the first flight. Bringing the Rapture around for a few approaches yielded no surprises. It floated down to the runway and flared at the last second for smooth landings that impressed my flying buddies.
I put in a few more flights that day to finish off the obligatory in-flight photos and then to stretch the envelope of what I could do with the Rapture. To do that, I increased the rudder throw quite a bit (approximately 45° deflection in each direction) and increased the aileron throw a bit. (If you increase the rudder throw, you also make the ground handling much more sensitive because the tail-wheel throw is the same as the rudder throw.)
Suddenly, knife-edge flight was not only possible but sustainable. It did require a bit of “steering” with down-elevator to keep it going straight, but the Rapture would easily fly around in this attitude until the engine quit.
Snaps and spins became much more lively and, dare I say, extremely fun. Then putting the knife edge and snaps together, I could fly in one knife edge and then do one complete snap right back to knife edge flight and continue. That’s not too bad from what would be considered an “underpowered” airplane these days.
As I write this I have a few dozen flights on the Rapture, and there have been no surprises. Everything has held up well, even though all of the landings haven’t been perfect. This model is as aerobatic as you want it to be, but at the same time it can be as docile as you need it to be.
If you’re looking for a second airplane, or maybe your first ready-to-build kit, I strongly suggest that you take a good, long look at the Rapture 40. It is a wonderful, solid design. It builds quickly and uses interlocking pieces to help keep the alignment straight and true.
The use of the Selig 8036 airfoil gives great performance on the high and low end of the power setting. Although the Rapture 40 can accept a wide variety of engines, the O.S. .40 LA was just right; it supplied lots of power for everything I wanted it to do.
Specifications:
- Model type: RTB—Ready to Build
- Wingspan: 60 inches
- Wing area: 625 square inches
- Length: 46.5 inches
- Recommended weight: 4.50–5.25 pounds
- Test model’s ready-to-fly weight: 5 pounds
- Recommended engine: Two-stroke .40–.50 or four-stroke .40–.52
- Engine used: O.S. .40 LA
- Recommended radio: Four channels, four servos
- Radio used: Futaba 6EXA transmitter, R127DF receiver, and five S3004 servos
- Materials used in construction: Balsa and plywood
Manufacturer/Distributor:
Great Planes Model Distributors Box 9021 Champaign, IL 61826 (800) 682-8948 www.greatplanes.com/airplanes/gpma0220.htm Street price: $95
Products used in review:
- Futaba 6EXA radio system, O.S. .40 LA engine, MonoKote covering, 2.5-inch plastic spinner, Slot Machine, 48-inch Pro Building Board
Great Planes Model Distributors Box 9021 Champaign, IL 61826 Tel.: (800) 682-8948 www.greatplanes.com
- 1/4-inch protective foam rubber
Du-Bro Products Box 815 Wauconda, IL 60084 (847) 526-2136 www.dubro.com
- APC 10 x 6 two-blade propeller
Landing Products 1222 Harter Woodland, CA 95776 (513) 661-0399 www.apcprop.com
- 6-ounce fuel tank, 2.5-inch Skylite wheels, 1-inch tail wheel
Sullivan Products 1 North Haven St. Baltimore, MD 21224 (410) 732-3500 www.sullivanproducts.com
Transcribed from original scans by AI. Minor OCR errors may remain.

