
Pvt. Kool's Bipe - 2006/03
by Charles Mackey
I am having so much fun and am so excited about this new 3-D foamie that not to share it with you would almost be a sin. The new foam 3-D airplanes have been life-altering for me and they may be for you. At the very least they will improve your flying skills and be a great deal of fun.
Can a model-airplane experience really change your life? You bet! Following are instances when it has happened to me.
- In 1945 a single loop could win any CL contest in the state of Illinois. I learned to fly consecutive loops and inverted at roughly the same time, and I was so elated that I became a modeler for life.
- I attended the 1947 Nationals and was so impressed with J.C. Yates flying his Orwick-powered Madman that he became my lifelong hero and inspired me to later write the book Pioneers of Control Line Flying (available from AMA). That year I had to become a model-airplane designer.
- My wife Phyllis and I attended the 1999 Tournament of Champions (TOC) in Las Vegas, Nevada. We were overwhelmed with emotion when we saw Christophe Paysant-Le Roux of France fly his Freestyle segment. It was perfectly timed to beautiful music, and the flying was slow and graceful. The airplane seemed to defy the laws of aerodynamics and gravity. We didn't care if anyone saw the tears run down our cheeks. My life was changed when I saw 3-D flying.
I am often asked, "What is 3-D flying?" My response is that it is "flying on the prop" with the wing and tail in a stalled condition. This requires the static thrust to be approximately twice the weight of the airplane. Experienced pilots maintain control with the airflow from the propeller over the control surfaces.
However, there's a problem! TOC-type airplanes cost thousands—not hundreds—of dollars. They require special transportation, assembly and disassembly, a flying site with liberal regulations, and potential liability considerations.
The learning curve certainly requires the expense of a few airplanes. Smaller cubic-inch-displacement 3-D airplanes alleviate the problem, but they don't come close to solving it. You can't pull one of these models out of your vehicle to fly a demonstration for your friends during your lunch hour. What do you do?
Help is here, and it comes in the form of brushless outrunner motors, Li-Poly batteries, foam, and carbon fiber. These items make 3-D flying available to everyone.
You may have seen a 3-D aircraft, and now I want you to try one. It can change your life. If you don't like to build from scratch, you can find many great airplanes at hobby shops, in magazines, or online.
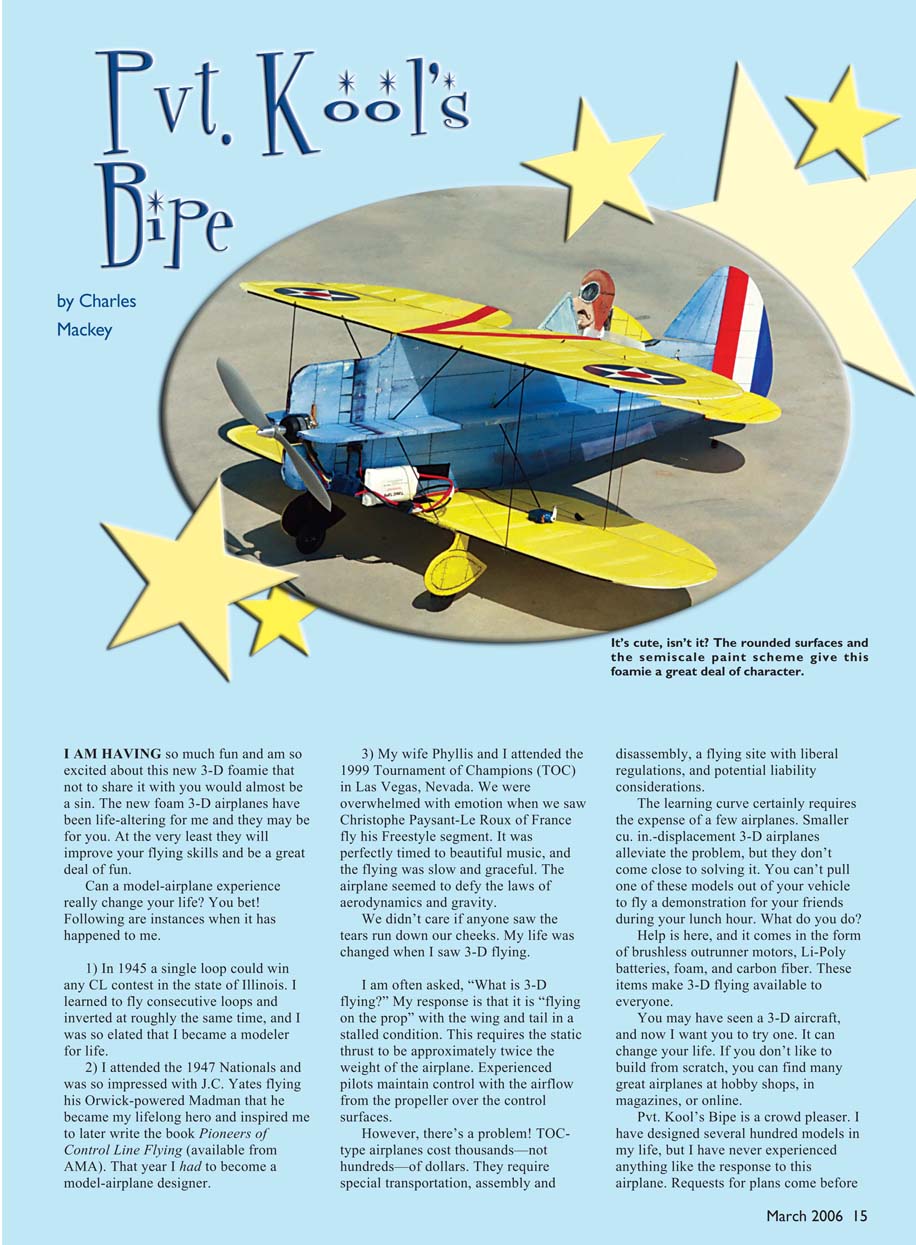
Pvt. Kool's Bipe is a crowd pleaser. I have designed several hundred models in my life, but I have never experienced anything like the response to this airplane. Requests for plans come before modelers see it fly; after they see it fly their requests change to near demands. I do all my flying outdoors, so you don't have to worry about a little wind with this model. The wind must be considered when the airplane is on the ground. Use your high power-to-weight ratio to keep the nose into the wind on takeoff and landing. Don't try to taxi with a side wind!
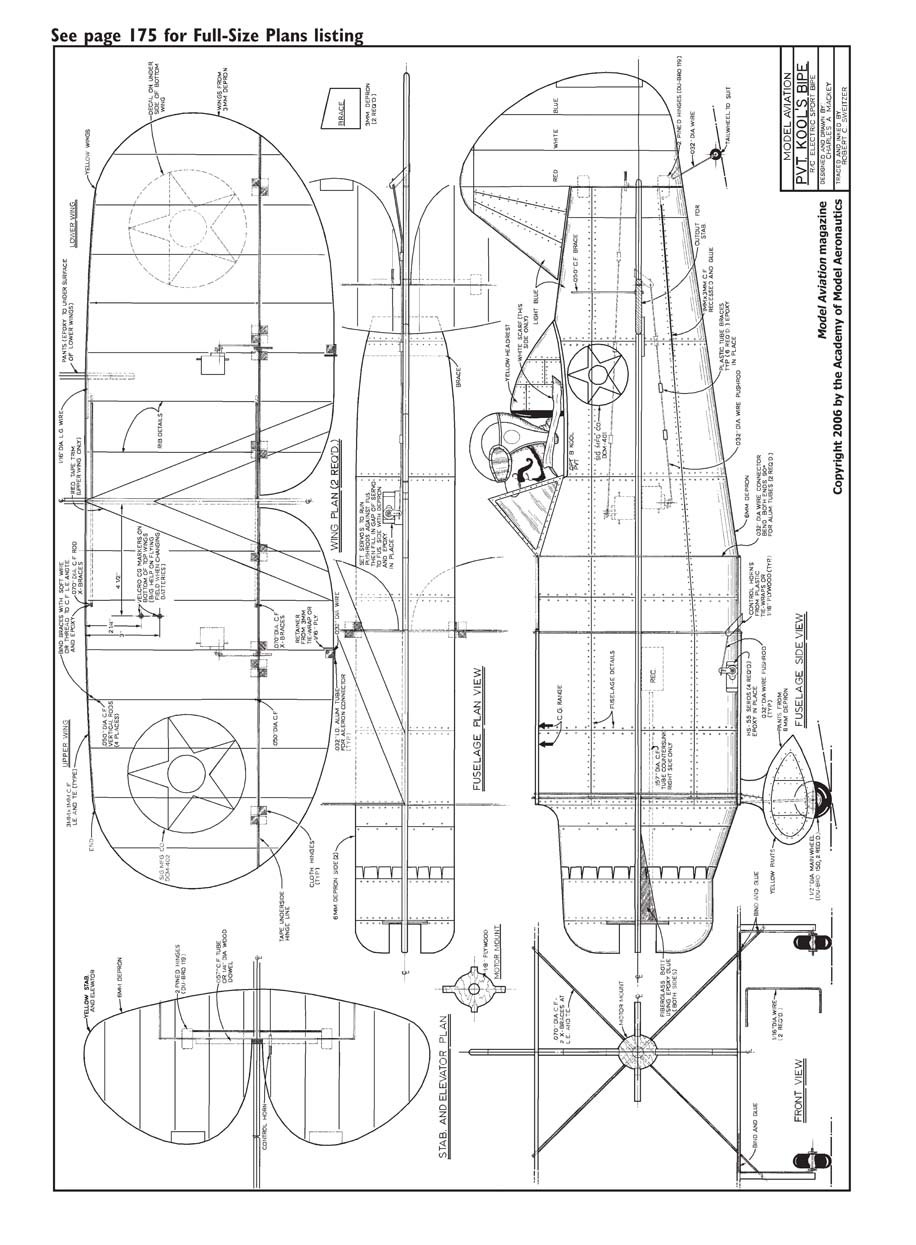
CONSTRUCTION
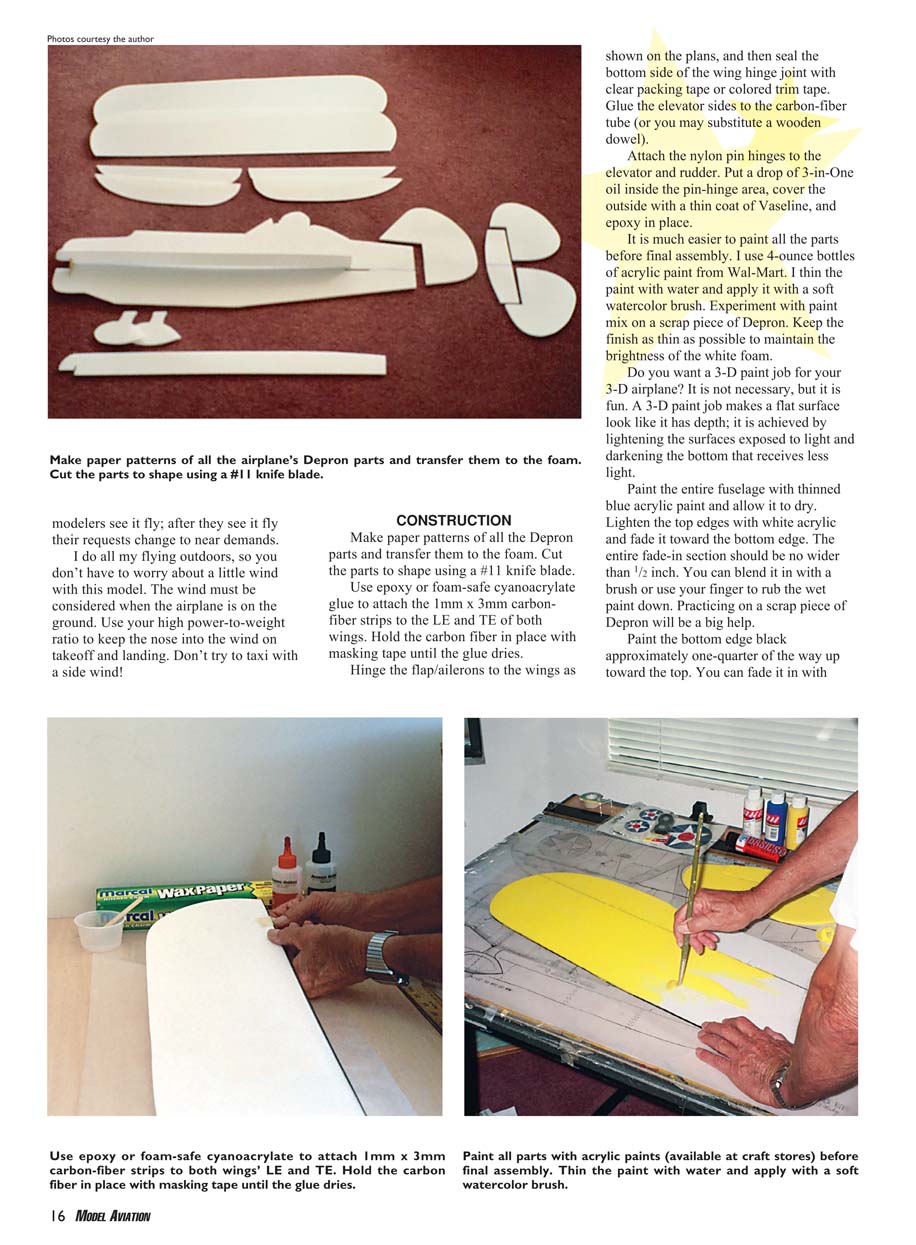
- Make paper patterns of all the airplane’s Depron parts and transfer them to the foam. Cut the parts to shape using a #11 knife blade.
- Use epoxy or foam-safe cyanoacrylate glue to attach 1 mm x 3 mm carbon-fiber strips to the leading edge (LE) and trailing edge (TE) of both wings. Hold the carbon fiber in place with masking tape until the glue dries.
- Hinge the flap/ailerons to the wings as shown on the plans, then seal the bottom side of the wing hinge joint with clear packing tape or colored trim tape.
- Glue the elevator sides to the carbon-fiber tube (or substitute a wooden dowel). Attach the nylon pin hinges to the elevator and rudder. Put a drop of 3‑in‑One oil inside the pin-hinge area, cover the outside with a thin coat of Vaseline, and epoxy in place.
Painting and finishing
- It is much easier to paint all parts before final assembly. I use 4-ounce bottles of artist's acrylic paint (available at craft stores or Wal‑Mart). Thin the paint with water and apply it with a soft watercolor brush. Experiment on scrap Depron and keep the finish as thin as possible to maintain the brightness of the white foam.
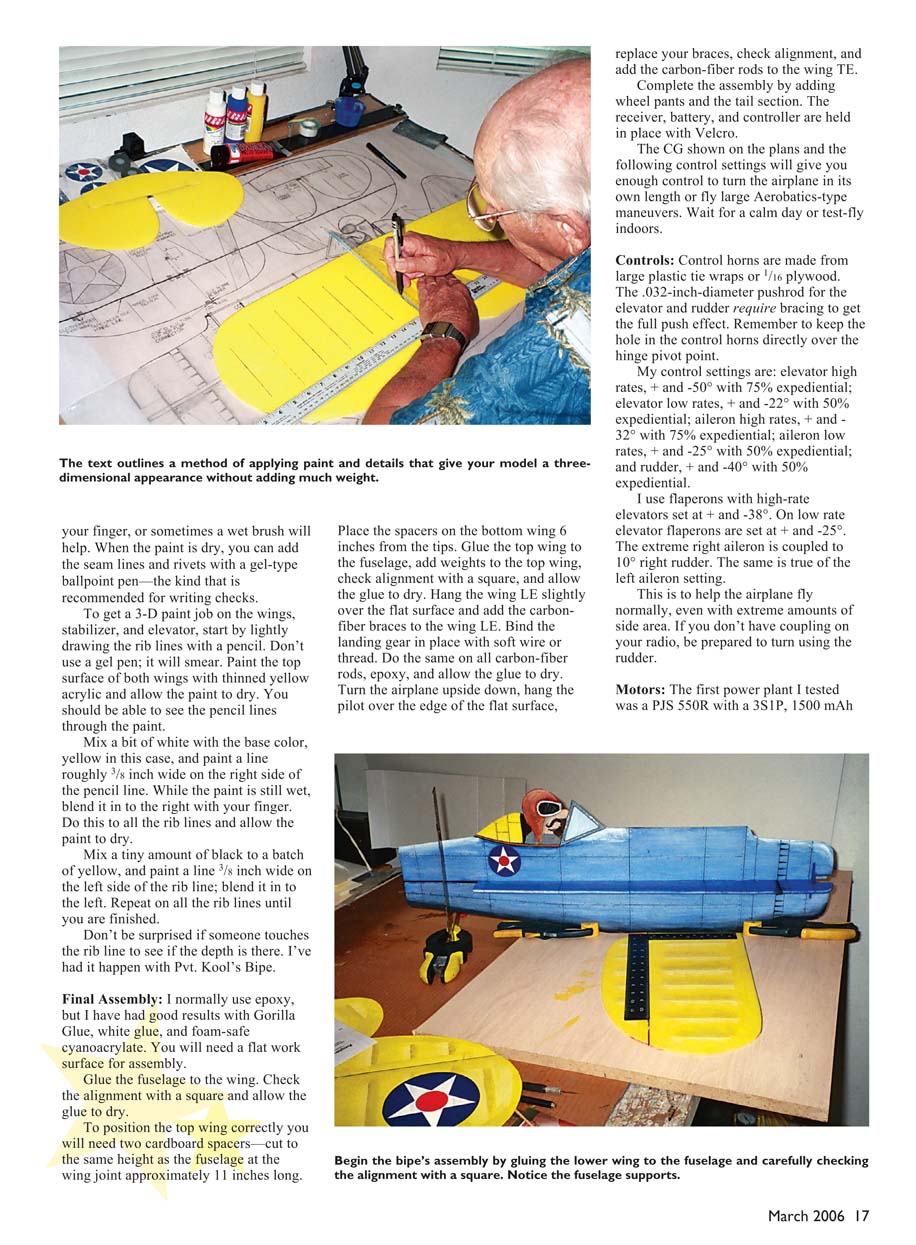
- A 3-D paint job is optional but fun. Lighten areas exposed to light and darken bottom areas to create the illusion of depth. For the fuselage: paint the entire fuselage with thinned blue acrylic and let dry. Lighten the top edges with white acrylic and fade toward the bottom edge; keep the fade no wider than 1/2 inch. Paint the bottom edge black about one-quarter of the way up and fade in. Add seam lines and rivets with a gel-type ballpoint pen.
- For wing/stabilizer 3-D ribs: lightly draw rib lines with pencil (not gel pen). Paint the top surface with thinned yellow acrylic and let dry so the pencil lines show through. Mix a bit of white with yellow and paint a ~3/8 inch line on the right side of the pencil rib line; blend to the right while wet. Mix a tiny amount of black with yellow and paint a ~3/8 inch line on the left side; blend to the left. Repeat for all rib lines.
Final assembly
- Use epoxy (or Gorilla Glue, white glue, or foam-safe CA) and a flat work surface for assembly.
- Glue the fuselage to the bottom wing. Check alignment with a square and allow glue to dry.
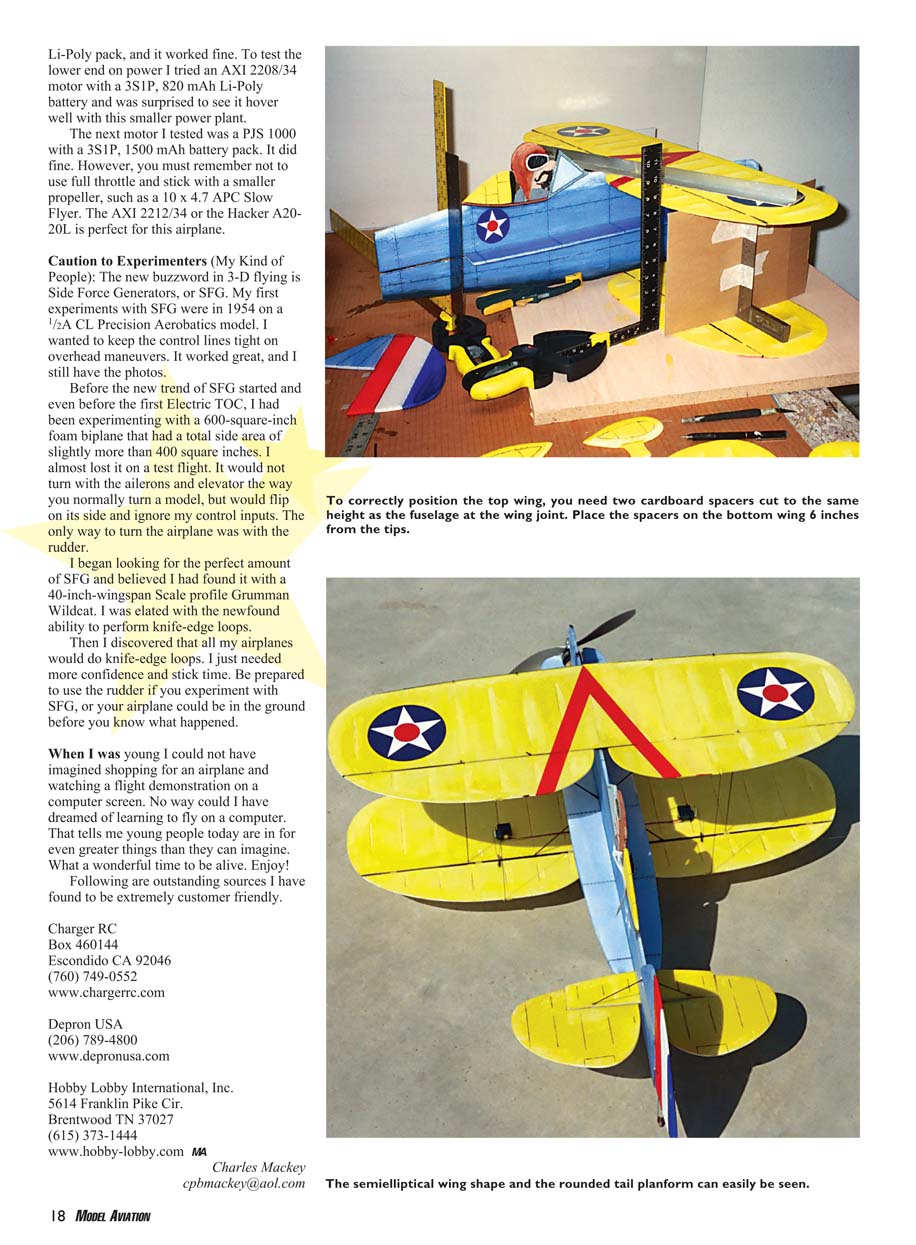
- For the top wing, make two cardboard spacers cut to the same height as the fuselage at the wing joint (approximately 11 inches long). Place the spacers on the bottom wing 6 inches from the tips. Glue the top wing to the fuselage, add weights to the top wing, check alignment with a square, and allow glue to dry.
- Hang the wing LE slightly over the flat surface and add carbon-fiber braces to the wing LE. Bind the landing gear in place with soft wire or thread. Epoxy and allow the glue to dry. Turn the airplane upside down, hang the pilot over the edge of the flat surface, replace your braces, check alignment, and add carbon-fiber rods to the wing TE.
- Complete assembly by adding wheel pants and the tail section. The receiver, battery, and controller are held in place with Velcro.
Controls and hardware
- Control horns: make from large plastic tie wraps or 1/16 plywood. Keep the hole in the control horns directly over the hinge pivot point.
- Pushrods: the .032-inch-diameter pushrods for elevator and rudder require bracing to get the full push effect.
- Control horns attach to servo linkages and are epoxied securely.
Control settings
- Elevator (high rates): + and -50° with 75% exponential
- Elevator (low rates): + and -22° with 50% exponential
- Aileron (high rates): + and -32° with 75% exponential
- Aileron (low rates): + and -25° with 50% exponential
- Rudder: + and -40° with 50% exponential
Flaperons
- I use flaperons with high-rate elevators set at + and -38°. On low-rate elevator flaperons are set at + and -25°.
- The extreme right aileron is coupled to 10° right rudder. The same is true for the left aileron setting. This helps the airplane fly normally even with extreme side area. If you don't have coupling on your radio, be prepared to turn using the rudder.
Motors and power
- The first power plant I tested was a PJS 550R with a 3S1P, 1500 mAh Li-Poly pack, and it worked fine.
- To test the lower end I tried an AXI 2208/34 motor with a 3S1P, 820 mAh Li-Poly battery and was surprised to see it hover well.
- I also tested a PJS 1000 with a 3S1P, 1500 mAh battery pack—it did fine, but avoid full throttle and stick with a smaller propeller such as a 10 x 4.7 APC Slow Flyer.
- Recommended motors: AXI 2212/34 or Hacker A20-20L.
Caution to Experimenters (My Kind of People)
The new buzzword in 3-D flying is Side Force Generators (SFG). My first experiments with SFG were in 1954 on a 1/2A CL Precision Aerobatics model—I wanted to keep the control lines tight on overhead maneuvers. It worked great, and I still have the photos.
Before the recent SFG trend and even before the first Electric TOC, I experimented with a 600-square-inch foam biplane that had a total side area of slightly more than 400 square inches. I almost lost it on a test flight. It would not turn with the ailerons and elevator the way you normally turn a model, but would flip on its side and ignore my control inputs. The only way to turn the airplane was with the rudder.
I began looking for the perfect amount of SFG and believed I had found it with a 40-inch-wingspan scale-profile Grumman Wildcat. I was elated with the newfound ability to perform knife-edge loops.
Then I discovered that all my airplanes would do knife-edge loops. I just needed more confidence and stick time. Be prepared to use the rudder if you experiment with SFG, or your airplane could be in the ground before you know what happened.
When I was young I could not have imagined shopping for an airplane and watching a flight demonstration on a computer screen. No way could I have dreamed of learning to fly on a computer. That tells me young people today are in for even greater things than they can imagine. What a wonderful time to be alive. Enjoy!
Following are outstanding sources I have found to be extremely customer friendly.
- Charger RC
Box 460144 Escondido, CA 92046 (760) 749-0552 www.chargerrc.com
- Depron USA
(206) 789-4800 www.depronusa.com
- Hobby Lobby International, Inc.
5614 Franklin Pike Cir. Brentwood, TN 37027 (615) 373-1444 www.hobby-lobby.com
Charles Mackey [email protected]
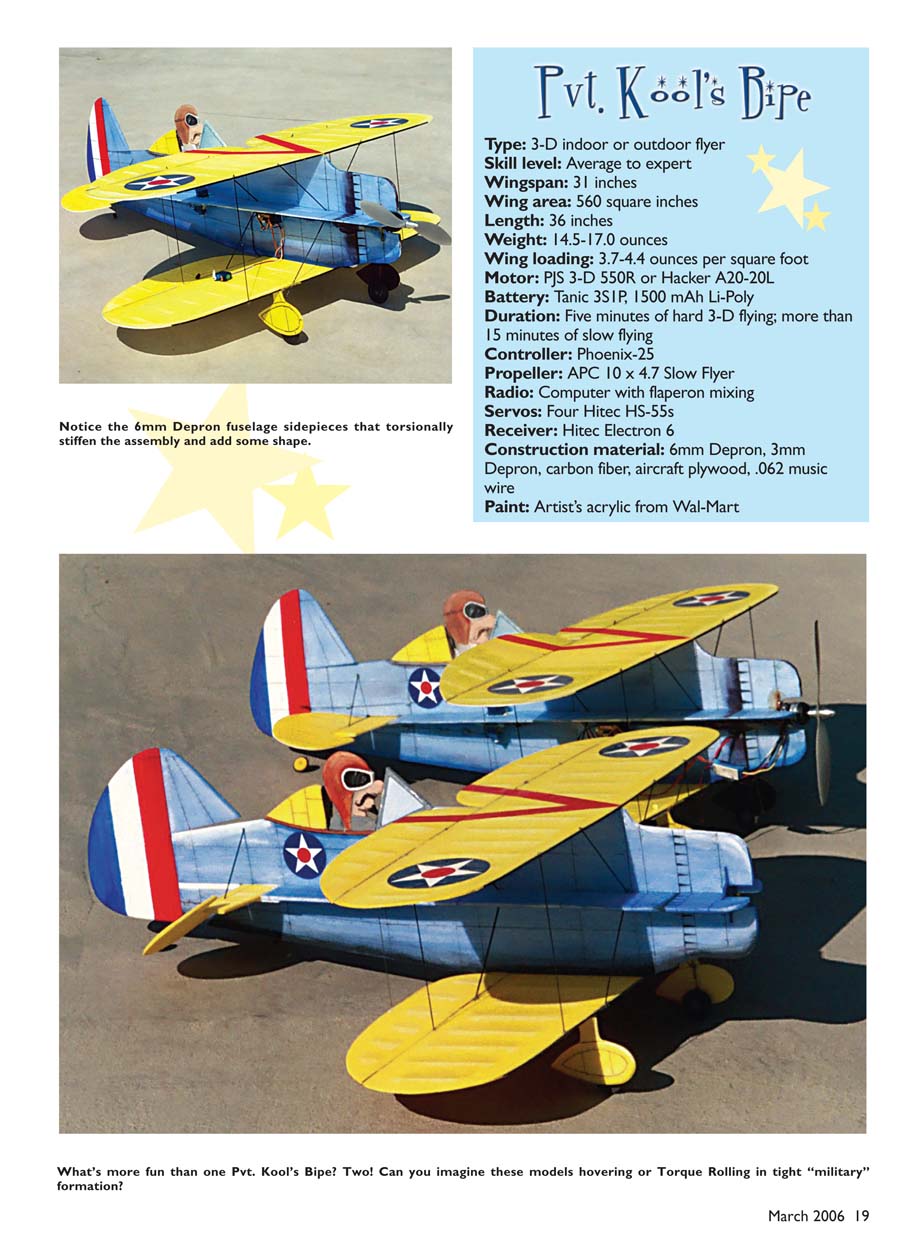
Pvt. Kool's Bipe
- Type: 3-D indoor or outdoor flyer
- Skill level: Average to expert
- Wingspan: 31 inches
- Wing area: 560 square inches
- Length: 36 inches
- Weight: 14.5–17.0 ounces
- Wing loading: 3.7–4.4 ounces per square foot
- Motor: PJS 3-D 550R or Hacker A20-20L
- Battery: Tanic 3S1P, 1500 mAh Li-Poly
- Duration: Five minutes of hard 3-D flying; more than 15 minutes of slow flying
- Controller: Phoenix-25
- Propeller: APC 10 x 4.7 Slow Flyer
- Radio: Computer with flaperon mixing
- Servos: Four Hitec HS-55s
- Receiver: Hitec Electron 6
- Construction material: 6 mm Depron, 3 mm Depron, carbon fiber, aircraft plywood, .062 music wire
- Paint: Artist's acrylic from Wal‑Mart
Transcribed from original scans by AI. Minor OCR errors may remain.

