
Radio Control Combat
Don Grissom [[email protected]]
Why SSC has become the Combat of choice
This year has been great for me! I enjoyed getting a chance to fly some types of RC Combat other than Slow Survivable Combat (SSC). The .2548 Zero I flew in Florida did well, and I have some Open B Avengers I plan to fly in the Nats in Muncie, Indiana. But when it comes to my favorite type of Combat, I enjoy SSC the most.
When getting started this year, I decided to rebuild all my SSC airplanes. Many people wonder why you would want to spend money on new models when you can just repair them. With SSC, it is important to keep the airplanes as close as you can to the 2-pound, 6-ounce minimum weight.
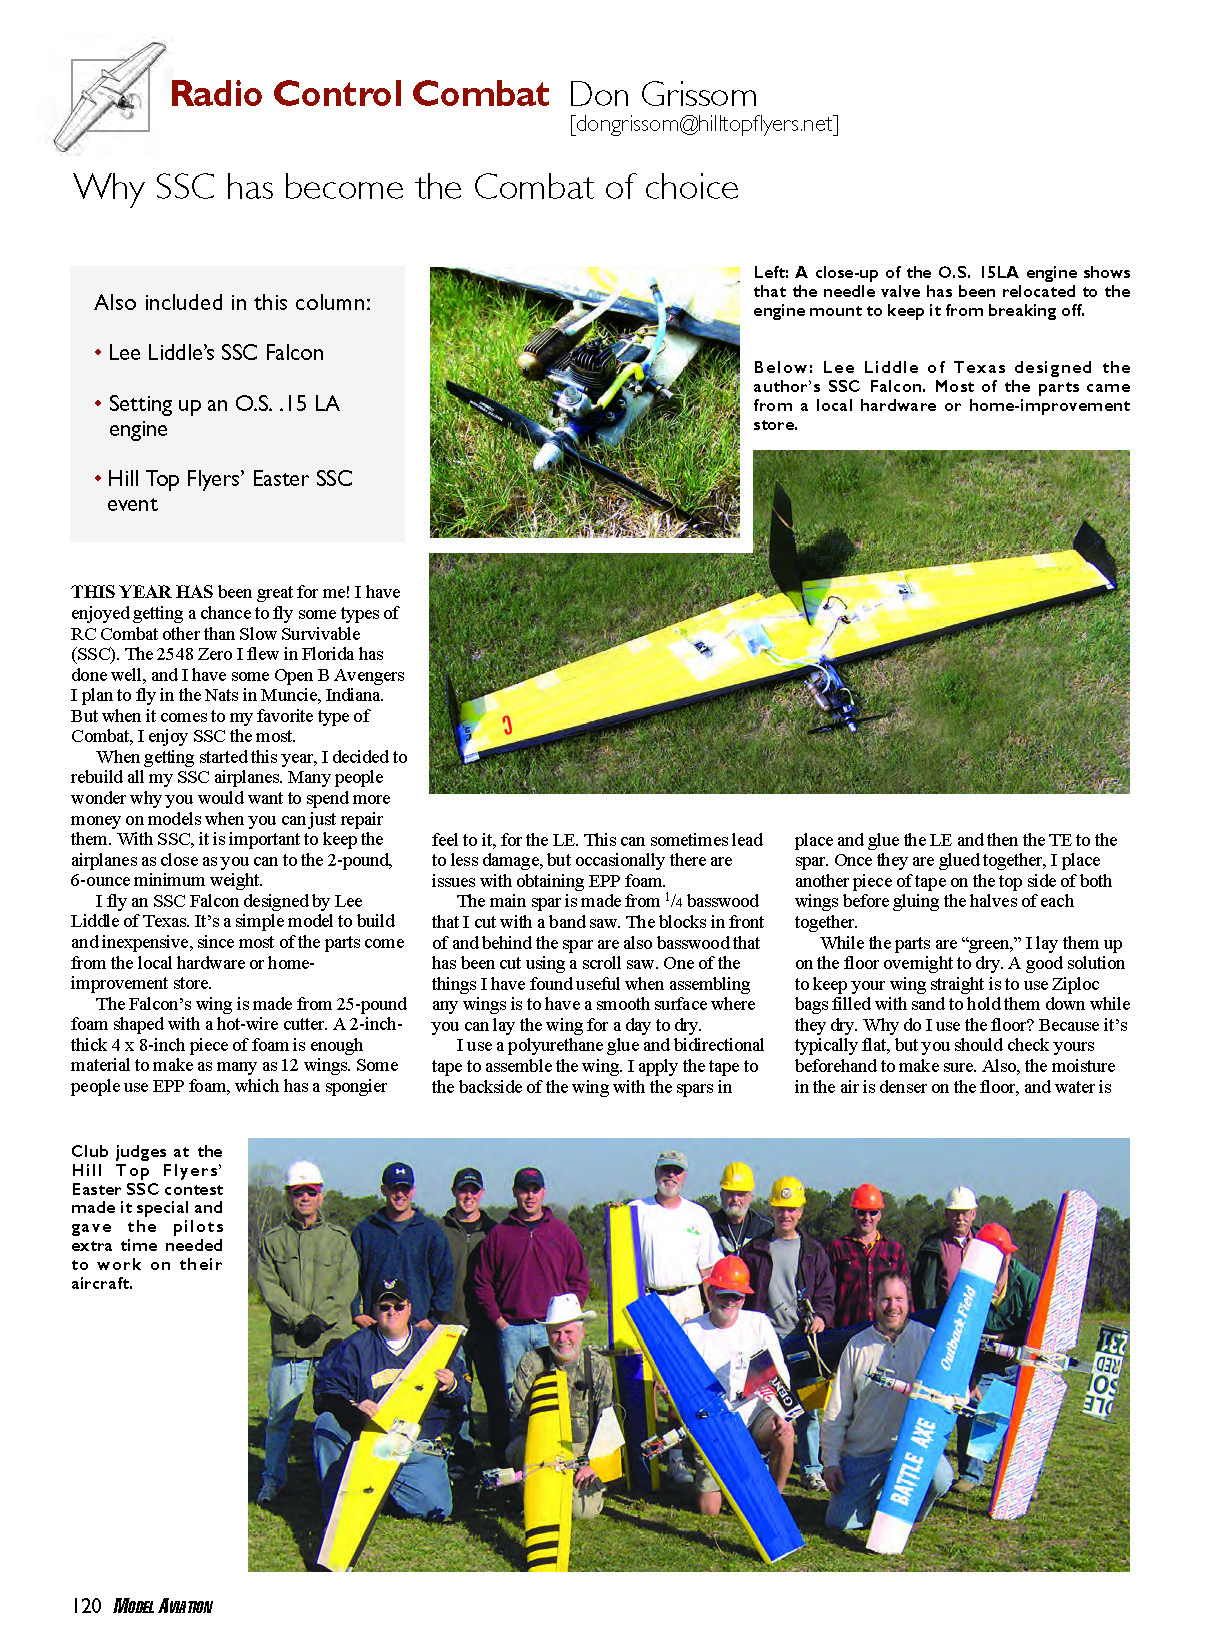
I fly an SSC Falcon designed by Lee Liddle of Texas. It's a simple, inexpensive model to build since most of the parts come from the local hardware or home-improvement store.
The Falcon — design and materials
- Wing: made from 25-pound foam shaped with a hot-wire cutter. A 2-inch-thick, 4 x 8-inch piece of foam is enough material to make as many as 12 wings. Some people use EPP foam for the leading edge (LE); it has a spongier feel and can sometimes reduce damage, though EPP can be harder to obtain.
- Main spar: 1/4-inch basswood, cut with a bandsaw.
- Blocks in front of and behind the spar: basswood, cut with a scroll saw.
- Covering: 2.2 mm color-coding tape available from FastPack or Uline.
One of the things I have found useful when assembling wings is a smooth, flat surface where you can lay the wing to dry for a day.
Wing construction and assembly
I use a polyurethane glue and bidirectional tape to assemble the wing. I apply tape to the backside of the wing with the spars in place and glue the LE and then the TE to the spar. Once glued, I place another piece of tape on the top side of both halves before gluing the halves of each wing together.
While the parts are "green," I lay them up on the floor overnight to dry. A good solution to keep your wing straight is to use Ziploc bags filled with sand to hold them down while they dry. Why the floor? Because it's typically flat (check yours beforehand) and the moisture in the air is denser near the floor; water is a catalyst that helps polyurethane glue cure properly.
Engine mount, balance, and components
The engine mount is made from a plastic cutting board. To cut it to shape, use a scroll saw with a plastic cutting blade at low speed to avoid melting the material. It's a good idea to make additional engine mounts since they are among the parts most likely to break in a crash.
To bring the weight up to the minimum limit, I use standard-size servos and a 4-ounce fuel tank mounted in the wing. The most important part of any flying wing is the balance, which for this airplane is located directly on the spar. To adjust the balance, I make additional screw holes in the mount so the engine can be moved forward and back.
- Muffler bolts: replace stock bolts with socket-head bolts; recommended size: 2.5 mm x 25 mm.
- Needle valve: consider cutting it away from the backplate and remounting it in another location, since it will inevitably break off otherwise. If you prefer the stock mount, make a small Dremel cut so it will break cleanly and leave the backplate intact after impact.
Preparing the O.S. .15LA engine for combat
The most common engine used is an O.S. .15LA. For cost and performance, it tends to be the best choice for SSC.
Before the first contest:
- Seal the backplate: the .15LA uses a plastic backplate that can leak under pressure. Some use gasket sealer; I find plumber’s (Teflon) tape works best. Wrap it around the backplate just in front of the screws to get a good, replaceable seal. Metal backplates are available, but the plastic one works fine when sealed.
- Protect the needle valve (see note above).
- Replace muffler bolts as noted.
Break-in procedure (example):
- Mount a 6 x 3 Master Airscrew propeller. You can also use an 8 x 3 Combat prop and cut 1 inch off each end, but be sure to balance it correctly.
- Start the engine and lean it to the point where it is running at about 90% of peak power (rpm).
- Run it for 30 seconds, then shut it off and let it cool to the touch (about five minutes).
- Repeat the 30-second run/cool cycle six times. This heats the cylinder so it expands, minimizing interference fit and undesirable wear, seating the crankpin-to-connecting-rod fit, and relieving stresses in the cast cylinder.
- After the short runs, perform four runs of three minutes each, pinching the fuel line to get to peak rpm once every 30 seconds.
- After these steps, the engine is ready for the first flight.
For more complete information, visit the Georgia RC Aircraft Combat web site.
Club contest report
This year, my club, the Hill Top Flyers, held its SSC contest over Easter weekend in March. Six pilots showed up at this smaller-than-usual contest. Attendees included Bob Loescher (Ohio), Chris Quinn (Tennessee), and Chris Handegard (Florida).
Since we were all on different frequencies, we did “all up” at the same time. We had club judges, which made for a relaxed day and allowed time to work on airplanes between rounds. Contest Director Don Pruitt did a great job directing the event and giving us time to get ready so everyone’s models could make it into the air.
Chris Handegard won the contest despite starting with a -60 in the first round, finishing with 1,904 points. Second place went to Wayne Voyles, third to Chris Quinn, and I finished fourth, taking the last trophy for the day.
Sources
- Georgia RC Aircraft Combat — www.georgiacombat.com
- Hill Top Flyers — www.hilltopflyers.com
Transcribed from original scans by AI. Minor OCR errors may remain.

