
RADIO CONTROL ELECTRICS
Bob Kopski, 25 West End Dr., Lansdale PA 19446
THIS COLUMN will follow up on the Sig Rascal story from the October 2004 column, offer a true-life name-tag lesson, and share some exciting new-product info.
Sig Rascal follow-up
The October column described how I helped local friend Paul get started in electric R/C with a Sig Rascal ARF. The events began in the June–July 2004 time frame, and by now (November 2004), Paul has accumulated considerable flying experience. The Rascal has proven itself well in this early learning process.
As typically happens with many newbies, Paul's Rascal has had its share of knocks. These have included the usual encounters with mother earth, trees, falls from trees, hangar rash, etc. Throughout it all, the Rascal has survived by virtue of its design strengths combined with ongoing maintenance and repair. It continues flying as I write this. Following are some lessons learned from this experience.
Wing attachment and cabin repairs
Do you recall my earlier comments that I would have preferred a rubber-banded-on wing instead of the Rascal's bolt-on wing? Sure enough, the latter brought consequence. Among all of the encounters with not-so-movable objects, some of those that engaged a wingtip did result in damage to the wing attachment. On one occasion, an LE dowel former hole was ripped open. On another, the somewhat feeble cabin structure was broken apart. These outcomes were not surprising and would likely have been avoided with rubber-banded-on wings. Repairs were needed, and photos show the approach used to repair and strengthen the cabin area.
The repair process:
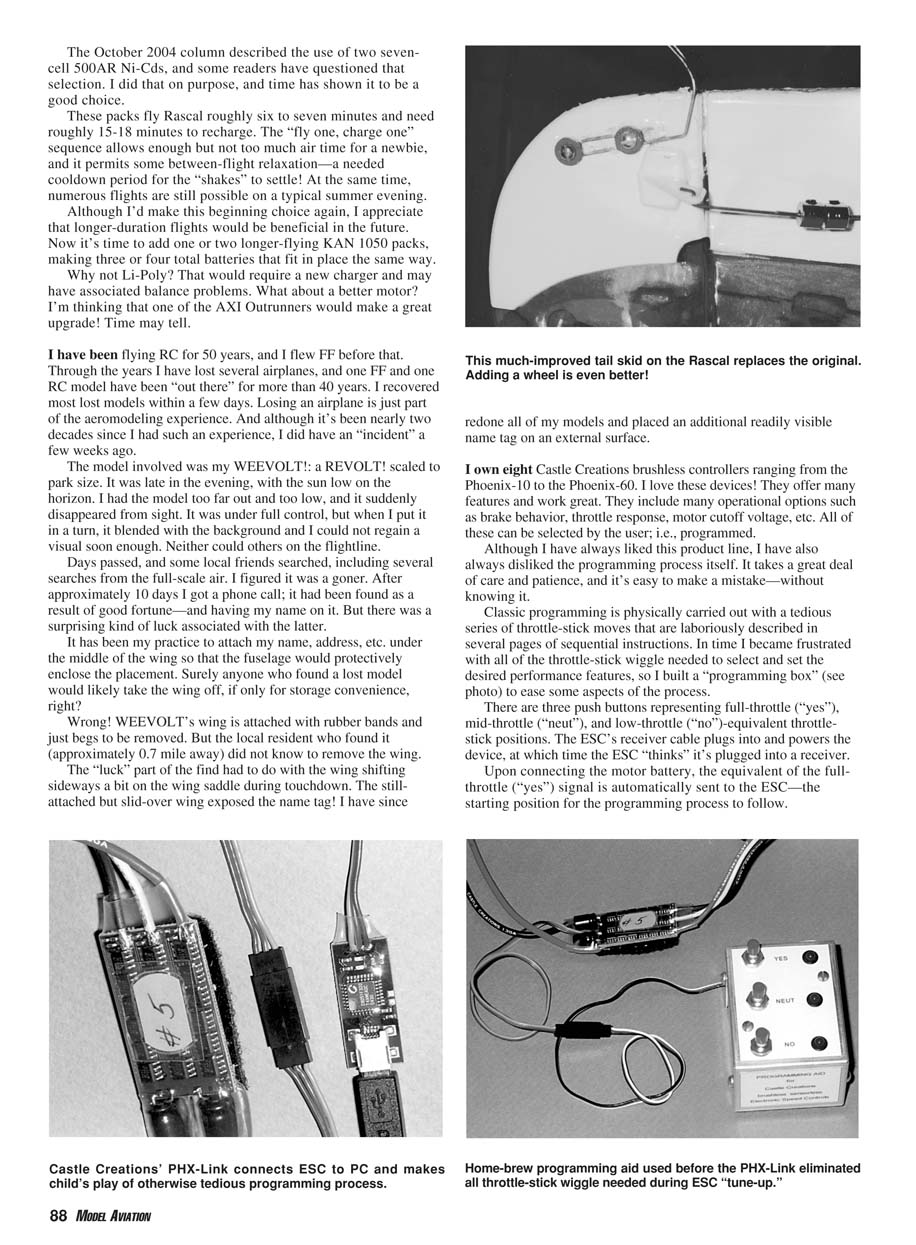
- A K&S 0.016 x 1/4-inch brass strip was formed over the top of the cabin structure and down each fuselage side. This brass strip was positioned at the wing center-section LE but over the fuselage cabin structure itself. Some careful bending and shaping permitted a good fit.
- Next, 1/2-inch-wide, 1/16-inch plywood pieces were glued in place inside the fuselage sides, centered where the brass-strip verticals fell. These plywood strips were epoxied to the existing light-plywood fuselage structure.
- Four #2 x 1/4-inch sheet-metal screws were used to firmly attach the brass to the outside of the fuselage. The screws had plenty of plywood to bite into, and the brass-strip band has admirably held the fuselage cabin structure in tight containment ever since.
The cost was pennies worth of material, but admittedly a serious cost to the innate beauty of the Rascal's appearance!
Landing gear and spreader
Another wear-and-tear point of this airplane (and many others) is the landing gear (LG). Newbies who are learning to land can really test the durability of any undercarriage. It turns out that the Rascal LG is quite sturdily installed (by design) in the fuselage and has never shown any signs of ripping out despite many hard encounters.
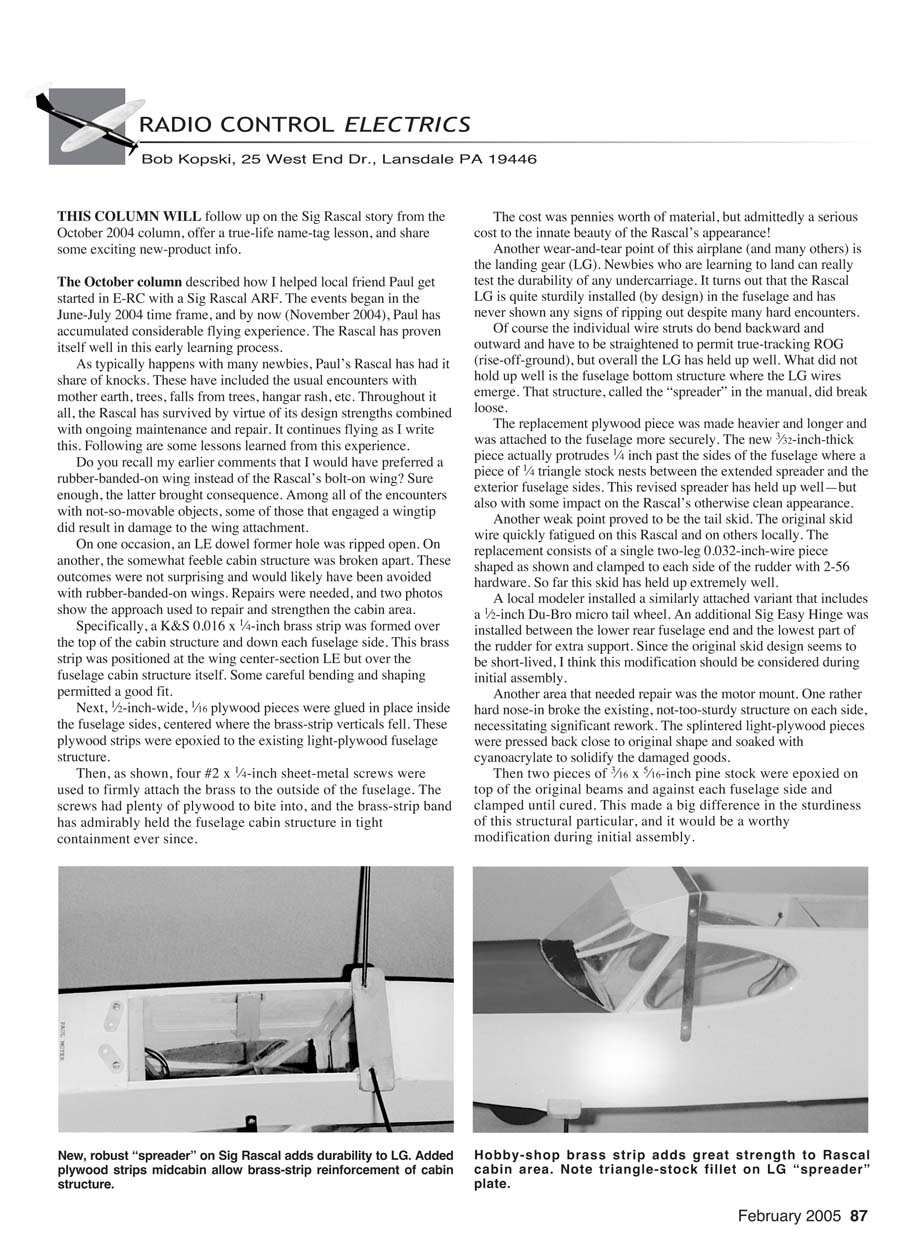
Of course the individual wire struts do bend backward and outward and have to be straightened to permit true-tracking ROG (rise-off-ground), but overall the LG has held up well. What did not hold up well is the fuselage bottom structure where the LG wires emerge. That structure, called the "spreader" in the manual, did break loose.
The replacement plywood piece was made heavier and longer and was attached to the fuselage more securely. The new 3/32-inch-thick piece actually protrudes 1/4 inch past the sides of the fuselage where a piece of 1/4-inch triangle stock nests between the extended spreader and the exterior fuselage sides. This revised spreader has held up well—but also with some impact on the Rascal's otherwise clean appearance.
Tail skid
Another weak point proved to be the tail skid. The original skid wire quickly fatigued on this Rascal and on others locally. The replacement consists of a single two-leg 0.032-inch-wire piece shaped like a wishbone and mounted with its center leg through a small hole in the fuselage floor. This skid has been far more durable than the original.
Battery choice and flight duration
The October 2004 column described the use of two seven-cell 500AR Ni-Cd packs, and some readers have questioned that selection. I did that on purpose, and time has shown it to be a good choice.
These packs fly the Rascal roughly six to seven minutes and need roughly 15–18 minutes to recharge. The "fly one, charge one" sequence allows enough but not too much air time for a newbie, and it permits some between-flight relaxation—a needed cooldown period for the "shakes" to settle! At the same time, numerous flights are still possible on a typical summer evening.
Although I'd make this beginning choice again, I appreciate that longer-duration flights would be beneficial in the future. Now it's time to add one or two longer-flying KAN 1050 packs, making three or four total batteries that fit in place the same way.
Why not Li-Poly? That would require a new charger and may have associated balance problems. What about a better motor? I'm thinking that one of the AXI Outrunners would make a great upgrade! Time may tell.
Lost model and the name-tag lesson
I have been flying RC for 50 years, and I flew free flight before that. Through the years I have lost several airplanes, and one free-flight and one RC model have been "out there" for more than 40 years. I recovered most lost models within a few days. Losing an airplane is just part of the aeromodeling experience. And although it's been nearly two decades since I had such an experience, I did have an "incident" a few weeks ago.
The model involved was my WEEVOLT! — a REVOLT! scaled to park size. It was late in the evening, with the sun low on the horizon. I had the model too far out and too low, and it suddenly disappeared from sight. It was under full control, but when I put it in a turn, it blended with the background and I could not regain a visual soon enough. Neither could others on the flightline.
Days passed, and some local friends searched, including several searches from the full-scale air. I figured it was a goner. After approximately 10 days I got a phone call; it had been found as a result of good fortune—and having my name on it. But there was a surprising kind of luck associated with the latter.
It has been my practice to attach my name, address, etc., under the middle of the wing so that the fuselage would protectively enclose the placement. Surely anyone who found a lost model would likely take the wing off, if only for storage convenience, right?
Wrong! WEEVOLT!'s wing is attached with rubber bands and just begs to be removed. But the local resident who found it (approximately 0.7 mile away) did not know to remove the wing.
The "luck" part of the find had to do with the wing shifting sideways a bit on the wing saddle during touchdown. The still-attached but slid-over wing exposed the name tag! I have since redone all of my models and placed an additional readily visible name tag on an external surface.
Castle Creations controllers and programming
I own eight Castle Creations brushless controllers ranging from the Phoenix-10 to the Phoenix-60. I love these devices! They offer many features and work great. They include many operational options such as brake behavior, throttle response, motor cutoff voltage, etc. All of these can be selected by the user; i.e., programmed.
Although I have always liked this product line, I have also always disliked the programming process itself. It takes a great deal of care and patience, and it's easy to make a mistake—without knowing it.
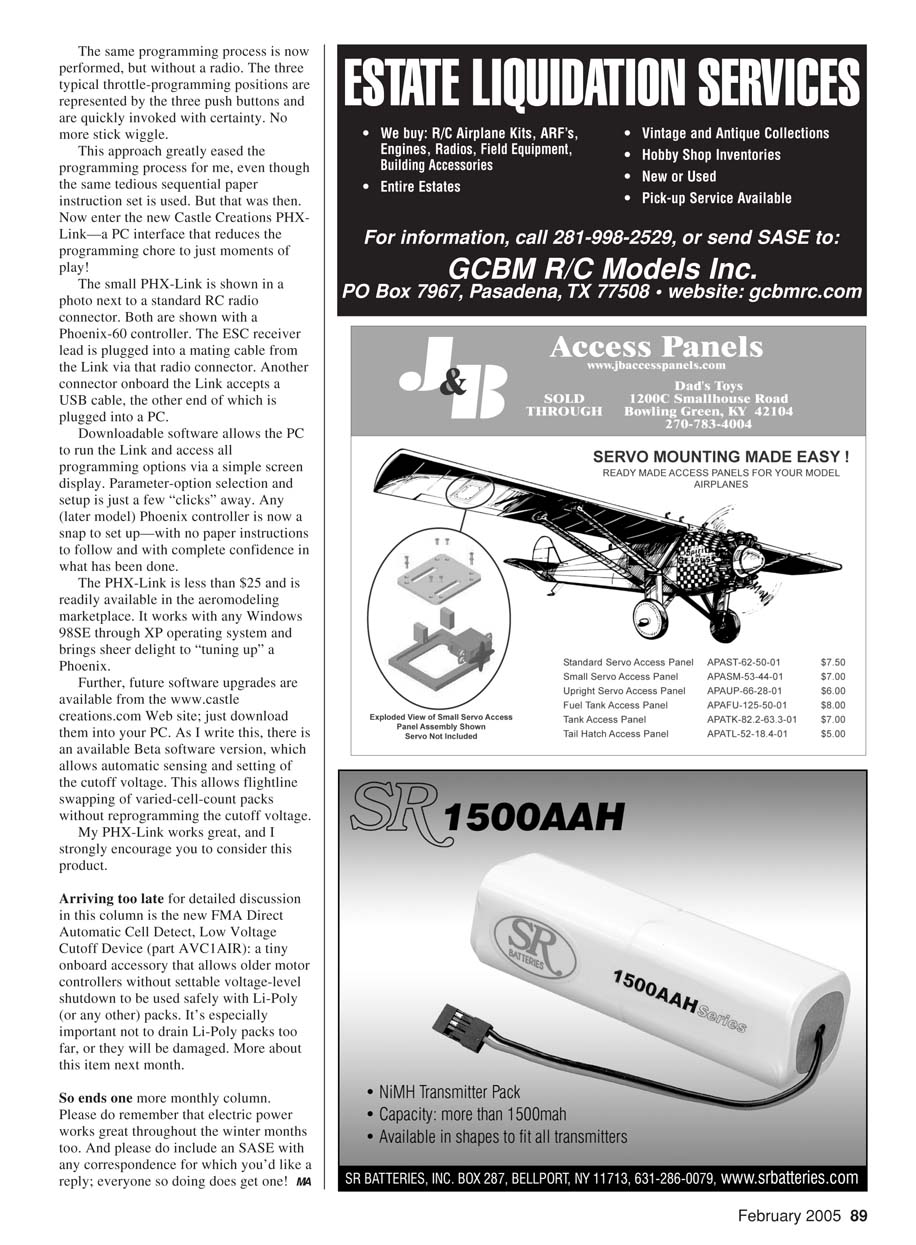
Classic programming is physically carried out with a tedious series of throttle-stick moves that are laboriously described in several pages of sequential instructions. In time I became frustrated with all of the throttle-stick wiggle needed to select and set the desired performance features, so I built a "programming box" (see photo) to ease some aspects of the process.
There are three push buttons representing full-throttle ("yes"), mid-throttle ("neut"), and low-throttle ("no")—equivalent throttle-stick positions. The ESC's receiver cable plugs into and powers the device, at which time the ESC "thinks" it's plugged into a receiver.
Upon connecting the motor battery, the equivalent of the full-throttle ("yes") signal is automatically sent to the ESC—the starting position for the programming process to follow. The same programming process is now performed, but without a radio. The three typical throttle-programming positions are represented by the three push buttons and are quickly invoked with certainty. No more stick wiggle.
This approach greatly eased the programming process for me, even though the same tedious sequential paper instruction set is used.
PHX-Link — PC programming interface
But that was then. Now enter the new Castle Creations PHX-Link — a PC interface that reduces the programming chore to just moments of play!
The small PHX-Link is shown in a photo next to a standard RC radio connector. Both are shown with a Phoenix-60 controller. The ESC receiver lead is plugged into a mating cable from the Link via that radio connector. Another connector onboard the Link accepts a USB cable, the other end of which is plugged into a PC.
Downloadable software allows the PC to run the Link and access all programming options via a simple screen display. Parameter-option selection and setup is just a few "clicks" away. Any (later model) Phoenix controller is now a snap to set up—with no paper instructions to follow and with complete confidence in what has been done.
The PHX-Link is less than $25 and is readily available in the aeromodeling marketplace. It works with any Windows 98SE through XP operating system and brings sheer delight to "tuning up" a Phoenix.
Further, future software upgrades are available from the www.castlecreations.com Web site; just download them into your PC. As I write this, there is an available Beta software version, which allows automatic sensing and setting of the cutoff voltage. This allows flightline swapping of varied-cell-count packs without reprogramming the cutoff voltage.
My PHX-Link works great, and I strongly encourage you to consider this product.
New product note: AVC1AIR
Arriving too late for detailed discussion in this column is the new FMA Direct Automatic Cell Detect, Low Voltage Cutoff Device (part AVC1AIR): a tiny onboard accessory that allows older motor controllers without settable voltage-level shutdown to be used safely with Li-Poly (or any other) packs. It's especially important not to drain Li-Poly packs too far, or they will be damaged. More about this item next month.
Closing
So ends one more monthly column. Please do remember that electric power works great throughout the winter months too. And please do include an SASE with any correspondence for which you'd like a reply; everyone so doing does get one!
MA
Transcribed from original scans by AI. Minor OCR errors may remain.

