
Radio Control Giants
Sal Calvagna [[email protected]]
Sal completes the dummy engine for his project Fokker D.VII
I was surprised by the volume of positive responses that I received concerning the D.VII build, and more specifically the article on its landing gear. Readers have submitted some great suggestions and their own designs, complete with instructions and photos. I want to share a couple of these in this column.
Before I get started I want to bring you up to date with the progress on my D.VII. I have finished the cowling by coating the exposed wood with finishing resin and gave the cowl a couple coats of Krylon satin white paint from a spray can. My Fokker will be finished in the Rittmeister scheme: Hermann Goering’s all-white Fokker D.VII. I chose Goering’s mount because, frankly, I’m lazy and the all-white D.VII is easy to finish. Most Fokker D.VIIs were finished with a lozenge pattern on part or most of the aircraft and I didn’t want to spend a great amount of time in the finish process.
In addition, my D.VII is being built specifically for a World War I contest that will be conducted by my local club throughout this flying season. The contest consists of:
- scale flight
- spot landings
- bomb drops
- mock dogfights
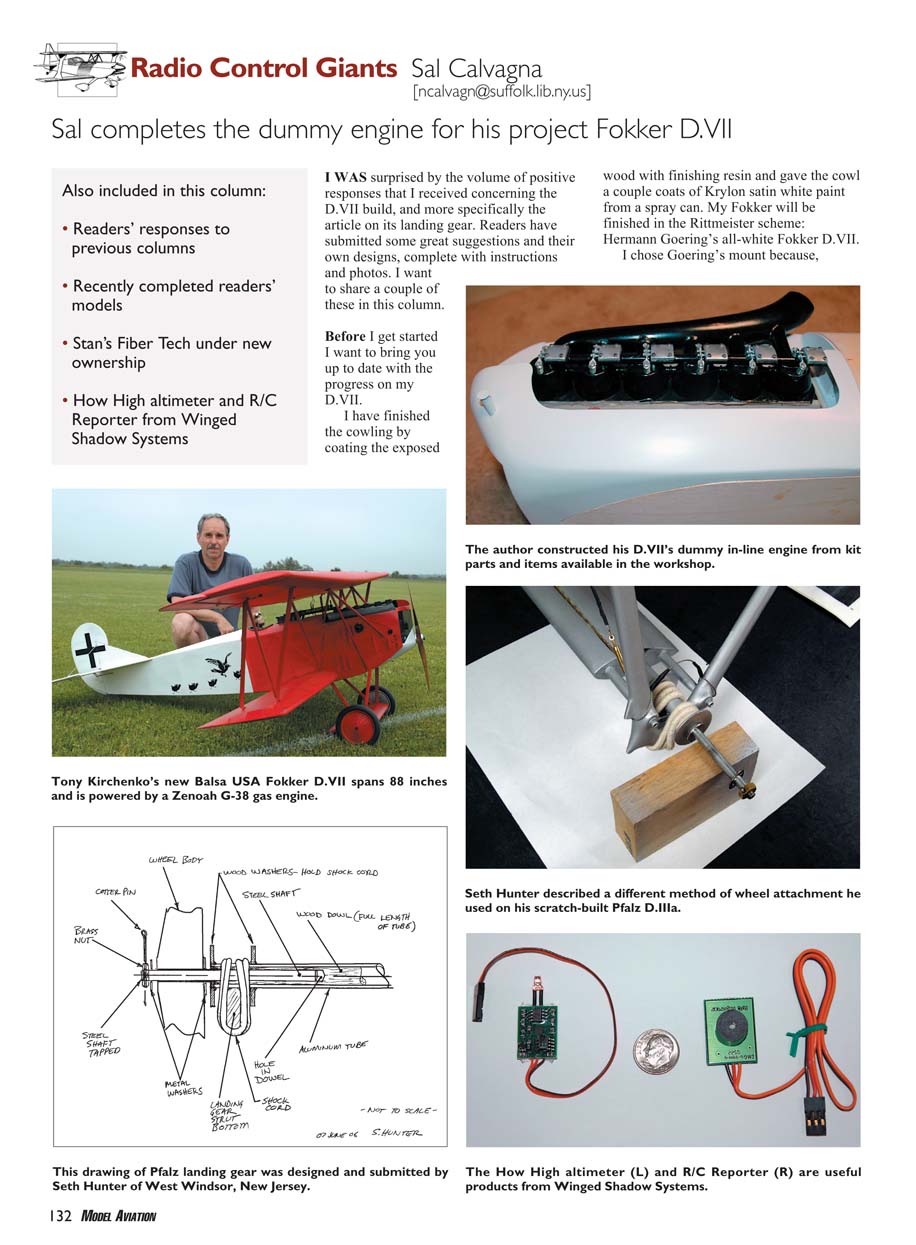
I chose the paint scheme in anticipation of numerous repairs; however, since my model would be boring because of lack of color and detail, I decided to put a little extra work into the appearance of the dummy six-cylinder in-line engine.
Balsa USA provided the ABS cylinder heads, an exhaust manifold (cardboard tube), and ABS exhaust. The company also supplied a wood dowel and balsa parts to fabricate the overhead cam. On my engine I used the provided ABS cylinder heads, the cardboard tubes for the exhaust manifold, and the ABS exhaust. I used aluminum tubing for the rocker arms, springs for the valve assembly, and some small hex-head bolts for the cam covers. The rocker arms and springs are held in place with hex-head wood screws—nothing fancy and I only spent a couple hours on the whole assembly.
Reproducing a somewhat scale-looking in-line engine or adding accurate detail to this model would not be possible without reference material. In addition to the books on the Fokker D.VII that I included in previous columns, I have found two wonderful websites that are documenting ground-up builds of the aircraft. These sites are a modeler’s dream, full of close-up photos documenting the construction of new Fokkers. The web pages are a must-see for anyone who is contemplating building a model of the D.VII:
- http://memorial.flight.free.fr/fokkerDVII_uk.html
- http://www.collectors-edition.com/FokkerD7/index_english.htm
On the subject of Fokker D.VIIs, one of the photos is of Tony Kirchenko of East Setauket, New York, with his newly completed Balsa USA D.VII. The photo was taken just before the model’s first successful flight. Tony built the model per the plans and chose the Zenoah G-38 for power—an excellent choice for powering the aircraft.
In the June 2006 MA, I described two methods that could be used to mount World War I wheels to an axle. I received the following email from fellow AMA modeler David Swanay of Tyngsborough, Massachusetts:
"I enjoyed your article on the D.VII landing gear and hope you will show more details next month.
"Regarding the two methods you described for attaching wheels with the brass tubing, there is a third way that is quite easy. It is similar to your ‘B’ approach but without the epoxy. Just drill the brass tubing so the screw for the collar goes through the tube and tightens against the music wire. I have done it this way on several airplanes and it allows removal of the tubing if ever damaged or perhaps for attachment of floats where you wouldn’t want the brass tubing at all."
David, your third method is simple and effective. Why didn’t I think of it? Thanks for taking the time to respond to the column and the best to you with all your future projects.
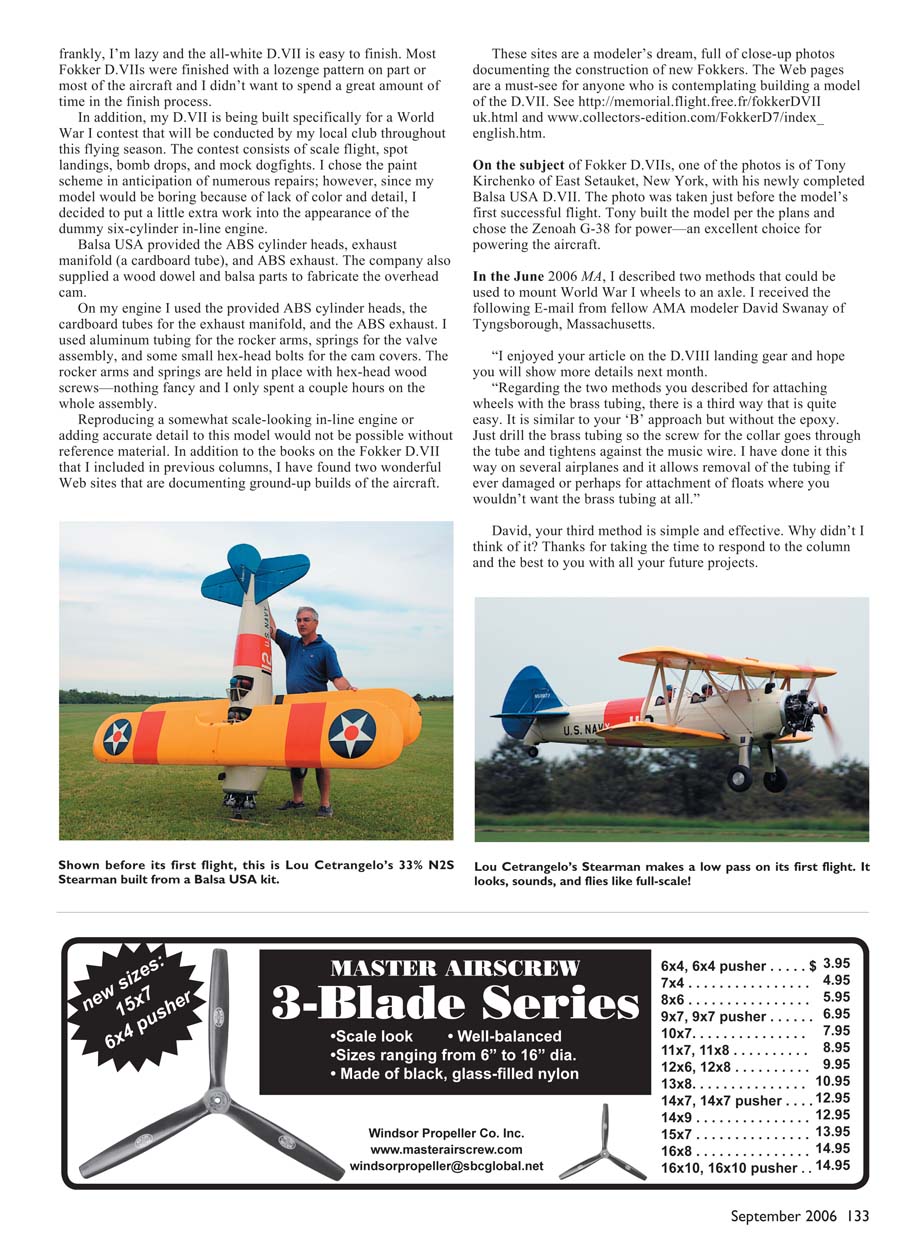
Seth Hunter, a member of the Mercer County RC Society of West Windsor, New Jersey, saw my column on the Fokker landing gear and submitted the following along with a hand drawing and photograph of his gear on his scratch-built Pfalz:
"I liked your article about World War I 1/4-scale wheel attachment. As you say, many ways to skin a cat! Since you invited ideas, here's another method I'm using on my Pfalz D.IIIa (the airplane is my design, not yet finished).
"One 1/2-inch OD aluminum tube runs through the landing gear plane as the main axle. I epoxied a dowel inside to increase stiffness without adding much weight, and to hold narrower-diameter steel inserts to form a shoulder in the axle. I drilled a 1/4-inch-diameter hole 2 inches deep into the ends of each dowel and epoxied 1/4-inch steel stub shafts (approximately 3 inches long) into each end, and tapped the end of the steel shafts 1/4-20.
"I ground a brass 1/4-20 nut to make it thinner, threaded it onto the shaft, and cross-match-drilled the nut and shaft for a cotter pin. I epoxied some large plywood washers onto the aluminum section to trap the bungee and added two steel washers to bracket the wheel. I added Proctor bungee cord and 1/32 x 7 SS retaining cables. I used a Nelson hinge on the access cover.
"By the way, the retaining cables (as with all the rigging) are spliced, and the splices are covered with black heat-shrink tubing. Splicing the wire is tricky, but eliminates the need to use clunky swage fittings. (I haven't figured out a way to put a thimble in the eye splice, but I am still trying!) The landing-gear struts are a combination of aluminum tubing, brass, wood, and fiberglass.
"Thanks for the great magazine!"
Thanks for the kind words, Seth, and thank you for taking the time to submit your fine gear design. Your scratch-built model looks like a work of art.
It's great to see other modelers' accomplishments. While we gather at the field to fly and enjoy each other's company, modeling is a great way to show individual achievement.
Keep up the fine work and thanks again for sharing!
Under New Ownership
Stan's Fiber Tech is now owned by longtime modeler Brad Hensley of Santa Maria, California. Brad has been around aviation all his life. He's a third-generation U.S. Air Force service member, a Federal Aviation Administration aircraft inspector, and is the owner of Navation, a full-scale aircraft maintenance business at Santa Maria's airport.
Brad has been interested in modeling from early in his youth and wanted to become more involved with the hobby he enjoys so much.
With the purchase of Stan's Fiber Tech, Brad's goal is to continue to provide high-quality epoxy-fiberglass/carbon-fiber cowls, wheel pants, fairings, and floats. In addition, he plans to offer a foam-cutting service and vacuum-formed canopies for all sizes of models.
For more information on Stan's Fiber Tech:
- Web: http://www.stansfibertech.com
- Mail: Brad Hensley, 3125 Liberator St., Santa Maria, CA 93455
- Phone: (805) 922-3262
How high is up?
Have you ever been involved in a discussion with a fellow modeler concerning how high a model was during a flight? I must have heard this a thousand times at my local field.
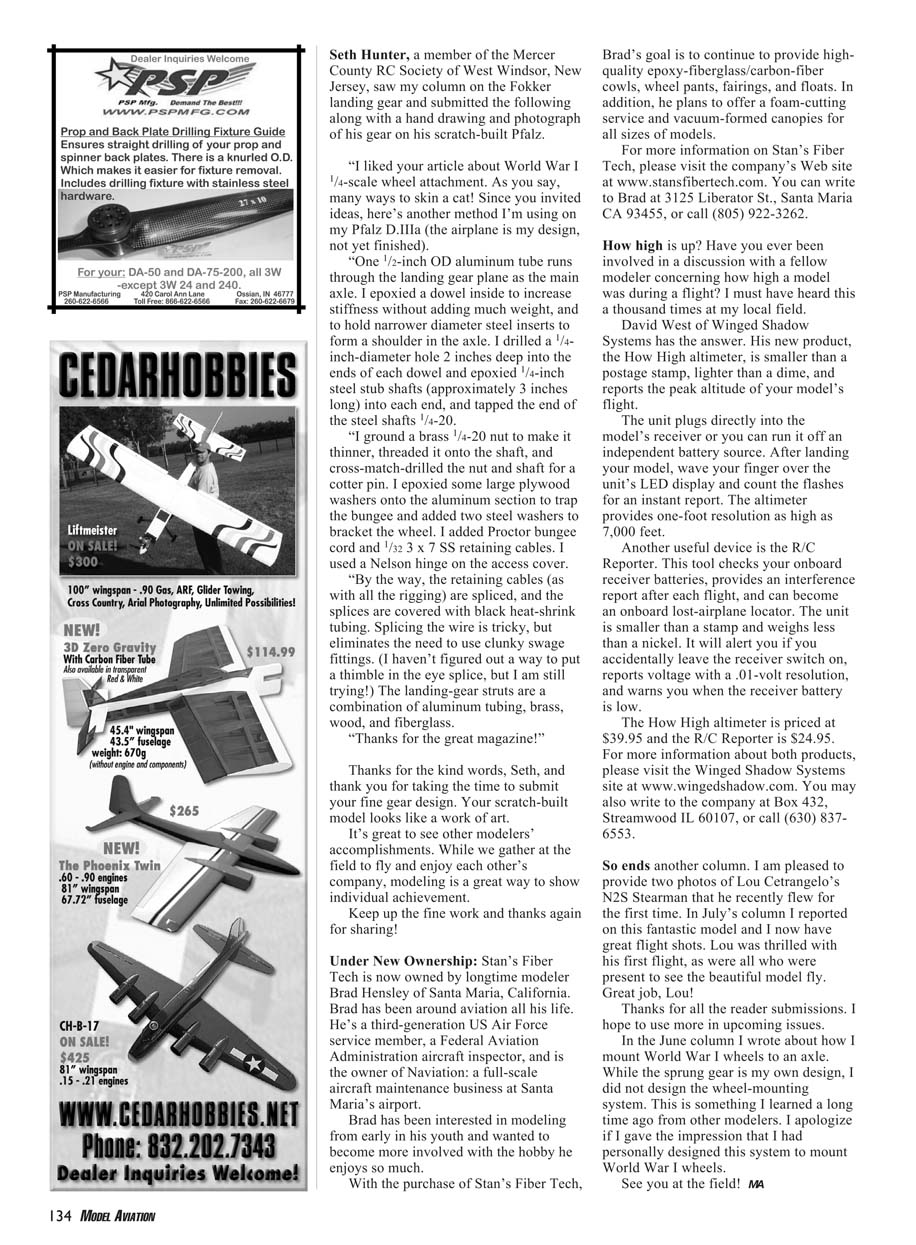
David West of Winged Shadow Systems has the answer. His new product, the How High altimeter, is smaller than a postage stamp, lighter than a dime, and reports the peak altitude of your model's flight.
The unit plugs directly into the model's receiver or you can run it off an independent battery source. After landing your model, wave your finger over the unit's LED display and count the flashes for an instant report. The altimeter provides one-foot resolution as high as 7,000 feet.
Another useful device is the R/C Reporter. This tool checks your onboard receiver batteries, provides an interference report after each flight, and can become an onboard lost-airplane locator. The unit is smaller than a stamp and weighs less than a nickel. It will alert you if you accidentally leave the receiver switch on, reports voltage with a 0.01-volt resolution, and warns you when the receiver battery is low.
Product details and pricing:
- How High altimeter: $39.95
- Features: peak-altitude reporting, 1 ft resolution up to 7,000 ft, plugs into receiver or runs on separate battery
- R/C Reporter: $24.95
- Features: receiver-battery check, interference report, onboard lost-plane locator, 0.01 V resolution, low-voltage alert
For more information about both products, visit Winged Shadow Systems:
- Web: http://www.wingshadow.com
- Mail: Winged Shadow Systems, Box 432, Streamwood, IL 60107
- Phone: (630) 837-6553
So ends another column. I am pleased to provide two photos of Lou Cetrangelo's N2S Stearman that he recently flew for the first time. In July's column I reported on this fantastic model and now I have great flight shots. Lou was thrilled with his first flight, as were all who were present to see the beautiful model fly. Great job, Lou!
Thanks for all the reader submissions. I hope to use more in upcoming issues. In the June column I wrote about how I mount World War I wheels to an axle. While the sprung gear is my own design, I did not design the wheel-mounting system. This is something I learned a long time ago from other modelers. I apologize if I gave the impression that I had personally designed this system to mount World War I wheels.
See you at the field!
Transcribed from original scans by AI. Minor OCR errors may remain.

