
Radio Control Giants — Sal Calvagna
How to make wing fillets using blue foam
In the last few columns I addressed some of the ways foam can be useful in building RC Giant models. This month I'll describe the method I used to construct the large wing fillets on my 1/4-scale Russian Polikarpov I-16 "Rata." This is another fine example of how blue foam can make a seemingly daunting task easier to manage.
The wing fillets on this subject are extremely big, both in width and length. At their widest point, the fillets add approximately 10 inches to the width of the fuselage and extend past the trailing edge (TE) of the wing to just shy of the horizontal stabilizer. In addition, the fillet shape makes it difficult, at least for me, to plank using strips of 1/8" balsa.
Had I attempted the planking method, I'm sure I would have sanded through the material in many places or left paper-thin areas that would have been too weak to handle, even with an outer layer of fiberglass cloth.
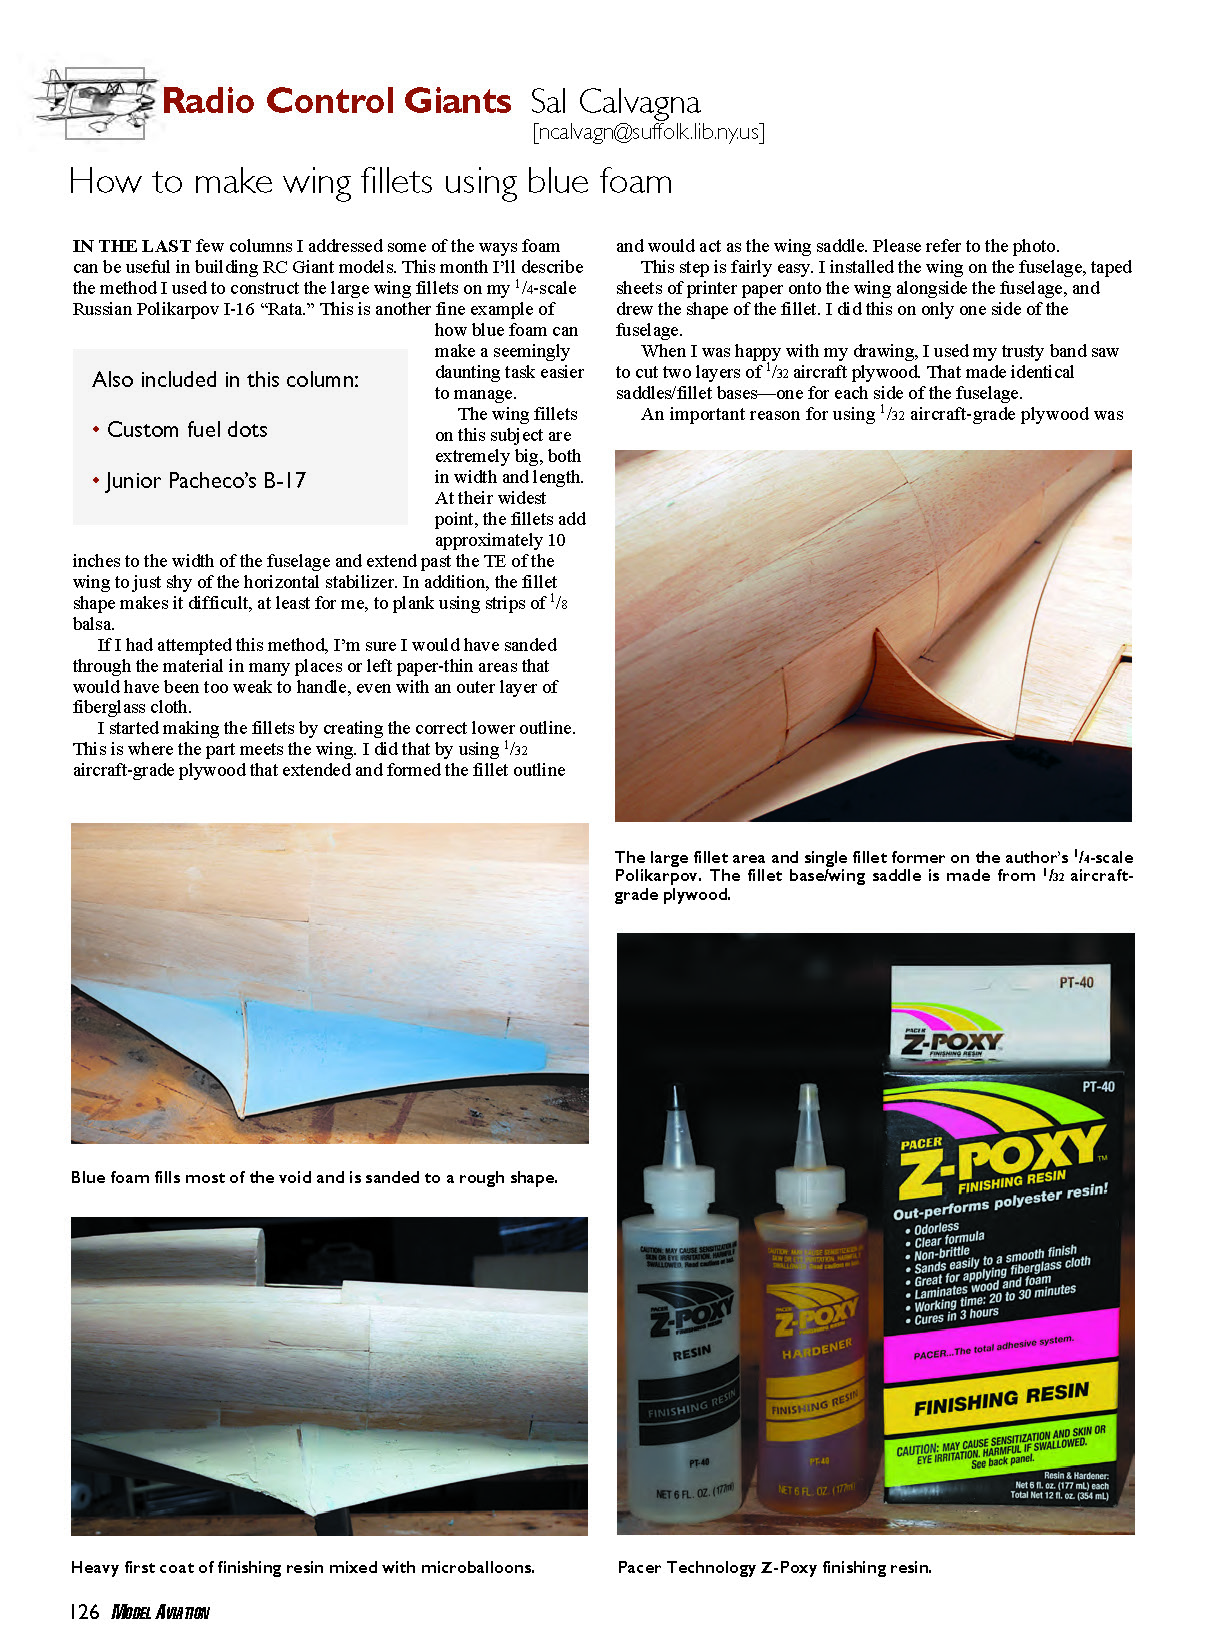
I started making the fillets by creating the correct lower outline—this is where the part meets the wing. I did that by using 1/32" aircraft-grade plywood that extended and formed the fillet outline and would act as the wing saddle. Please refer to the photo.
This step is fairly easy. I installed the wing on the fuselage, taped sheets of printer paper onto the wing alongside the fuselage, and drew the shape of the fillet. I did this on only one side of the fuselage.
When I was happy with my drawing, I used my trusty bandsaw to cut two layers of 1/32" aircraft plywood. That made identical saddles/fillet bases—one for each side of the fuselage.
An important reason for using 1/32" aircraft-grade plywood was that it created a strong, hangar-rash–resistant, sharp edge where the fillet met the wing. The plywood creates a smooth transition from fillet to wing that tapers at the outside to a fine edge. Balsa would not provide the strength needed and would be too thick for a crisp transition.
The next step was to mark the proper height on the fuselage. I penciled a line on its surface where the fillet should have ended. At this point I had the fillet shape where it met the wing and where it would meet the fuselage. However, that did not give me the radius or curve that the fillet would take from the high point on the fuselage to the low point of the wing. I was able to determine that by making two fillet formers from 1/8" balsa—one for each side of the fuselage. No mathematics were required; I simply eyeballed what I thought was correct from the reference photos. Once installed, I had the curve template that would carry through the entire fillet.
It was time to fill in the large voids. I rough-cut pieces of blue foam, epoxied them in place, and used a hobby knife to whittle the foam to the approximate shape. I didn't worry about getting anywhere close to the correct shape; I would use handheld 80-grit sandpaper to contour further. Even during sanding, it is unimportant to get the foam fillet to a finished shape. It is better to remove more foam than needed, because the finished product will be obtained by applying a coat of finishing resin mixed with microballoons, which can be easily shaped and sanded when dry.
If you don't know what microballoons are, following is a description I found on the Internet: "Microballoons are a lightweight free-flowing white powder consisting of microscopic, hollow, glass ball clusters. Microballoons are a specially processed silica glass, classified to ensure uniform particle size and product performance and is hydrophobic."
They disperse extremely well when mixed with various resins or plaster. Microballoons do not absorb resin and therefore provide maximum filler function. Cured systems are more water resistant and have a higher temperature resistance in addition to being more thermally and electrically resistant.
A photo shows how I spread the first heavy layer of finishing resin mixed with microballoons. Keep in mind that when mixing microballoons, the more material you add to the resin, the easier it will be to sand when dry.
The mixture I use is not scientific. I add microballoons to the mixed resin until the paste has lost all its sheen. You can usually obtain microballoons at your local hobby store or from any of the large Internet hobby suppliers.
Check in upcoming columns for the finished results of the fillet and more about the Rata build!
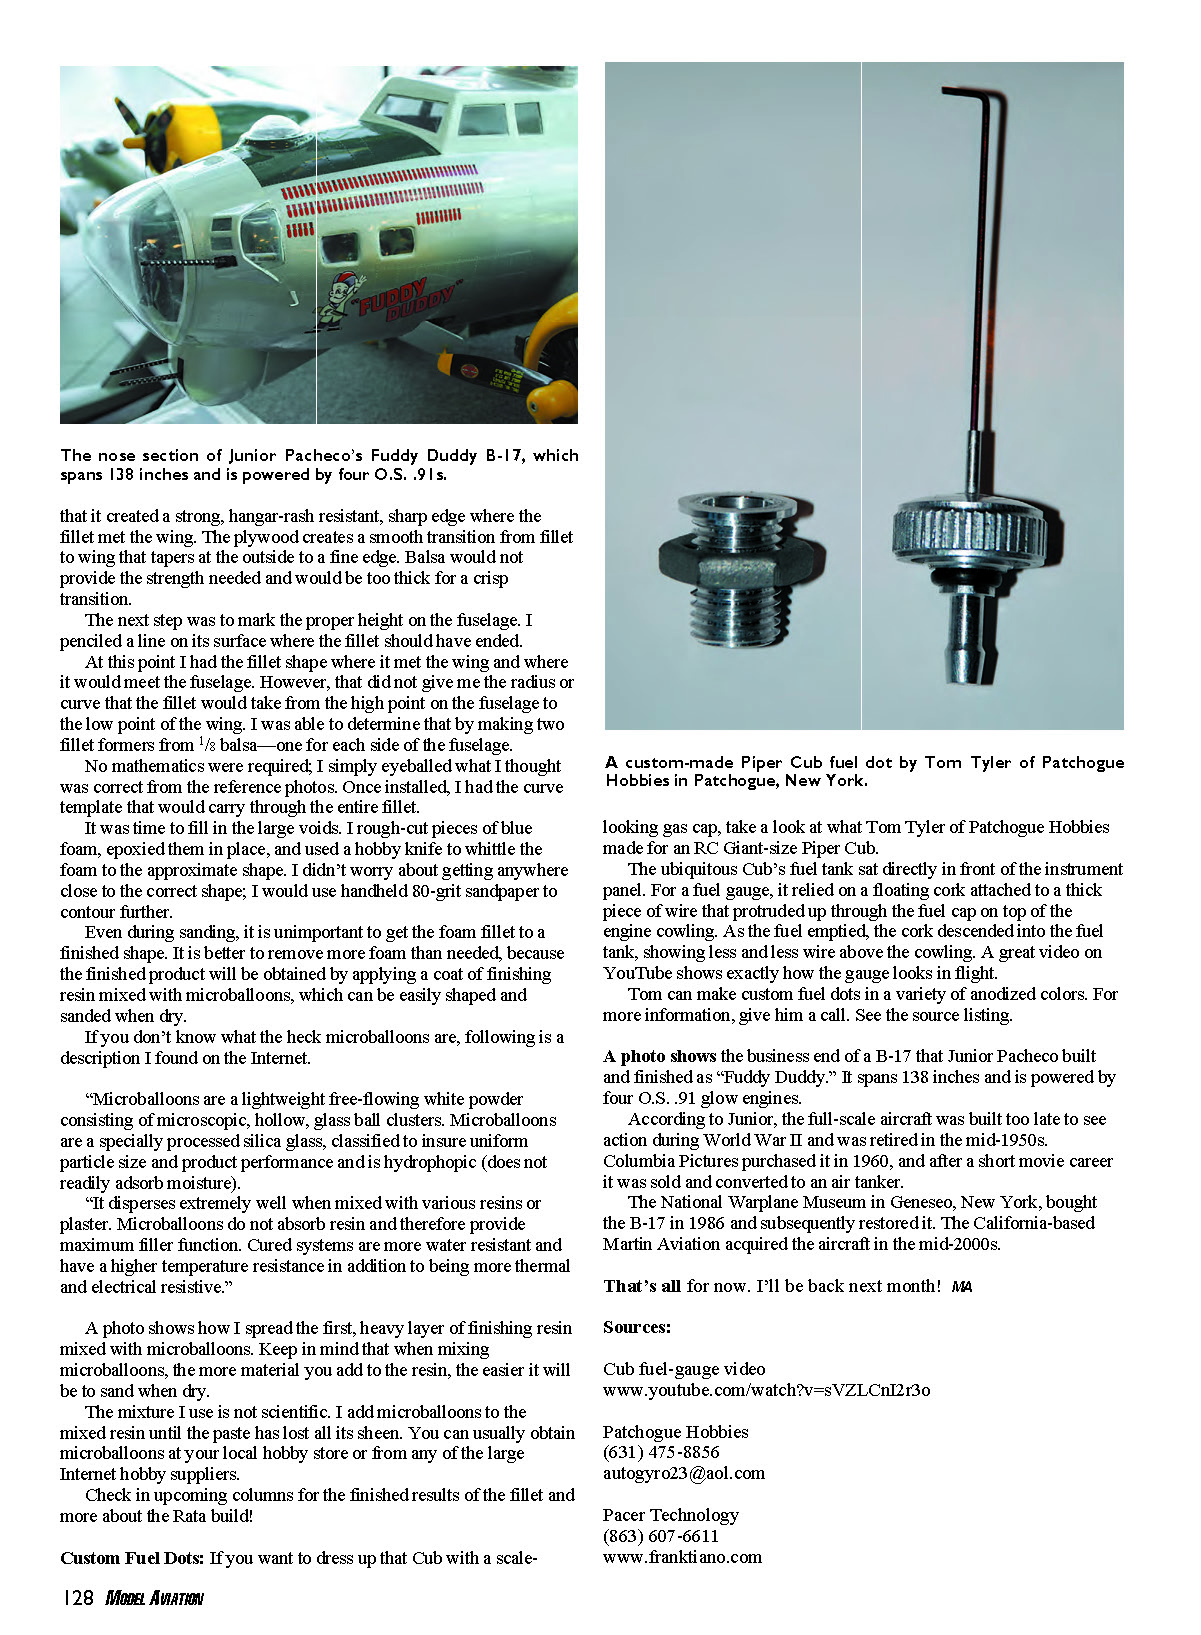
Custom Fuel Dots
If you want to dress up that Cub with a scale-looking gas cap, take a look at what Tom Tyler of Patchogue Hobbies made for an RC Giant-size Piper Cub.
The ubiquitous Cub’s fuel tank sat directly in front of the instrument panel. For a fuel gauge, it relied on a floating cork attached to a thick piece of wire that protruded up through the fuel cap on top of the engine cowling. As the fuel emptied, the cork descended into the fuel tank, showing less and less wire above the cowling. A great video on YouTube shows exactly how the gauge looks in flight.
Tom can make custom fuel dots in a variety of anodized colors. For more information, give him a call. See the source listing.
A photo shows the business end of a B-17 that Junior Pacheco built and finished as “Fuddy Duddy.” It spans 138 inches and is powered by four O.S. .91 glow engines.
According to Junior, the full-scale aircraft was built too late to see action during World War II and was retired in the mid-1950s. Columbia Pictures purchased it in 1960, and after a short movie career it was sold and converted to an air tanker.
The National Warplane Museum in Geneseo, New York, bought the B-17 in 1986 and subsequently restored it. The California-based Martin Aviation acquired the aircraft in the mid-2000s.
That's all for now. I'll be back next month!
Sources:
- Cub fuel-gauge video: www.youtube.com/watch?v=sVZLCnI2r3o
- Patchogue Hobbies
- (631) 475-8856
- [email protected]
- Pacer Technology
- (863) 607-6611
- www.franktiano.com
Transcribed from original scans by AI. Minor OCR errors may remain.

