

RADIO CONTROL HELICOPTERS - 2003/11
Dan Williams 27 Treeline Dr., Liverpool NY 13090 E-mail: [email protected]
Introduction
It seems as though the weather in the Northeast is finally settling down into a nice summer pattern. We actually got our first Saturday without rain in quite some time. Every weekend had been a one-day washout or a complete washout. Finally, it's time to fly!
As I promised, this month I'm including a review of the FMA Direct Co-Pilot. This handy little device will help keep a model level during flight by using infrared technology to sense the difference between the sky and ground infrared levels. A newbie pilot can use it to help in the first stages of learning to hover. It can also be used in a fixed-wing aircraft, but I'm going to write about the helicopter application.
How the Co-Pilot Works
The Co-Pilot uses infrared sensors to receive information from four viewpoints: one for each 90° quadrant around a circle. This allows the sensor to view all the way around the model. It does not "see" the horizon as other stabilizers do; instead, it uses the infrared "heat" given off by the earth versus the sky. It looks for a change in the infrared heat signal based on how it was calibrated.
As the infrared sensor angle changes toward the sky, the amount of heat detected drops. The sensor on the opposite side of the model will increase as its angle changes toward the earth. The computer decides which servos—fore-aft (elevator) or right-left (aileron)—to actuate to bring the model back to the calibration values.
What's in the Package
As packaged, the unit comes with:
- the Co-Pilot infrared sensor
- the Co-Pilot computer
- ribbon cable for connecting the sensor to the computer
- an infrared calibration button
- Velcro for installing the components on the aircraft
- the instruction manual
It is recommended that the model be completely set up with the radio installed and working properly before you connect the Co-Pilot.
Another important thing is that if you are going to fly Futaba PCM (Pulse Code Modulation), the Co-Pilot needs to have digital servo buffers connected between the receiver and the computer. FMA Direct part number 505SB will take care of that. I chose to fly FM for this experiment, so I opted to use the FMA Direct Quantum 8 receiver with my Futaba 9Z transmitter.
Installation
I read the manual before installing the Co-Pilot. What a novel idea: to read the instructions first. Since I was going to trust this thing to fly in one of my 3-D machines, I wanted to be sure I was doing the right thing. The basic concept of how the Co-Pilot works was straightforward and well explained in the manual.
However, reading all of the setup and calibration instructions became slightly overwhelming until I sat down with the helicopter and went through the procedure. Things quickly became clear. The pictures included in the manual are for fixed-wing and helicopter installation. The photos are clear and concise, but for the Tim Taylor types out there, you must actually read the instructions—not just look at the pictures.
I installed the Co-Pilot in my Bergen Intrepid 46 with an O.S. .50 engine, Futaba 9202 servos, 600-millimeter V-Blades, and KSJ flybar paddles. The helicopter is outfitted for 3-D flight, which is probably not the best choice for testing the Co-Pilot, but I decided to see what would happen.
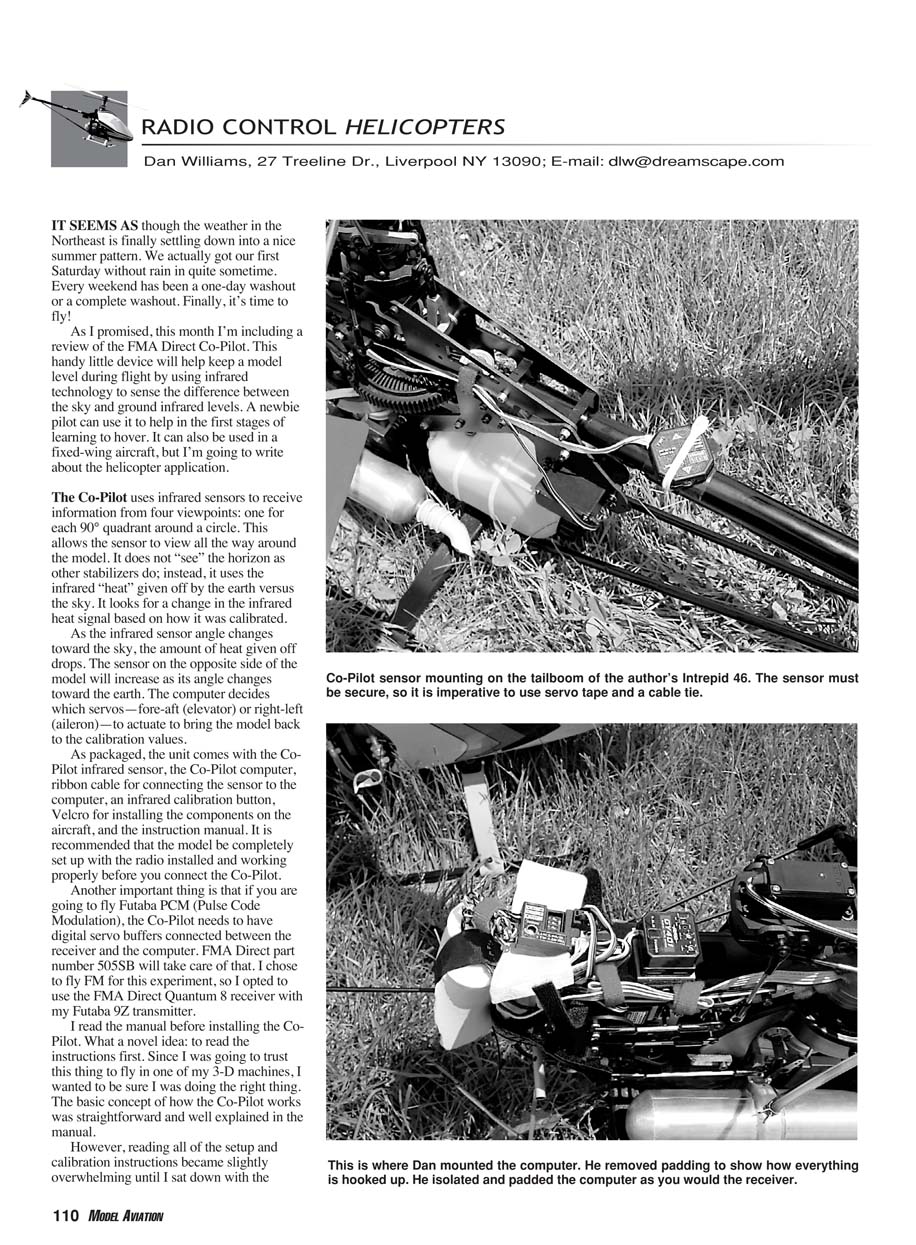
I mounted the sensor on the tailboom near the back end of the side frames, as suggested in the manual. I used double-stick tape on the tailboom and a plastic cable tie around the sensor and tailboom. Velcro came with the package, but the instructions discussed a cable tie and double-stick tape, and they specifically instructed not to use the Velcro for helicopter installations.
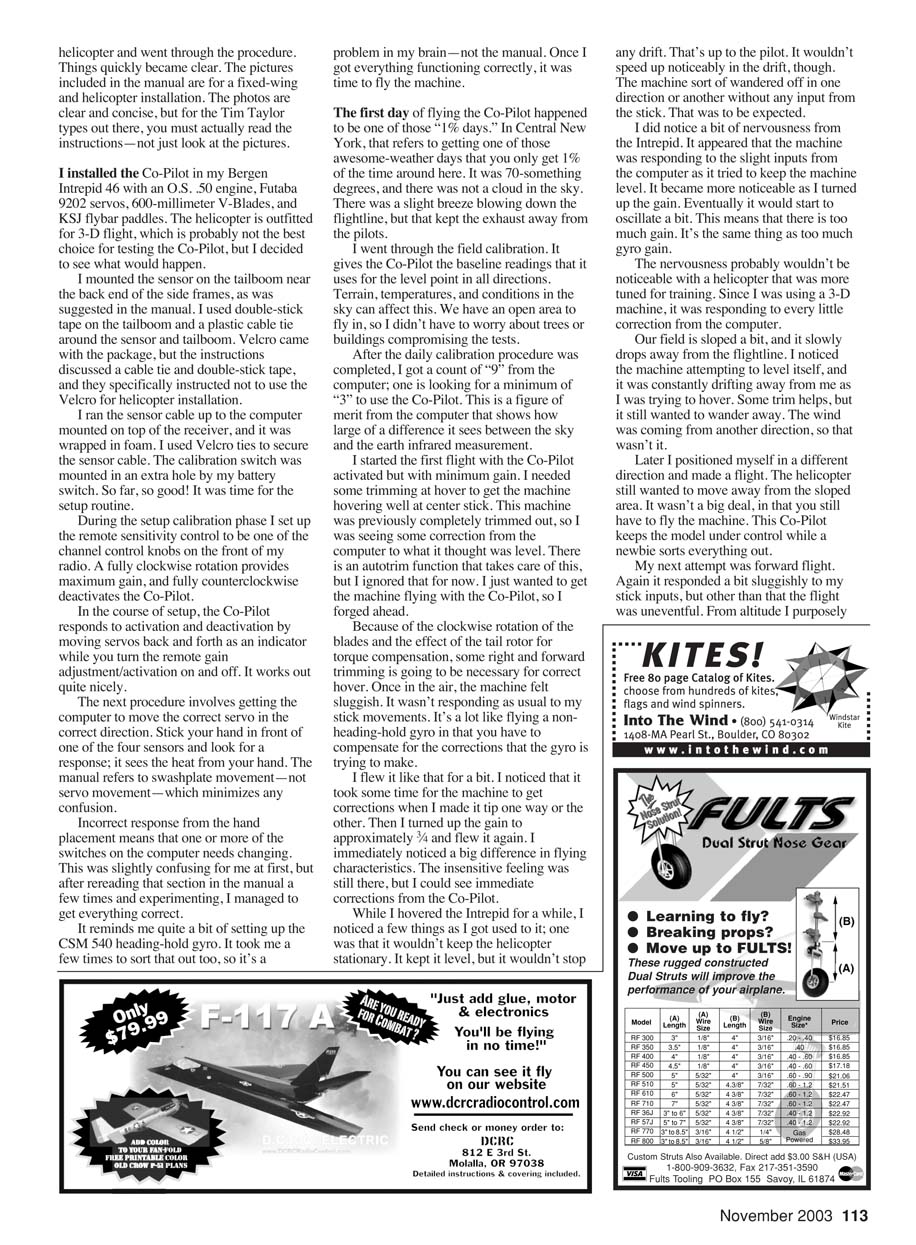
I ran the sensor cable up to the computer mounted on top of the receiver, and it was wrapped in foam. I used Velcro ties to secure the sensor cable. The calibration switch was mounted in an extra hole by my battery switch. So far, so good! It was time for the setup routine.
Setup and Calibration
During setup and calibration I set the remote sensitivity control to be one of the channel control knobs on the front of my radio. A fully clockwise rotation provides maximum gain, and fully counterclockwise deactivates the Co-Pilot.
In the course of setup, the Co-Pilot responds to activation and deactivation by moving servos back and forth as an indicator while you turn the remote gain adjustment/activation on and off. It works out quite nicely.
The next procedure involves getting the computer to move the correct swashplate motion in the correct direction. Stick your hand in front of one of the four sensors and look for a response; it sees the heat from your hand. The manual refers to swashplate movement — not servo movement — which minimizes any confusion.
Incorrect response from the hand placement means that one or more of the switches on the computer needs changing. This was slightly confusing for me at first, but after rereading that section in the manual a few times and experimenting, I managed to get everything correct.
It reminds me quite a bit of setting up the CSM 540 heading-hold gyro. It took me a few tries to sort that out too, so it’s a problem in my brain — not the manual. Once I got everything functioning correctly, it was time to fly the machine.
Flight Testing: First Day
The first day of flying the Co-Pilot happened to be one of those “1% days.” In Central New York, that refers to getting one of those awesome-weather days that you only get 1% of the time around here. It was 70-something degrees, and there was not a cloud in the sky. There was a slight breeze blowing down the flightline, but that kept the exhaust away from the pilots.
I went through the field calibration. It gives the Co-Pilot the baseline readings that it uses for the level point in all directions. Terrain, temperatures, and conditions in the sky can affect this. We have an open area to fly in, so I didn’t have to worry about trees or buildings compromising the tests.
After the daily calibration procedure was completed, I got a count of "9" from the computer; one is looking for a minimum of "3" to use the Co-Pilot. This is a figure of merit from the computer that shows how large a difference exists between the sky and the earth infrared measurement.
I started the first flight with the Co-Pilot activated but with minimum gain. I needed some trimming at hover to get the machine hovering well at center stick. This machine was previously completely trimmed out, so I was seeing some correction from the computer to what it thought was level. There is an auto-trim function that takes care of this, but I ignored that for now. I just wanted to get the machine flying with the Co-Pilot, so I forged ahead.
Because of the clockwise rotation of the blades and the effect of the tail rotor for torque compensation, some right and forward trimming is necessary for correct hover. Once in the air, the machine felt sluggish. It wasn’t responding as usual to my stick movements. It’s a lot like flying a non-heading-hold gyro in that you have to compensate for the corrections that the gyro is trying to make.
I flew it like that for a bit. I noticed that it took some time for the machine to get corrections when I made it tip one way or the other. Then I turned up the gain to approximately 3/4 and flew it again. I immediately noticed a big difference in flying characteristics. The insensitive feeling was still there, but I could see immediate corrections from the Co-Pilot.
While I hovered the Intrepid for a while, I noticed a few things as I got used to it: one was that it wouldn’t keep the helicopter stationary. It kept it level, but it wouldn’t stop any drift. That’s up to the pilot. It wouldn’t speed up noticeably in the drift, though. The machine sort of wandered off in one direction or another without any input from the stick. That was to be expected.
I did notice a bit of nervousness from the Intrepid. It appeared that the machine was responding to the slight inputs from the computer as it tried to keep the machine level. It became more noticeable as I turned up the gain. Eventually it would start to oscillate a bit. This means that there is too much gain. It’s the same thing as too much gyro gain.
The nervousness probably wouldn’t be noticeable with a helicopter that was more tuned for training. Since I was using a 3-D machine, it was responding to every little correction from the computer.
Our field is sloped a bit, and it slowly drops away from the flightline. I noticed the machine attempting to level itself, and it was constantly drifting away from me as I was trying to hover. Some trim helps, but it still wanted to wander away. The wind was coming from another direction, so that wasn’t it.
Later I positioned myself in a different direction and made another flight. The helicopter still wanted to move away from the sloped area. It wasn’t a big deal, in that you still have to fly the machine. This Co-Pilot keeps the model under control while a novice sorts everything out.
My next attempt was forward flight. Again it responded a bit sluggishly to my stick inputs, but other than that the flight was uneventful. From altitude I purposely threw the Intrepid on its side, and the Co-Pilot immediately corrected it back to level. The machine kept moving a bit in that direction, but that was it. It was back to level in less than a second.
I played around with it in various attitudes in the air, letting the computer reestablish level flight. In every case the helicopter was back to level before anything major could happen. This was an unusual case because new pilots shouldn't be up that high doing crazy things. On the other hand, they probably could end up like that. The Co-Pilot doesn't do everything for you.
My last flight of the day was an extreme experiment. In the manual, FMA Direct warns you not to fly the machine inverted while under Co-Pilot control. I did it anyway, and the helicopter immediately flipped back over! I could flip the machine sideways to inverted just long enough to have the Co-Pilot flip it back over level. I never could get it to flip backward or forward; the Co-Pilot wouldn't let me. This has nothing to do with this review, but I thought it was cool.
Flight Testing: Overcast Day and Other Observations
On my next flying day the sky was dark and overcast. I only got a count of "4" from the computer, but I flew anyway. I didn't notice anything different with its flying characteristics, but I did notice the raindrops on my transmitter and stopped flying.
I found nothing that I would consider a real problem with setting up or flying the Co-Pilot. Would it help a new pilot? I think it would, with the understanding that it will not fly the helicopter for him or her. It does a good job of keeping the machine level. The pilot has to do the rest.
Is it worth the investment for a new pilot? I'm donating the Co-Pilot to my club to be used with the next new flier, and I'll see how he or she progresses with the device's help.
As of this writing, the Co-Pilot is incapable of working with a CCPM (Cyclic Collective Pitch Mixing) helicopter. It is being developed by FMA Direct and should be available soon.
For more information contact FMA Direct at:
- 5716A Industry Ln., Frederick, MD 21704
- Phone: (800) 343-2934
- Web: www.fmadirect.com
That's it for this month. Success is found at the bottom of each gallon of fuel burned. You've got to burn it to learn it! MA
Transcribed from original scans by AI. Minor OCR errors may remain.

