
Thoughts about converting older ducted-fan models to turbine power
By Jim Hiller [[email protected]]
Introduction
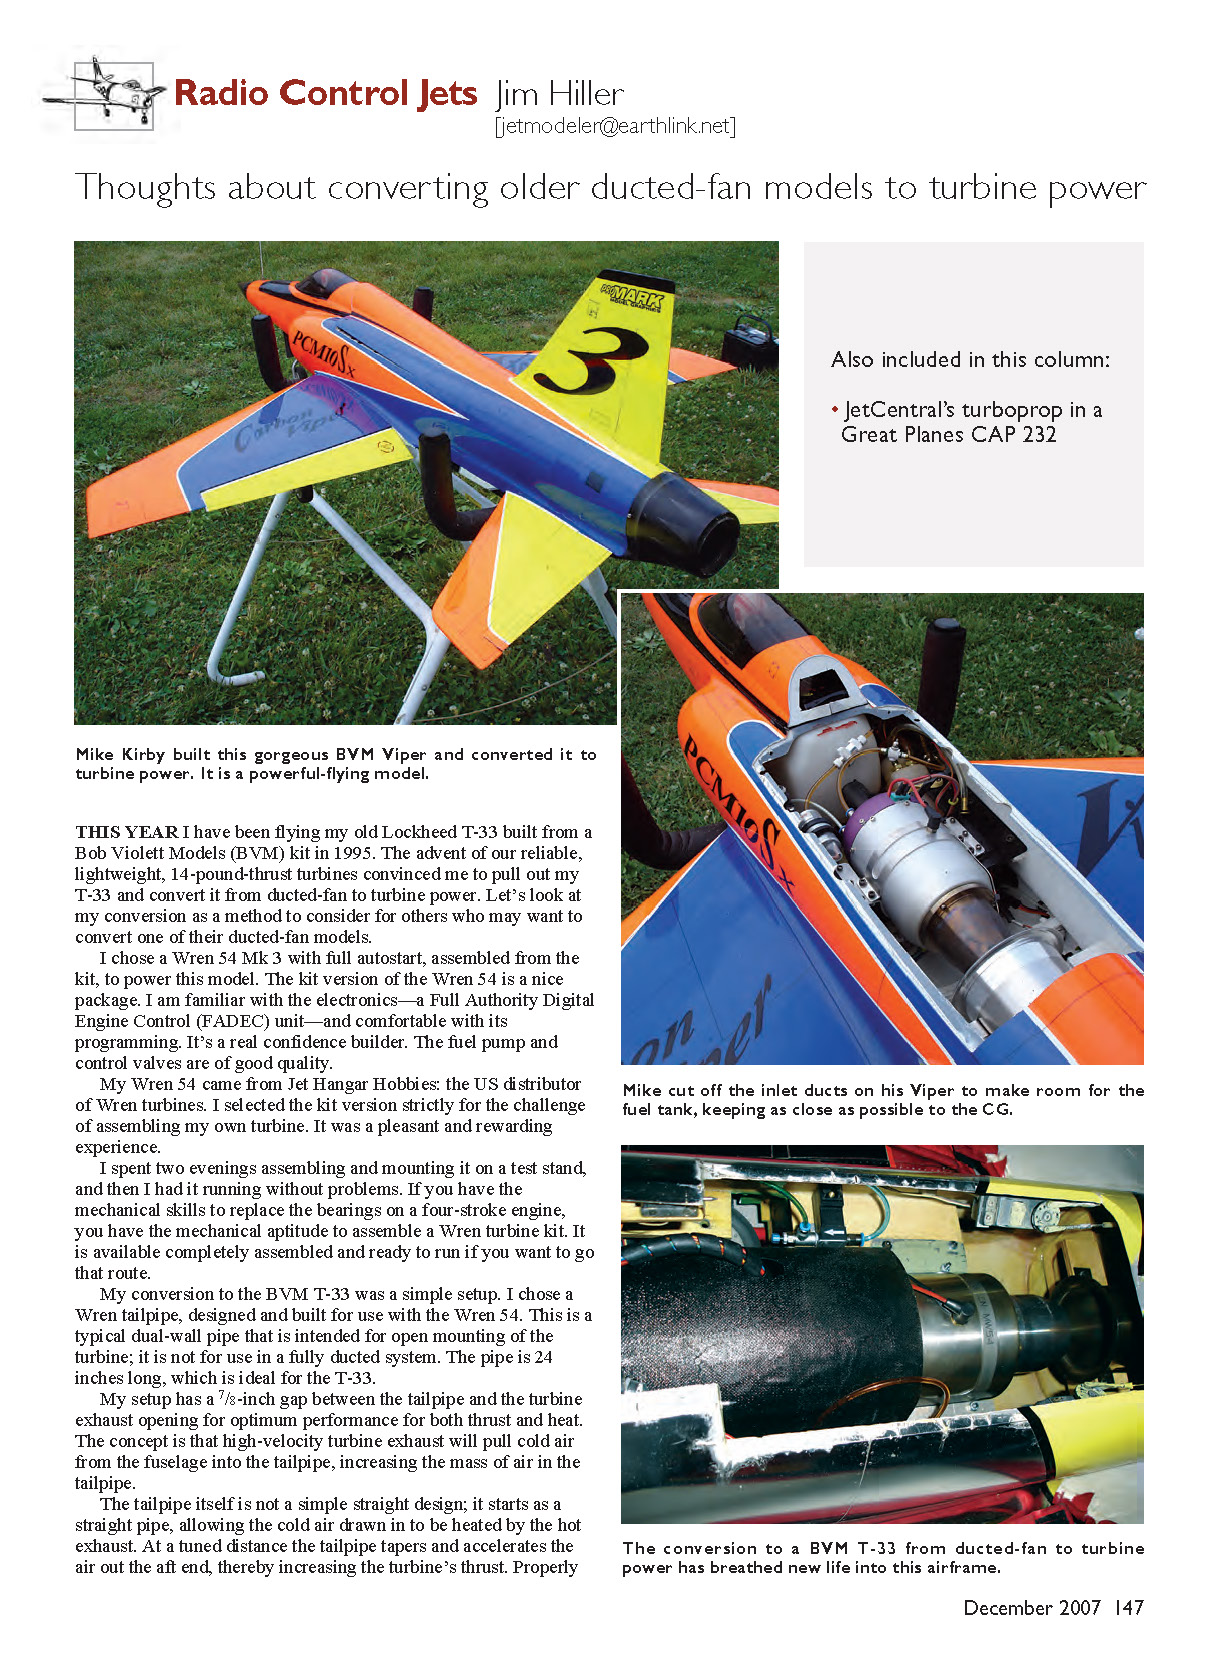
This year I have been flying my old Lockheed T-33 built from a Bob Violett Models (BVM) kit in 1995. The advent of reliable, lightweight turbines in the 14-pound-thrust class convinced me to pull out my T-33 and convert it from ducted-fan to turbine power. Below I describe my conversion as a method others can consider when converting ducted-fan models.
Turbine selection and assembly
I chose a Wren 54 Mk 3 with full autostart (kit version) to power this model. The kit version is a nice package and includes the Full Authority Digital Engine Control (FADEC) unit. I am familiar with the electronics and comfortable with its programming, which is a real confidence builder. The fuel pump and control valves are of good quality.
My Wren 54 came from Jet Hangar Hobbies, the U.S. distributor of Wren turbines. I selected the kit version strictly for the challenge of assembling my own turbine. It was a pleasant and rewarding experience. I spent two evenings assembling and mounting it on a test stand, and then had it running without problems. If you have the mechanical skills to replace the bearings on a four-stroke engine, you have the aptitude to assemble a Wren turbine kit. The turbine is also available completely assembled and ready to run if you prefer that route.
Tailpipe design and installation
I chose a Wren tailpipe designed for use with the Wren 54. This dual-wall pipe is intended for open mounting of the turbine and not for use in a fully ducted system. The pipe is 24 inches long, which is ideal for the T-33.
My setup has a 7/8-inch gap between the tailpipe and the turbine exhaust opening for optimum performance for both thrust and heat control. The concept is that high-velocity turbine exhaust will pull cold air from the fuselage into the tailpipe, increasing the air mass in the tailpipe.
The tailpipe is not a simple straight design; it starts as a straight pipe so the cold air drawn in can be heated by the hot exhaust. At a tuned distance the tailpipe tapers and accelerates the air out the aft end, thereby increasing the turbine’s thrust. Properly done and installed, this tailpipe design can actually increase a turbine’s thrust compared to the typical 5% loss associated with a straight tailpipe.
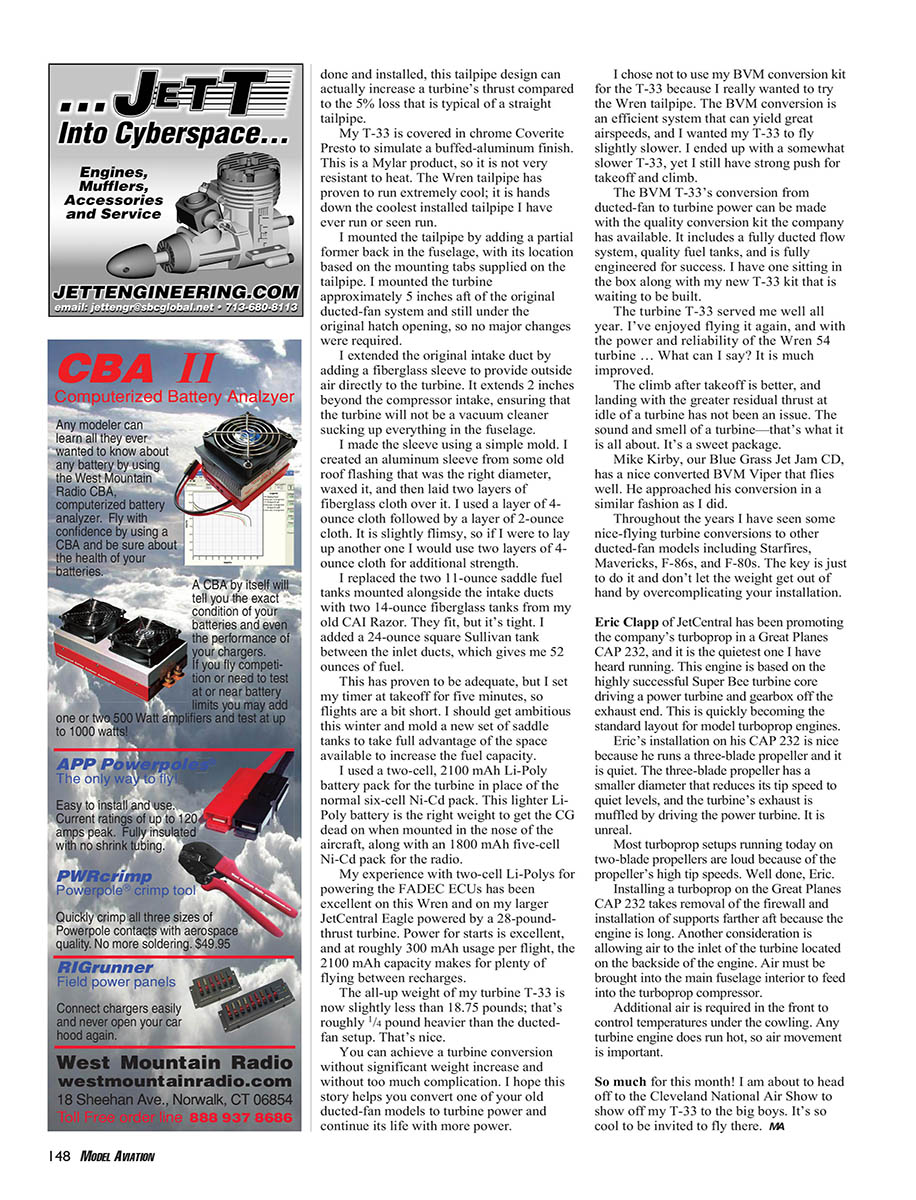
I mounted the tailpipe by adding a partial former in the fuselage, locating it based on the mounting tabs supplied with the tailpipe. I mounted the turbine approximately 5 inches aft of the original ducted-fan system and still under the original hatch opening, so no major structural changes were required.
Intake and fuel system
I extended the original intake duct by adding a fiberglass sleeve to provide outside air directly to the turbine. It extends 2 inches beyond the compressor intake, ensuring that the turbine will not act as a vacuum cleaner and suck up everything in the fuselage.
The sleeve was made using a simple mold. I created an aluminum sleeve from old roof flashing that was the right diameter, waxed it, and then laid two layers of fiberglass cloth over it: one layer of 4-ounce cloth followed by one layer of 2-ounce cloth. It is slightly flimsy; if I were to lay up another one I would use additional layers of cloth for strength.
I replaced the two 11-ounce saddle fuel tanks that were mounted alongside the intake ducts with two 14-ounce fiberglass tanks from my old CAI Razor. They fit, but it’s tight. I also added a 24-ounce square Sullivan tank between the inlet ducts, giving a total of 52 ounces of fuel. This has proven adequate, but I set my timer at takeoff for five minutes, so flights are a bit short. I should make a new set of saddle tanks to better use the available space and increase fuel capacity.
Battery, weight, and balance
I used a two-cell 2100 mAh Li-Poly battery pack for the turbine in place of the original six-cell Ni-Cd pack. This lighter Li-Poly battery is the right weight to get the center of gravity dead on when mounted in the nose, along with an 1800 mAh five-cell Ni-Cd pack for the radio.
My experience with two-cell Li-Polys for powering FADEC ECUs has been excellent on this Wren and on my larger JetCentral Eagle powered by a 28-pound-thrust turbine. Power for starts is excellent; at roughly 300 mAh usage per start, the 2100 mAh capacity provides plenty of starts between recharges.
The all-up weight of my turbine T-33 is now slightly less than 18.75 pounds — roughly 3/4 pound heavier than the ducted-fan setup. That’s a modest increase and acceptable for the performance gain.
Performance and flight impressions
You can achieve a turbine conversion without significant weight increase and without too much complication. The climb after takeoff is better, and landing with the greater residual thrust at idle of a turbine has not been an issue. I ended up with a somewhat slower T-33 compared to a fully ducted conversion, yet I still have strong push for takeoff and climb. The sound and smell of a turbine — that’s what it is all about. It’s a sweet package.
The Wren tailpipe has proven to run extremely cool; it is the coolest installed tailpipe I have ever run or seen run. My T-33 is covered in chrome Coverite Presto to simulate a buffed-aluminum finish. Because Coverite Presto is a Mylar product and not very heat resistant, the cool-running tailpipe has been important.
BVM conversion option
I chose not to use my BVM conversion kit for the T-33 because I wanted to try the Wren tailpipe. The BVM conversion is an efficient system that can yield great airspeeds; I wanted my T-33 to fly slightly slower. The BVM conversion includes a fully ducted flow system, quality fuel tanks, and is fully engineered for success. I have one sitting in the box along with my new T-33 kit that is waiting to be built.
Other conversions and turboprops
Mike Kirby (Blue Grass Jet Jam CD) has a nicely converted BVM Viper that flies well. He approached his conversion similarly to mine. Over the years I have seen successful turbine conversions of Starfires, Mavericks, F-86s, and F-80s. The key is to do it and not let weight get out of hand by overcomplicating the installation.
Eric Clapp of JetCentral has been promoting the company’s turboprop installed in a Great Planes CAP 232; it is the quietest one I have heard running. This engine is based on the Super Bee turbine core driving a power turbine and gearbox out the exhaust end, a layout that is becoming standard for modern turboprops.
Eric’s installation runs a three-blade propeller and is quiet because the smaller diameter reduces tip speed and the turbine’s exhaust is muffled by driving the power turbine. Most turboprops running today with two-blade props are loud due to high tip speeds. Installing a turboprop on the CAP 232 requires removal of the firewall and installation of supports farther aft because the engine is long. You must also allow air to reach the turbine compressor and keep the air inlet clear of the propeller’s wash. Air must be allowed to enter the main fuselage interior to feed the compressor via intake ducts, and additional air in the front is required to control temperatures under the cowling. Any turbine engine does not run hot, so air movement is important.
Final thoughts
The turbine T-33 served me well all year. I’ve enjoyed flying it again, and with the power and reliability of the Wren 54 turbine it was well worth the effort. If you have an older ducted-fan model sitting in the hangar, consider converting it to turbine power — you may be surprised how straightforward and rewarding the project can be.
Key takeaways:
- Choose a turbine that matches the model and your mechanical comfort (kit or ready-to-run).
- Consider a tuned tailpipe for improved thrust and cooler external temperatures.
- Ensure proper intake ducts so the turbine isn’t drawing debris from the fuselage.
- Plan fuel capacity and battery choices to meet desired flight duration and balance.
- Keep installations simple to avoid unnecessary weight penalties.
Transcribed from original scans by AI. Minor OCR errors may remain.

