
The benefits of gyro stabilization for jets
Jim Hiller [[email protected]]
Let's spend some time reviewing stability augmentation and the use of gyros on flight control surfaces. Employing gyros on flight control surfaces was in vogue at the last World Jet Masters—and for good reason: the benefits to the competition pilot are enormous. These benefits also make flying any model more enjoyable. Using a gyro can correct inherent design deficiencies and do much to reduce or eliminate the rocking caused by gusting winds or turbulent air.
Dutch roll
Dutch roll is an aircraft's tendency to rock its wing in roll. It becomes especially pronounced as angle of attack increases in slow flight. All wings with highly swept leading edges (LE) tend to exhibit this trait to varying degrees. The wing rocking is the result of the airplane's yawing from side to side.
The old rule of thumb is that every 5° of LE sweep provides an equivalent 1° of dihedral. This resulting dihedral effect causes a swept wing to bank when the airplane is yawed out of square. Follow this out-of-square yaw with a swing past center and a roll in the opposite direction, and the Dutch roll begins.
It is easy for a pilot to chase Dutch roll with the ailerons and actually aggravate the condition. The best pilot technique is to resist the urge to fight it and allow it to dampen out by itself. Something has to cause the airplane to go off center in yaw to initiate the wing rocking—adverse yaw from ailerons in slow flight or turbulence in the air are common causes.
Jet airplanes typically have swept wings and large fuselage side areas forward of the wing. Large fins are used for yaw stability, but this is not always enough. Full-scale jets such as the F-86 Super Sabre have yaw stability boosters to improve the situation; on a model airplane we can employ gyros.
Gyro installation on the BobCat
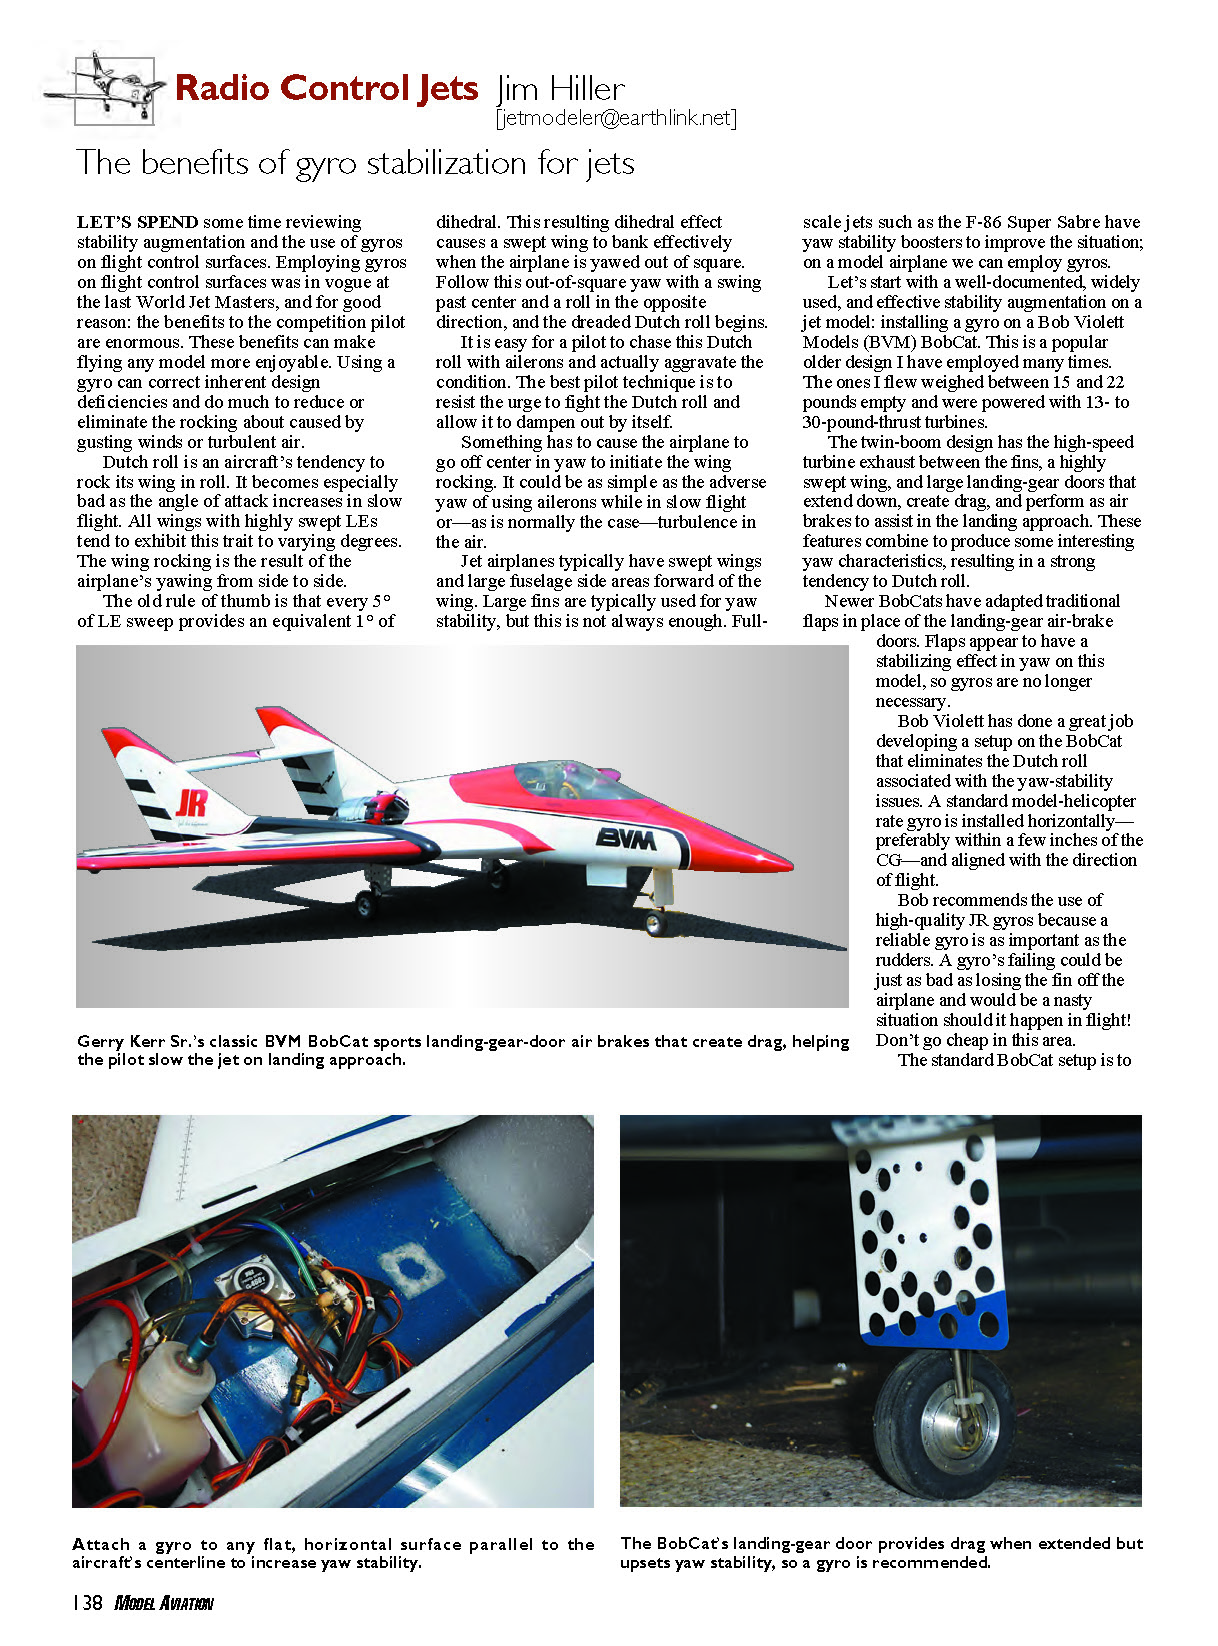
A well-documented, widely used, and effective stability augmentation on a jet model is installing a gyro on a Bob Violett Models (BVM) BobCat. This popular older design has been flown by the author many times. The ones flown weighed between 15 and 22 pounds empty and were powered with 13- to 30-pound-thrust turbines.
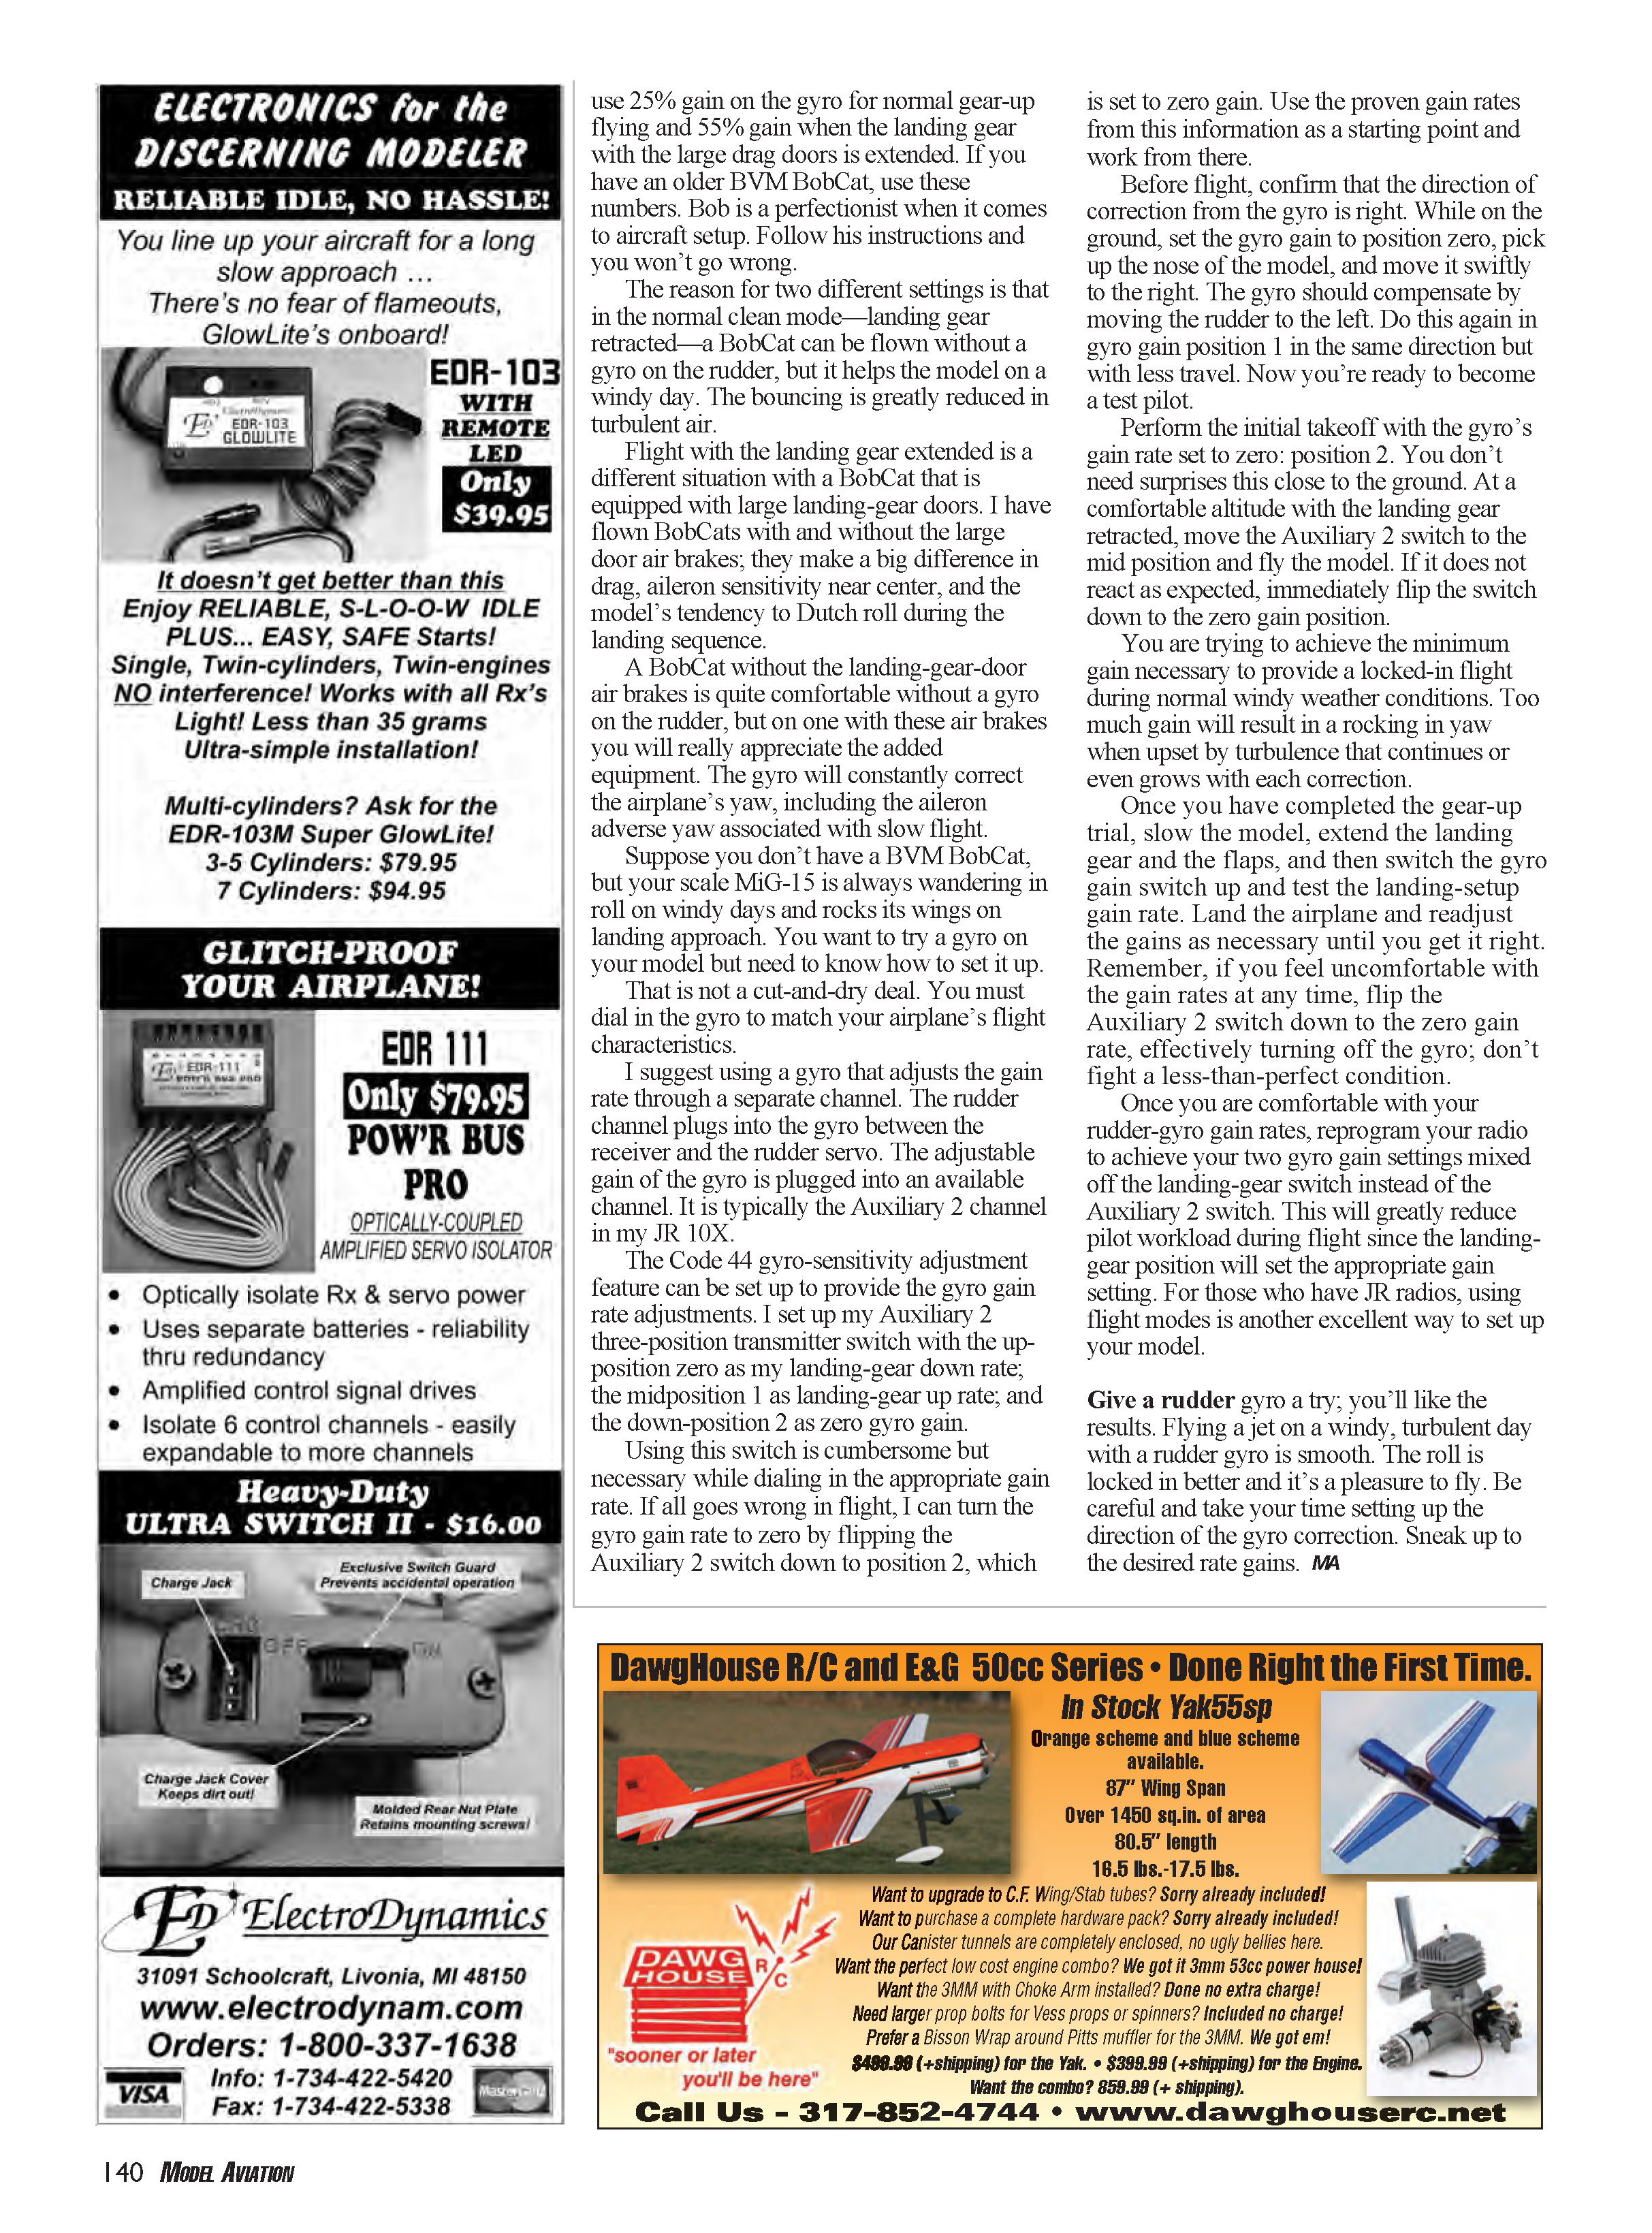
The twin-boom BobCat has high-speed turbine exhaust between the fins, a highly swept wing, and large landing-gear doors that extend down, create drag, and perform as air brakes during landing. These features combine to produce interesting yaw characteristics and a strong tendency to Dutch roll.
Newer BobCats have adopted traditional flaps in place of the landing-gear air-brake doors. Flaps appear to have a stabilizing effect in yaw on this model, so gyros are no longer always necessary on the newer versions.
Bob Violett developed a setup on the BobCat that eliminates the Dutch roll associated with the yaw-stability issues. A standard model-helicopter rate gyro is installed horizontally—preferably within a few inches of the center of gravity—and aligned with the direction of flight.
Bob recommends the use of high-quality JR gyros because a reliable gyro is as important as the rudders. A gyro failure could be just as bad as losing the fin off the airplane and would be a nasty situation in flight. Don’t go cheap in this area.
The standard BobCat setup is:
- 25% gain on the gyro for normal gear-up flying.
- 55% gain when the landing gear with the large drag doors is extended.
If you have an older BVM BobCat, use these numbers as a starting point. Bob is a perfectionist when it comes to aircraft setup—follow his instructions and you won't go wrong.
The reason for two different settings is that in the clean mode (landing gear retracted) a BobCat can be flown without a rudder gyro, though it helps in windy conditions by greatly reducing bouncing in turbulent air. Flight with the landing gear extended and large landing-gear doors is different: the doors add drag, change aileron sensitivity near center, and increase the model's tendency to Dutch roll during landing. On these models you will appreciate a rudder gyro—the gyro will continuously correct yaw, including aileron-induced adverse yaw in slow flight.
Choosing and wiring a gyro
If your model (for example a scale MiG-15) wanders in roll on windy days or rocks its wings on approach, a rudder gyro may help. Setting it up is not universal—you must dial the gyro in to match your airplane’s characteristics.
I suggest using a gyro that adjusts gain through a separate channel. Wire the gyro inline between the receiver and the rudder servo. The adjustable gain signal from the gyro plugs into an available receiver channel—typically Auxiliary 2 on my JR 10X. Use the radio’s programmable features (for JR radios, Code 44 gyro-sensitivity adjustment is useful) to provide the gyro gain rate adjustments.
I set my Auxiliary 2 three-position transmitter switch as follows:
- Up position: landing-gear-down gain rate.
- Mid position: landing-gear-up gain rate.
- Down position: zero gyro gain.
Using this switch is cumbersome but necessary while dialing in the appropriate gain rate. If all goes wrong in flight, flip the Auxiliary 2 switch down to position 2 (zero gain) to disable the gyro. Use the proven gain rates above as your starting point and work from there.
Pre-flight checks and flight testing
Before flight, confirm the direction of gyro correction:
- Set the gyro gain to zero.
- Pick up the nose of the model and move it swiftly to the right.
- The gyro should compensate by moving the rudder to the left.
- Repeat in the mid gain position; the rudder should move in the same corrective direction but with less travel.
Perform the initial takeoff with the gyro gain set to zero (Aux 2 down). At a comfortable altitude with the landing gear retracted, move the Aux 2 switch to mid and fly the model. If it does not react as expected, immediately flip the switch back to zero.
You are trying to achieve the minimum gain necessary to provide locked-in flight in normal windy conditions. Too much gain will result in a yaw rocking that can continue or even grow with each correction.
After the gear-up trial:
- Slow the model, extend the landing gear and flaps.
- Switch the gyro to the gear-down (up) position and test the landing-setup gain rate.
- Land and readjust gains as necessary until you get it right.
If at any time you feel uncomfortable with the gain rates, flip the Aux 2 switch to zero to effectively turn off the gyro—don’t fight a less-than-perfect condition.
Final setup recommendations
Once comfortable with rudder-gyro gain rates, reprogram your radio so the two gyro gain settings are mixed off the landing-gear switch instead of relying on the Aux 2 switch. This reduces pilot workload during flight because the gear position will set the appropriate gain automatically. For JR radios, using flight modes is another excellent way to implement this.
Give a rudder gyro a try—you'll like the results. Flying a jet on a windy, turbulent day with a rudder gyro is much smoother: the roll is locked in better and the airplane is a pleasure to fly. Be careful and take your time setting up the direction of the gyro correction; sneak up on the desired gain rates.
Transcribed from original scans by AI. Minor OCR errors may remain.

