
Radio Control Jets
Jim Hiller [email protected]
What's to like about flying a large electric jet?
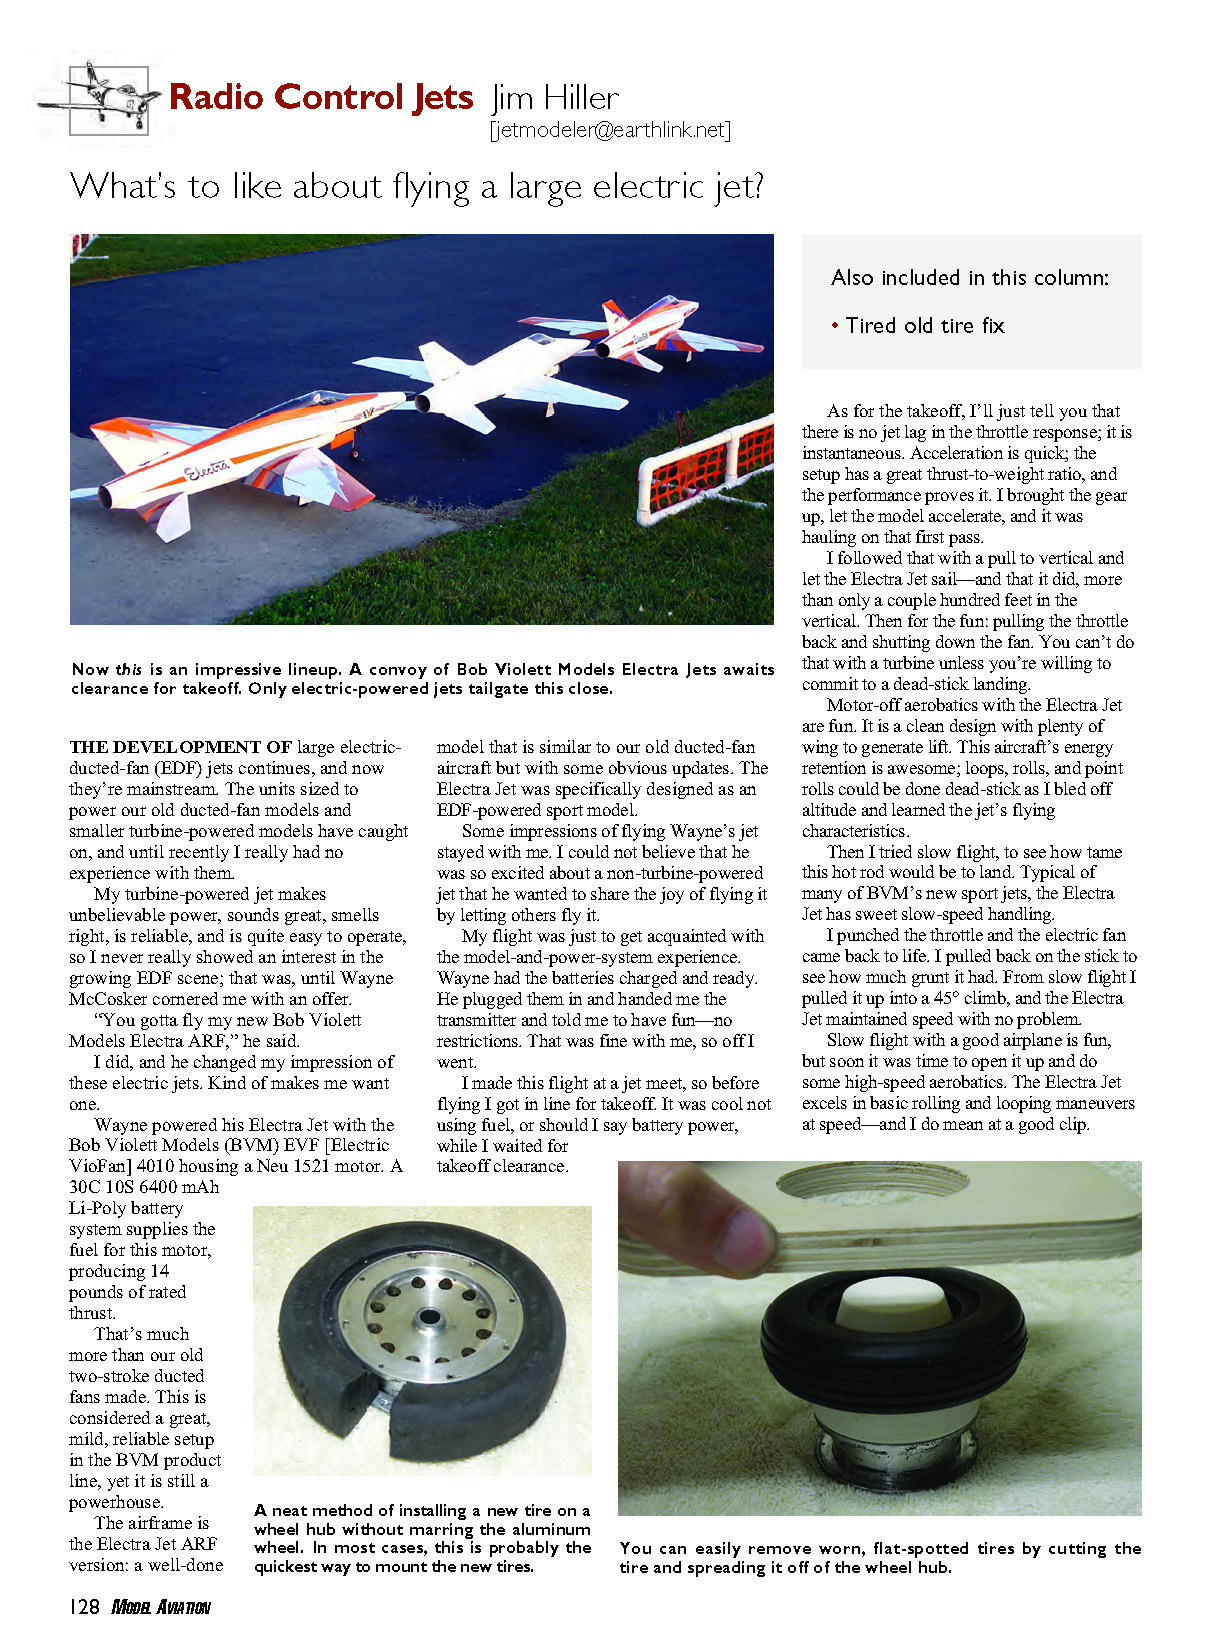
The development of large electric-ducted-fan (EDF) jets continues, and now they're mainstream. The units sized to power our old ducted-fan models and smaller turbine-powered models have caught on, and until recently I really had no experience with them.
My turbine-powered jet makes unbelievable power, sounds great, smells right, is reliable, and is quite easy to operate, so I never really showed an interest in the growing EDF scene; that was, until Wayne McCosker cornered me with an offer.
"You gotta fly my new Bob Violett Models Electra ARF," he said.
I did, and he changed my impression of these electric jets. Kind of makes me want one.
Wayne powered his Electra Jet with the Bob Violett Models (BVM) EVF [Electric VioFan] 4010 housing a Neu 1521 motor. A 30C 10S 6400 mAh Li-Poly battery system supplies power for this motor, producing 14 pounds of rated thrust. That's much more than our old two-stroke ducted fans made. This is considered a great, mild, reliable setup in the BVM product line, yet it is still a powerhouse.
The airframe is the Electra Jet ARF version: a well-done model that is similar to our old ducted-fan aircraft but with some obvious updates. The Electra Jet was specifically designed as an EDF-powered sport model.
Some impressions of flying Wayne's jet stayed with me. I could not believe that he was so excited about a non-turbine-powered jet that he wanted to share the joy of flying it by letting others fly it.
My flight was just to get acquainted with the model-and-power-system experience. Wayne had the batteries charged and ready. He plugged them in and handed me the transmitter and told me to have fun—no restrictions. That was fine with me, so off I went.
I made this flight at a jet meet, so before flying I got in line for takeoff. It was cool not using fuel, or should I say battery power, while I waited for takeoff clearance.
As for the takeoff, I'll just tell you that there is no jet lag in the throttle response; it is instantaneous. Acceleration is quick; the setup has a great thrust-to-weight ratio, and the performance proves it. I brought the gear up, let the model accelerate, and it was hauling on that first pass.
I followed that with a pull to vertical and let the Electra Jet sail—and that it did, more than only a couple hundred feet in the vertical. Then for the fun: pulling the throttle back and shutting down the fan. You can't do that with a turbine unless you're willing to commit to a dead-stick landing.
Motor-off aerobatics with the Electra Jet are fun. It is a clean design with plenty of wing to generate lift. This aircraft's energy retention is awesome; loops, rolls, and point rolls could be done dead-stick as I bled off altitude and learned the jet's flying characteristics.
Then I tried slow flight, to see how tame this hot rod would be to land. Typical of many of BVM's new sport jets, the Electra Jet has sweet slow-speed handling.
I punched the throttle and the electric fan came back to life. I pulled back on the stick to see how much grunt it had. From slow flight I pulled it up into a 45° climb, and the Electra Jet maintained speed with no problem.
Slow flight with a good airplane is fun, but soon it was time to open it up and do some high-speed aerobatics. The Electra Jet excels in basic rolling and looping maneuvers at speed—and I do mean at a good clip. This mild BVM 4010 with only a 10-cell battery in the model is still a potent power system. Large loops, big, zooming climbs, and pure speed are plenty with this model. Proper throttle management is recommended to keep the battery temperatures under control and maximize flight time—or so Wayne reminded me.
After roughly four minutes of fun, Wayne had the timer set for me to land. I hate when that happens.
Setting up the Electra Jet for landing was just too easy. Its excellent slow-speed characteristics combined with flaps and the ability to completely shut down the motor made for great descent control to make a spot landing.
The landing gear is set up with a rather nose-high, positive angle of attack on the ground, which is great for takeoff. But on landing, remember to extend the flare to get the main gear on the ground before the nose gear.
The final touchdown was at an incredibly low airspeed. I could see this model flying off of grass fields with no problems.
Thank you, Wayne, for my first flight with a large EDF-powered model. Overall, I am extremely impressed with the Electra Jet and the power available to fly it.
The basic flying experience with the characteristics of electric power does have some advantages over turbines: instant power, quietness, and the ability to shut down power and restart instantly. It can spoil you.
But electric power lacks the aroma and the sound of power that only a turbine can give you. Both types of power are fun. These electrics don't have to suffer any loss of performance, and they can get it on, too!
Back to Turbine Topics
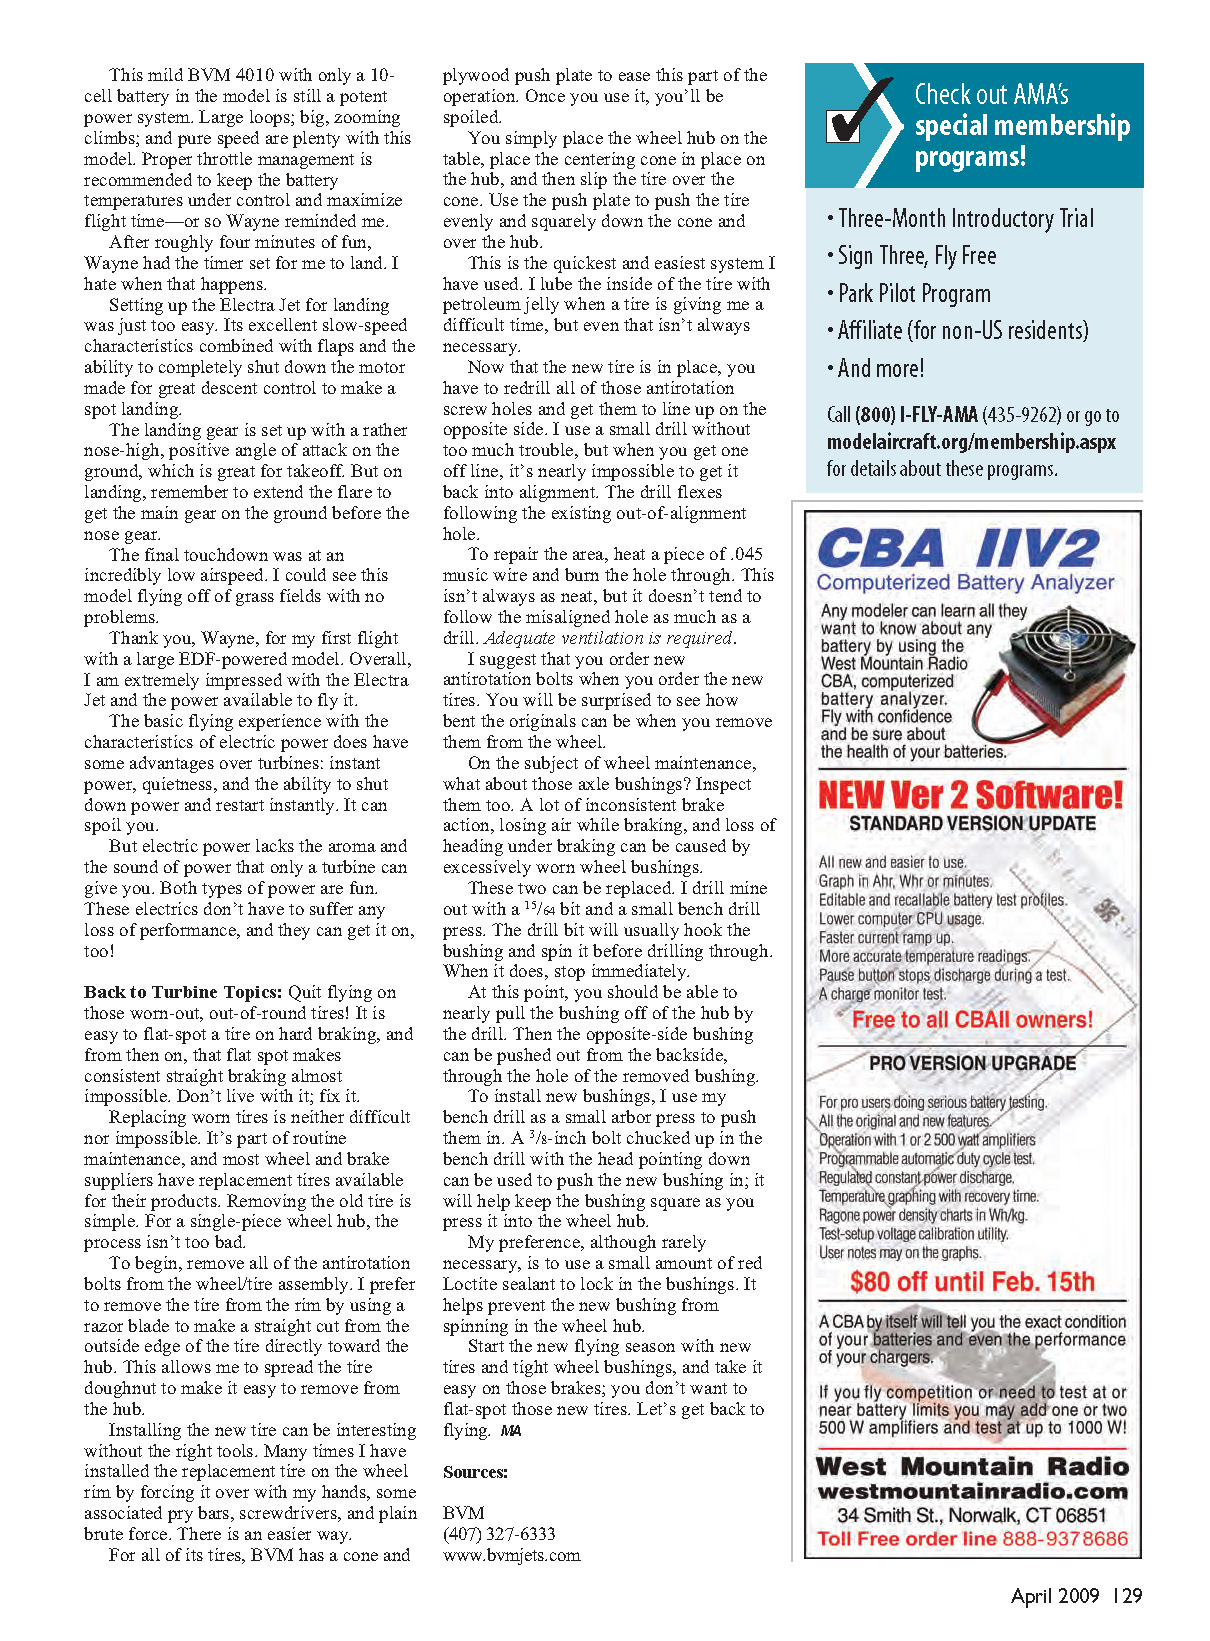
Quit flying on those worn-out, out-of-round tires! It is easy to flat-spot a tire on hard braking, and from then on, that flat spot makes consistent straight braking almost impossible. Don't live with it; fix it.
Replacing worn tires is neither difficult nor impossible. It's part of routine maintenance, and most wheel and brake suppliers have replacement tires available for their products. Removing the old tire is simple. For a single-piece wheel hub, the process isn't too bad.
To begin:
- Remove all of the antirotation bolts from the wheel/tire assembly.
- I prefer to remove the tire from the rim by using a razor blade to make a straight cut from the outside edge of the tire directly toward the hub. This allows me to spread the tire doughnut to make it easy to remove from the hub.
Installing the new tire can be interesting without the right tools. Many times I have installed the replacement tire on the wheel rim by forcing it over with my hands, some associated pry bars, screwdrivers, and plain brute force. There is an easier way.
For all of its tires, BVM has a cone and plywood push plate to ease this part of the operation. Once you use it, you'll be spoiled.
- Place the wheel hub on the table, place the centering cone on the hub, and then slip the tire over the cone.
- Use the push plate to push the tire evenly and squarely down the cone and over the hub.
This is the quickest and easiest system I have used. I lube the inside of the tire with petroleum jelly when a tire is giving me a difficult time, but even that isn't always necessary.
Now that the new tire is in place, you have to redrill all of those antirotation screw holes and get them to line up on the opposite side. I use a small drill without too much trouble, but when you get one off line, it's nearly impossible to get it back into alignment. The drill flexes following the existing out-of-alignment hole.
To repair the area:
- Heat a piece of .045 music wire and burn the hole through. This isn't always as neat, but it doesn't tend to follow the misaligned hole as much as a drill. Adequate ventilation is required.
I suggest that you order new antirotation bolts when you order the new tires. You will be surprised to see how bent the originals can be when you remove them from the wheel.
On the subject of wheel maintenance, what about those axle bushings? Inspect them too. A lot of inconsistent brake action, losing air while braking, and loss of heading under braking can be caused by excessively worn wheel bushings.
These can be replaced. I drill mine out with a 15/64 bit and a small bench drill press. The drill bit will usually hook the bushing and spin it before drilling through. When it does, stop immediately.
- At this point, you should be able to nearly pull the bushing off of the hub by the drill.
- Then the opposite-side bushing can be pushed out from the backside, through the hole of the removed bushing.
To install new bushings:
- Use a bench drill as a small arbor press to push them in. A 3/8-inch bolt chucked up in the bench drill with the head pointing down can be used to press the new bushing in; it will help keep the bushing square as you press it into the wheel hub.
- My preference, although rarely necessary, is to use a small amount of red Loctite sealant to lock in the bushings. It helps prevent the new bushing from spinning in the wheel hub.
Start the new flying season with new tires and tight wheel bushings, and take it easy on those brakes; you don't want to flat-spot those new tires. Let's get back to flying.
Sources:
- BVM
- (407) 327-6333
- www.bvmjets.com
Transcribed from original scans by AI. Minor OCR errors may remain.

