
Radio Control Jets
Jim Hiller
Smaller, faster, and stronger
I just got back from three days at Jets Over the Heartland in Winamac, Indiana. What a great time flying with good friends! This is an event for fliers, held by fliers, at a wonderful flying field that a good group of modelers runs. The site looked great this year, and the addition to the hangar made model storage convenient.
This is a neat gathering at which you can see the latest equipment fly—especially Bob Violett’s new electric-powered jets. All of you at E-Jets should look out for Rob Lynch. His fleet of sport, speed, and scale models continues to grow. He can fly them well, and he does so often.
This is definitely the year for Jet Central. At Florida Jets the company rolled out kerosene start on the Super Bee II and Rabbit turbines, and then the Mammoth hit the skies. Now the next major product change is out: the new Cheetah.
The Cheetah is a significant product development that has Jet Central replacing the old standard, its Super Eagle, and the Falcon because of the Cheetah’s weight and size. It’s the next step in the evaluation of 30-pound-thrust turbines.
The Cheetah is actually rated at 31 pounds of thrust, yet it weighs more than a pound less than the Eagle and promises to be more fuel-efficient. The Cheetah weighs approximately 3.0 pounds, compared with the Super Eagle’s 4.2 pounds and the Falcon’s 3.3 pounds.
The diameter of the Cheetah is only 4.031 inches, compared with the Eagle’s 4.37-inch diameter and the Falcon’s 3.89 inches. The overall length is the major difference with the Cheetah: it’s 9.838 inches with starter, and both the Eagle and Falcon exceed 11.6 inches.
The compact Cheetah is a game changer in size and performance. I’m looking forward to getting my hands on one.
Another new product I have been using this flying season is Robart smoke oil. Yes, that is the company that makes retracts and landing gear. This new oil will be distributed through the normal channels and at hobby shops. So far its price is comparable to Super-Dry and other smoke oils.
I have burned a couple gallons of the Robart product, and it has performed great. I have been a dedicated Super-Dry user because of its performance, but I have found the Robart smoke oil to do just as well. The Robart oil is a good, bright white, and it possesses excellent hang time. Taking into account its ease of availability and equal performance based on my unscientific testing, I’ll take it.
Maverick conversion
I have been going slowly on this Maverick conversion project throughout the summer, but progress has not stopped; the model will soon be ready for paint.
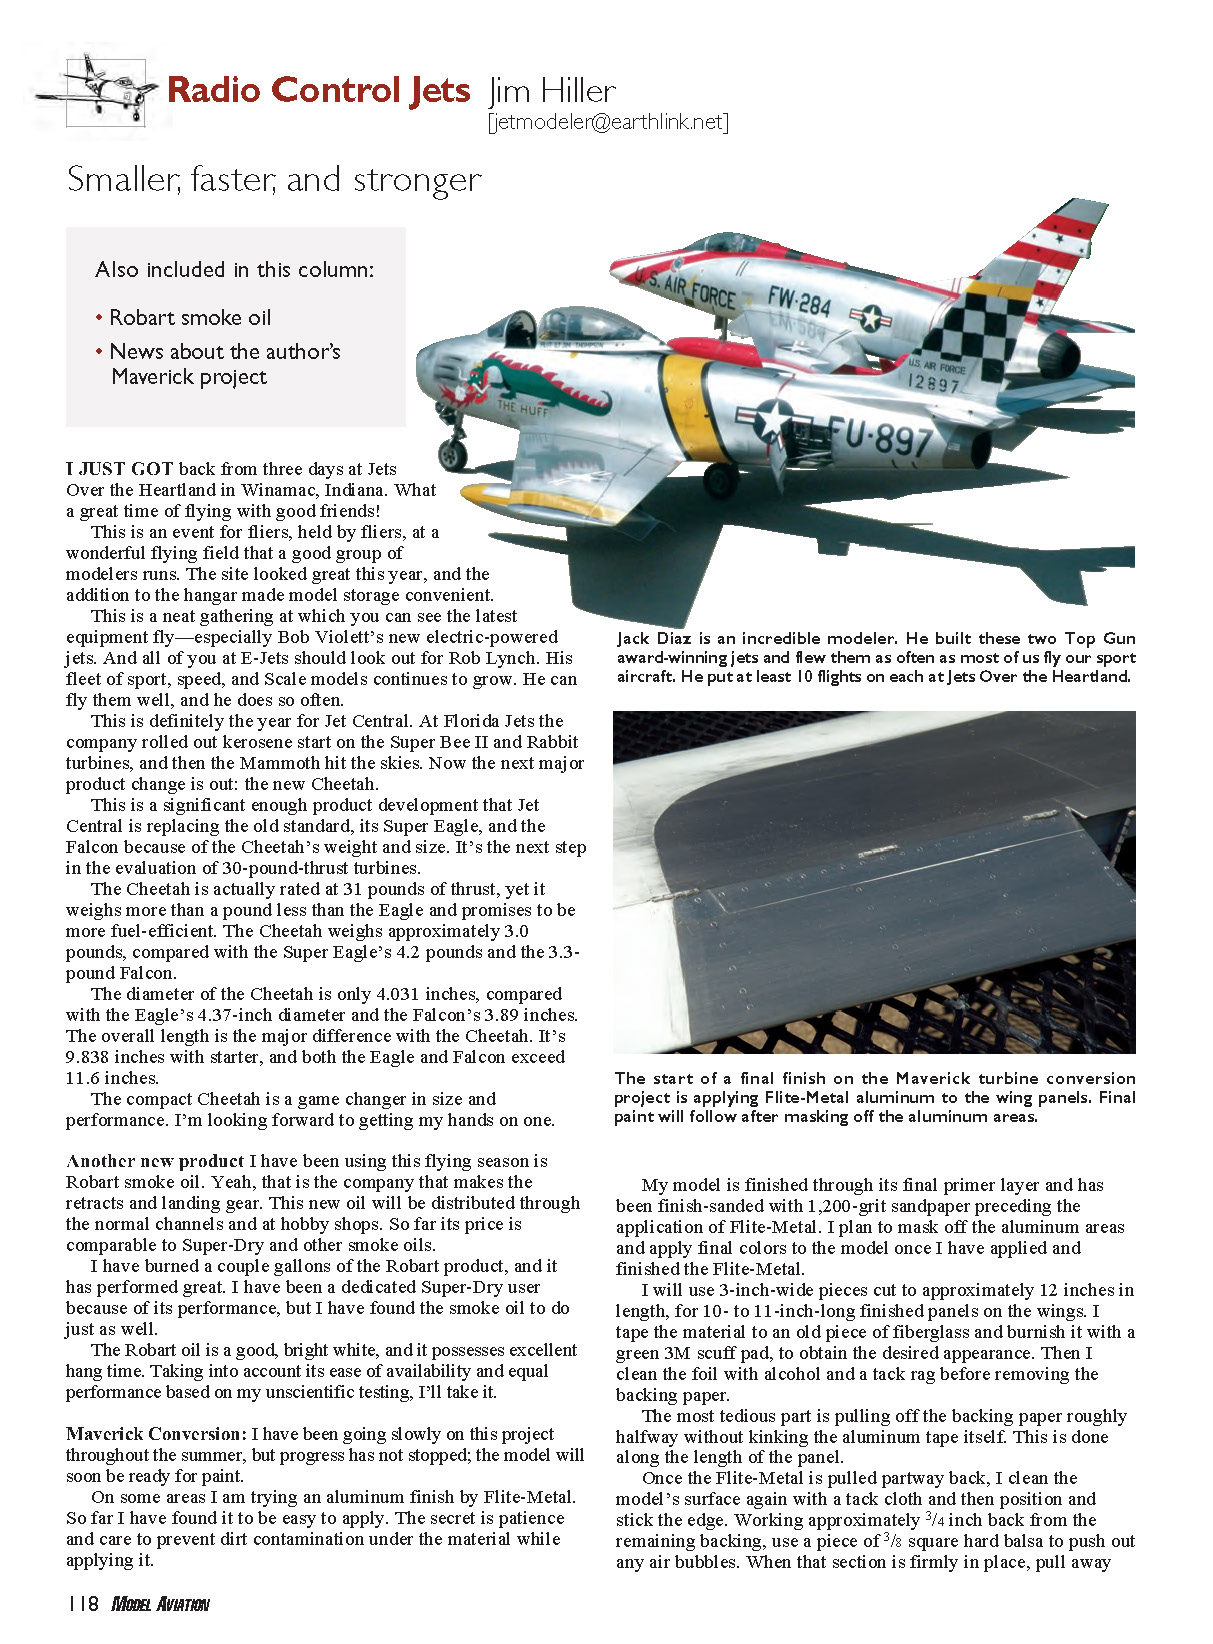
On some areas I am trying an aluminum finish using Flite-Metal. So far I have found it easy to apply. The secret is patience and care to prevent dirt contamination under the material while applying it.
My model is finished through its final primer layer and has been finish-sanded with 1,200-grit sandpaper preceding the application of Flite-Metal. I plan to mask off the aluminum areas and apply final colors to the model once I have applied and finished the Flite-Metal.
I will use 3-inch-wide pieces cut to approximately 12 inches in length, for 10- to 11-inch-long finished panels on the wings. I tape the material to an old piece of fiberglass and burnish it with a green 3M scuff pad to obtain the desired appearance. Then I clean the foil with alcohol and a tack rag before removing the backing paper.
Application steps (summary):
- Pull the backing paper off roughly halfway along the length of the panel without kinking the Flite-Metal.
- Clean the model’s surface again with a tack cloth and position and stick the exposed edge.
- Working approximately 3/8 inch back from the remaining backing, use a 3/8-inch-square hard balsa block to push out any air bubbles.
- When that section is firmly in place, pull away the remainder of the backing paper.
- Carefully work from the attached foil with the balsa push block to secure the material and avoid trapping air bubbles.
- After applying panels, start the final rivet-detail application by pressing a 1/16-inch-ID brass tube with a sharpened edge into the foil to leave rivet impressions.
Because Flite-Metal is applied one panel at a time, I take breaks to work on rivet detail. It’s working out nicely and should provide a cool, authentic-looking aluminum finish. If you want to try this kind of finish, I strongly suggest visiting the Flite-Metal website for their instructions.
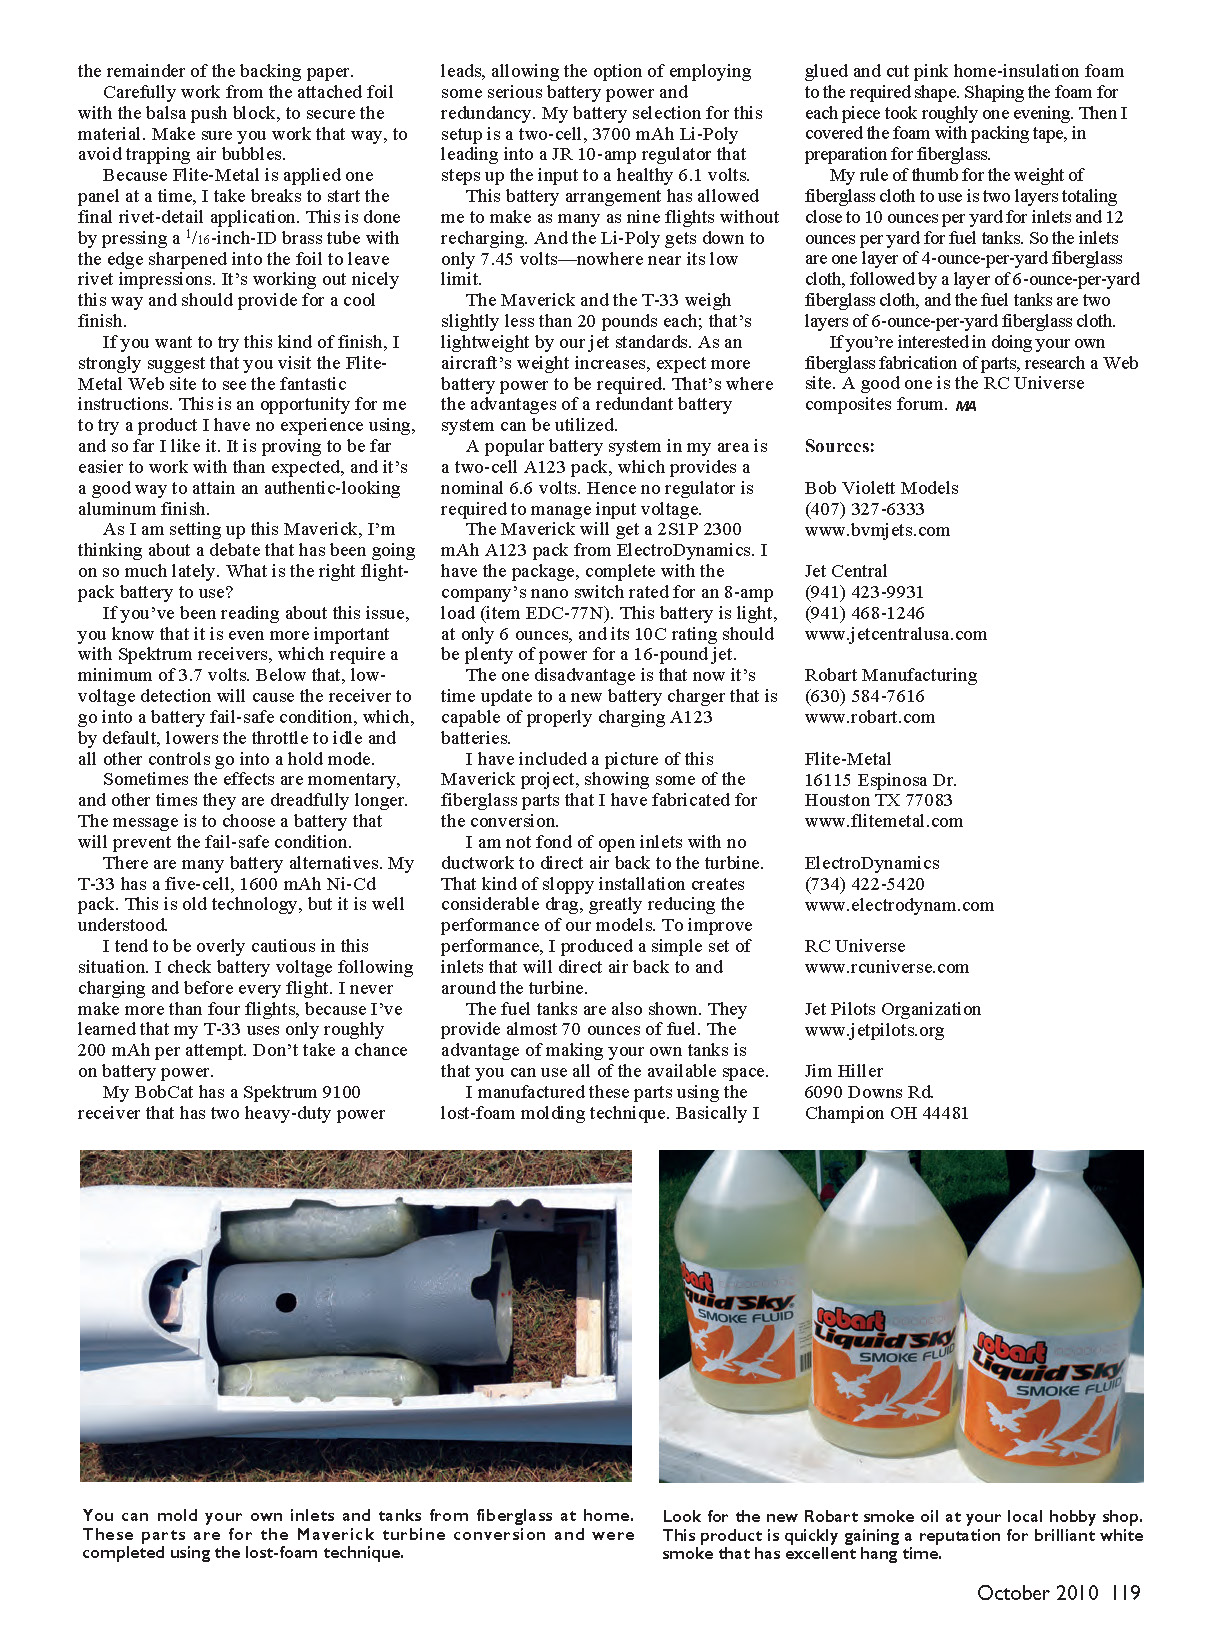
I have included a picture of this Maverick project showing some of the fiberglass parts I fabricated for the conversion.
I am not fond of open inlets with no ductwork to direct air back to the turbine. That kind of sloppy installation creates considerable drag, greatly reducing the performance of our models. To improve performance, I produced a simple set of inlets that will direct air back to and around the turbine.
The fuel tanks are also shown. They provide almost 70 ounces of fuel. The advantage of making your own tanks is that you can use all of the available space.
I manufactured these parts using a lost-foam molding technique. Basically, I glued and cut pink home-insulation foam to the required shapes. Shaping the foam for each piece took roughly one evening. Then I covered the foam with packing tape in preparation for fiberglass.
My rule of thumb for fiberglass cloth weight:
- Inlets: two layers totaling close to 10 ounces per yard (one layer of 4-oz/yd cloth followed by one layer of 6-oz/yd cloth).
- Fuel tanks: two layers of 6-oz/yd fiberglass cloth (about 12 oz/yd total).
If you’re interested in doing your own fiberglass fabrication of parts, research the RC Universe composites forum for guidance.
Flight-pack batteries
As I set up this Maverick, I’m thinking about a debate that has been going on lately: what is the right flight-pack battery to use?
If you’ve been reading about this issue, you know that it is even more important with Spektrum receivers, which require a minimum of 3.7 volts. Below that, low-voltage detection will cause the receiver to go into a battery fail-safe condition, which, by default, lowers the throttle to idle and holds all other controls. Sometimes the effects are momentary, and other times they last much longer. The message is to choose a battery that will prevent the fail-safe condition.
There are many battery alternatives:
- Ni-Cd: My T-33 has a five-cell, 1600 mAh Ni-Cd pack. This is old technology, but well understood. I tend to be overly cautious: I check battery voltage after charging and before every flight and never make more than four flights, because my T-33 uses only roughly 200 mAh per attempt.
- Li-Poly (LiPo): My BobCat has a Spektrum 9100 receiver that has two heavy-duty power leads, allowing serious battery power and redundancy. My selection for this setup is a two-cell, 3700 mAh Li-Poly leading into a JR 10-amp regulator that steps up the input to a healthy 6.1 volts. This arrangement has allowed me to make as many as nine flights without recharging. The Li-Poly gets down to only 7.45 volts—nowhere near its low limit.
- A123 (LiFe type): A popular system in my area is a two-cell A123 pack, which provides a nominal 6.6 volts, so no regulator is required to manage input voltage. The Maverick will get a 2S1P 2300 mAh A123 pack from ElectroDynamics. I have the package complete with the company’s nano switch rated for an 8-amp load (item EDC-77N). This battery is light (about 6 ounces), and its 10C rating should be plenty of power for a 16-pound jet. The one disadvantage is that you may need to update to a charger capable of properly charging A123 batteries.
The Maverick and the T-33 weigh slightly less than 20 pounds each; that’s lightweight by our jet standards. As an aircraft’s weight increases, expect more battery power to be required. That’s where the advantages of a redundant battery system can be utilized.
Sources
- Bob Violett Models
(407) 327-6333 www.bvmjets.com
- Jet Central
(941) 423-9931 (941) 468-1246 www.jetcentralusa.com
- Robart Manufacturing
(630) 584-7616 www.robart.com
- Flite-Metal
16115 Espinosa Dr. Houston, TX 77083 www.flitemetal.com
- ElectroDynamics
(734) 422-5420 www.electrodynam.com
- RC Universe
- Jet Pilots Organization
- Jim Hiller
6090 Downs Rd Champion, OH 44481
Transcribed from original scans by AI. Minor OCR errors may remain.

