
RADIO CONTROL PYLON RACING
Duane Gall, 1267 S. Beeler Ct., Denver, CO 80231; E-mail: [email protected]
CYBER-FLYING REVISITED
I received some good feedback on the January 2000 column feature about practicing racing flight using the Great Planes flight simulator.
Alert reader Jim Skolmowski of Toledo, Ohio writes:
"Thanks for the advice on setting up a racing machine. My sons and I have been cyber-flying to get ready for next year's round of club contests. We do the SuperTigre .40 engine thing at Toledo Weak Signals."
Jim reminded me that Great Planes offers an "Add-Ons" CD-ROM with additional airplanes and fields to try. I purposely didn't mention that, because the pylon course included was less than satisfactory.
However, Jim managed to get around the problems. I'll turn the description over to him.
"Give this a try. Select the Canyon Pylons as your field. Under 'Options,' where you select background features such as buildings, etc., select 'Pylon short course.' I find this works best for my purposes.
"By now you are saying, 'Yes, I know, but you have to fly from the right of pylon 3.' Not true! Taxi out between pylons 2 and 3 and near the cross-runway. Point your zoomer toward pylon 1. Hit the F4 key (only once) at this point and take off.
"At first, until you take off, the view will appear as though you are in the cockpit. However, once you hit the gas you will find that your position is now between pylons 2 and 3 with your aircraft zooming away.
"You have to experiment with the positioning a bit before hitting F4 to get yourself where you like to be. Now crash that thing or hit the space bar, and you will find that on your next takeoff, you are still positioned between the pylons but taking off from the runway to the right. You remain positioned between the pylons until you exit out from the session."
Thanks, Jim! When I tried Jim's method, I learned that the screen image would shimmy or appear "scrambled" when I hit the F4 key, but would immediately smooth out once the simulated airplane started moving forward. I don't know if that's unique to my computer, but don't be alarmed if it happens on yours.
THE SKINNY ON HINGES
Denny Wann, aka Speedy Gonzales, writes, "What kind of hinges do you recommend for flying at 200 mph?" After choking down the urge to say, "Thank you for thinking I have ever gotten anything to go 200 mph," I collected my wits enough to pen the following response.
For hinges on high-speed airplanes, the "skin hinges" on modern composite Quickies and Quarter 40s are ideal. These are where the fiberglass skin on one side of the premolded surface acts as a hinge, and the skin on the other side is cut away to allow free movement. The resulting slot is usually covered by a strip of Mylar™ tape that is adhered to the back side of the slot and tucked under the skin at the front edge. This allows air to flow smoothly over the slot, rather than burbling up into it and causing drag.
With or without the cover over the slot, skin hinging seals the hinge line so air can't get through it—not only reducing most of the drag, but greatly reducing the tendency of the surface to flutter at high speed. The premolded airplanes use at least two-ounce glass cloth for the skin—usually more. You can duplicate this on a built-up airplane by laying up a strip of two- to four-ounce glass cloth and epoxy resin on one side of the surface, and cutting away enough of the wood on the other side to allow it to swing back and forth the necessary amount—10–15° on most airplanes.
Those who use MonoKote® or similar iron-on coverings can apply the covering directly over the smooth (glass-skinned) side of the hinge; the covering will seal the hinge line and preserve the smooth airflow. In short, skin hinges give the best combination of low drag and flutter resistance for high-speed pylon ships.
RADIO CONTROL PYLON RACING
RETURN TO THE PLANET OF F3D
Last month I promised you results of the F3D (Fédération Aéronautique Internationale [FAI] Pylon) Team Trials, held November 11–12, 2000 at the Speedworld R/C Flyers site in Phoenix, AZ.
I've included some photos, courtesy of Mabo Amano—the "M" of H&M Racing, Inc., and host of a fun racing Web site: www.superminnow.com.
There were 14 official contestants and six "guest fliers," consisting of the current World Champion Chip Hyde and members of Canadian, Japanese, and Mexican teams.
Contest Director Stan Douglas organized the pilots into two matrices of two-airplane heats. This was helpful because it minimized the chances of midairs (according to FAI rules, it is not the order of finish but the elapsed time that counts, so head-to-head competition is unnecessary) and gave a little extra time between heats for those who needed it.
F3D airplanes are high-maintenance beasts. If nothing else, the typical pit stop consists of changing the glow plug, cleaning and checking the pipe connections and hold-downs, and refueling. This requires removing the cowl—that is, roughly one-third of the fuselage—and reinstalling it with tape covering all the seams before the next flight.
Even with all this attention, there were more than enough flameouts to go around. Self-screwing glow plugs were my bugaboo; other fliers had melted-down pipes caused by inefficient cooling or erratic runs caused by over- or under-compression (head spacing). Precontest rumors had most of the entries equipped with retractable landing gear. However, by Friday, the second and last practice day, the pits were a sea of upside-down airplanes with retract bays hastily covered with balsa and tape, and fixed gear bolted on in place of the retract units.
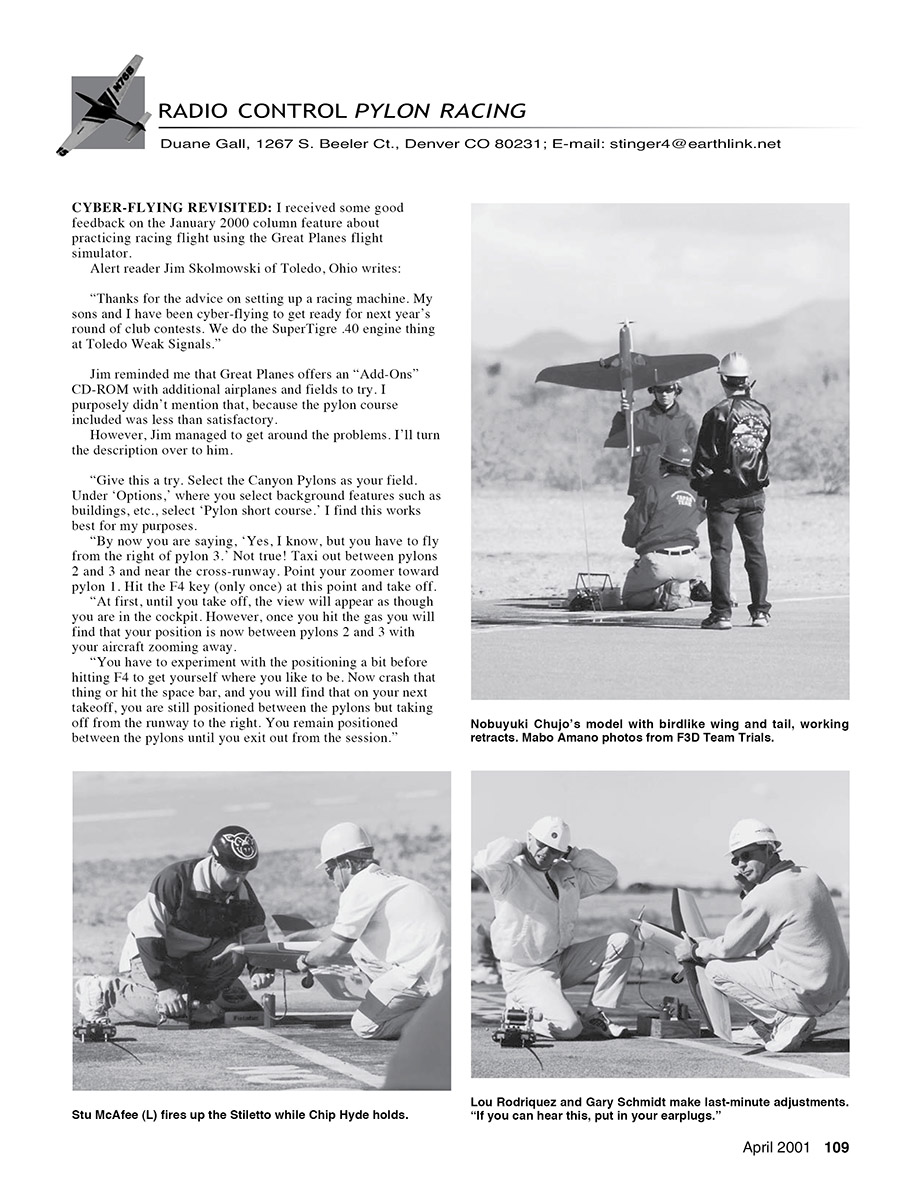
Even with the wheels up and locked, it's next to impossible to keep them from peeking out during a high-g pylon turn. Apparently the stopwatch showed enough of a disadvantage from that to overcome the drag reduction in the straightaways, so most competitors went back to fixed gear. The only one who was able to use retracts to advantage was Nobuyuki Chujo of the Japanese team, with his elegant lavender-and-white model.
My setup, which employed backward-retracting wheels that stayed up on landing, finally got beaten to pieces on the runway after approximately the fourth round, so I also got out the wrenches and surrendered.
The predominant aircraft designs were the German Dago produced by Christian Wolf (not to be confused with a Dago Red P-51); the Pole Duster F3D produced by Jim Katz; the good old Stiletto P-51 design, produced by Gary Hover; and Bruce de Chastel's radical bird-winged Revolution.
All but one contestant used the Nelson front-intake, rear-exhaust (FIRE) .40, and the exception was notable. Henry Bartle, teaming with Bruce de Chastel and flying an Evolution powered by the Metekemeyer (MB) FIRE from Holland, set the fast time of the meet at 1:01.22. The next-fastest competitor was defending World Champion Chip Hyde, with a Nelson FIRE-powered Stiletto at 1:01.82.
The MB has a big, square venturi opening; you could lose all your pocket change in it, and it loves run-in. Bruce de Chastel made propellers for it that measured seven inches in diameter and spun at roughly 28,000 rpm on the ground. He promised the engine would unload better when it was fully broken in.
Bob Smith, returning, and other veteran fliers provided an interesting mix of results. Among the newcomers were several fast and dangerous pilots. Bob Smith placed first in the event, Ray Brown made second alternate, and Darrel Cady had too many "goose eggs" to qualify.
Among those returning from breaks, Stu McAfee took second place, Henry Bartle took third, and I provided the bacon (fourth).
Veteran and former World Champion Richard Verano was edged out by less than four points (that is, less than four seconds total elapsed time after 10 rounds of flying), to rank as first alternate.
Complete results can be viewed on Mabo Amano's Web site. MA
Transcribed from original scans by AI. Minor OCR errors may remain.

