
Radio Control Scale
Stan Alexander [[email protected]]
The author's progress report on his Super Stearman
My Great Planes Super Stearman is coming along nicely. I went to the local hobby shop and, since I'll be using a JR radio with this model, selected one of the new JR Flight Packs for a .120-size model. I'm not a fanatic about JR radios, but I do like them and have several. I have Airtronics systems too. Does anyone out there remember the old JR eight-channel "Scale" radio systems?
The JR Flight Pack comes with five servos, a six-channel receiver, and assorted goodies including two 12-inch servo extensions. I'll need both of those with the Stearman. The package doesn't come with a crystal; you need to purchase that separately.
Yes, for what I paid for this Flight Pack I could have bought a good sport radio with standard servos, but Great Planes recommends servos with at least 52 ounces of torque for the Stearman's control surfaces. Looking at—and then measuring—the size of the ailerons, you'll see why.
Strings were added through the wing ribs, so it was easy to pull the 12-inch servo extensions through each panel from the hole cut for the servos. This took approximately five minutes to do, gently pulling back and forth until the leads were all the way through. When I hit a rib, I'd pull back a little the other way and then proceed slowly.
A good square knot on the servo extension behind the connector held it in place. Then I screwed the servos down to the exterior of the wing. I used masking tape to hold the servo extension at the end of the root (inboard) rib of the wing panel. I'm going to paint the servos white to try to hide them a bit.
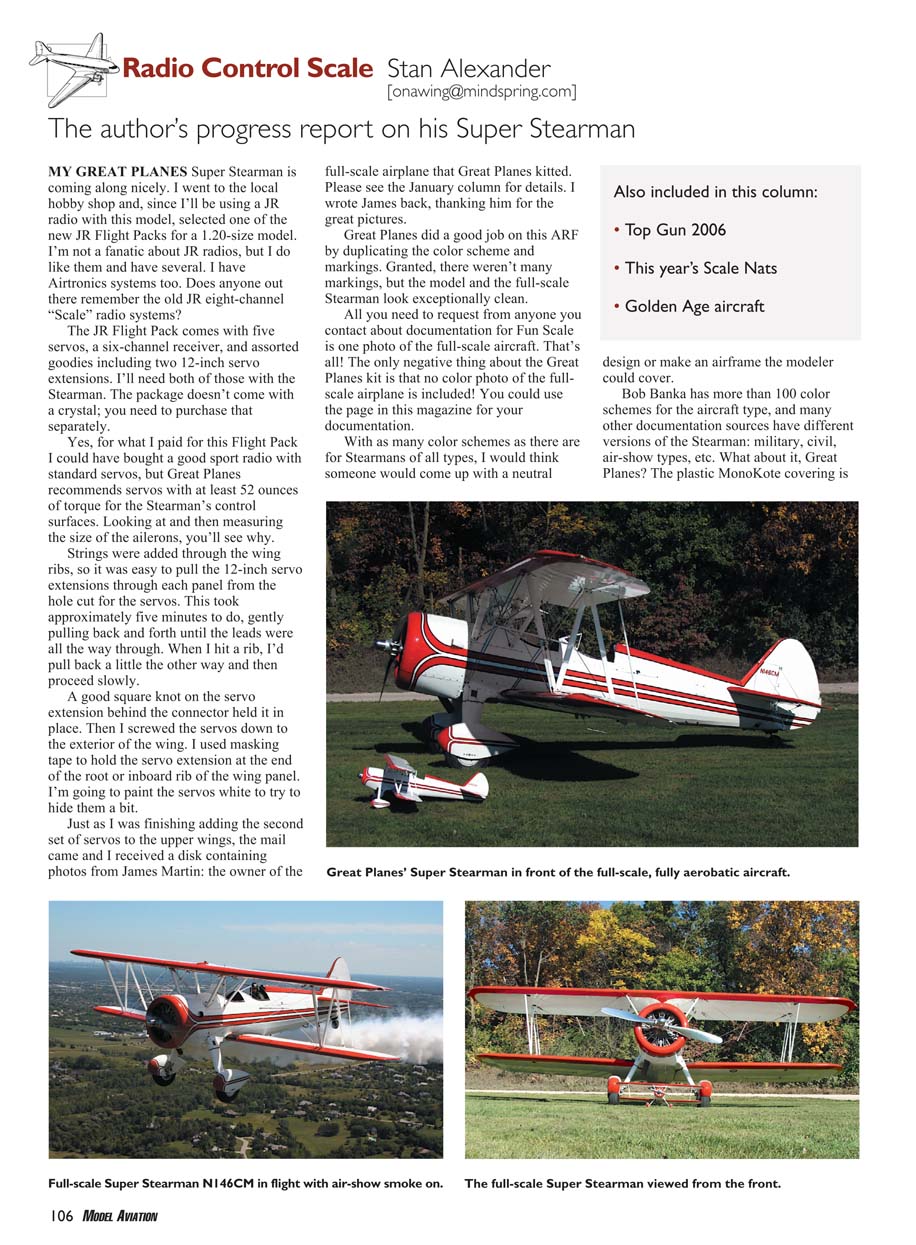
Just as I was finishing adding the second set of servos to the upper wings, the mail came and I received a disk containing photos from James Martin, the owner of the full-scale airplane that Great Planes kitted. Please see the January column for details. I wrote James back, thanking him for the great pictures.
Great Planes did a good job on this ARF by duplicating the color scheme and markings. Granted, there weren't many markings, but the model and the full-scale Stearman look exceptionally clean. All you need to request from anyone you contact about documentation for Fun Scale is one photo of the full-scale aircraft. That's all! The only negative thing about the Great Planes kit is that no color photo of the full-scale airplane is included— you could use the page in this magazine for your documentation.
With as many color schemes as there are for Stearmans of all types, I would think someone would come up with a neutral design or make an airframe the modeler could cover. Bob Banka has more than 100 color schemes for the aircraft type, and many other documentation sources show different versions of the Stearman: military, civil, air-show types, etc. What about it, Great Planes? The plastic MonoKote covering is nice and shiny, but how about a fabric-covered ARF that the modeler could paint?
One of the photos shows the full-scale Stearman with full smoke on. Smoke would be a great addition to the model. The pictures also give me some ideas about adding other details, just for the fun of it.
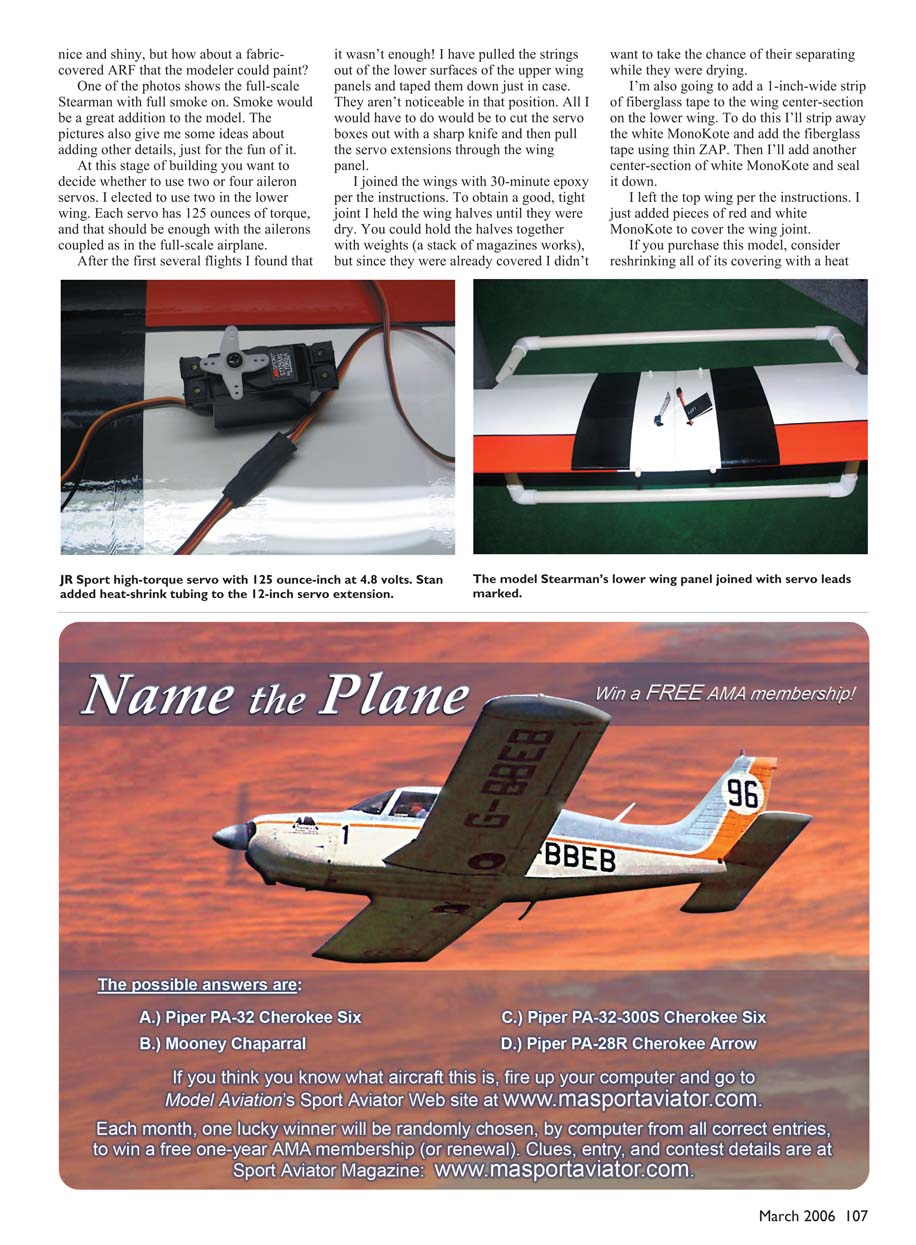
At this stage of building you want to decide whether to use two or four aileron servos. I elected to use two in the lower wing. Each servo has 125 ounces of torque, and that should be enough with the ailerons coupled as in the full-scale airplane.
After the first several flights I found that it wasn't enough. I have pulled the strings out of the lower surfaces of the upper wing panels and taped them down just in case. They aren't noticeable in that position. All I would have to do to add additional servos would be to cut the servo boxes out with a sharp knife and then pull the servo extensions through the wing panel.
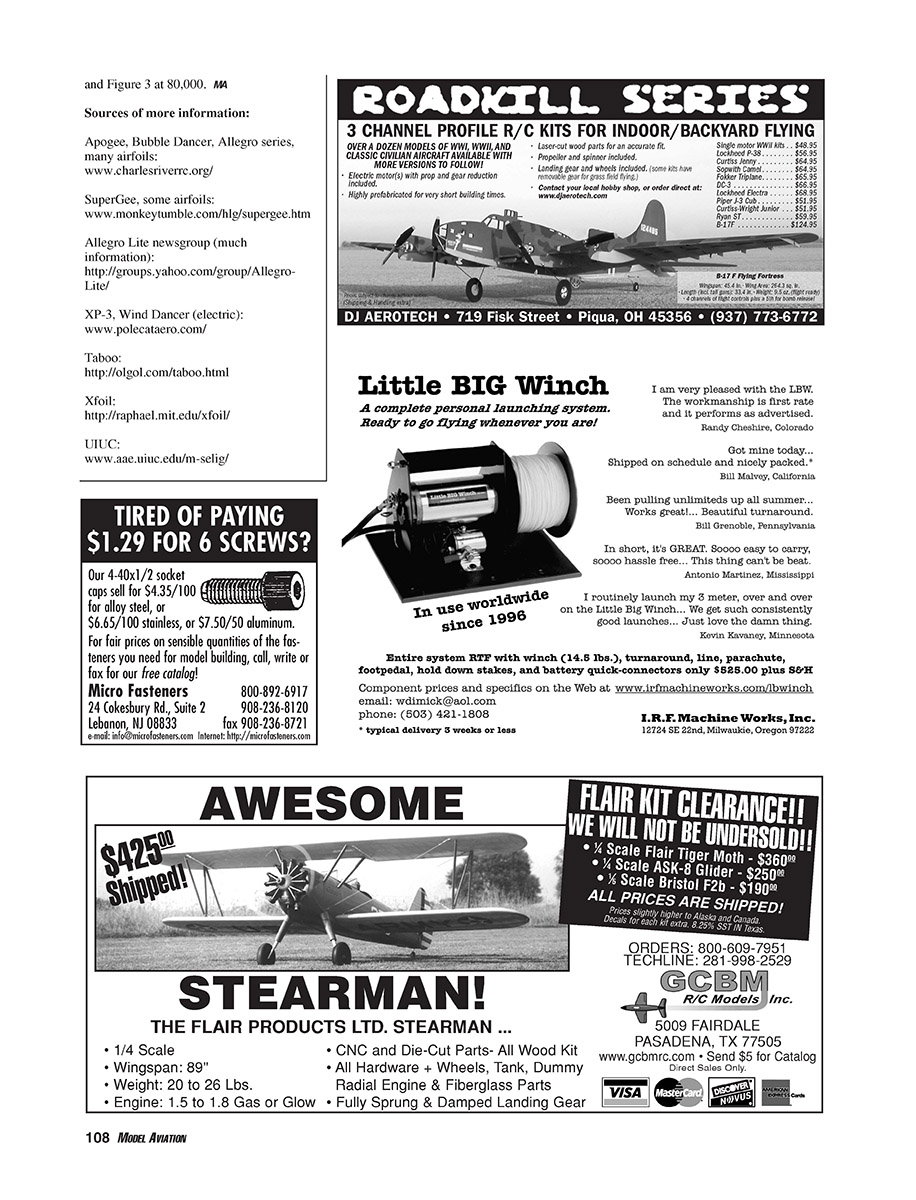
I joined the wings with 30-minute epoxy per the instructions. To obtain a good, tight joint I held the wing halves until they were dry. You could hold the halves together with weights (a stack of magazines works), but since they were already covered I didn't want to take the chance of their separating while they were drying.
I'm also going to add a 1-inch-wide strip of fiberglass tape to the wing center section on the lower wing. To do this I'll strip away the white MonoKote and add the fiberglass tape using thin ZAP. Then I'll add another center section of white MonoKote and seal it down.
I left the top wing per the instructions. I just added pieces of red and white MonoKote to cover the wing joint. If you purchase this model, consider re-shrinking all of its covering with a heat gun.
Transcribed from original scans by AI. Minor OCR errors may remain.

