
Radio Control Scale — Stan Alexander [[email protected]]
2007 Scale National Aeromodeling Championships recap
THE 2008 Scale National Championships will take place in August. It will be held, as it has been for many years, at AMA’s International Aeromodeling Center in Muncie, Indiana.
The weather for the 2007 Scale Nats was great, with no major storms or weather-related issues serious enough to cancel the event. August in Muncie may be on the warm side, but the rest of the conditions are normally excellent.
Also included in this column:
- Basic building skills coming to this column
- ElectriFly recovering project
- World War I models need a pilot with rudder skills
Unlike many Scale contests, the AMA Nats hosts all the classes listed in the AMA Competition Regulations handbook. Within the different categories you can find an event for whatever skill level you can participate in, from Fun Scale Novice to FAI F4C, a class of international competition in which many contestants scratch-build their models and fly them.
Event highlights and winners
Terry Nitsch, a Top Gun pilot, won Fun Scale Open with an electric-powered Hangar 9 P-51 Mustang. He flew it realistically and included all the mechanical options available for a P-51, including bomb drop, flaps, and retracts.
Joe Hass took first place in Fun Scale Novice with a P-51 from EZ Models, powered by an O.S. .46 engine.
Billy Thompson took first place in Sportsman with his 1/3-scale Sopwith Pup, which featured a dummy engine that was newly installed before the Nats. The difference between Fun Scale and Sportsman is that in Sportsman you have to build the model. After winning several Sportsman trophies, Billy will be ready to step up to Expert class.
Jack Buckley took first place in F4C. In F4C many modelers design their own plans and then construct and finish their aircraft; using someone else’s plans is also acceptable. You see the most beautiful aircraft in F4C world competition. It’s a natural progression from Sportsman to Expert and then finally to F4C. The rules for all these classes are similar.
Nats Team Scale included a mix of veterans and younger flyers, plus a father-and-son team, which helped populate this class with great modelers. Dale and Jeremy Arvin took first place with their SNJ-5 built from a Yellow Aircraft kit.
Dave Johnson competed with two scratch-built World War I models: an Albatros D.III and a later-model Albatros D.Va. He won the Expert division with his D.Va and took second place in Designer, just behind Hal Parenti and his Ryan Fireball, with the D.III.
In many columns I’ve written that in Fun Scale you can enter a model you bought or enter Sportsman class and build a model from a kit or semi-kit. You can do all this while working on that Scale model you’ve always dreamed of — such as a P-51B you don’t see a kit of and must build from plans.
Sometimes I have problems finding enough room in the shop to work on a new project. One of the cars may have to sit outside this winter!
Scale Nats sponsors were Airborne Media, Pacer Zap Glue, Balsa USA, Barbee Construction, Brodak Manufacturing Co., Great Planes, Futaba, R/C Report, Bob’s Aircraft Documentation, Dynamic Balsa, FMA Direct, Lone Star Models, Master Airscrew, Micro Fasteners, Nick Ziroli Plans, Northeast Screen Graphics, Precision Cut Kits, and Vintage R/C Plans.
Experienced modelers will notice that in this and many future columns I will be writing about the basics of Scale or modeling in general. That’s because we have to cultivate a new generation of Scale modelers, and quickly. We want to — no, we desperately need to — encourage new modelers to enter the fold, and providing them with the basics can only help.
ElectriFly WWI ARF project (Fokker Dr.I, D.VII, S.E.5a)
I’ve started a new project. At the Toledo R/C Expo I saw three little scale electric-powered gems at the Great Planes area: the ElectriFly Fokker Dr.I, Fokker D.VII, and S.E.5a ARFs. I thought they would make great models with different paint schemes.
The original finish on the Dr.I is similar to that of the Red Baron, and with a little work it would be easy to duplicate. But I wanted something different and hadn't decided on the finish yet.
Each of these kits costs approximately $99, and then the rest of the radio gear will cost you roughly $175 if you don't have your own receiver and radio. So you're looking at slightly more than $300 for the entire airplane and the gear needed to power it.
To begin the strip job, get out a new box of hobby blades. Change the blades often. If you get to the point where you catch yourself sawing back and forth, it's past time to swap the blade. I usually wrap used blades in masking tape so I, or somebody else who accidentally drops something in the trash, can retrieve it without getting cut.
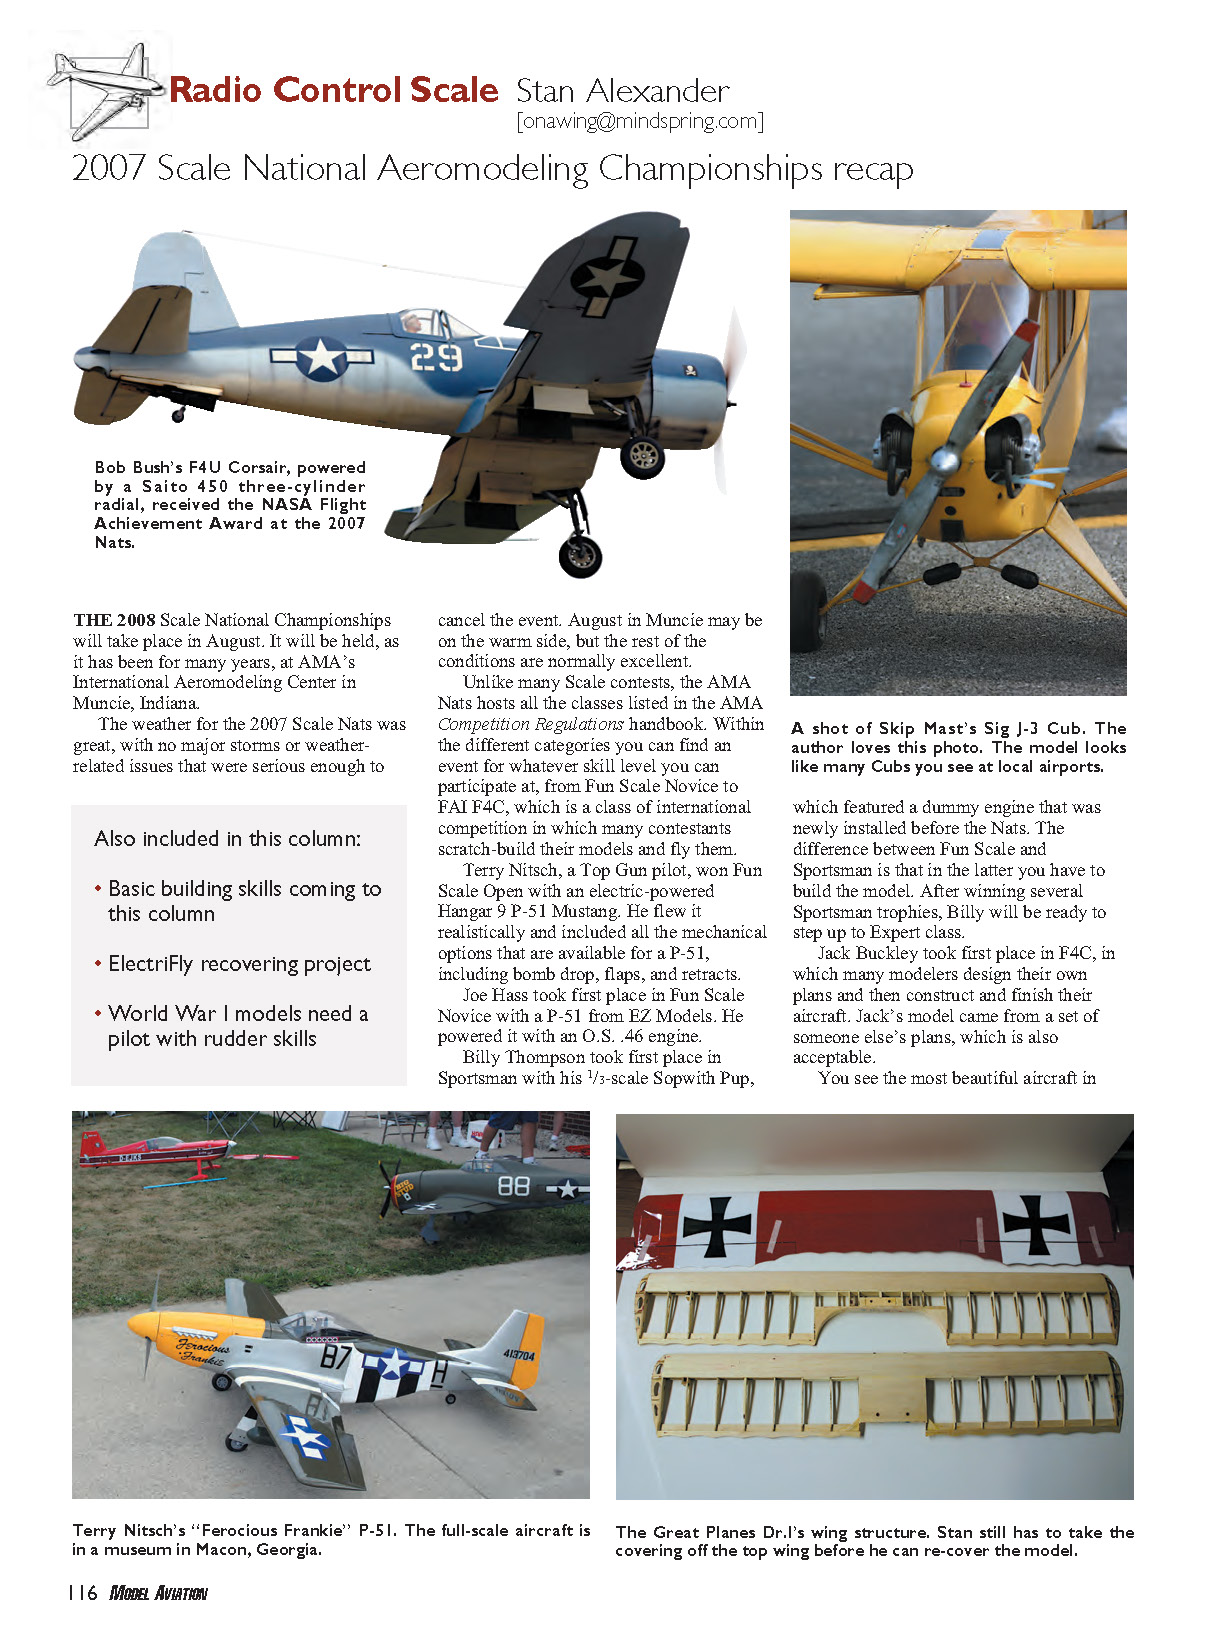
Since there were three wings to strip on the Dr.I, I began taking the MonoKote off the lower wing first. I noticed that the covering was glued to each rib and all the surfaces. That is important to remember for when I recover the model.
I managed to get almost all the covering off, and I saved the Iron Cross graphics on the fuselage and the wings. I'll use those as templates for the new graphics I will add.
I went on to strip the middle wing and then the top wing. I saved the smallest and most delicate parts until last, such as the ailerons, stabilizer, and elevator.
The fuselage covering was also adhered to all the Dr.I's surfaces. Many models on which the covering is already applied have just the edges secured, and then the covering is shrunk. But I'm guessing that the designers did the covering this way with this small model to add strength to the overall structure.
Recovering and finishing with Coverite Microlite
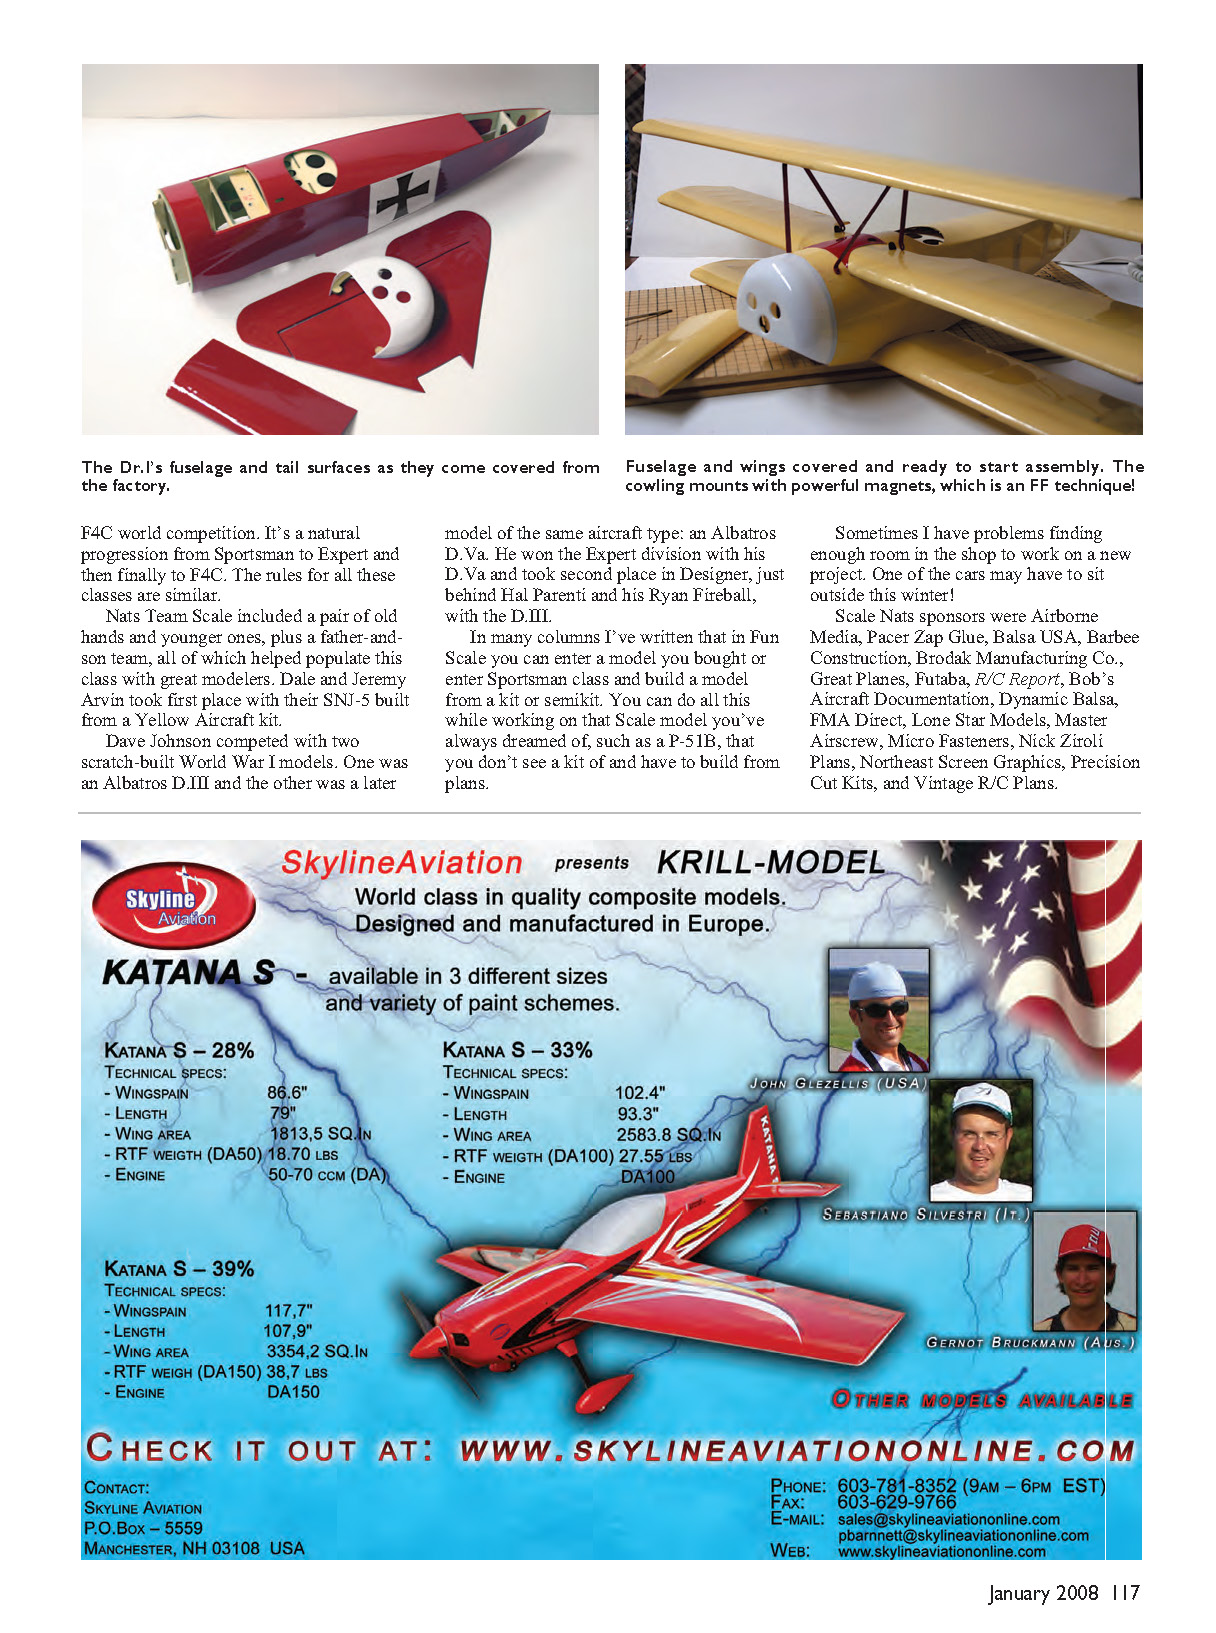
I selected Coverite Microlite at the local hobby shop. This material weighs only 0.06 ounce per square yard. It is an iron-on covering with the glue already on the backside. You don't have to use brushed-on glue in the covering process.
I lightly sanded the Dr.I in preparation for covering, and then I started again with the bottom wing of the three. The Microlite requires a medium-heat iron setting; if your iron has a setting of 1–3, put it on 2.
I didn't use a heat gun for this finishing technique. If I had, it might have warped the airplane's structure.
Cover the bottom surface of the wing first. Cut the edges of the covering flush with the edge of the surface after you iron it down the second time.
On the top surface, as with the bottom, start in the middle and work your way out to the wingtips. I leave approximately 1½ inches of extra covering on the outside edges to have something for my big hands to hold onto.
Don't stretch the material too tight; you'll tear it. Let the glue do its work, and you'll have a good-looking covering job.
Work the same way with the fuselage. Start with the bottom, then do the sides, and then finish the top and turtledeck behind where the pilot sits.
The ailerons were the hardest for me to cover. They were delicate with small balsa ribs and could be damaged easily if not finished with covering material.
The kit comes with many screws, cabanes, strut mounts, and other hardware. Always put these in a plastic bag with a resealable opener. This will keep all the parts in one place, and you won't be in a panic looking all over the shop or the floor for parts.
I'll have more about this project next month.
Mint Julep Scale Meet — S.E.5a impressions
At the Mint Julep Scale Meet I flew Dave Johnson's S.E.5a. It was already trimmed out and flew beautifully. I did have to add rudder in the turns, as you do with many World War I aircraft, so don't think you can go out and sport-fly this model with ailerons only; it needs the rudder too.
You have to use the rudder or make some ugly turns at the very least. In calm conditions you can take off with the model from asphalt or you can hand-launch it if you want. I made a few ugly turns too, until I caught myself. Dave graciously let almost anyone who wanted to fly the S.E.5a take a turn.
His full-time job is as a product designer for Hobbico, and he loves to fly Scale models in his own time. That part isn't a requirement of his job, but an added perk to allow him to compete more often and go to trade shows.
Fair skies and tailwinds. MA
Transcribed from original scans by AI. Minor OCR errors may remain.

