

Radio Control Scale — 2010/05
Finishing scale parts with fiberglass
Stan Alexander [email protected]
Adding the Piper PA‑11’s distinctive cowling makes a large difference in this model versus the typical J‑3 Cub. The full‑scale aircraft had several subtle differences, but the enclosed engine was one of the major distinctions.
Use spackle on your balsa cowling to fill holes or to flesh out curves where you want them. I applied a thin layer of spackle around the cowling sides to make the curves more in line with the full‑scale PA‑11. I also added filler balsa to the sides to bow out the backsides, per full scale, for cooling exits.
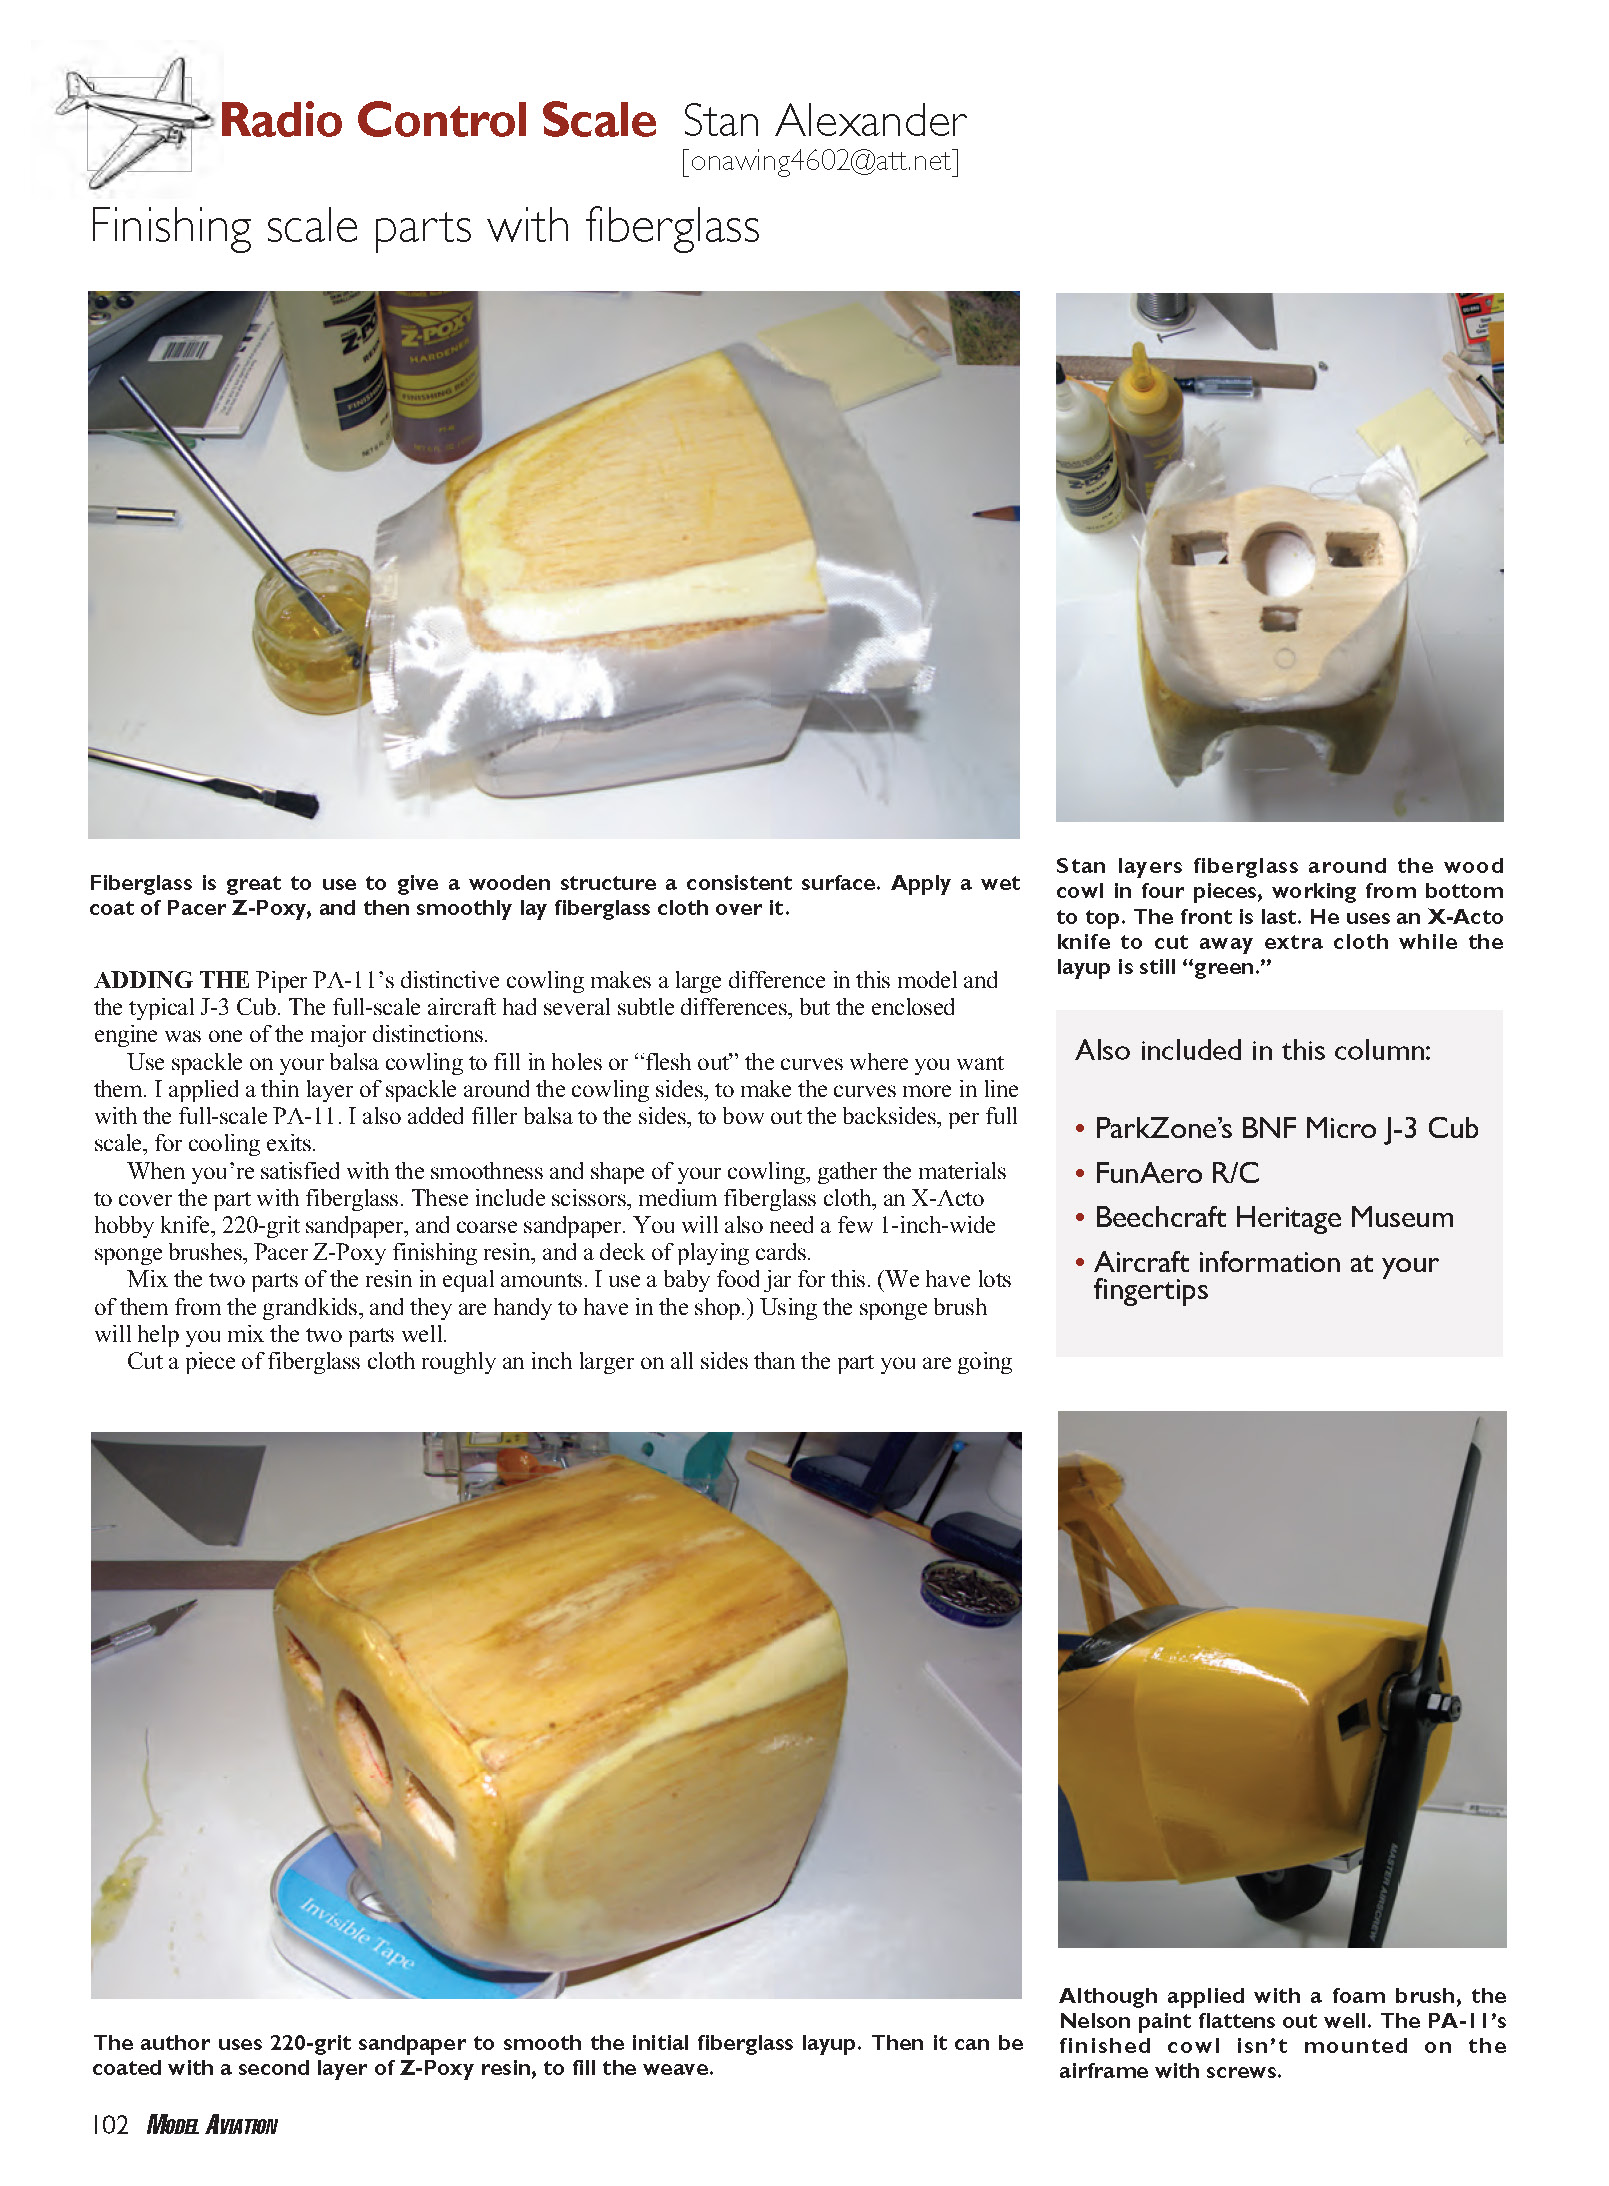
When you’re satisfied with the smoothness and shape of your cowling, gather the materials to cover the part with fiberglass.
Materials
- Scissors
- Medium fiberglass cloth
- X‑Acto hobby knife
- 220‑grit sandpaper and coarse sandpaper
- A few 1‑inch‑wide sponge brushes
- Pacer Z‑Poxy finishing resin (two‑part)
- A deck of playing cards (for squeegeeing)
- A small mixing jar (I use a baby food jar)
Mix the two parts of the resin in equal amounts. Using a sponge brush helps mix the two parts well.
Step‑by‑step process
- Cut a piece of fiberglass cloth roughly an inch larger on all sides than the part you will cover.
- Apply mixed Pacer finishing resin to the balsa in even strokes along the full length of the area you’re working on. Start with the bottom, then the sides and top, and finish with the front.
- After you apply a wet coat, lay the precut fiberglass cloth over the wet resin and let it soak through. Use your brush to help the resin penetrate the cloth.
- Use one of your playing cards to squeegee out excess resin while positioning the cloth exactly where you want it. In a short time the fiberglass will be set permanently. Continue working the sides, then the top, and then the front.
- If you are unhappy with the way something looks while the resin is still wet, remove the fiberglass cloth, use the playing card to remove the resin, sand, and start over.
With the first coat on the part, lightly sand the entire cowl so you can find any high spots or places that need additional filling and sanding. Use coarse‑grit sandpaper to remove unwanted bumps, but be careful not to take too much off at once.
Add another coat of resin to the entire structure and hold it up in the light to check for runs, high spots, and low spots. Use the brush to even these out. I avoid small epoxy brushes because they tend to shed bristles, which end up embedded in the finish.
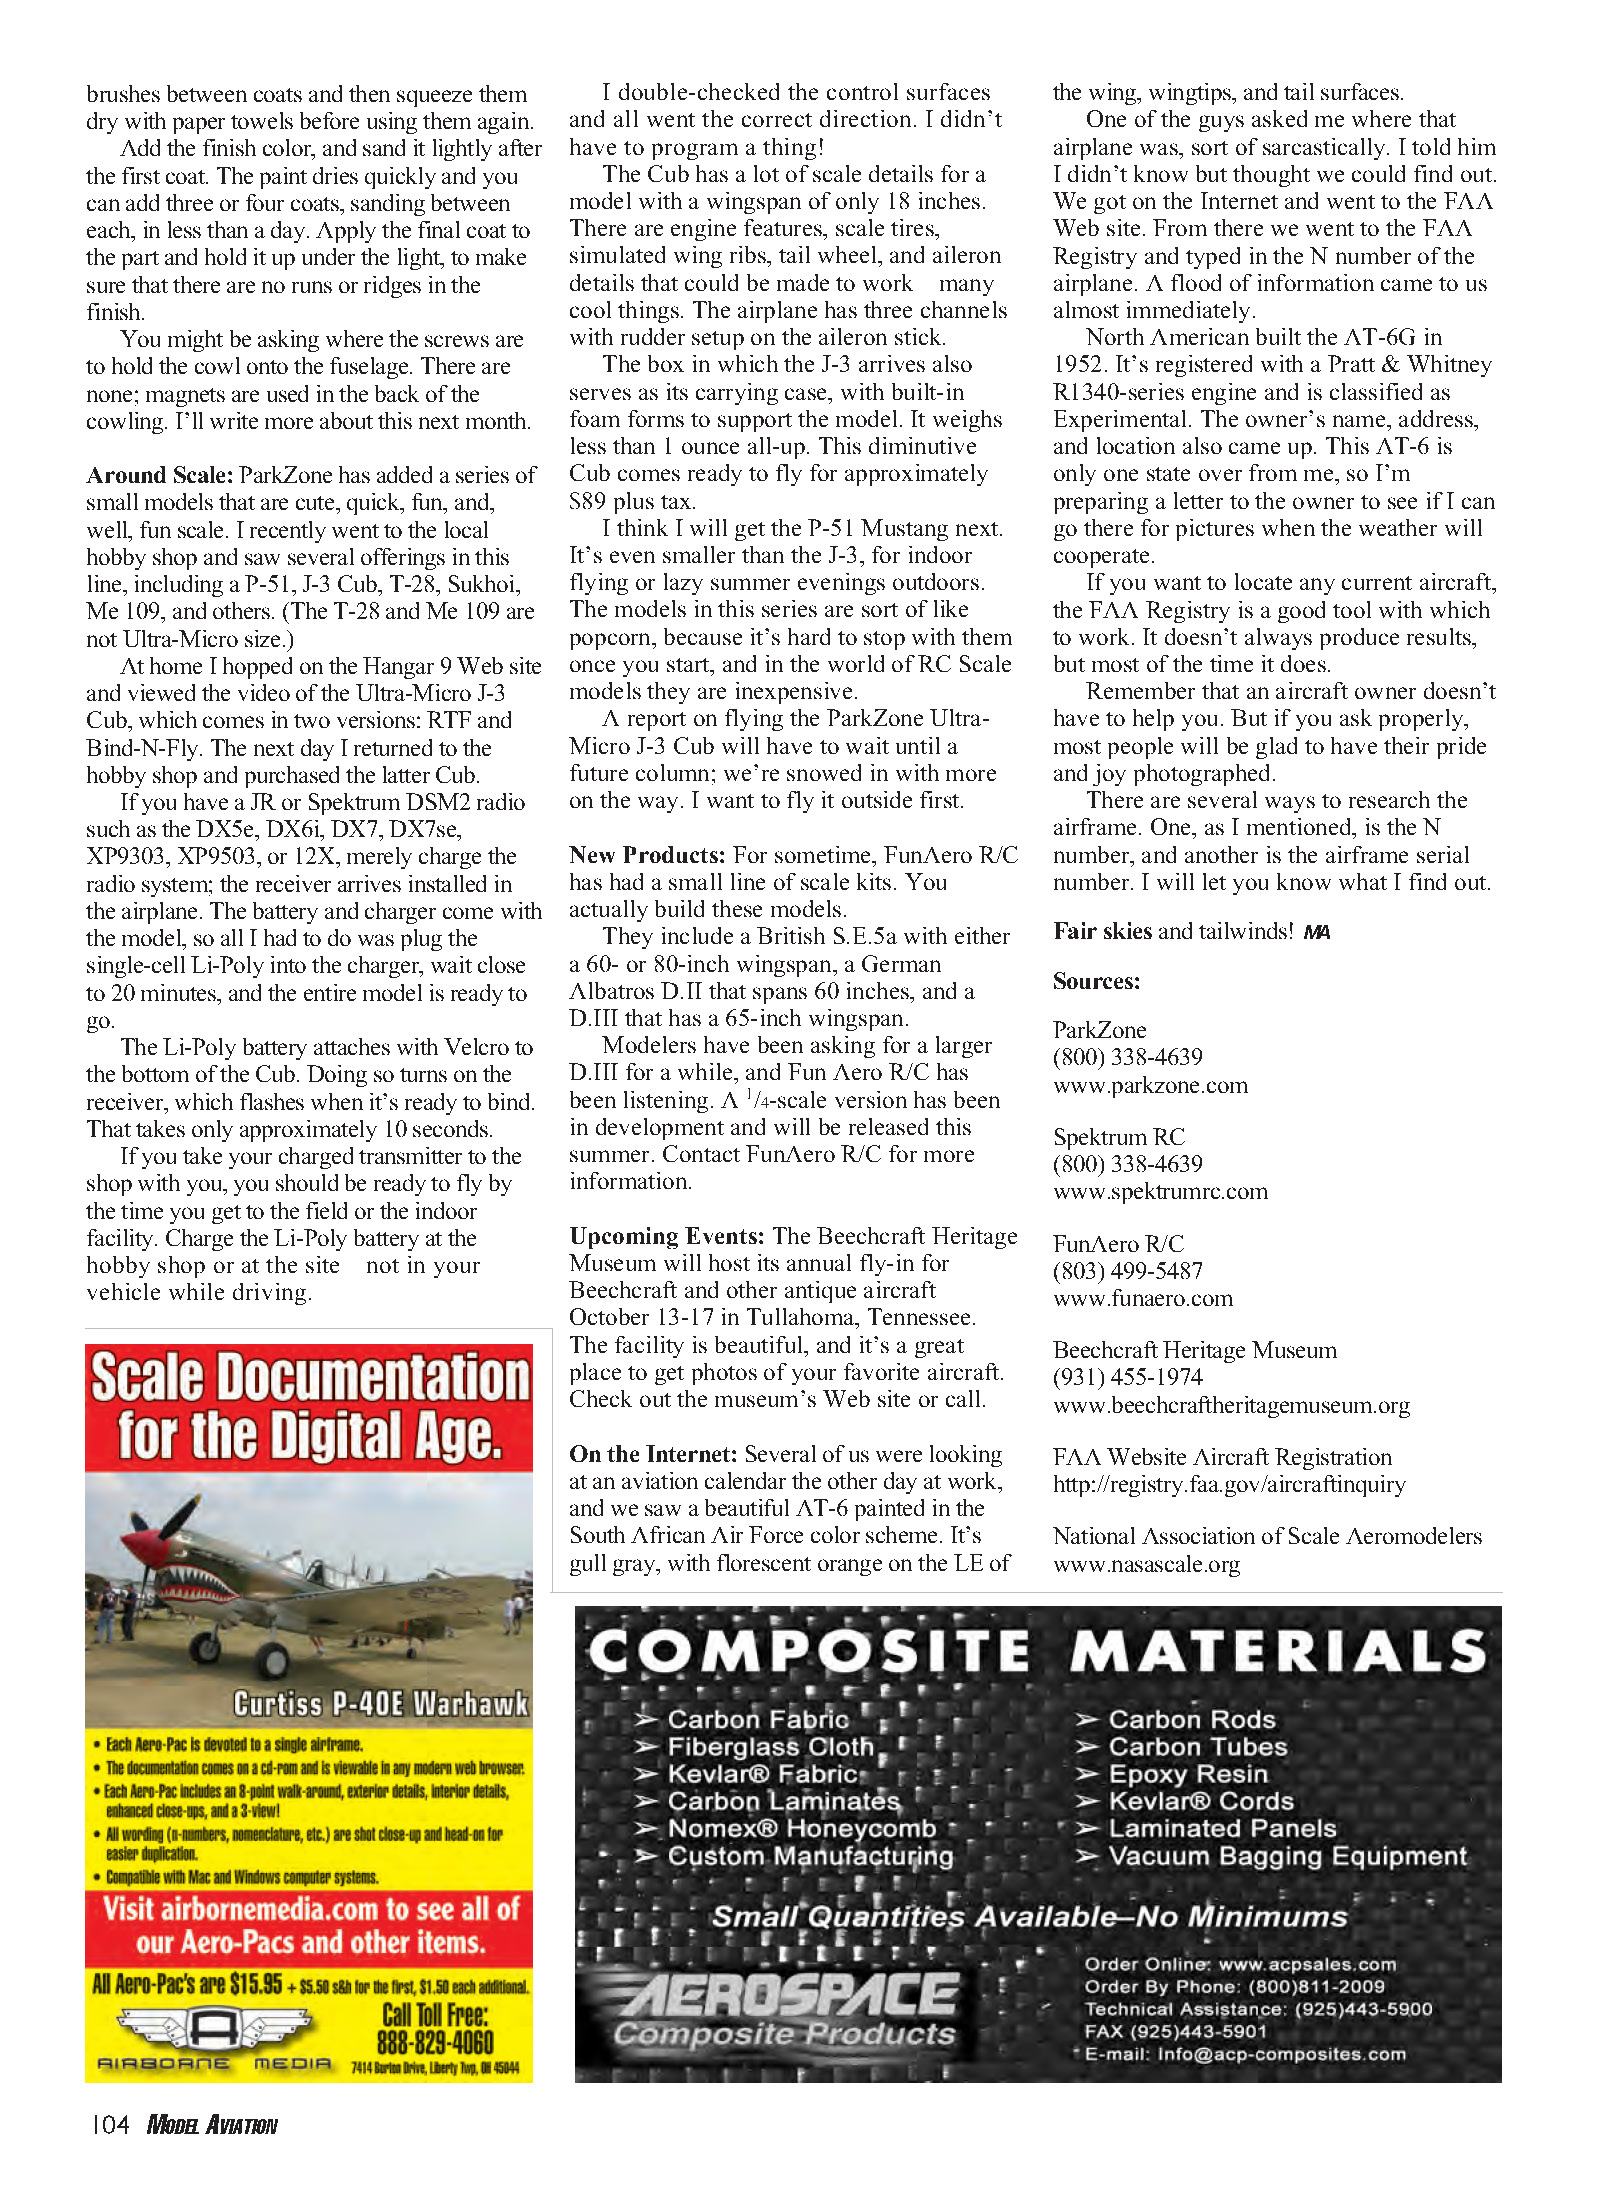
After you are satisfied with the smoothness of the surface and you’ve sanded all edges and cutouts, it’s time to prime the cowling. As on the rest of the airframe, I use Nelson paint and primer. Paint the first coat with a sponge brush, let it dry, then rub most of it off with 220‑grit sandpaper.
You may discover some bumps and ridges; sand these down and add another coat of primer. When the primed surface is smooth, apply Nelson Lockhaven Yellow as the finish color using a separate sponge brush. Nelson Hobby Paint cleans up with water; soak the brushes between coats and squeeze them dry with paper towels before reusing.
Add the finish color, sanding lightly after the first coat. The paint dries quickly, so you can apply three or four coats, sanding between each, in less than a day. Apply the final coat and hold the part up under light to make sure there are no runs or ridges.
You might be asking where the screws are to hold the cowl onto the fuselage. There are none; magnets are used in the back of the cowling. I’ll write more about this next month.
Around Scale
ParkZone has added a series of small models that are cute, quick, and fun scale. I recently visited the local hobby shop and saw several offerings in this line, including a P‑51, J‑3 Cub, T‑28, Sukhoi, Me 109, and others. (The T‑28 and Me 109 are not Ultra‑Micro size.)
At home I watched the Hangar 9 video of the Ultra‑Micro J‑3 Cub, which comes in two versions: RTF and Bind‑N‑Fly. The next day I returned to the hobby shop and purchased the Bind‑N‑Fly Cub.
If you have a JR or Spektrum DSM2 radio such as the DX5e, DX6i, DX7, DX7se, XP9303, XP9503, or 12X, merely charge the radio system; the receiver arrives installed in the airplane. The battery and charger come with the model, so all I had to do was plug the single‑cell Li‑Poly into the charger, wait close to 20 minutes, and the entire model was ready to go.
The Li‑Poly battery attaches with Velcro to the bottom of the Cub. Doing so turns on the receiver, which flashes when it’s ready to bind. That takes only approximately 10 seconds.
If you take your charged transmitter to the shop, you should be ready to fly by the time you get to the field or indoor facility. Charge the Li‑Poly battery at the hobby shop or at the site — not in your vehicle while driving.
I double‑checked the control surfaces and all moved in the correct direction. I didn't have to program a thing!
The Cub has a lot of scale details for a model with an 18‑inch wingspan. There are engine features, scale tires, simulated wing ribs, tail wheel, and aileron details that make for a convincing little model. The airplane has three channels with rudder on the aileron stick.
The box in which the J‑3 arrives also serves as its carrying case, with built‑in foam forms to support the model. It weighs less than 1 ounce all‑up. This diminutive Cub comes ready to fly for approximately $89 plus tax.
I think I will get the P‑51 Mustang next. It’s even smaller than the J‑3, for indoor flying or lazy summer evenings outdoors. The models in this series are addictive — it’s hard to stop once you start — and in the world of RC scale models they are inexpensive.
A report on flying the ParkZone Ultra‑Micro J‑3 Cub will have to wait until a future column; we’re snowed in with more on the way. I want to fly it outside first.
New Products
For some time, FunAero R/C has offered a small line of scale kits that you actually build. They include:
- British S.E.5a — 60‑ or 80‑inch wingspan
- German Albatros D.II — 60‑inch wingspan
- Albatros D.III — 65‑inch wingspan
Modelers have been asking for a larger D.III for a while, and FunAero R/C has been listening. A 1/4‑scale D.III has been in development and will be released this summer. Contact FunAero R/C for more information.
Upcoming Events
The Beechcraft Heritage Museum will host its annual fly‑in for Beechcraft and other antique aircraft October 13–17 in Tullahoma, Tennessee. The facility is beautiful and it’s a great place to get photos of your favorite aircraft. Check the museum’s website or call for details.
On the Internet
Several of us were looking at an aviation calendar the other day at work and saw a beautiful AT‑6 painted in the South African Air Force color scheme — gull gray with fluorescent orange on the leading edge of the wing, wingtips, and tail surfaces.
One of the guys asked where that airplane was. We went to the FAA website, accessed the FAA Registry, and typed in the N‑number of the airplane. A flood of information came up almost immediately.
North American built the AT‑6G in 1952. It’s registered with a Pratt & Whitney R‑1340‑series engine and is classified as Experimental. The owner’s name, address, and location also came up. This AT‑6 is only one state over from me, so I’m preparing a letter to the owner to see if I can go there for pictures when the weather cooperates.
If you want to locate any current aircraft, the FAA Registry is a good tool. It doesn’t always produce results, but most of the time it does.
Remember that an aircraft owner doesn’t have to help you. But if you ask properly, most people will be glad to have their pride and joy photographed.
There are several ways to research the airframe — by N‑number or by airframe serial number. I will let you know what I find out.
Fair skies and tailwinds! MA
Sources
- ParkZone — (800) 338‑4639, www.parkzone.com
- Spektrum RC — (800) 338‑4639, www.spektrumrc.com
- FunAero R/C — (803) 499‑5487, www.funaero.com
- Beechcraft Heritage Museum — (931) 455‑1974, www.beechcraftheritagemuseum.org
- FAA Website Aircraft Registration — http://registry.faa.gov/aircraftinquiry
- National Association of Scale Aeromodellers — www.nasascale.org
Transcribed from original scans by AI. Minor OCR errors may remain.

