

RADIO CONTROL SCALE AEROBATICS
Mike Hurley, 11542 Decatur Ct., Westminster CO 80234; E-mail: [email protected]
ONE OF THE most overlooked—no, forgotten—steps in building a new model and getting it ready for competition is trimming it for precision flight. I don't mean adjusting the aileron and elevator trim. I mean tuning your airplane to fly to the best of its ability. I'll admit it; I've never fully trimmed one of my airplanes. I usually end up buying or building the next big thing! Maybe all I needed to do was spend a few days out at the field getting it dialed in just right. Trimming is a forgotten art by many modern competitors.
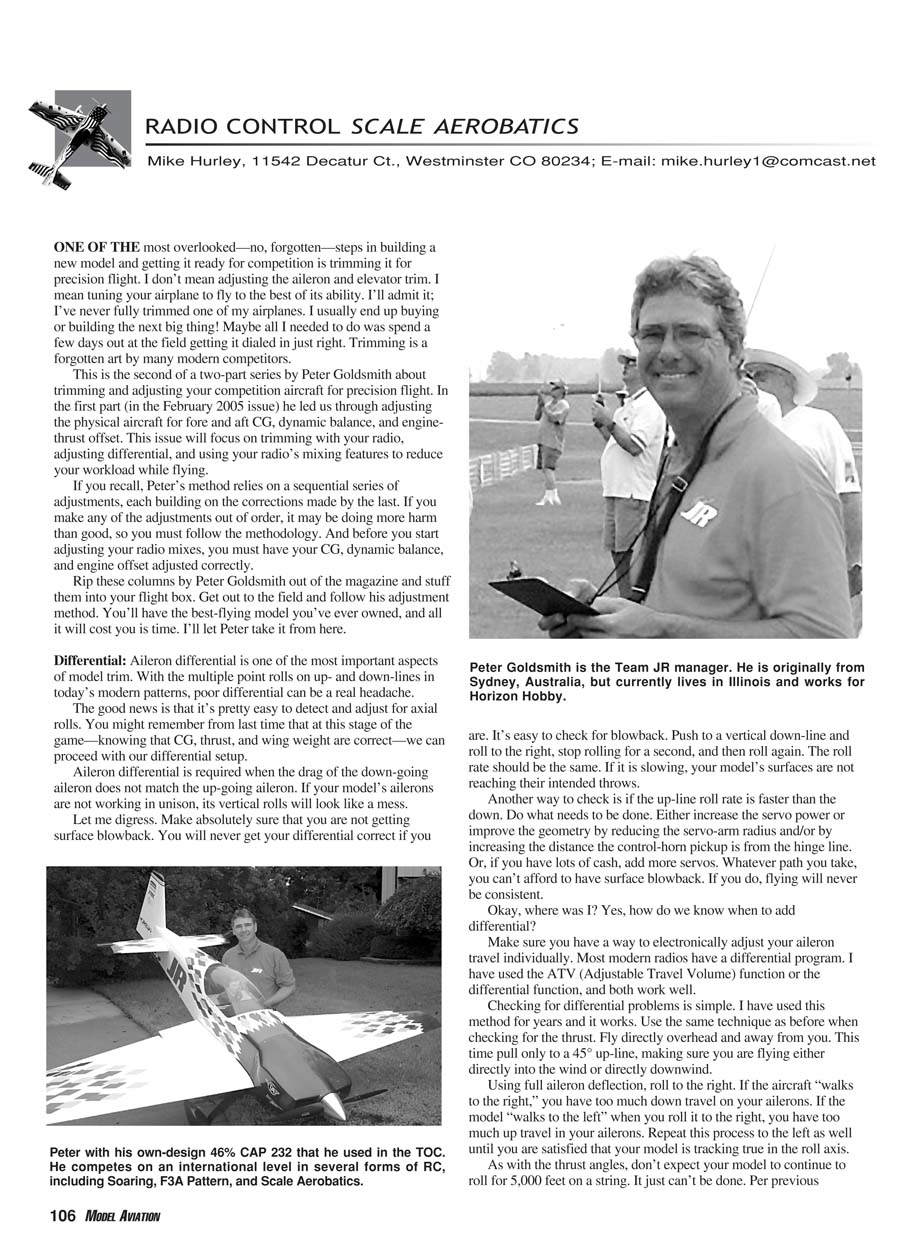
This is the second of a two-part series by Peter Goldsmith about trimming and adjusting your competition aircraft for precision flight. In the first part (in the February 2005 issue) he led us through adjusting the physical aircraft for fore and aft CG, dynamic balance, and engine-thrust offset. This issue will focus on trimming with your radio, adjusting differential, and using your radio's mixing features to reduce your workload while flying.
If you recall, Peter's method relies on a sequential series of adjustments, each building on the corrections made by the last. If you make any of the adjustments out of order, it may be doing more harm than good, so you must follow the methodology. And before you start adjusting your radio mixes, you must have your CG, dynamic balance, and engine offset adjusted correctly.
Rip these columns by Peter Goldsmith out of the magazine and stuff them into your flight box. Get out to the field and follow his adjustment method. You'll have the best-flying model you've ever owned, and all it will cost you is time. I'll let Peter take it from here.
Differential
Aileron differential is one of the most important aspects of model trim. With the multiple-point rolls on up- and down-lines in today's modern patterns, poor differential can be a real headache.
The good news is that it's pretty easy to detect and adjust for axial rolls. You might remember from last time that at this stage of the game—knowing that CG, thrust, and wing weight are correct—we can proceed with our differential setup.
Aileron differential is required when the drag of the down-going aileron does not match the up-going aileron. If your model's ailerons are not working in unison, its vertical rolls will look like a mess.
Make absolutely sure that you are not getting surface blowback. You will never get your differential correct if you are. It's easy to check for blowback. Push to a vertical down-line and roll to the right, stop rolling for a second, and then roll again. The roll rate should be the same. If it is slowing, your model's surfaces are not reaching their intended throws.
Another way to check is if the up-line roll rate is faster than the down. Do what needs to be done. Either increase the servo power or improve the geometry by reducing the servo-arm radius and/or by increasing the distance the control-horn pickup is from the hinge line. Or, if you have lots of cash, add more servos. Whatever path you take, you can't afford to have surface blowback. If you do, flying will never be consistent.
Okay, where was I? Yes, how do we know when to add differential?
Make sure you have a way to electronically adjust your aileron travel individually. Most modern radios have a differential program. I have used the ATV (Adjustable Travel Volume) function or the differential function, and both work well.
Checking for differential problems is simple. I have used this method for years and it works. Use the same technique as when checking thrust angles. Fly directly overhead and away from you. This time pull only to a 45° up-line, making sure you are flying either directly into the wind or directly downwind.
Using full aileron deflection, roll to the right. If the aircraft "walks to the right," you have too much down travel on your ailerons. If the model "walks to the left" when you roll to the right, you have too much up travel in your ailerons. Repeat this procedure to the left as well until you are satisfied that your model is tracking true in the roll axis.
As with the thrust angles, don't expect your model to continue to roll for 5,000 feet on a string. It just can't be done. If you get conflicting recommendations, go with the majority situation. There are not that many 5,000-foot up- and down-lines. Fortunately.
With the correct differential on your model, you will be amazed by how easy it is to do hesitations on lines. Another benefit is in point rolls on a horizontal line. The rudder will have an even feel on both sides, as your model will not be barreling in the rolls.
Mixing
You will notice that this topic is the last in the sequence, but it's where many people go first! I get phone calls all the time from excited pilots saying, "Pete, I just test-flew my new Edge; it only has 8% aileron mix and 4% knife-edge mixing." Boy, I think, they sure got to the details of trimming their models faster than I can. If you stick to the correct trim sequence, you may be ready after only 10–20 flights to work on the mixing to fine-tune your model.
I've broken the Program Mix (P-mix) topic into two sections. The first is the down-line torque offset, or throttle offset mixing. The second is the traditional rudder-to-elevator/aileron mixing. Most pilots have a fairly good understanding of the latter, but not many are using throttle offset mixing. I have seen some, but only in pitch compensation. Pay attention to what your model is doing on a down-line or at reduced throttle (idle) in the roll or yaw axis.
One of the benefits of judging our events is that you see many strange trim situations. I can clearly remember models at the Nats rolling on down-lines and yawing off-axis, causing some strange-looking down-line rolls. It's almost impossible to have perfect trim in roll at all speeds. All you can hope for is to mix in some compensation to help reduce your workload.
The yaw and the roll axis, in most cases, have a bigger effect on model tracking on down-lines than any other situation. Imagine what the effects of a 5° error on every down-line would mean. Over the height of the box, your airplane can drift in or out by as much as 150 feet. The same applies to the roll axis. Have you ever noticed how hard it is to get the wings level when approaching a pull corner with little time? With your model rolling and yawing at different speeds, you will never be consistent. It is hard enough to be sure if your wings are level, let alone chase an out-of-trim situation. The good news is that it's fairly easy to compensate for.
Throttle-to-Aileron Mixing
Let's do the roll axis first. You can do this either of two ways, and both work well. In fact, I suggest that you try both to get the best input.
The first way is to climb your model to a high altitude, simulating a typical top-of-the-box altitude, and fly it directly over your head and into the wind. Roughly 50–100 feet out from yourself, push down. Watch carefully to see if the model is rolling on the down-line. Most models will roll slightly to the right as the throttle is reduced. The aileron trim set for full throttle will be too much at low throttle as the torque effects will be greatly reduced.
Okay, I know many of you fly with no aileron trim. That's great, but I'll bet you are carrying trim at reduced throttle. I have never had a model that hasn't needed a little left aileron mix on low throttle.
The second way to check for throttle-aileron mix is to fly along a level flight, at medium height, and reduce the throttle. Watch carefully and see if your model is rolling; chances are that it is. Have you ever wondered why you always have to lean a little left aileron entering spins or why your model always falls one way? Perhaps it's because your low-power trim is not correct.
Throttle-to-Rudder Mixing
The second P-mix is throttle to rudder. Again, it's hard to get your model to track correctly in the yaw axis at all speeds. Your only hope is to apply a small amount of left rudder on low throttle.
To check for this, use the same technique as for throttle-to-aileron. Fly the model above yourself, directly into the wind, push down in front of yourself, and watch carefully. You will be amazed, especially at the start of the down-line. If you haven't got any throttle offset to rudder, you are most likely flying around the problem, and where I find it most challenging is in figure 9s and vertical and horizontal 8s. Anytime you are using elevator and are off on the yaw axis, it's a bad day.
I can hear all of you saying, "Yes, it's true; my model could need a little rudder mix on low throttle." Give it a try and you will be amazed.
I know of some fairly experienced modelers who use the same theory but reverse where the mix is. They use little to no right thrust on the engine but have right rudder mixed on full throttle. That works well too, I've been told, but I haven't tried it.
Something you may want to experiment with in both of these scenarios is where the mix is activated. For a low-throttle left-rudder mix, I like to have the stick offset start at least above half and let it progress from there as I reduce the throttle. It seems to be the best balance, and I am not getting a sudden mix input; it progresses more or less with the model's speed. This will vary from model to model, but try to keep the mix activation well above an idle setting.
Rudder-Aileron Mixing
Earlier I made reference to pilots applying programmable mixes in their trim program. This is the last thing you do. Looking through the sequence, the trim adjustment has complemented the next stage. In most cases, for rudder-aileron mix, a linear P-mix is all that is required. What I mean by linear P-mix is that you don't need a progressive value to the mix; i.e., less at the start and more at the ends. The mix will be linear.
What causes adverse roll or proverse roll coupled to the rudder is incorrect dihedral. Most modern designs, with the exception of biplanes, are really close and only require a small amount of rudder-aileron mix. Some like to put their models on knife-edge, but I like to do flat turns, simulating rolling-to-turn inputs.
Rolling turns require more precise mixing than sustained knife-edge flight. In a contest your model doesn't do much flying on its side, but it sure does a lot of rolling turns. So I like to do flat-turning. Doing a simple inside rudder turn to the left, using left rudder, the model should just yaw, with no roll effect. If the model rolls to the left, you need to mix 2%–5% right aileron to left rudder.
My CAP is unique in that it has adverse roll. When I apply left rudder the model rolls right, so I need left aileron mixed with left rudder. Repeat the process with right rudder.
Now I want you to vary the speed at which your aircraft does flat turns. If you find that the mix becomes too much as you increase your model's speed, you could be getting surface blowback. I'm sorry to keep harping on this, but it is important.
With insufficient rudder power, when you apply a P-mix for roll, or pitch for that matter, the mix value will become too much as the rudder throw reduces because of aerodynamic pressure. I see a few lights going on again. Could this be why you have your mix perfect for knife edge, but you chase your aircraft everywhere doing rolling circles?
Rudder-Elevator Mixing
I think about three times in my entire life when I had a model that didn't need rudder-elevator compensation. As with the previous rudder-aileron, start by doing a flat turn to the left and see what happens. If your model pitches down when rudder is applied, mix a small amount of up-elevator; if it pitches up, apply a small amount of down-elevator. In some cases, even without blowback, the mix value will not be exactly correct for all throttle settings.
Don't panic because, as with most modern radios that are suitable for aerobatics, you can use what is called a curve mix. It allows you to have multiple points along your mix curve to increase or decrease your mix value at different rudder inputs.
My CAP is a good example of this. At low rudder throws I need only 1%–2% mix, but as the throw increases I need as much as 10%. If I have just a 10% mix, it will be too much at small rudder inputs. The curve mix is designed to solve this problem.
Tricks of the Trade
I'm going to share a few tricks of the trade to help you with your competition efforts. By now you probably have an idea of how much work there is in trimming a model. Considering all things equal, you will have a hard time beating a person with the same skills you have but with a model that is more properly trimmed. It took me 20 years to figure most of this out.
Be patient, be observant, and be objective. If your model is not flying right, investigate why. Chances are that it's just not trimmed. Even if your models are not straight, you can trim them. I can almost guarantee that my models are at the lower half of building accuracy. They all carry aileron trim and elevator trim. I don't have a nuclear-powered building bench with warp-speed laser meters, nor do I have a 12-foot-square by 8-inch-thick granite table on which to build.
Don't feel as if you have a disadvantage if your model is not perfect; you can trim it pretty well. It makes me laugh to hear people talk about how straight their models' wings are and how perfectly their models are trimmed, yet even with perfectly trimmed models, they fly with their inside wings down 5°–10°.
If your model's not level in all orientations, vertical and horizontal, at the top and the bottom of the box, you will have a lot of work on your hands. Probably the biggest progression I've made in my flying career was when I learned to fly level. The truth was that I didn't know my airplane wasn't level!
I started watching other pilots and noticed that everybody flew with their inside wings down; nobody flew level. From that point I went home, made three flags—red, white, and blue—and asked my helper to go out and stand under the flight path and keep me level. I think red was for inside wing down, white was for level, and blue was for outside wing down.
The next month or so was one of the most dramatic learning times of my life. My workload doing maneuvers was reduced immensely. I found myself just waiting for the next input—not my normal 54 inputs all the way up to vertical! I could pay more attention to corner radius, centering rolls within legs, and so on. It was a truly amazing breakthrough. I encourage all of you to investigate flying level.
Many people ask me the following questions:
- What's the best thing I can spend my money and/or time on to improve my results at events?
- Should I get a more powerful engine or a better aircraft?
- What style should I fly?
The truth is that all of these things are important, but the best thing you can spend your money on is gasoline and oil. Practice. Try to avoid letting your ego be your only motivation. Be objective, be humble, listen, watch, and experiment. That's what all of the TOC (Tournament of Champions) and Masters pilots do. Sure, we all have egos, but at some stage in our lives they let us down; we are humbled and forced to listen and be objective.
Stay cool and hopefully we can catch up at the next Aerobatics event! MA
Transcribed from original scans by AI. Minor OCR errors may remain.

