


Radio Control Scale Aerobatics
Dave Patrick [[email protected]]
The author kicks off his first column writing about servos
Since this is the first column for me, I would like to welcome all readers. We share this great passion of flying, and I hope this will be a fun place to share what we have all learned throughout the years.
I will try to keep topics as open and varied as possible. For me, Scale Aerobatics is everything from the 40% Edge to aerobatics in a small sport Cub, perfecting a rolling circle to the simple loop, how to compete and how to do your first roll. It's all about fun and the learning experience. More important, it's about flying.
I have spent most of my modeling career competing. At last count that's almost 30 years. I have been fortunate to have enjoyed some success, traveling around the world, and so on, but I love to fly and can be found fooling around doing touch-and-gos simply for the fun of it. Let's face it: greasing one in for a great landing is a kick whether you're a beginner or a seasoned pro.
There is a level that fits everyone's time and ambitions, but I think we can agree that getting a tip that helps you improve any part of your hobby is rewarding at any level. That's why we are here; I am an open book with no secrets, and I am open to learn from others and share here.
There are so many great Scale Aerobatics topics. Servos are extremely important because they are the final link and can have a large influence on how your model flies. Other than CG and throws, probably the biggest change you can make is in the servos. Servo choice is extremely important. I cannot tell you how often I have seen an aircraft compromised, lost, or at the very least have its performance greatly affected by using the wrong servo. This is generally caused by a lack of understanding during the selection process, so let's get to it.
Always start with the manufacturers' recommendations for servos, and it certainly won't hurt to exceed the minimums suggested. As I like to say, you cannot buy a servo that is too fast or too powerful. To help you pick servos, let's review what those "specs" really mean.
- Speed: Faster is better. Speed, or transit time, is usually measured in the time it takes to move 60°. The faster the better, even on large models. Any servo with a transit time of less than 0.1 second is extremely fast, and almost all the servos I own are. A time of 0.15 second is still considered fast, but that is as slow as I would recommend. Some modelers prefer fewer bigger but slower (0.15–0.20 s) servos on large models, and they are used quite successfully. But I would still choose faster servos, even if it meant more servos needed to get the torque needed. If you don't believe me, try a test on your model.
- Torque: Usually given in inch-ounces, this is simply the amount of push or pull. If your servo claims 100 inch-ounces, with a 1-inch arm, it will lift 100 ounces. It's easy. When looking at the torque specs, refer to the voltage mentioned. If you plan on using 4.8 volts, which most systems use, and specs show 6.0 volts, the servo torque will be significantly less. I usually choose 6.0 volts for the higher torque.
Be careful; some servos are not designed to operate at the higher voltages and will not only operate improperly, but could fail.
Type of Motor
- Pole: These are usually three- or five-pole power plants; the five-pole motor is typically better. A pole motor is generally cheaper but can be reliable and durable.
- Coreless: These are more expensive but quite a bit better because of their much lower rotating mass.
When you ask a servo to move, the motor has to accelerate, go where it was told to go, and stop. This means accelerating and braking. If the motor is heavy, the engineers have to design extra time for it to ramp up to speed and slow. If the timing is incorrect, the servo will stop before it reaches its position, overshoot, or even wobble back and forth. If the servo motor is light, such as the coreless variety, it will get to speed much more easily and can wait until the last moment to brake the motor to a stop. Don't confuse this with transit time or deadband. The result is a much tighter feel and precision in control.
- Brushless: Shhhh; these are a secret. They haven't even been released yet, but they are coming.
Gears
- Plastic: There is nothing wrong with this kind of gear; if properly made, they are probably the tightest and most accurate of all types. They can also be extremely long-lasting and are a bit lighter.
- Metal: These are normally used when extra strength is needed. The only negative to metal gears is that they wear more quickly. Some servos use a combination of metal and plastic for the extra strength and long life.
Analog
There is a big rush to buy digital servos, but consider the analog type before you do for the following reasons.
- They are generally less expensive.
- It can be argued that they are more precise because the movement is not divided into steps. There is, in fact, an infinite number of positions an analog servo can be asked to go to — not so with digital servos.
- They are faster. There is no processor delay in an analog servo.
Digital
Following are points to think about when considering this kind of servo.
- Some digital servos can be programmed. This is a huge feature for me. I would love to see all digital servos be programmable.
- "Holding power" is a term for how a digital servo can ramp up its power rapidly just off position. This is true. This seems helpful in certain applications, such as helicopters, but because breakout forces on aerodynamic surfaces are low on airplanes, the benefit is minimal, if any.
- Today's modern digital servos have high clock rates; they update rapidly. But that is still "in addition to time," whereas an analog servo has no such lapse. When the analog servo gets a signal to change position, it does. A digital servo has to do a short computation. This takes little time, but it's in addition to the response time the analog servo needs to start moving.
Voltage
Servos are optimized for a certain voltage. Generally, 4.8 volts (four NiCd cells in series) has been the standard, but five cells or 6.0 volts makes for a faster and more powerful servo. I typically use 6.0 volts.
When you have a fully charged pack vs. a partly charged pack, there will be a difference in servo speed and torque that can be felt in certain models. A good way to eliminate this is to use a voltage regulator. I like to use 6.0 volts and a 5.8V regulator.
Some servos will be damaged by using 6.0 volts. Check with the manufacturer before doing so.
Deadband
This is how much you move the stick before the servo moves. Today's servos have little deadband, but they all have some. The amount of deadband is determined by the mechanical slop in gears because nothing is perfect.
A simple test to find out what I mean is by using the trim. Slowly move trim in one direction, then go the other direction. The best servos might move the other way on one beep, and some might even take two or three.
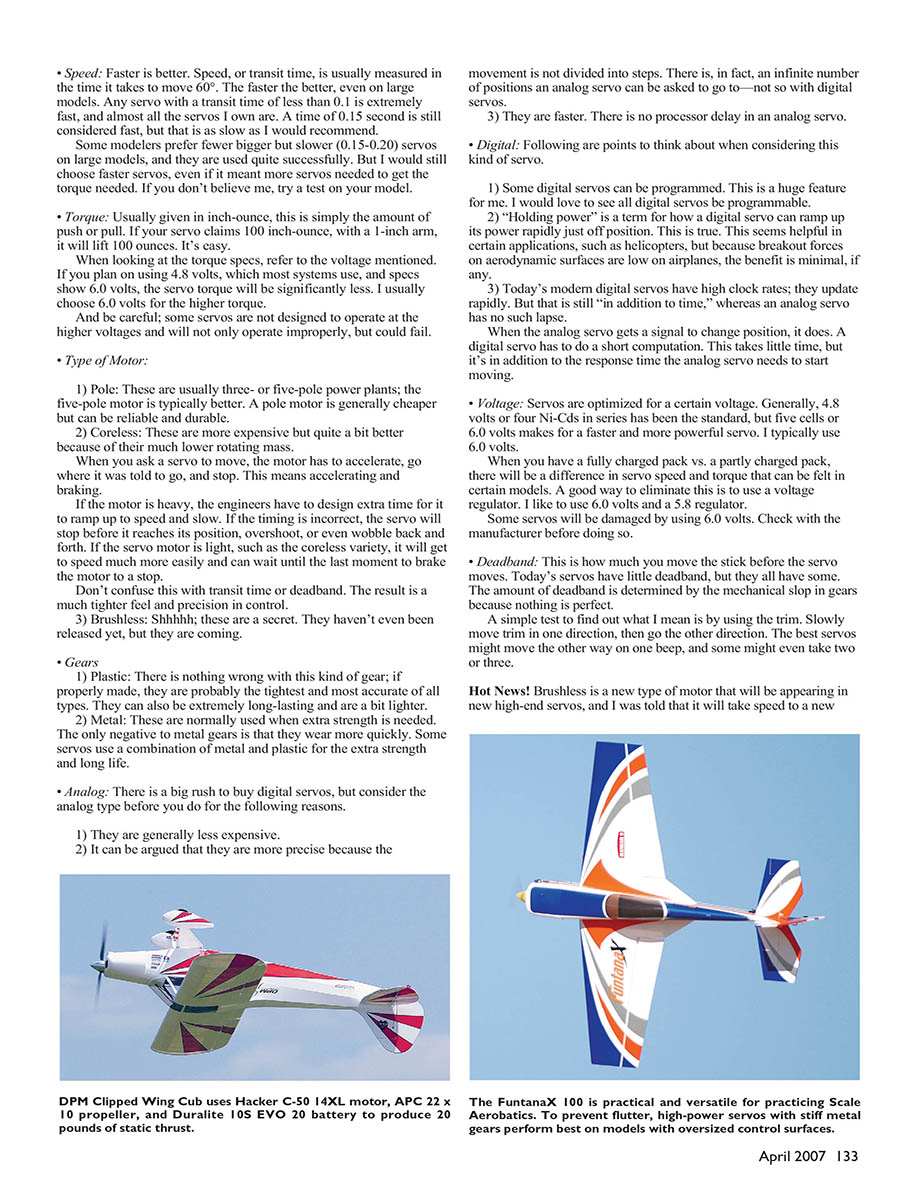
Hot news: brushless is a new type of motor that will be appearing in new high-end servos, and I was told that it will take speed to a new level. I heard Futaba is close to testing in the field.
Tips for getting the best from what you have
- Set the transmitter to at least 85% of the available throws. On a Futaba the throw can be set at 140%; 85% of 140% is 119%. On a JR it's 150% × 85%, or 128%. This alone could make a huge difference in performance.
By starting with a lower value on the transmitter, you dramatically reduce system accuracy and available power from servos. This cannot be overstated.
- Use the longest control arm that is practical on a control surface, such as elevator and aileron, and use the outer hole. Now find the correct servo arm to get the desired throw. And don't start with those 3D rates; work your way up to it.
- Make sure there is no slop or friction anywhere. This is hard to do; perfect is impossible, but strive for it. You can have the best equipment and poor performance because of a sloppy installation.
- Follow the manufacturers' directions.
Yes, servos really do make a difference. I was in California for a trade show and a vendor asked if I would make the first test flights on a prototype 33% CAP 232. Honored by being asked and curious about this new airplane, off we went to the beautiful Chino RC field on a near-perfect day. We did the preliminary checks. All looked well, and we proceeded with the testing.
The model flew okay, but it wasn't great. It felt kind of like the wing was heavy, yet it wasn't. It wasn't really locked. So I landed the CAP. I wanted a closer look.
The manufacturer had the best five-pole motor servos in it — not coreless. After some more trimming I could easily see that this model would never see greatness with these servos. I asked the owner to try it, and he thought it was fine since he was a sport flier.
I strongly suggested that he replace all the servos with the same brand, but coreless, with the same size, speed, and torque.
The next day we met at Chino again and the weather was a carbon copy. The new servos had virtually the same speed and torque, and setup was exactly the same.
After a quick preflight we were rolling. When the CAP 232 lifted, I could instantly feel the difference. This model had totally improved overnight. I was delighted and had a great time. When I handed the owner the sticks, his first comment was, "Wow! I would have never believed it."
This was a huge difference with a CAP 232, so there would definitely be a difference with an airplane such as a Cub. Try it someday!
I hope this outline helps you understand some servo lingo and helps you match servos to your application. Fly safely and enjoy!
Dave Patrick
Transcribed from original scans by AI. Minor OCR errors may remain.

