
Radio Control Scale Aerobatics
John Glezellis [[email protected]]
So you're putting together your first giant-scale aerobat …
Also included in this column:
- Servo synchronizers
- Multichannel radios make setup as simple as possible
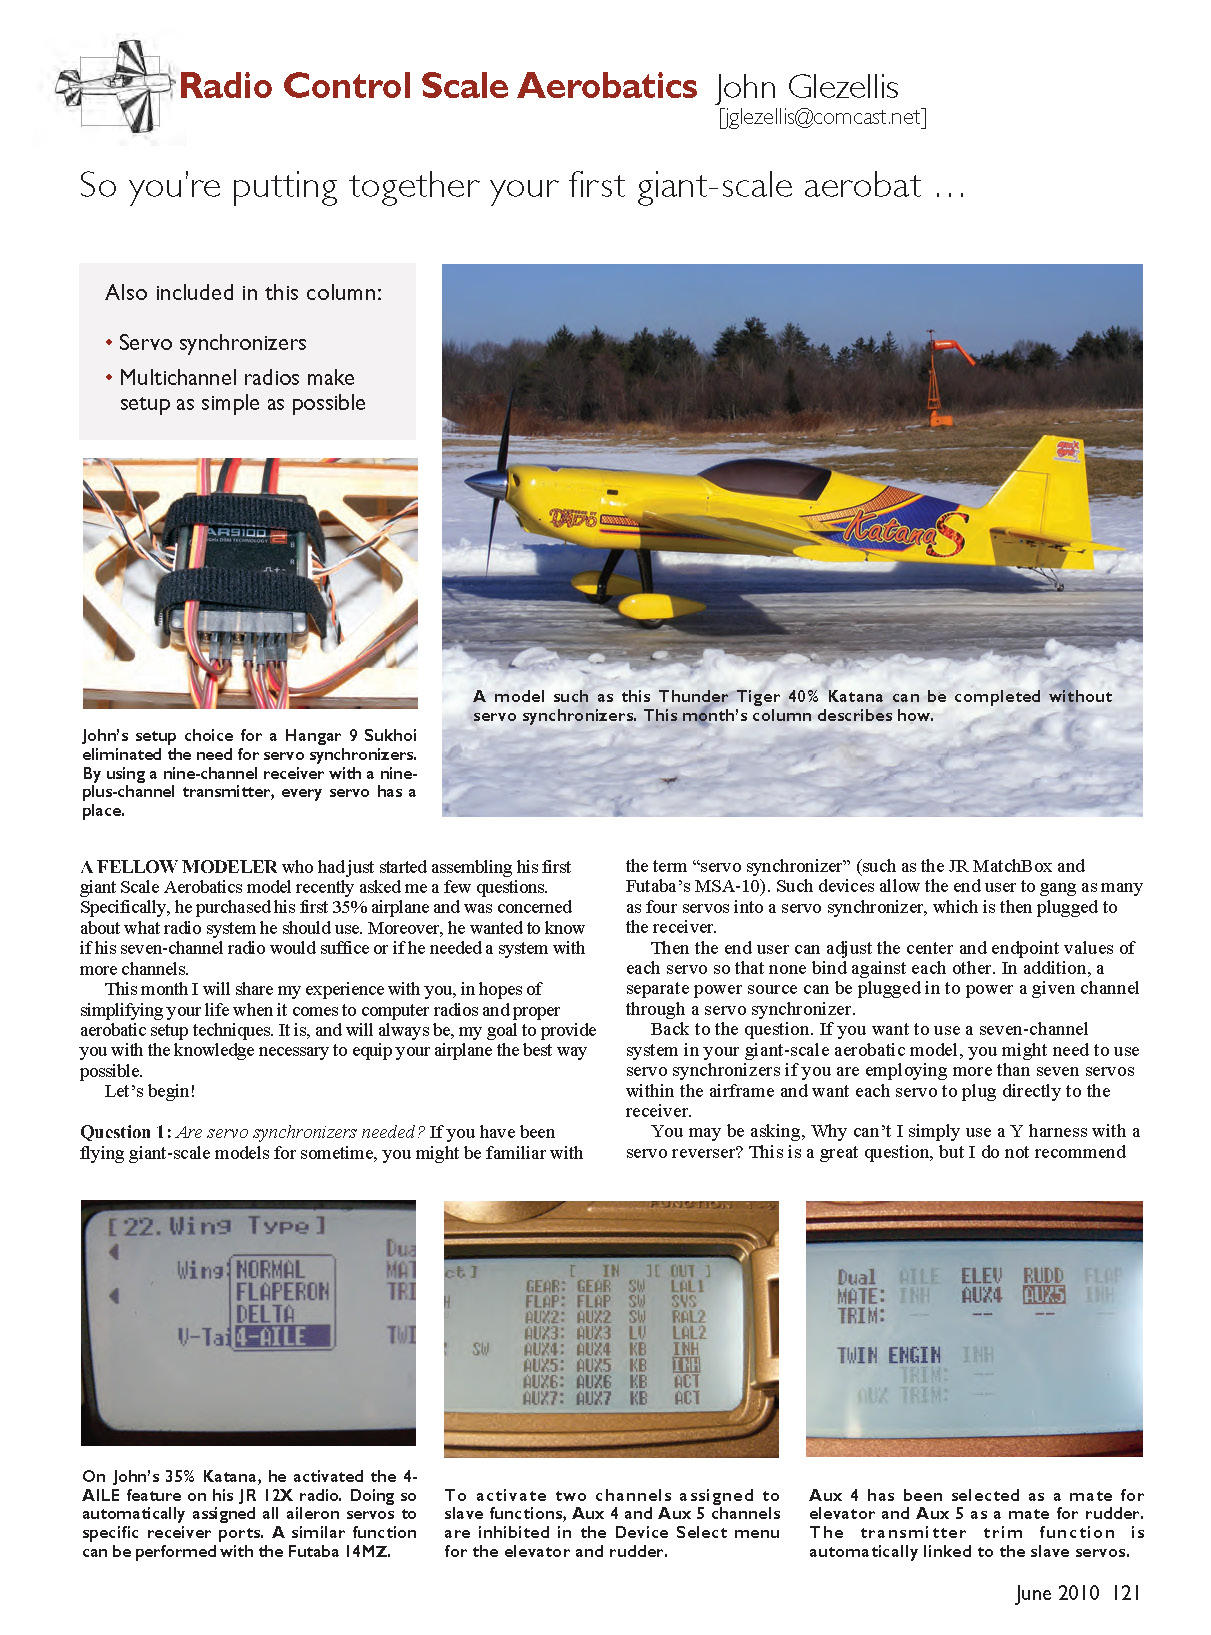
A fellow modeler who had just started assembling his first giant-scale aerobatic model recently asked me a few questions. Specifically, he purchased his first 35% airplane and was concerned about what radio system he should use. He wanted to know if his seven-channel radio would suffice or if he needed a system with more channels.
This month I will share my experience with you, in hopes of simplifying your life when it comes to computer radios and proper aerobatic setup techniques. It is, and will always be, my goal to provide you with the knowledge necessary to equip your airplane the best way possible.
Let's begin!
Question 1: Are servo synchronizers needed?
If you have been flying giant-scale models for some time, you might be familiar with the term "servo synchronizer" (examples: JR MatchBox and Futaba MSA-10). Such devices allow the end user to gang as many as four servos into a synchronizer, which is then plugged into the receiver. The user can adjust the center and endpoint values of each servo so that none bind against each other. In addition, a separate power source can be plugged in to power a given channel through the synchronizer.
If you want to use a seven-channel system in your giant-scale aerobatic model, you might need servo synchronizers if you are employing more than seven servos within the airframe and want each servo to plug directly into the receiver.
You may be asking, Why can't I simply use a Y-harness with a servo reverser? I do not recommend doing so. It does not always allow independent adjustments on each servo. For example, if you have two elevator servos plugged into a Y-harness and one is reversed, both servos are plugged into the same receiver port (the elevator port). Any adjustment made in subtrim or Adjustable Travel Volume (ATV) will apply to both servos. By plugging each servo into its own port, you can make independent changes to each servo.
If your airplane has one servo per aileron, two servos on the elevator, two servos on the rudder, and a servo on the throttle, most seven-channel systems will work (that is a total of seven servos). However, if you have a 35% model with two servos per aileron, two servos on the elevator, two servos on the rudder, and a throttle servo, you will need more channels. That scenario shows the need for a nine-channel radio.
If you plan on having multiple giant-scale aerobatic models, I recommend investing in a nine-channel (or higher) system so you will not have to purchase multiple servo synchronizers per airplane.
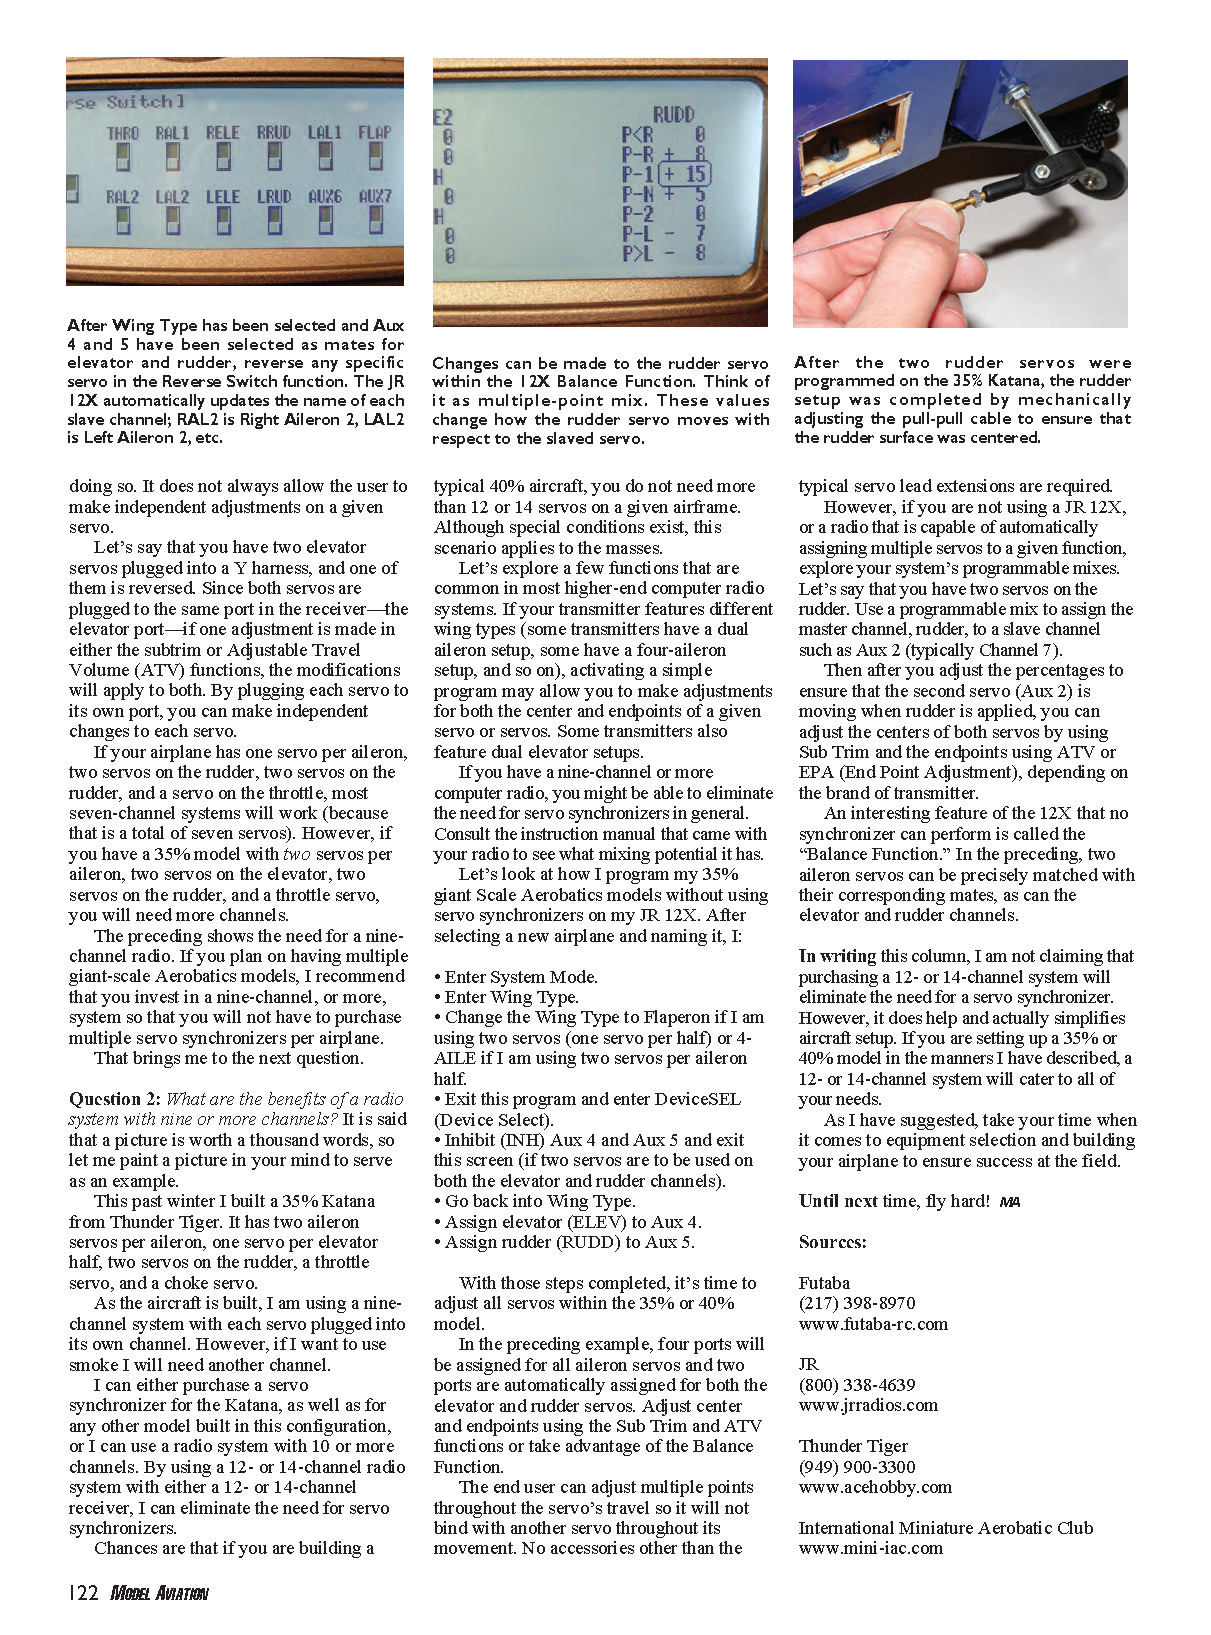
On my 35% Katana I activated the 4-AILE feature on my JR 12X radio. Doing so automatically assigned all aileron servos to specific receiver ports. A similar function can be performed with the Futaba 14MZ.
To assign slave channels for elevator and rudder on the 12X:
- In Device Select, inhibit (INH) Aux 4 and Aux 5.
- Assign Aux 4 as the mate for elevator and Aux 5 as the mate for rudder.
- The transmitter trim function is automatically linked to the slave servos.
With those assignments, each servo has its own channel and you can adjust centers and endpoints independently.
Question 2: What are the benefits of a radio system with nine or more channels?
A picture is worth a thousand words, so let me paint one. This past winter I built a 35% Katana from Thunder Tiger. It has two aileron servos per aileron, one servo per elevator half, two servos on the rudder, a throttle servo, and a choke servo. As built, I used a nine-channel system with each servo plugged into its own channel. If I want to use smoke I will need another channel.
I can either purchase servo synchronizers for the Katana and other similarly configured models, or use a radio system with 10 or more channels. By using a 12- or 14-channel radio with matching receivers, I can eliminate the need for servo synchronizers on most typical 35–40% aircraft. Chances are, if you are building a typical 40% aircraft, you do not need more than 12 or 14 servos on a given airframe.
Higher-end computer radios offer useful functions:
- Different wing types (flaperon, 4-aileron, dual aileron setups) can be selected so the transmitter automatically assigns and controls multiple servos.
- Dual elevator or multiple-aileron setups can be supported without external hardware.
- Programmable mixes allow you to map a master channel (e.g., rudder) to a slave channel (e.g., Aux 2), then adjust percentages so the slave servo follows correctly. Subtrim and ATV or EPA can be used to fine-tune centers and endpoints.
If your transmitter supports automatic assignment of multiple servos to a function (as in the JR 12X), you can often eliminate synchronizers. If it does not, explore programmable mixes to achieve the same result.
Here is how I program my 35% giant-scale aerobatic models on the JR 12X (after selecting and naming a new airplane):
- Enter System Mode.
- Enter Wing Type.
- Change Wing Type to Flaperon (for one servo per half) or 4-AILE (for two servos per aileron half).
- Exit and enter DeviceSEL (Device Select).
- Inhibit (INH) Aux 4 and Aux 5 (if two servos are to be used on both elevator and rudder channels).
- Go back into Wing Type.
- Assign Elevator (ELEV) to Aux 4.
- Assign Rudder (RUDD) to Aux 5.
After these steps, four ports will be assigned for all aileron servos and two ports will be automatically assigned for both elevator and rudder servos. Adjust centers and endpoints using Sub Trim and ATV, or use the Balance Function.
The Balance Function (a feature of the JR 12X) allows precise matching of paired servos (two aileron servos, elevator mates, or rudder mates) at multiple points throughout the servo travel so they will not bind at endpoints or during movement. No accessories other than typical servo lead extensions are required when using these radio functions.
I am not claiming that purchasing a 12- or 14-channel system will always eliminate the need for a servo synchronizer, but it does simplify aircraft setup greatly. If you are setting up a 35% or 40% model as described, a 12- or 14-channel system will usually meet your needs.
Take your time when it comes to equipment selection and building your airplane to ensure success at the field.
Until next time, fly hard! JG
Sources:
- Futaba — (217) 398-8970 — www.futaba-rc.com
- JR — (800) 338-4639 — www.jrradios.com
- Thunder Tiger — (949) 900-3300 — www.acehobby.com
- International Miniature Aerobatic Club — www.mini-iac.com
Transcribed from original scans by AI. Minor OCR errors may remain.

