
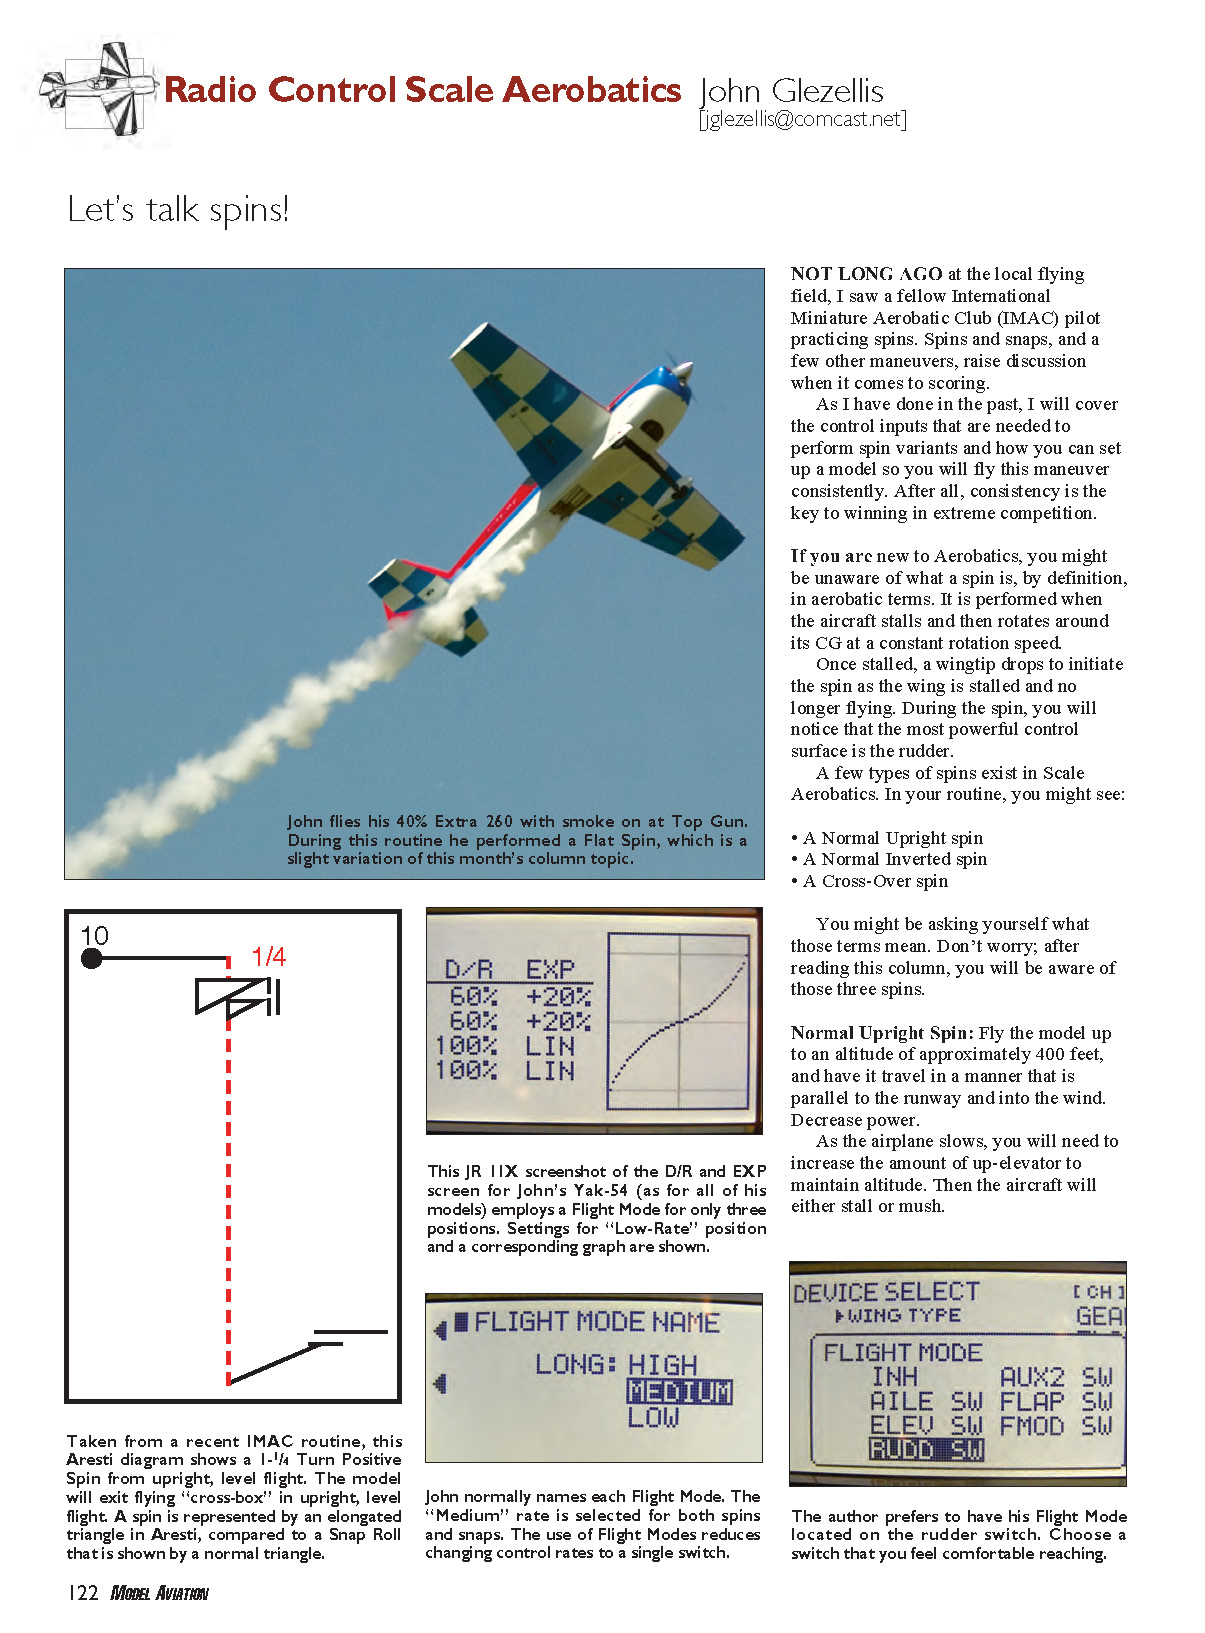
Let's talk spins!
Not long ago at the local flying field, I saw a fellow International Miniature Aerobatic Club (IMAC) pilot practicing spins. Spins and snaps, and a few other maneuvers, raise discussion when it comes to scoring.
As I have done in the past, I will cover the control inputs needed to perform spin variants and how you can set up a model so you will fly this maneuver consistently. After all, consistency is the key to winning in extreme competition.
What is a spin?
If you are new to aerobatics, you might be unaware of what a spin is, by definition, in aerobatic terms. A spin is performed when the aircraft stalls and then rotates around its center of gravity (CG) at a constant rotation speed. Once stalled, a wingtip drops to initiate the spin because the wing is stalled and no longer producing lift. During the spin you will notice that the most powerful control surface is the rudder.
Types of spins
You might see the following types of spins in scale aerobatics:
- A Normal Upright spin
- A Normal Inverted spin
- A Cross-Over spin
Below are descriptions and control inputs for each.
Normal Upright Spin
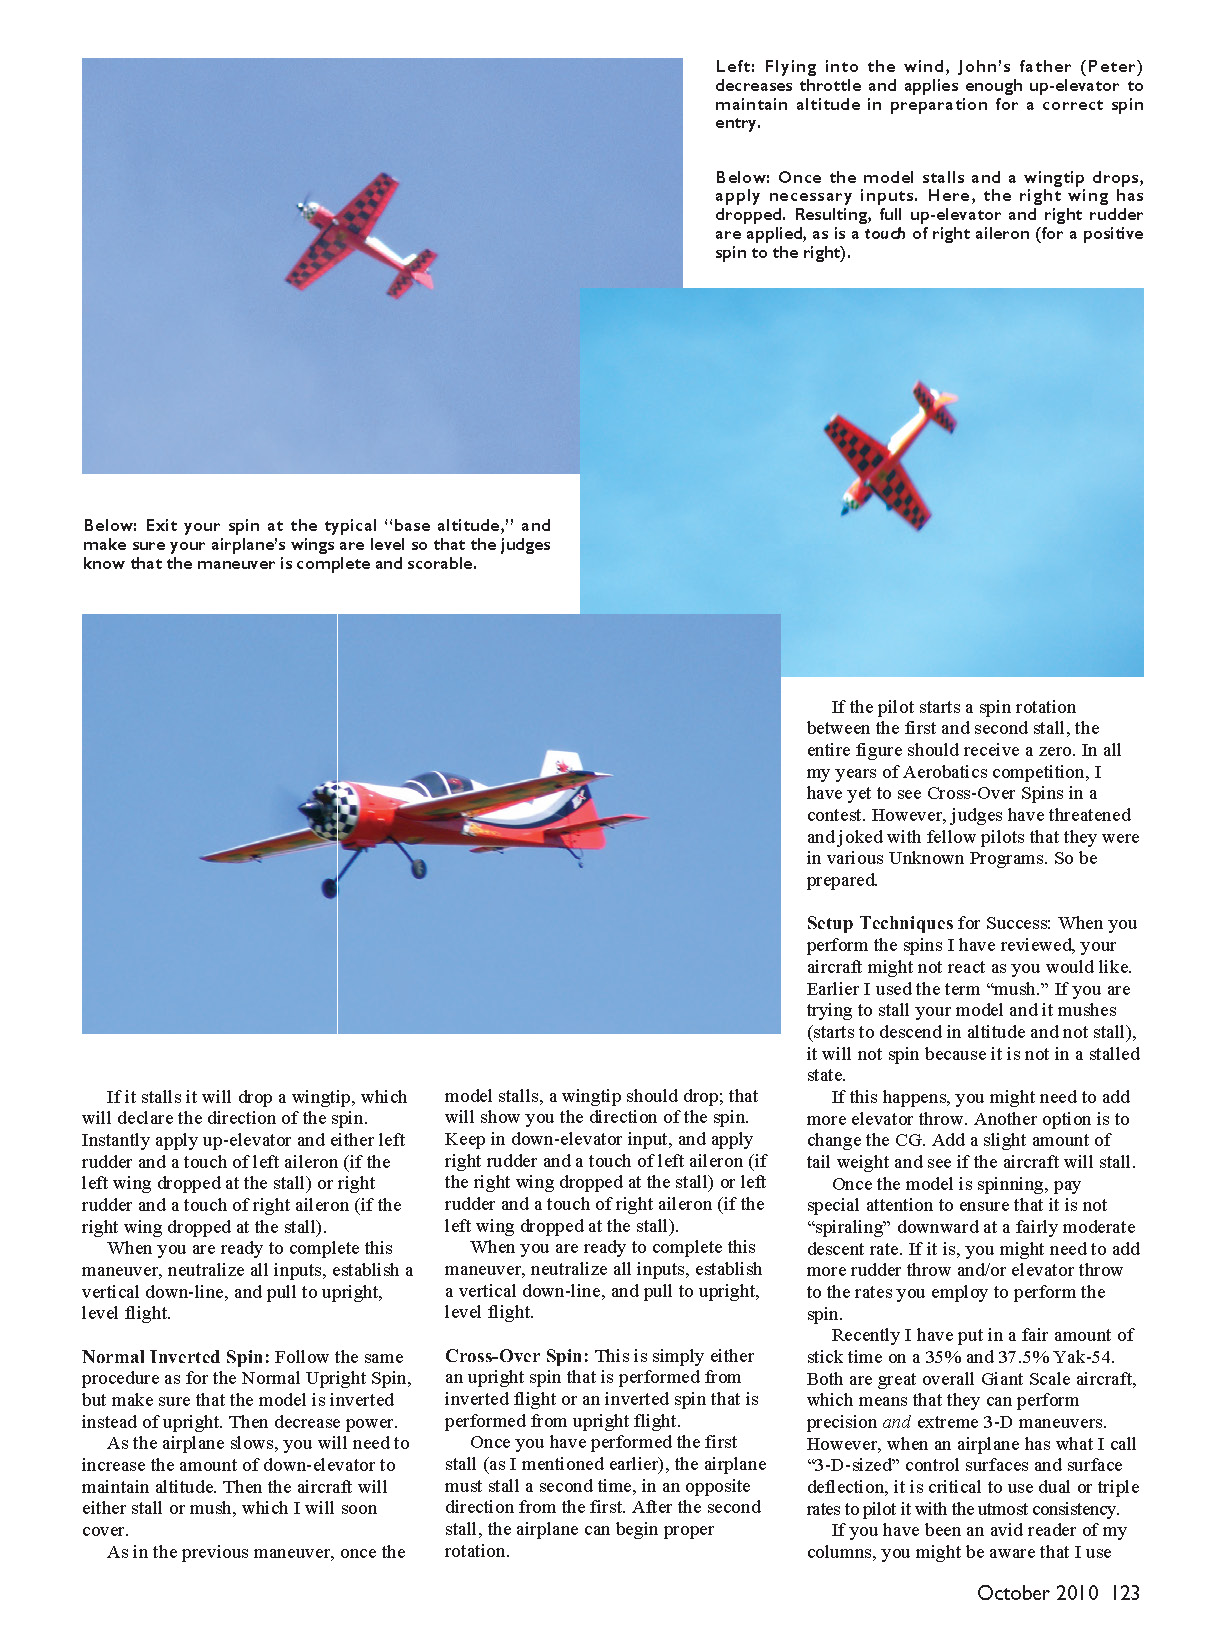
- Fly the model up to an altitude of approximately 400 feet, traveling parallel to the runway and into the wind.
- Decrease power.
- As the airplane slows, increase up-elevator to maintain altitude. The airplane will either stall or mush. If it stalls, it will drop a wingtip, which determines the direction of the spin.
- Instantly apply up-elevator and rudder toward the dropped wing (and a touch of aileron toward the dropped wing):
- If the left wing dropped at the stall: apply left rudder and a touch of left aileron.
- If the right wing dropped at the stall: apply right rudder and a touch of right aileron.
- When ready to complete the maneuver, neutralize all inputs, establish a vertical down-line, and pull to upright, level flight.
Normal Inverted Spin
- Follow the same procedure as for the Normal Upright Spin, but start with the model inverted.
- Decrease power.
- As the airplane slows, increase down-elevator to maintain altitude. The airplane will either stall or mush. If it stalls, a wingtip should drop and that indicates the direction of the spin.
- Keep in the down-elevator input and apply rudder and a touch of aileron as follows:
- If the right wing dropped at the stall: apply right rudder and a touch of left aileron.
- If the left wing dropped at the stall: apply left rudder and a touch of right aileron.
- Increase elevator throw so the model can achieve the required angle of attack for a stall.
- Change the center of gravity (CG). Adding a slight amount of tail weight can help the airplane reach a stall.
- Once the model is spinning, ensure it is not "spiraling" downward at a moderate descent rate. If it is, add more rudder throw and/or elevator throw to the rates you use for the spin.
Cross-Over Spin
A Cross-Over Spin is either an upright spin performed from inverted flight or an inverted spin performed from upright flight. After the first stall, the airplane must stall a second time in the opposite direction from the first for a proper cross-over. If the pilot starts a spin rotation between the first and second stall, the entire figure should receive a zero. In my years of aerobatics competition, I have yet to see Cross-Over Spins in a contest; judges sometimes threaten or joke that they were in various Unknown Programs, so be prepared.
Setup techniques for success
If your aircraft does not react as expected, it may be "mushing" rather than stalling. A mush occurs when the model begins to descend without actually stalling; a mushed model will not spin because it is not stalled.
Remedies:
I recently put in a fair amount of stick time on 35% and 37.5% Yak-54s. Both are great Giant Scale aircraft capable of precision and extreme 3-D maneuvers. When an airplane has large control surfaces and large surface deflections, it is critical to use dual or triple rates to pilot it with the utmost consistency. If you have been an avid reader of my columns, you might be aware that I use dual or triple rates to keep control authority manageable and consistent.
Transcribed from original scans by AI. Minor OCR errors may remain.

